Browse by Solutions
Browse by Solutions
How do I Customize Left Panel Views in Contacts App?
Updated on September 18, 2017 12:41AM by Admin
The most common piece of information that any business need to store is the contact information of the people they interact with. Whether they are customer contacts, industry experts, suppliers, or even just a family member who provides great feedback. Managing all of your contacts in a central location is key to keeping a business efficiently. Its important for your entire business to have a single address book that you can share with your most trusted employees. This ensures your team always has the correct information needed to contact your clients and customers.
To makes things easier for you at work, you need to customize your Left Panel Navigation bar. Go through the following steps to understand better.
Steps to customize left panel in Contacts App
- Log in and access Contacts App from your universal navigation menu bar.

- Click on "More"
 icon and select "Settings" located in the app header bar.
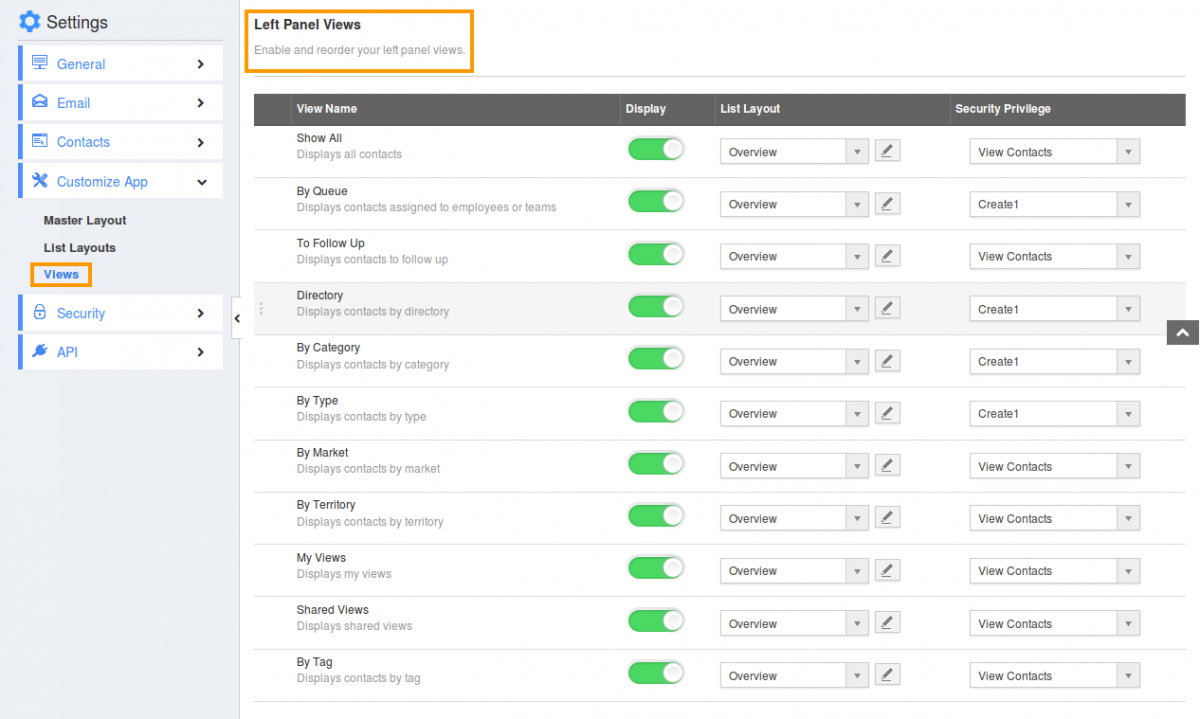
- Click on "Views" from the left navigation panel.
- You will see the following:
- All Contacts
- By Queue
- By Category
- Directory
- By Type
- To Follow up
- By Market
- By Territory
- My Views
- Shared Views
- Quick Links
- You can enable/disable views according to your needs. You must enable at least one view to be shown in contacts home dashboard.

- Click on "Show" button to enable and "Hide" button to disable views.
- You will see the enabled views in left panel of Contacts App home page.

