Browse by Solutions
Browse by Solutions
How do I import opportunities from CSV file?
Updated on June 3, 2019 05:14AM by Admin
Opportunities can be created manually in two ways. They are
To Import Opportunities from a CSV File
- Opportunities creation page
- Import opportunities
To Import Opportunities from a CSV File
- Log in and access Opportunities App from your universal navigation menu bar.
- Click on the "More" icon and select “Import” located at the app header bar.

- Click on "Import" button.

- Click on "Browse" button and select CSV file from your computer and click on "Next".

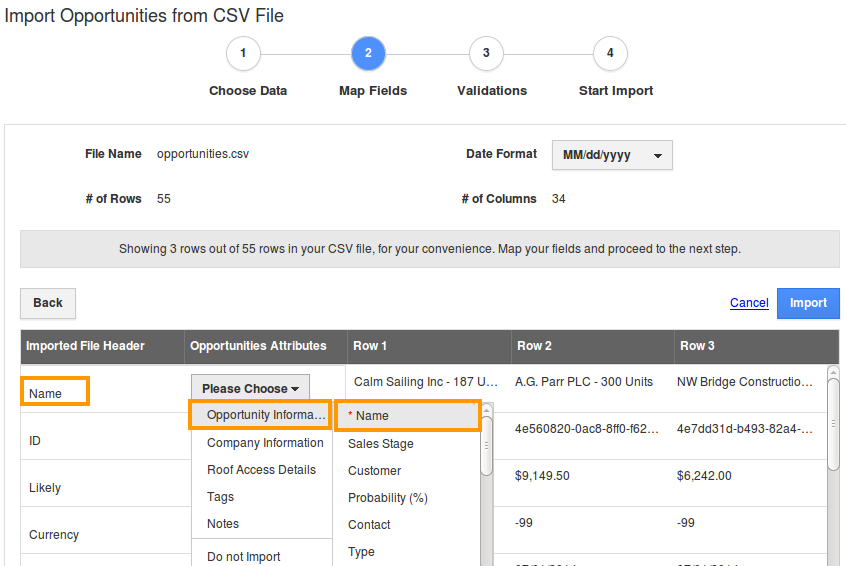
- Map opportunities fields to respective CSV fields. Make sure to map "Close Date" and custom mandatory fields.

- Click on "Import" button to import records.
- You can view warning popup which alerts you for mapping common fields such as territory, segments, etc.
- In case of mandatory fields not having values, they are added to exceptions. If error records are added to exception, they will be ignored and available for download later.
- Click on the "Proceed" button for each step.

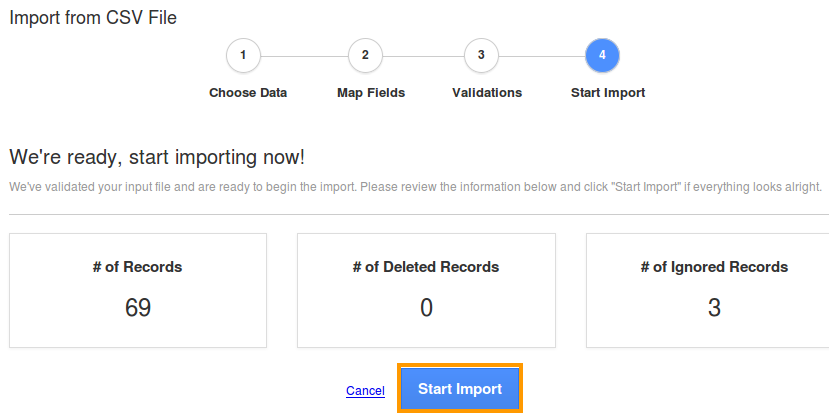
- After proceeding, the system will display the following counts:
- # of Records - Total count of contact records found in a file(CSV)
- # of Del Rec - Count of deleted records at the time of validating the contacts
- # of Ignored - Count of ignored records which are added to the exceptions at the time of mapping

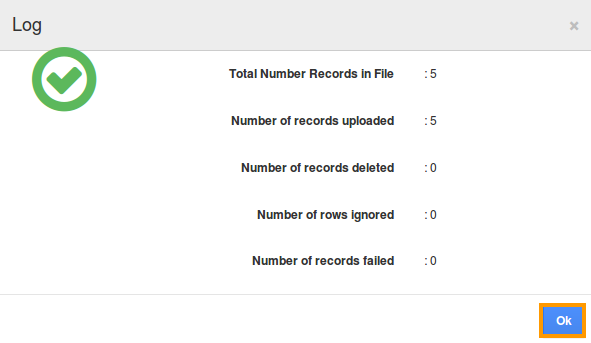
- Once the reference data completes, click on the “Proceed” button to import records. You can view the number of records uploaded and failed, as shown below in the below image:

Related Links
Read more about:
- Opportunities can also be created manually one by one Create an opportunity
- Opportunities can be created with custom fields Create custom attributes
- Opportunities can be collected from emails.
- Opportunities can be created from leads.
Flag Question
Please explain why you are flagging this content (spam, duplicate question, inappropriate language, etc):

