Browse by Solutions
Browse by Solutions
How do I Customize Payment Terms in Invoices App?
Updated on October 13, 2016 02:56AM by Admin
Payment terms are imposed to ensure that payments are received in a reasonable period of time. Payment terms allows you to set customer payment periods. It may be immediate, one month due or any custom length. You can select from one of the default values or create your own payment term to allow your customers to make payments.
Steps to Customize Payment Terms in Invoices
- Log in and access Invoices App from your universal navigation menu bar.
- Click on "More" icon at the app header bar and click on "Settings".

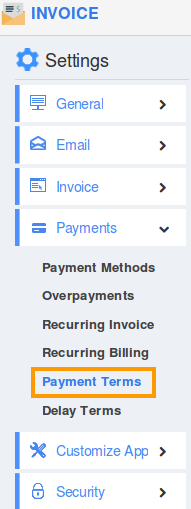
- Click on "Payment Terms" from "Payment" dropdown.

- Default payment terms in invoices include immediate, Net 30 and Net 45 days.

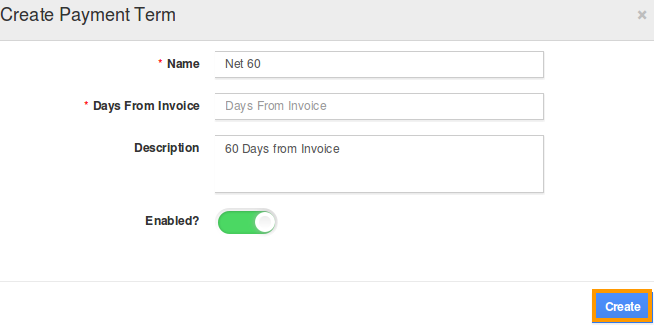
- You can add more payment term by clicking on "Create" button and provide:
- Name - Name of the invoice payment term.
- Days from Invoice - Provide Due Days from the date of generating invoice.
- Description - Description about the payment term in invoices.
- Enabled - Enable this check box for availability.

- Click on “Create” button to complete.

- You can update the invoice payment term information by clicking on "Edit" icon, if needed.

- By default the created payment term in invoices will be in enabled mode.
- You can also set the created payment term as a default.
Related Links
Flag Question
Please explain why you are flagging this content (spam, duplicate question, inappropriate language, etc):

