Browse by Solutions
Browse by Solutions
How do I Configure eSignature for the Cases App?
Updated on January 12, 2023 05:39AM by Admin
Apptivo integrates with Sign.co to help you to get documents signed digitally within the App. To enable eSignature in Apptivo make sure to have an account in Sign.co and integrate it with Apptivo. Start your safe digital document signing journey with uptight secured apps. Now, let us walk through the steps to eSign your Cases. You can use this feature to get the approval signature from your customers/managers for the created tickets.
Steps to configure the signing document:
- Log in and access the Cases App from the universal navigation menu bar.
- Click on More(...) icon → Settings → Customize App → Print/Web Layouts.
- Open existing or Create a new PDF Template.
- In the PDF layout, You can include the case attribute to add the case details and further information by using the palette tab.
- Drag & Drop the eSign attribute from the Palette tab.
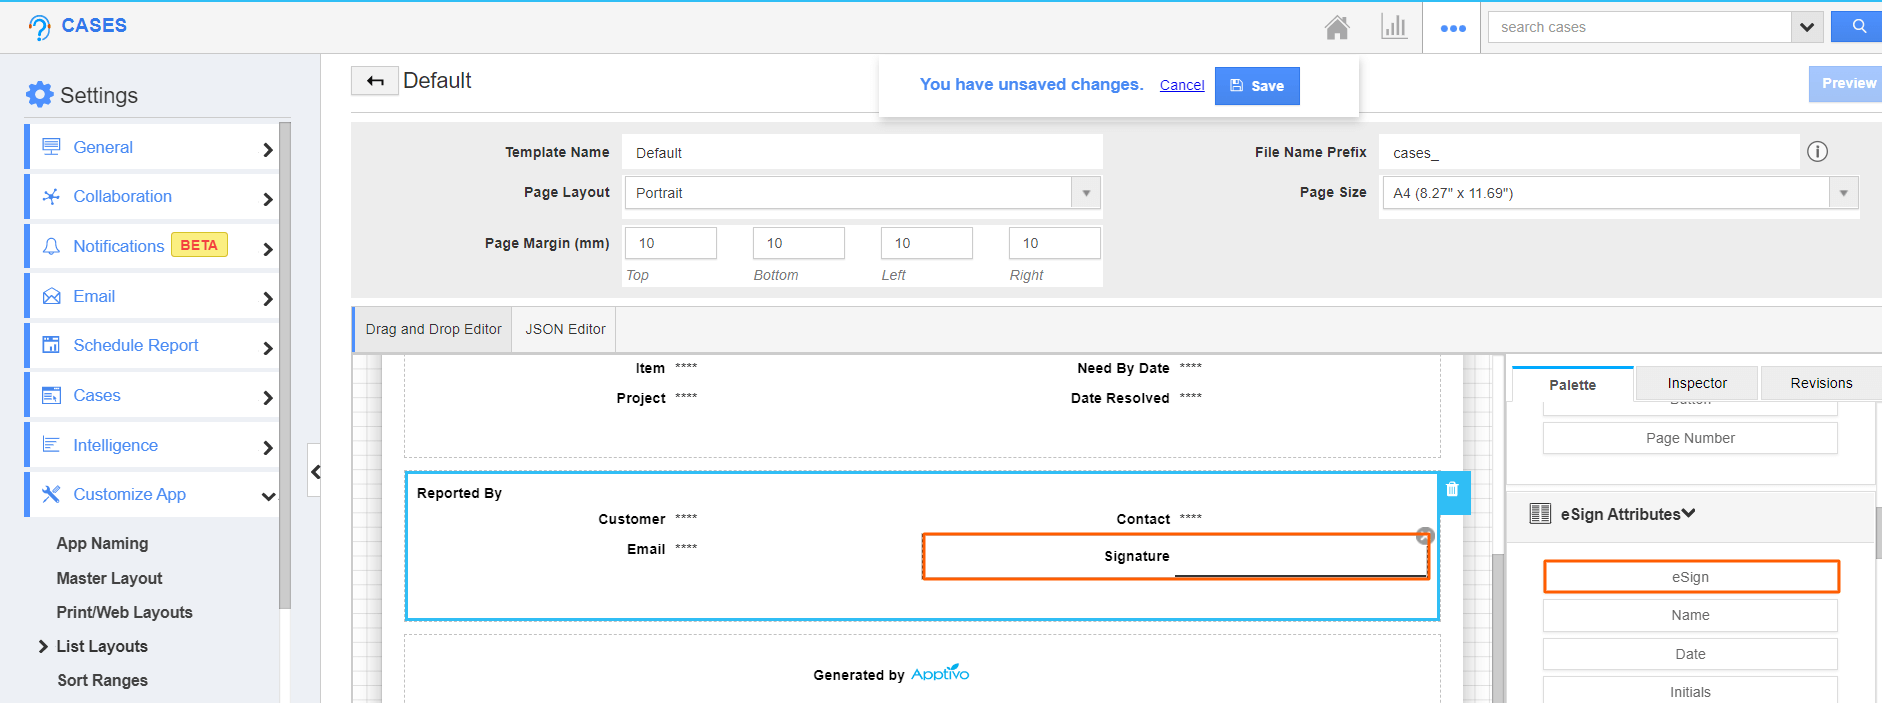
Configure the Signee:
- In the Configured PDF Template, click on the eSign attribute.
- Upon clicking on the attribute you’ll be redirected to the Inspector tab. Here, select the signee of the eSignature document by using the Who drop-down and choose the value either Customer or Contact.
- This configuration works with the respective PDF Template only.
Note: You can add multiple signees to sign the documents by configuring multiple eSign attributes into the layout.

Send Case Document for Signature:
- Access to Cases App and Create a Case with the configured PDF Template.
- In the Case overview page, the “Send eSign” button will be enabled.

- Click the Send eSign button, It will automatically pre-populate the Customer/Contact email address based on PDF Configuration in Send eSign Popup.
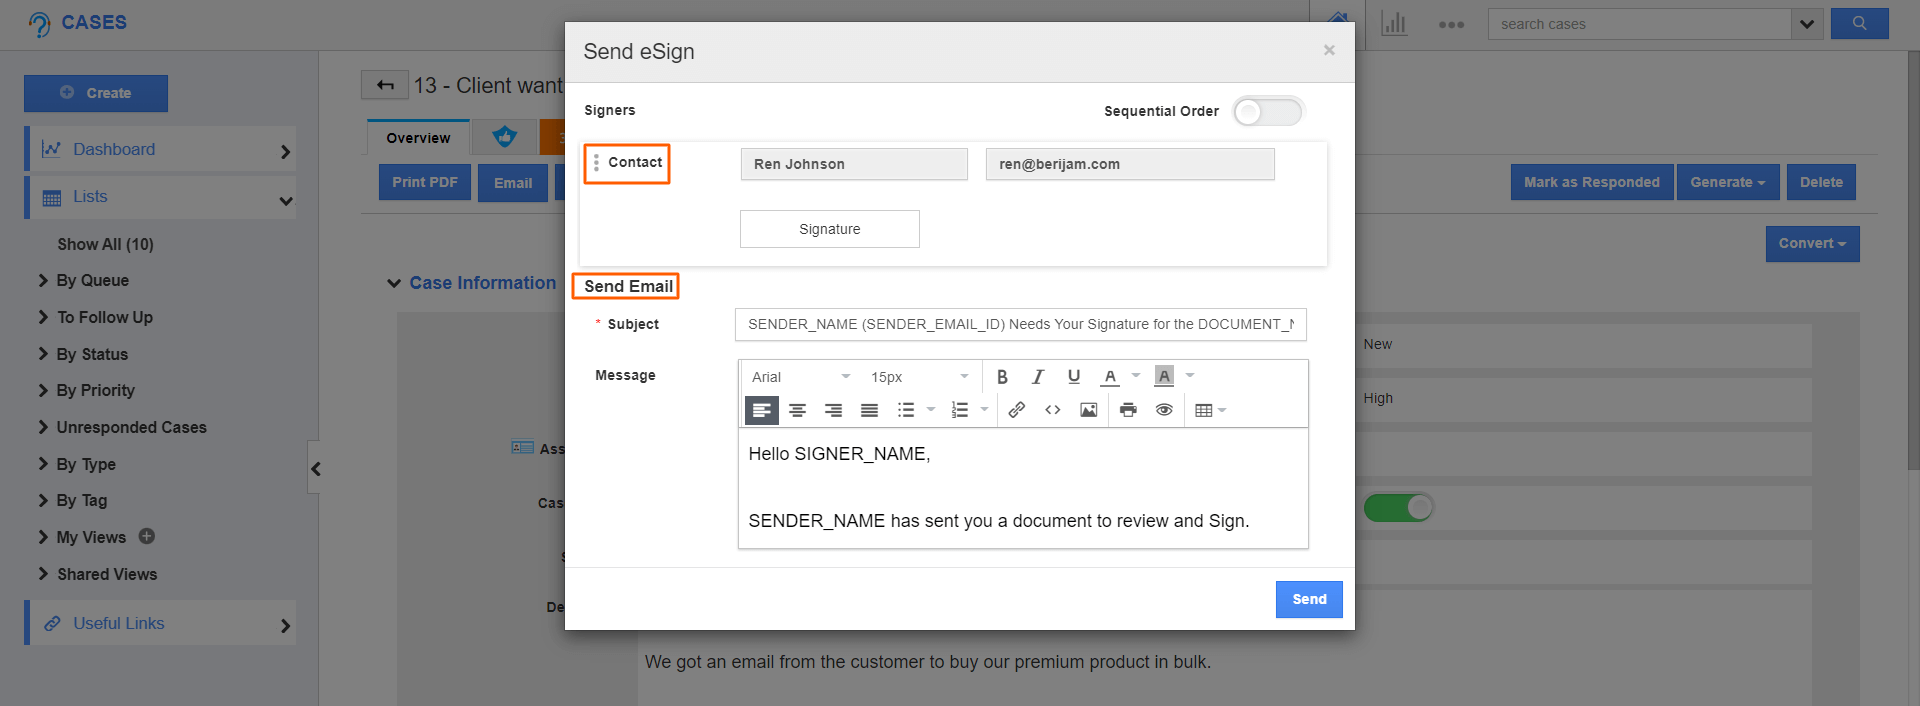
- You could manually enter the email address in the Send eSign Popup if the email address is not present in the Customer/Contact record.
- If more than one signature is added to the template and needs a signature, the emails will be sent to the recipients whose signature is required.
- You can make use of the Sequential Order option. Enabling this toggle will let you send the email in sequential order based on the recipients listed in the Send eSign popup.
Note: The Send eSign button will be disabled. If the selected PDF has not been configured with the eSign attribute.
Receiving the eSign request email:
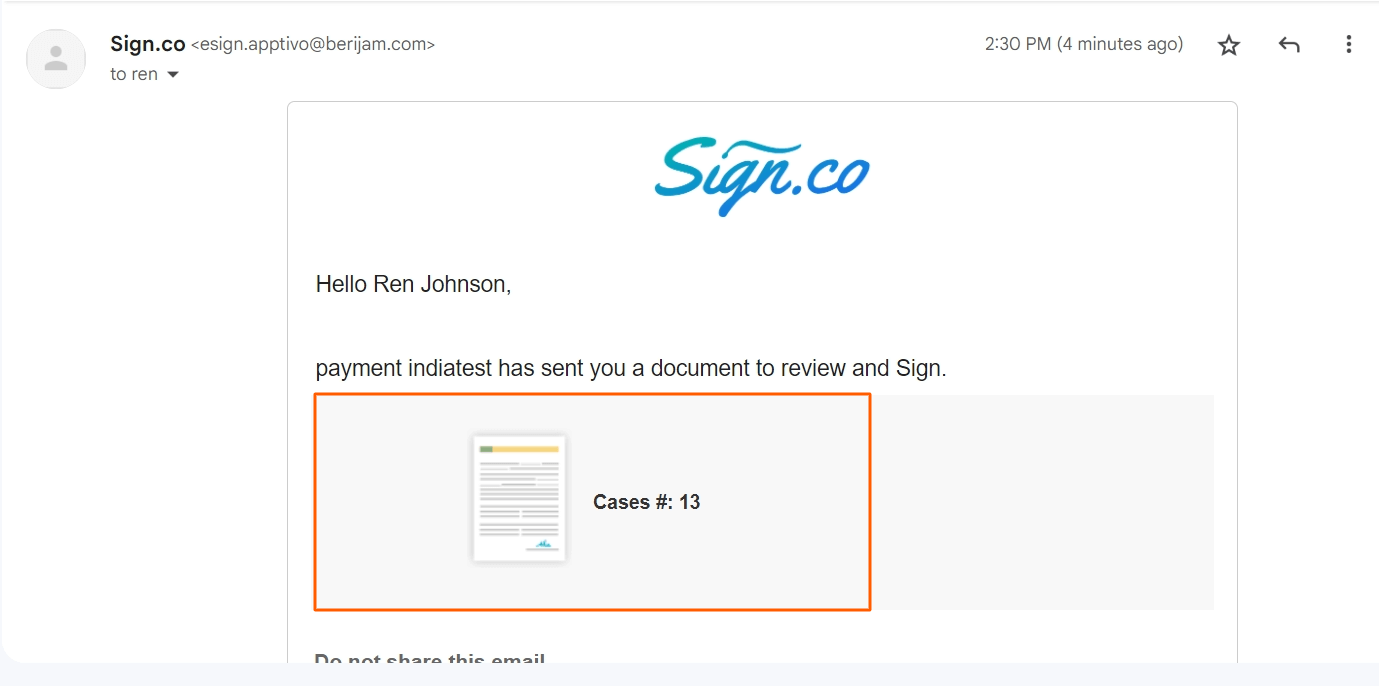
- Once you sent the eSign, the Customer/Contact will receive the eSign request email.
- Click the document icon in the received email and you will be redirected to Sign.co App.
Steps to eSign the document:
- In Sign.co, you can view the case document.
- You’ll be asked for your consent to sign electronically. Click on Yes, I Agree.

- Either Draw or Type your signature and once completed click “Sign”.
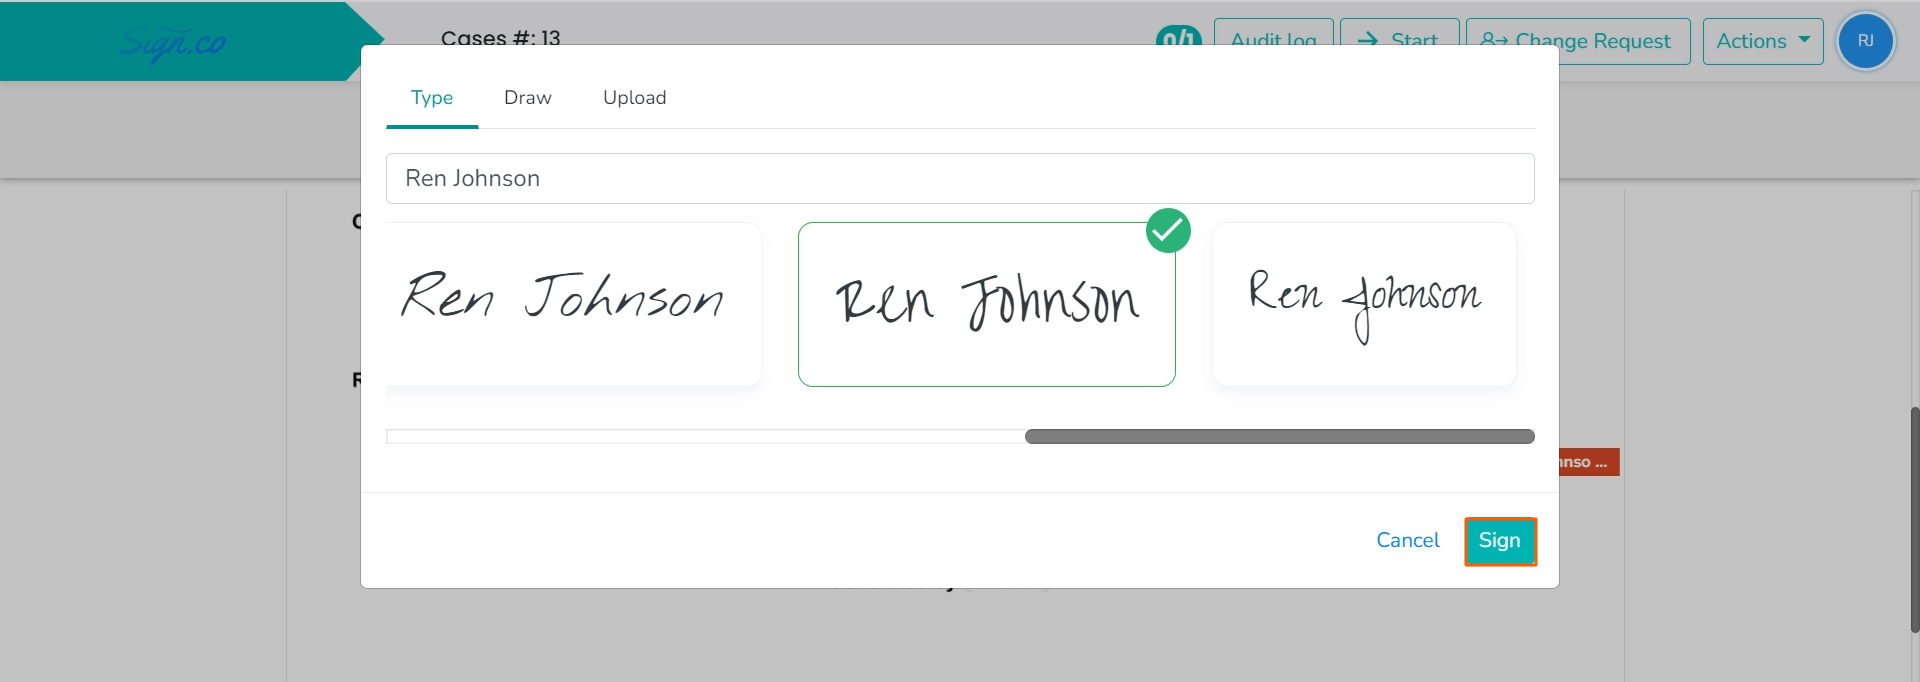
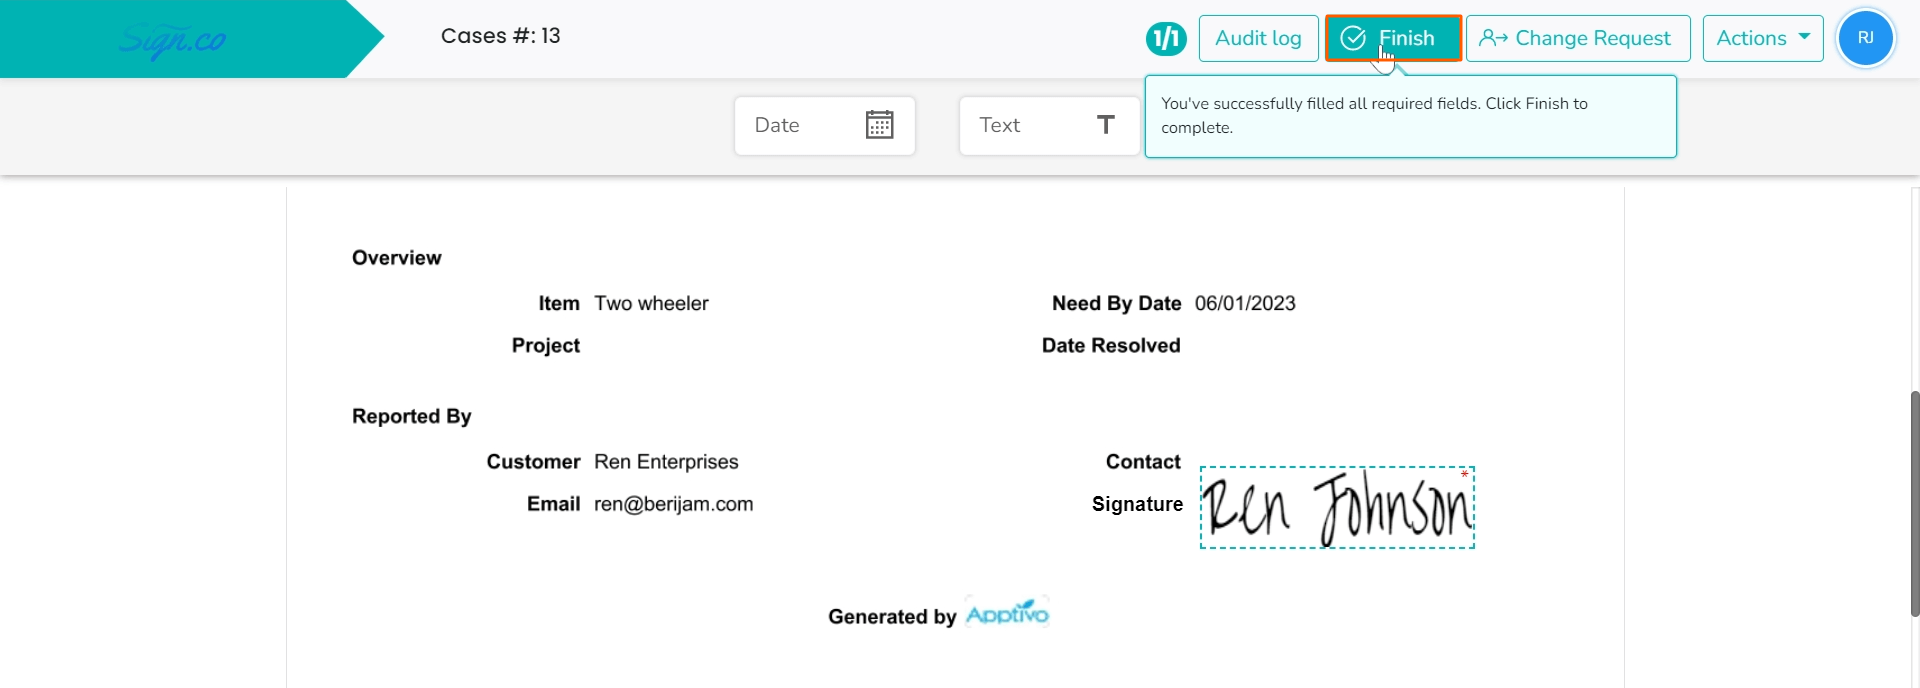
- The Signature will be displayed in the Document. Then, click Finish to submit the signed document.
eSignature History for Individual Case:
- In the Cases App, Go to More(...) icon → Settings→ Cases → eSignature.
- You could set the eSignature History details in Tab or Overview format by using this customization.

- Then in the Cases App, click on the eSign History tab in the case record.
- Here, you could see the details of the eSignature status.


