Browse by Solutions
Browse by Solutions
How do I create new sales receipt?
Updated on September 5, 2017 12:12AM by Admin
A document which typically shows the date and time a purchase was made, items purchased, amount of purchase price and totals, the name and location of store/entity where the purchases were made, and supplemental information concerning store returns, the method of payment used and other relevant sales-related information. Sales receipts are often necessary for store returns or exchanges.
Steps to Create New Sales Receipts
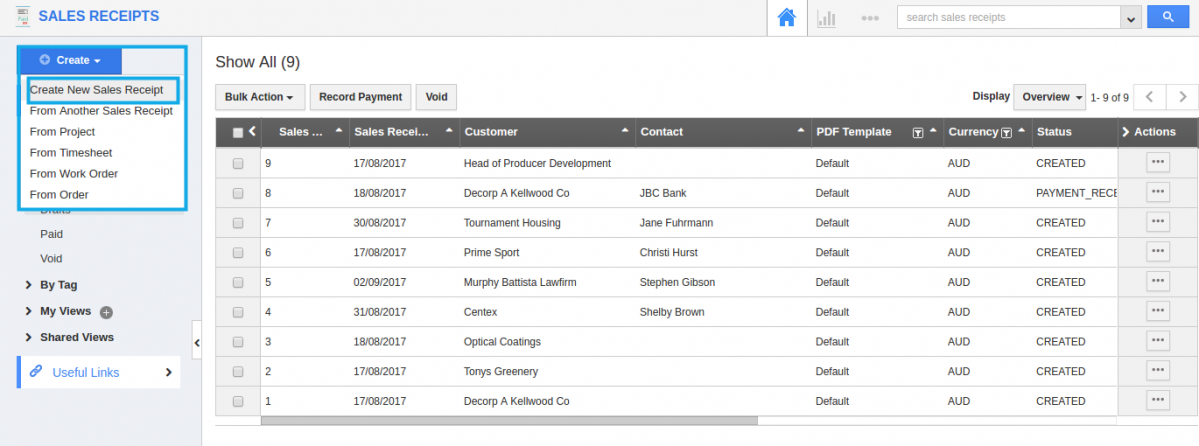
- Log in and access Sales Receipts App from your universal navigation menu bar.
- Click on “Create” button, select “Create New Sales Receipt” from the Left navigation panel.

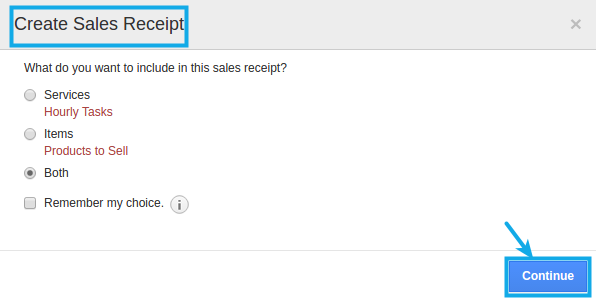
- You will be opened with a "Create Sales Receipt" pop up where you can include Items or Services or both in the Sales Receipts.

- Select your choice and click on Continue button to move to the Creation page.
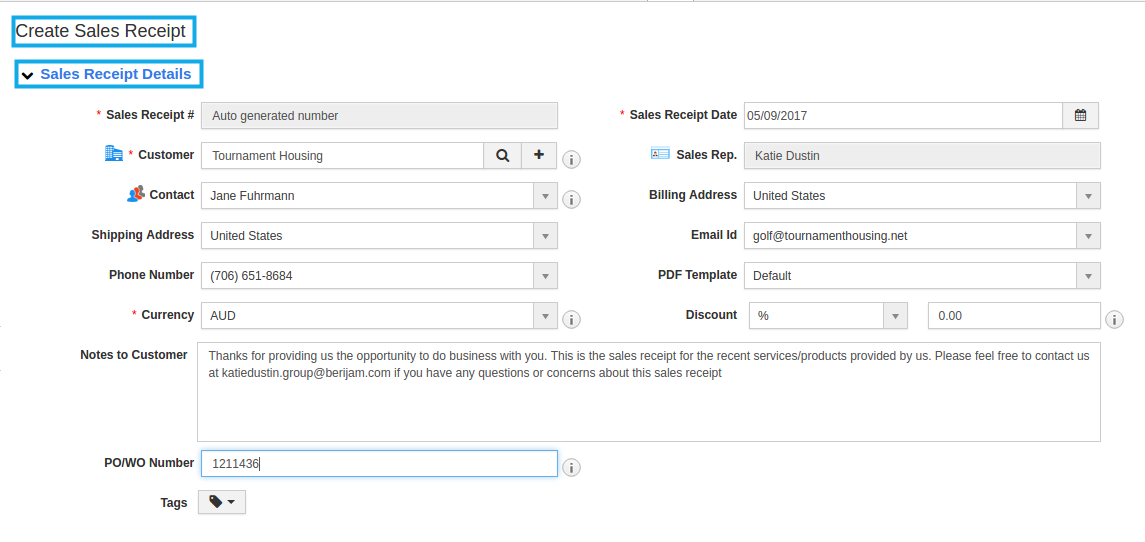
- Provide the following information:
- Customer - Name of the customer.
- Contact – Name of the Customer’s Contact.
- Sales Rep - Name of an employee will be pre populated.
- Sales Receipt # - This is an auto generated or manually entered number to identify Sales Receipt.
- Sales Receipt Date - Sales Receipt Date.
- Discount - Either in percentage or fixed.
- PO/WO Number - Number to identify PO.
- Template - Select a template from a predefined list.
- Currency - Select a currency from a predefined list.
- Notes to Customer - A short description about a Sales Receipt. You can also send your own notes to the customer by configuring general settings.

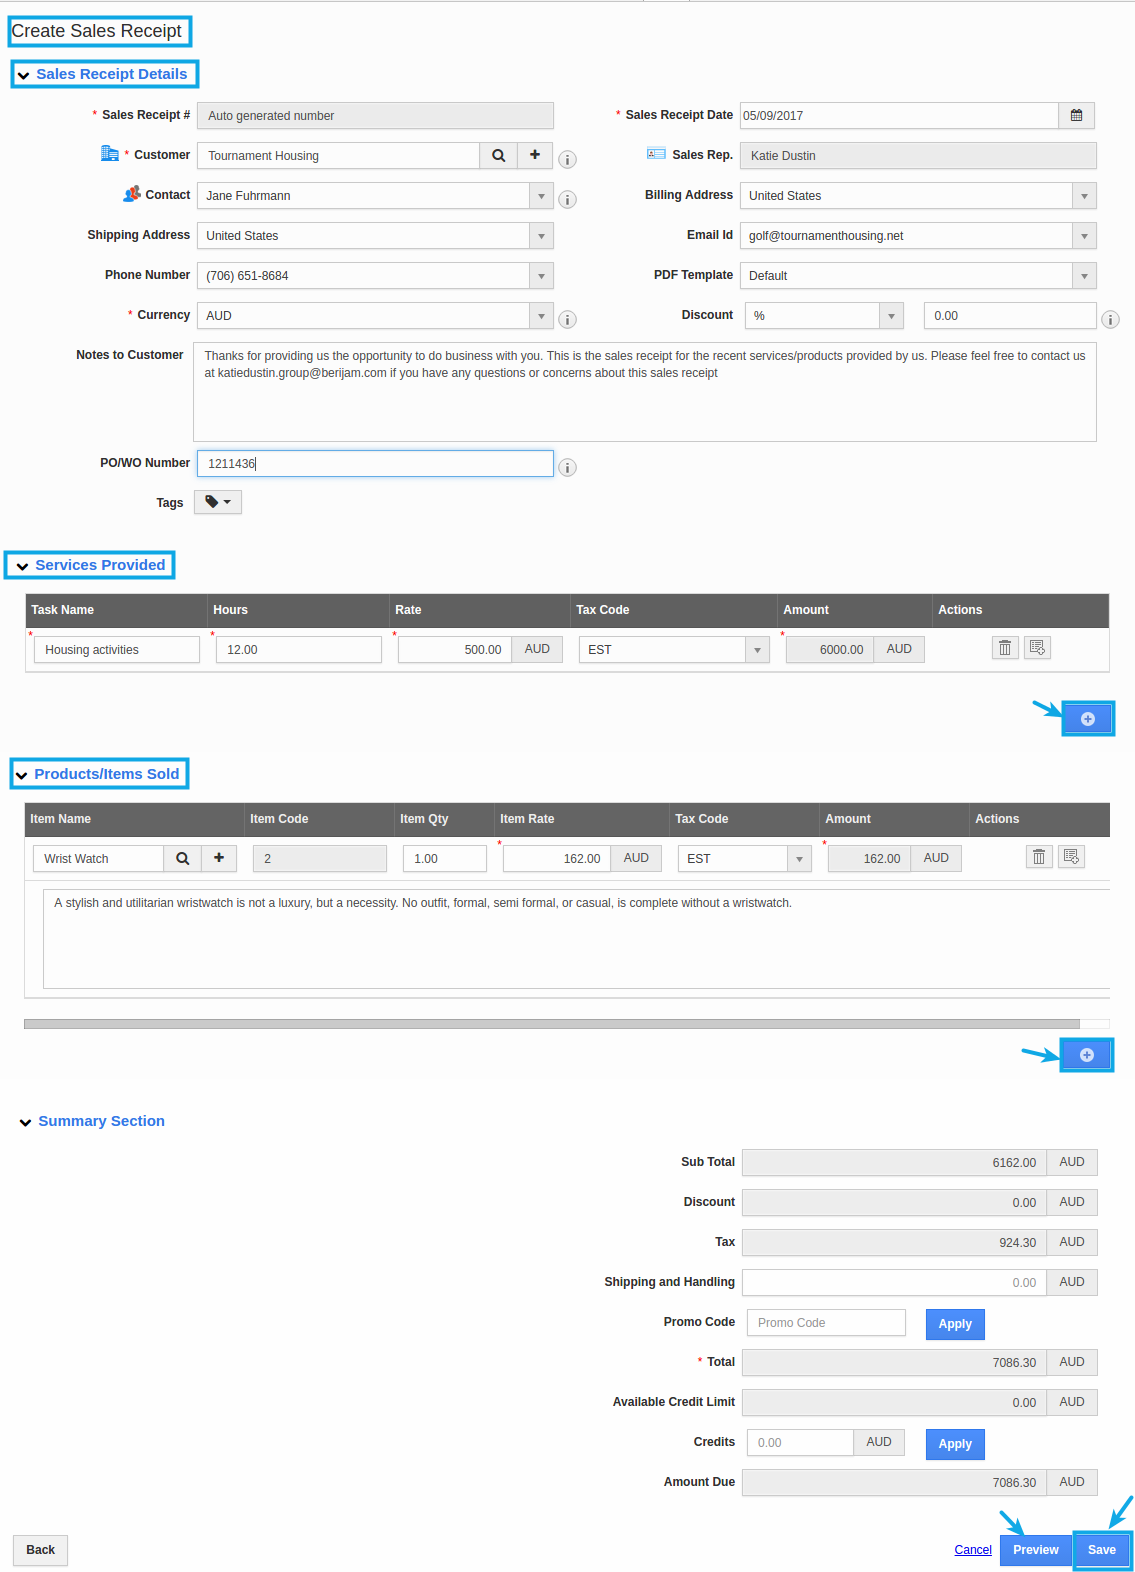
- Fill in the services provided:
- Task Name - Name of task will be pre populated.
- Hours - Enter hours spent for task.
- Rate - Enter rate per hour.
- Tax Code - Select a tax code from a predefined list.
- Amount - This field is auto calculated from number of hours spent and rate per hour.
- Click on “Add Tasks” to add more tasks.

- Fill in the Products/Items Sold:
- Item Name - Name of an item will be pre populated.
- Quantity - Number of items to be Sales Receiptd will be pre populated. You are allowed to update this field.
- Rate - Rate per item will be pre populated. You are allowed to update this field.
- Tax Code - Select a tax code from a predefined list.
- Amount - This field is auto calculated from the number of items and rate per item.
- Click on “Add Items” to add more items.

- Click on “Save” button to complete.

- Click on “Preview” button to view the sales receipt PDF view, if needed.
Related Links
Read more about:
Flag Question
Please explain why you are flagging this content (spam, duplicate question, inappropriate language, etc):

