Browse by Solutions
Browse by Solutions
How do I Create Supplier Invoice in Apptivo by Syncing with Xero?
Updated on July 8, 2019 07:27AM by Admin
The integration with Xero enables you to create supplier invoices with taxes syncing with the Xero application. For that, you need to do the following.
- Add Currency in Xero
- Create Tax in Xero
- Enable Xero Integration
- Create Invoice with Inventory and Tax Syncing with Xero
Steps to Add Currency in Xero
- Click on the organization name, and select “Settings”.

- Under “Organization Settings”, click “Currencies”.

- Click “Add Currency”.

- Select a currency then click “Add Currency”.

- Now, the currency has been added successfully.

Steps to Create Tax in Xero
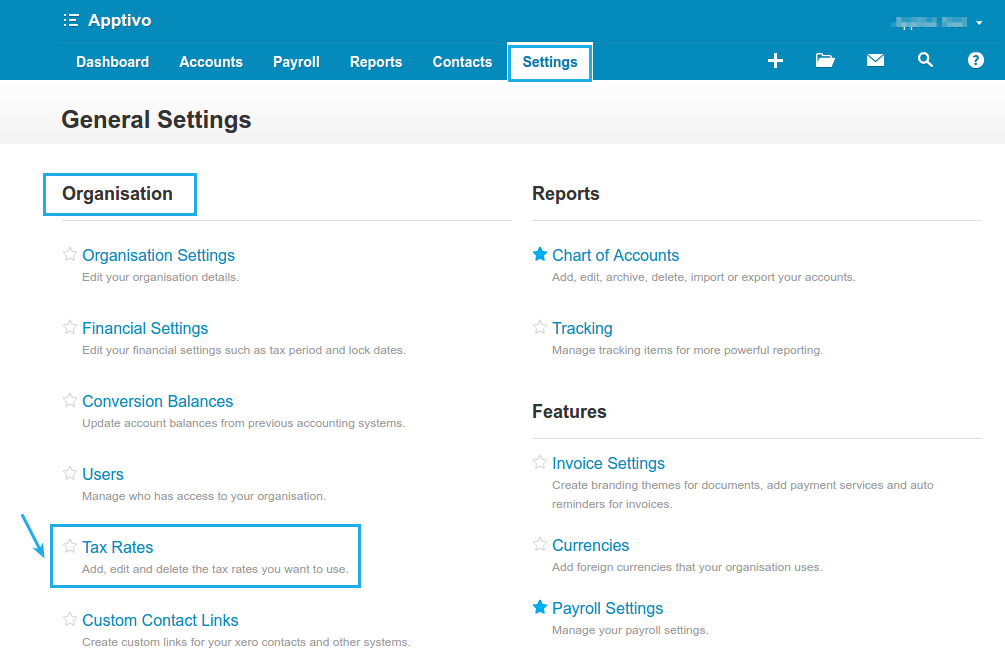
- In the “Settings” menu, select “General Settings”.
- Under “Organisation”, click “Tax Rates”.

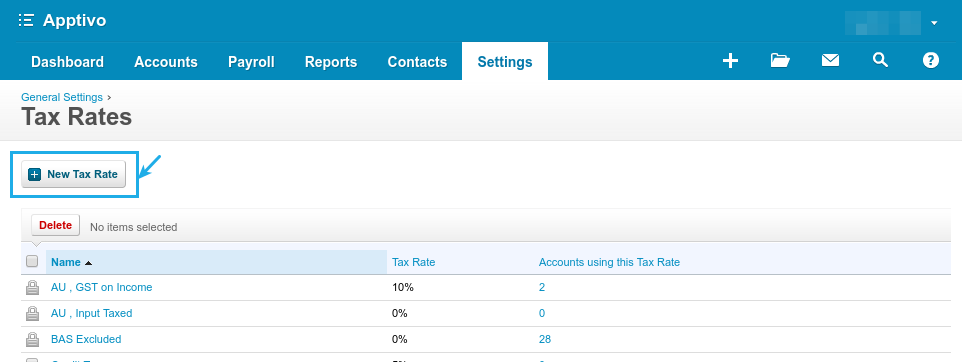
- Click on “New Tax Rate” button.

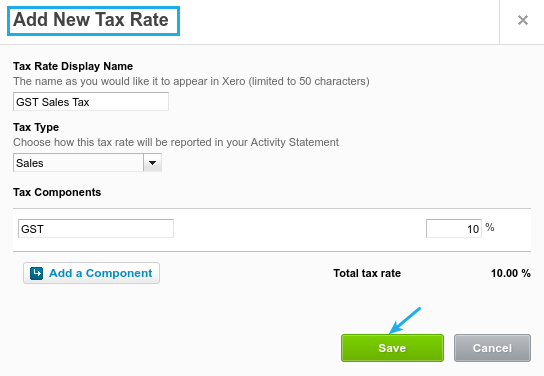
- In the “Add New Tax Rate” popup, enter the following details:
- Tax Rate Display Name
- Tax Type
- Tax Components
- Click “Save”.

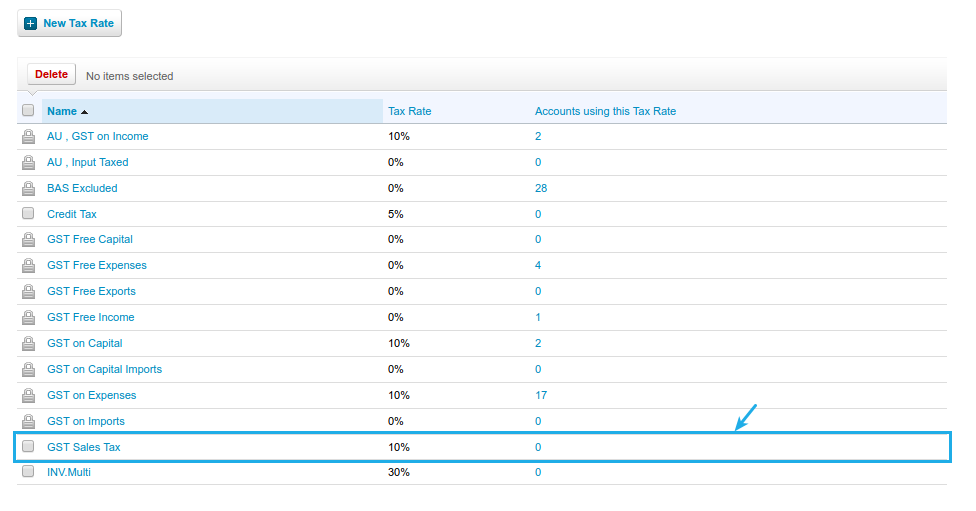
- Now, the tax rate will be successfully created.

Steps to Enable Xero Integration
Now, that the tax has been created in Xero, you need to Enable Xero Integration. Once successfully done, the tax will be synced from Xero.
Steps to Create Supplier Invoice with Inventory and Tax Syncing with Xero
- Go to Supplier Invoices App.
- Create a supplier invoice.
- For Inventory Syncing, In the “Products/Items Sold” section, create/select the item. Click on “Save For Later”.

- Once created, the inventory for the invoice will be automatically synced in Xero as shown:

- For Tax Syncing, In the “Products/Items Sold” section, select the tax created in Xero from the “Tax Code” dropdown.
- Click on “Save For Later”.
- Once created, the invoice will be automatically synced in Xero as shown:

Flag Question
Please explain why you are flagging this content (spam, duplicate question, inappropriate language, etc):

