Browse by Solutions
Browse by Solutions
How do I Configure Payment Terms in Estimates App?
Updated on January 23, 2018 08:49PM by Admin
The Estimates App allows the user to provide sales quotes to his customers. Using this app he can track sales opportunities, generate estimates for them, and then convert this estimate into an invoice or work order once completed.
This application can also be used to configure the payment terms for each estimate. Have a look at the steps to understand better.
Steps to Configure Payment Terms
- Log in and access Estimates App from your universal navigation menu bar.
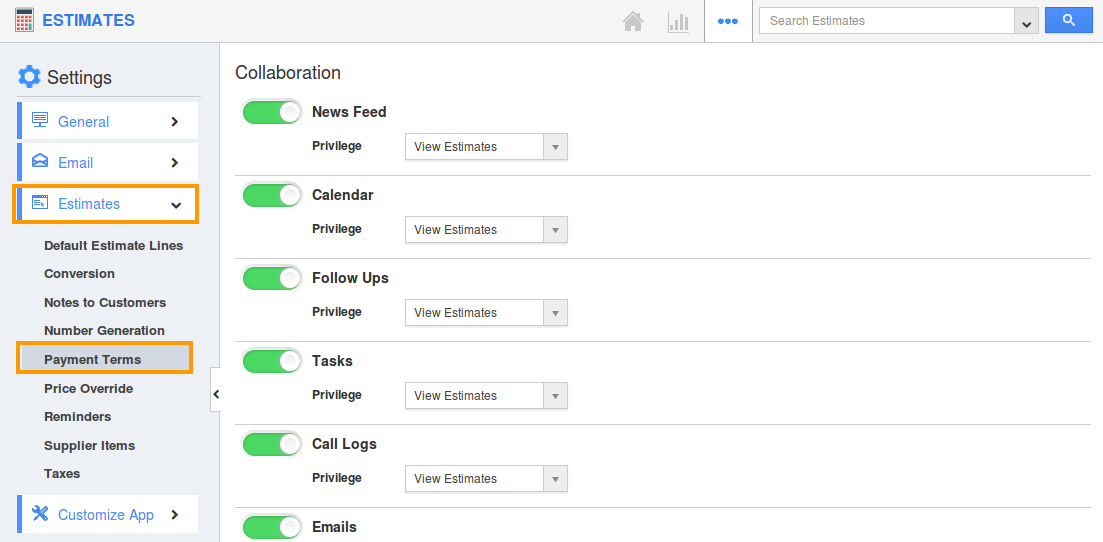
- Click on "More(...)" icon and select "Settings" icon located at the app header bar.

- Click on “Payment Terms” under "Estimates" drop down from the left navigation panel.

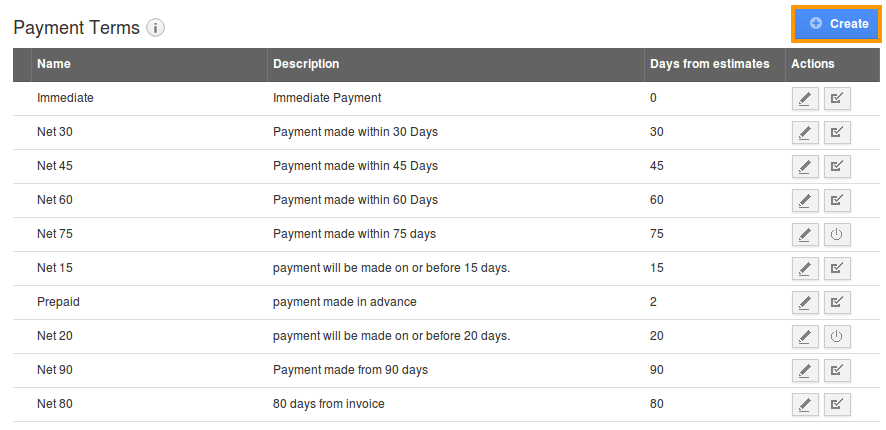
- The payment term dashboard will be displayed as shown:

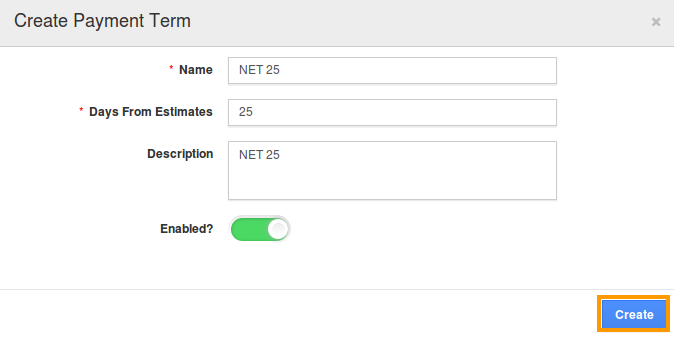
- Click on “Create” button to create new payment term and specify:
- Name – Name of the payment term.
- Days From Estimates – Number of days for payment.
- Description – Description about payment term.
- Enabled – By default, you can enable payment term.

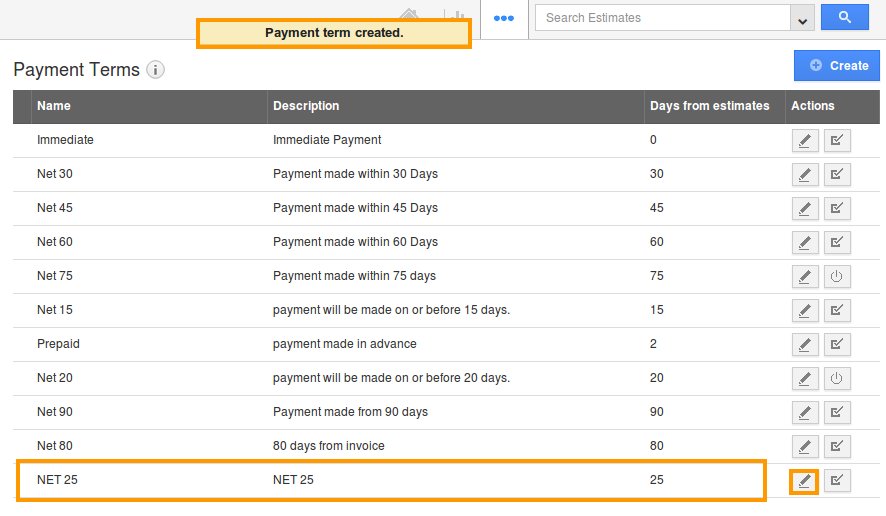
- You can view the created payment term as shown in the image below:

- You can update payment term information by clicking on “Edit” icon, if needed.
- By default the created payment term will be in enabled mode.
Related Links
Flag Question
Please explain why you are flagging this content (spam, duplicate question, inappropriate language, etc):

