Browse by Solutions
Browse by Solutions
How do I Allow Customer Contact View a Project?
Updated on July 27, 2017 10:49PM by Admin
It goes without saying that every customer would want to see the progress of his project that you are working on . Therefore, its your responsibility to keep them up to date regarding the project you are handling.
If the customer wants to take a peek at the progress/status of the project, you should be able to show him. Apptivo CRM allows you to invite the customer to view the status of the project.
Following are steps to invite your customer. Let's quickly have a look.
Steps to Invite your Customer to Join a Project
- Log in and access Projects App from your universal navigation menu bar.
- Create a new project or view a project you would like to share with your customer.
- Click on "Team"
 tab and click on "Add Contact" button under the "Customer Team" column.
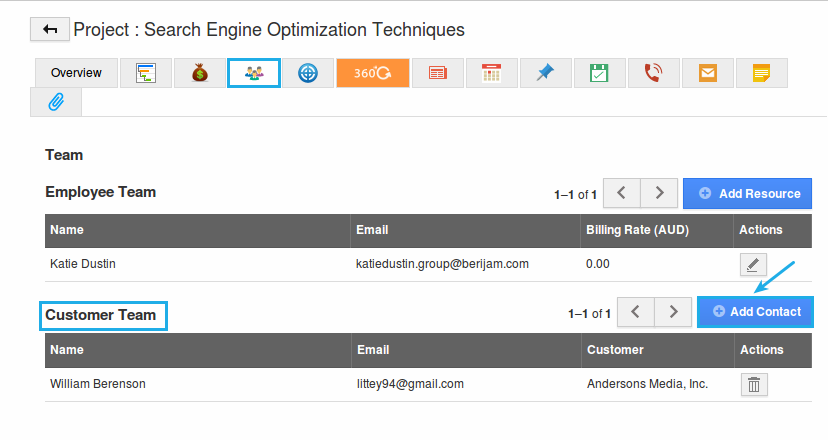
- Please take note, to get the invitation to view your project, you should be a premium or enterprise account holder. If you are a standard plan user, you need to upgrade to premium or enterprise plan to avail this feature.
- Search for a contact (or) create a new contact.
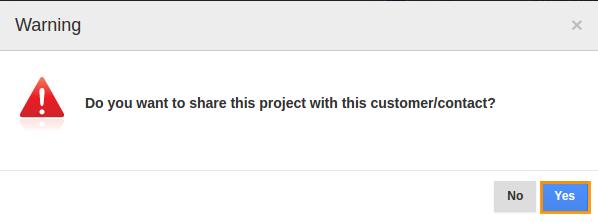
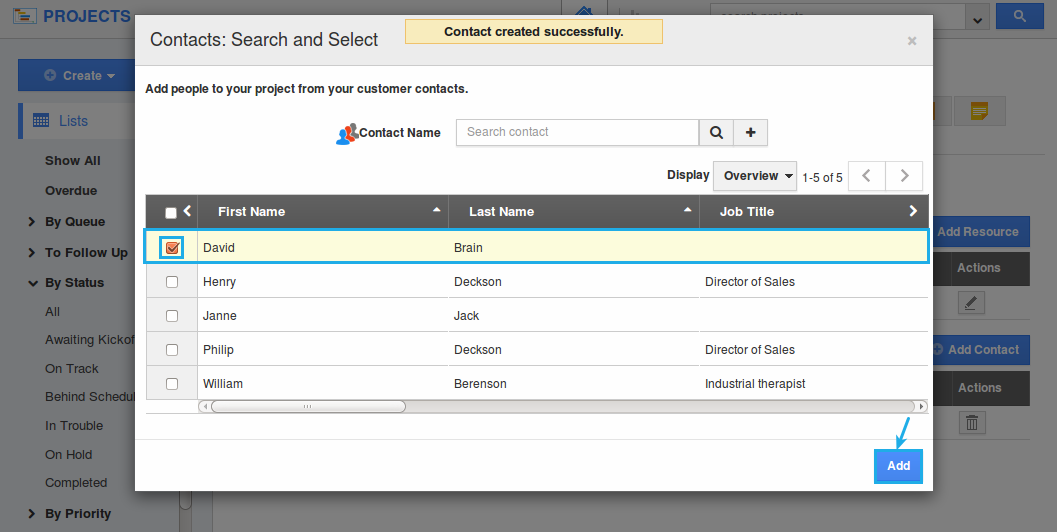 6. You will receive following warning popup to share project to customer contacts.
7. Click on "Yes" button to send invitation to contact.
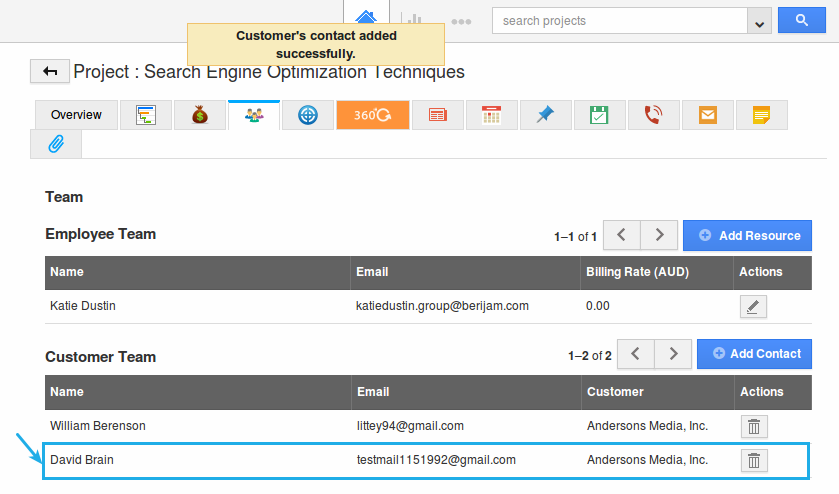
- This contact will now appear in the customer team, and they will be sent an email inviting them to the project.
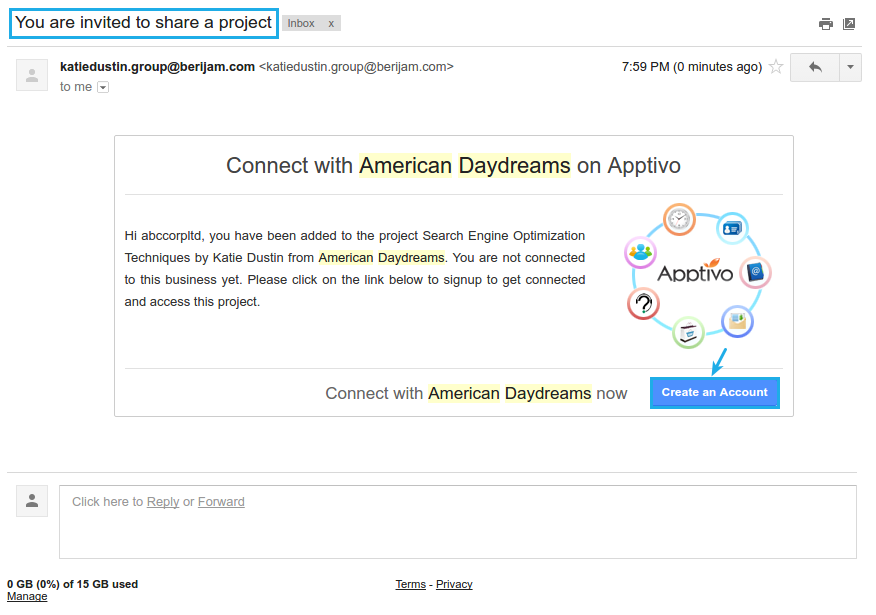
- The customer will receive an email invitation as shown below:
How the Customer will Access the Project
Now that the customer has been added to the project, they will need to access Apptivo. If they already have an Apptivo account, they can simply log in to their existing account, and see the project in their Projects App. If they don’t have an Apptivo account, they will need to sign up for a free account using the same email which you added to the team.
- On clicking the "Create an Account" button, you will be directed to the Apptivo SignUp page. Fill in the required fields and click on "Sign Up".
Note: The email id entered in the sign up page and the email id of the customer should be the same.
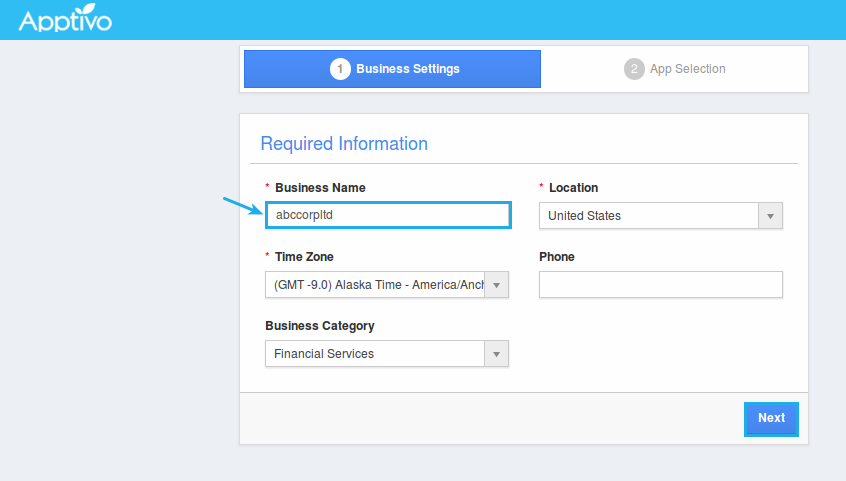
- By clicking Sign Up, the "Business Settings" page will be displayed. Here, the business name entered should be the name of the customer.
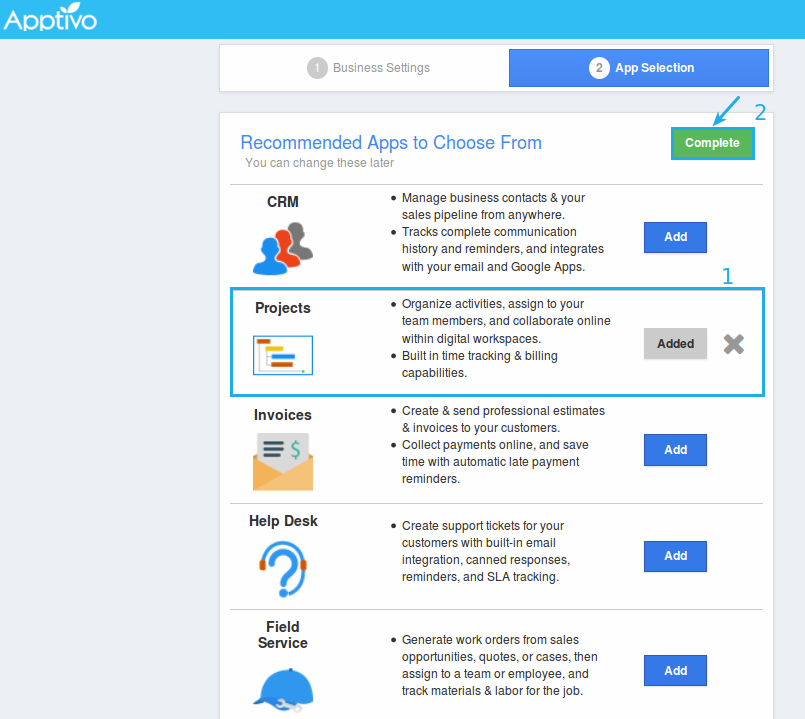
- In the "App Selection" page, add the Projects App and click on "Complete".
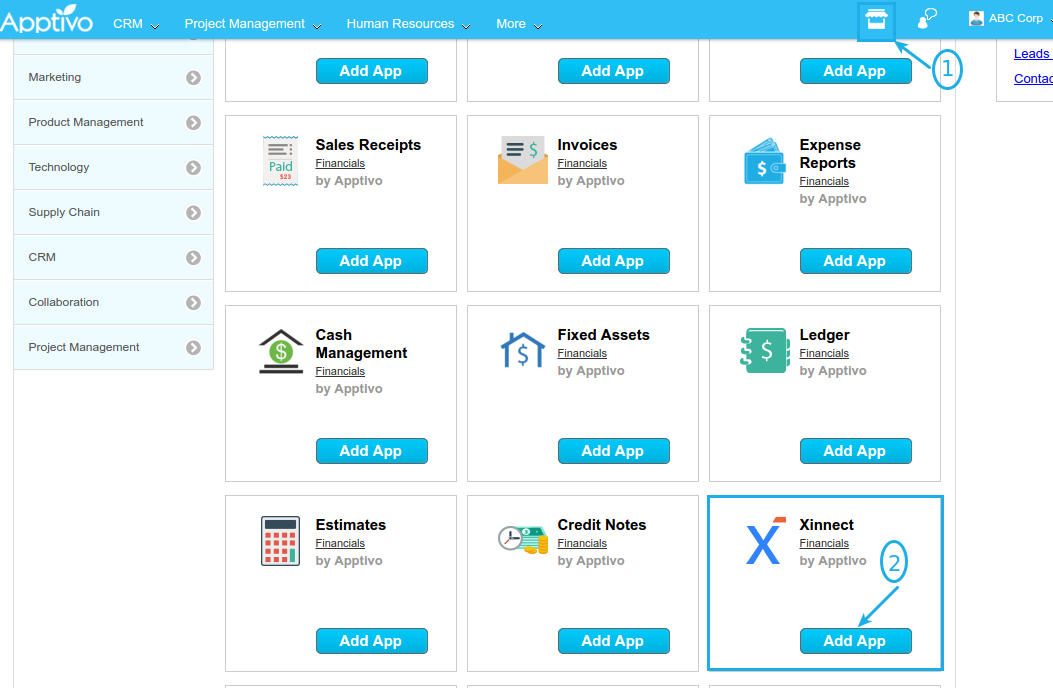
- Your Apptivo Homepage will now be displayed. Now, click on the App Store to add the "Xinnect App" under the "Financial" category.
- Access the Xinnect App from the homepage to accept the invitation. The invitation will be collected in the "Invitation" section. Click on "Accept" to accept the invitation.

- The invitation will be successfully added.

- Once the invitation is accepted, click on the "Projects App". The project will now be listed and you can view the details of it by clicking on the "More Details (...)" icon.


