Browse by Solutions
Browse by Solutions
How do I Configure Fuze with Apptivo?
Updated on June 24, 2018 10:11PM by Admin
Maintaining calls and having a centralized contact center is an integral part of most of the enterprises nowadays. Yet many organizations oversee it sometimes, but Apptivo keeps expanding its’ integrations and in that way, have now integrated with Fuze, next to RingCentral, offering you an incredible way of connecting with your customers and recording your calls in the CRM App.
Note:
Apptivo Fuze integration will be available only for the paid plans:- Premium
- Ultimate
- Enterprise
What does the Integration of Fuze with Apptivo CRM allow you to do?
- Initiates Web App Calls - Make a call within the Apptivo Web App.
- Initiates Mobile App Calls - You can also make a call from Apptivo Mobile App.
- Effective Call Tracking - All the Fuze calls can be tracked. Whether it's incoming or outgoing, it will be automatically logged irrespective of whether they originate from Apptivo web or mobile apps.
- Automatic Call Logging - A call log will get created automatically for both the inbound and outbound calls.
- Automatic creation of a Contact when a new member calls in
- Route calls effectively between Fuze & Apptivo
To have this integration process work, you will need to follow the following process:
Steps to Authenticate Fuze
- Log in to Apptivo CRM.
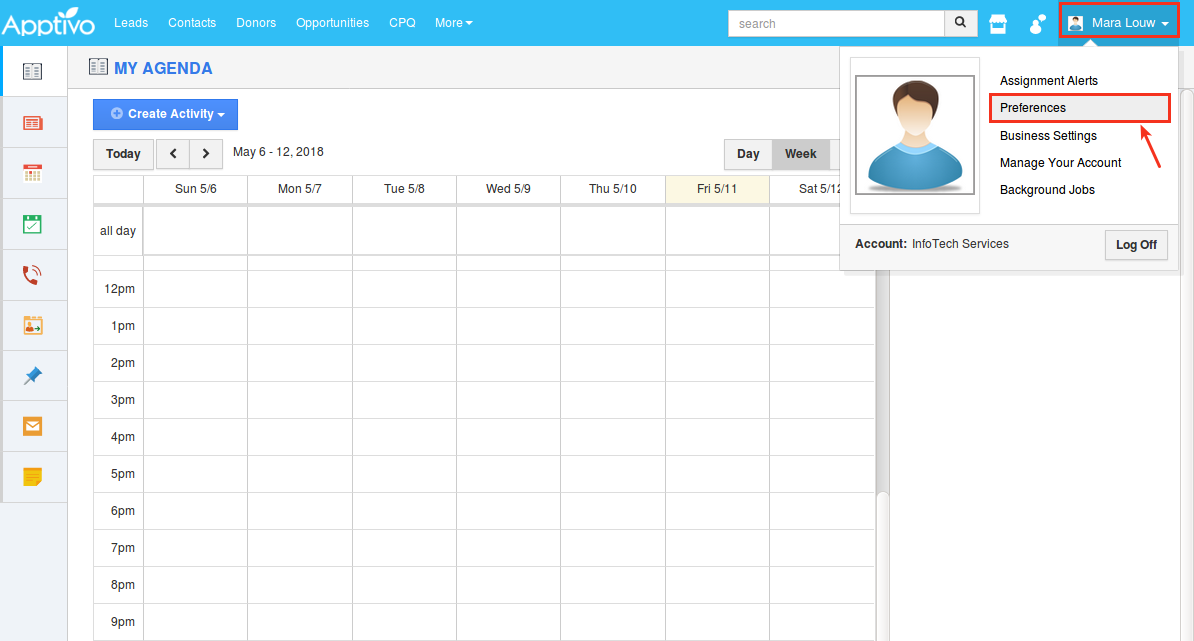
- Go to Preferences at the top right corner in your Apptivo profile.
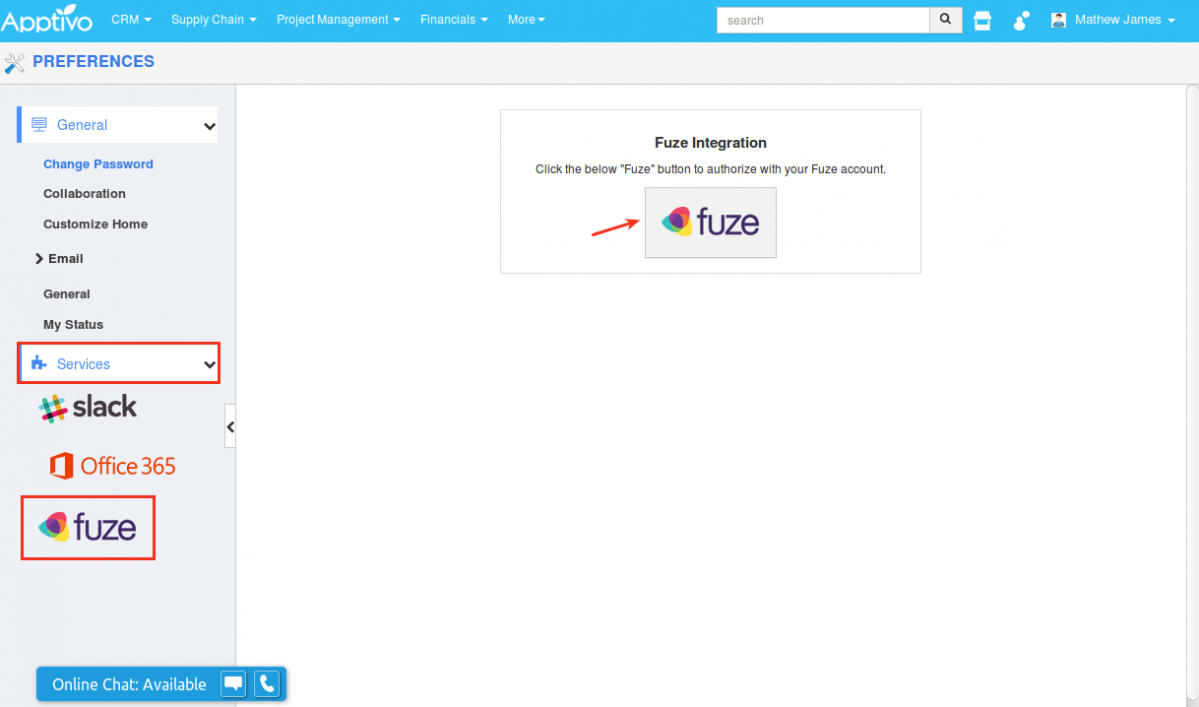
- Click on Services -> Fuze from the left navigation panel.
- Click on the “Fuze” button to authorize your Fuze account.
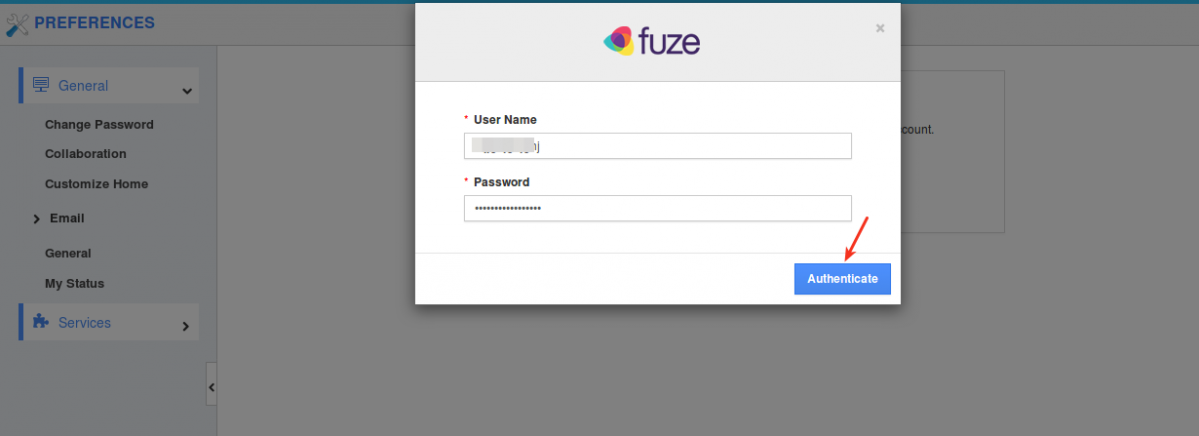
- Fuze popup will appear. Enter your Fuze User Name & Password. Click on Authenticate.
- You have now successfully authorized your Fuze account.
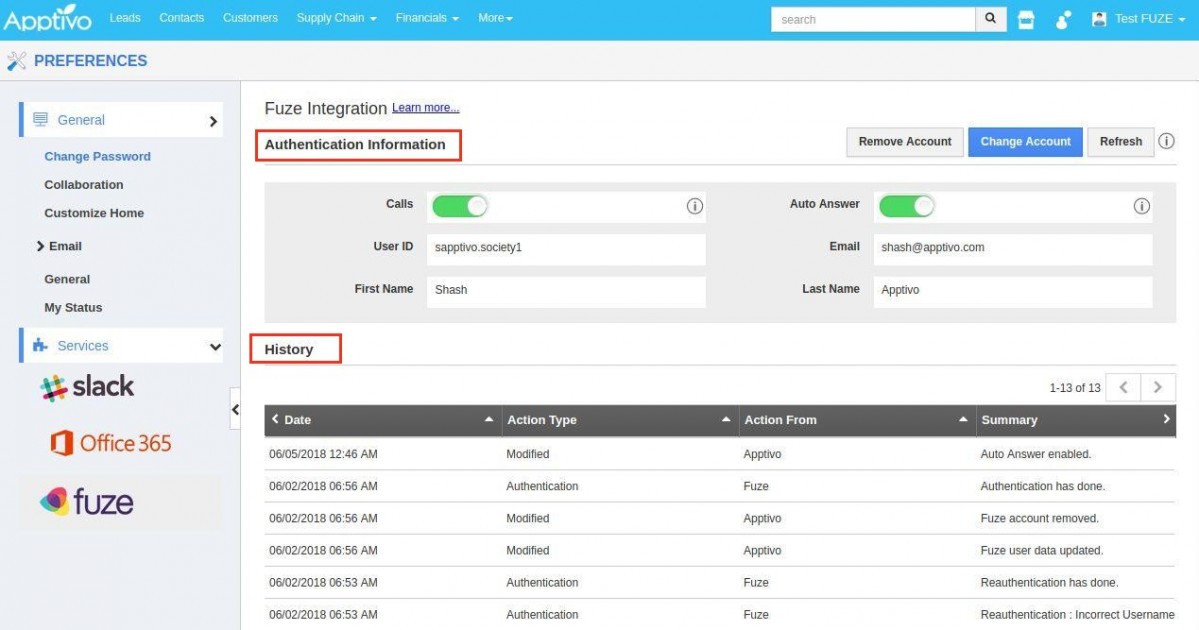
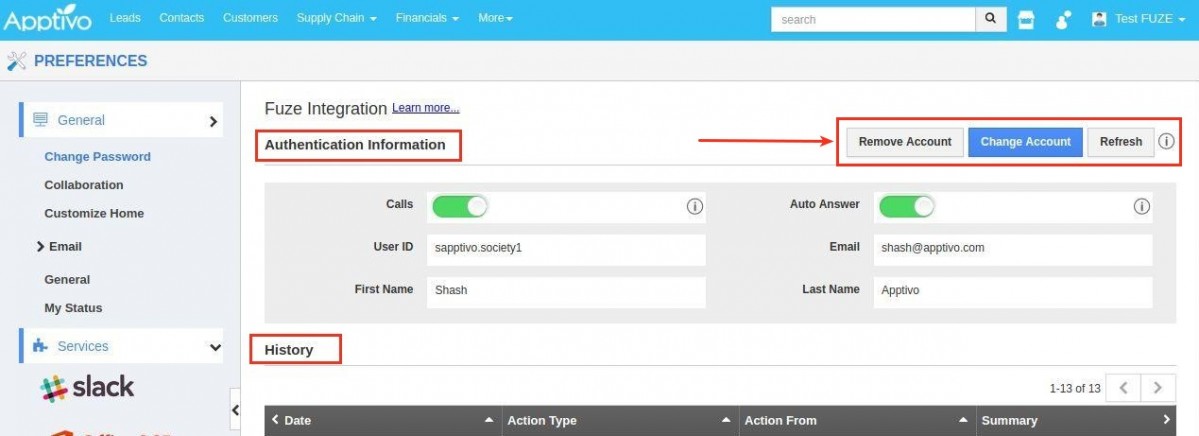
- In the Fuze Integration page, the following sections will be displayed:
- Authentication Information - Displays the details like User ID, Email, First Name, Last Name, along with the following two toggles:
- Calls - Enabling this toggle you can view the Click-to-Call icon next to the Phone field of the object and will make your Fuze Calls work and connect all the incoming and outgoing calls within the app. (Note: It will be enabled by default)
- Auto Answer - Connects to Fuze and redirects directly to the customer. (Note: It will be disabled by default)
- History - Displays the list of all authentications and changes that are done.
- Authentication Information - Displays the details like User ID, Email, First Name, Last Name, along with the following two toggles:
- When you click on Refresh, the Fuze information will get updated in Apptivo if any changes are made to the authenticated Fuze account.
- If you need to change the associated Fuze account to an another one in Apptivo, click on Change Account button.
- If you want to remove the Fuze account from Apptivo, then click on Remove Account.
- After the authentication process, you need to install the Fuze app on your Desktop/Laptop.
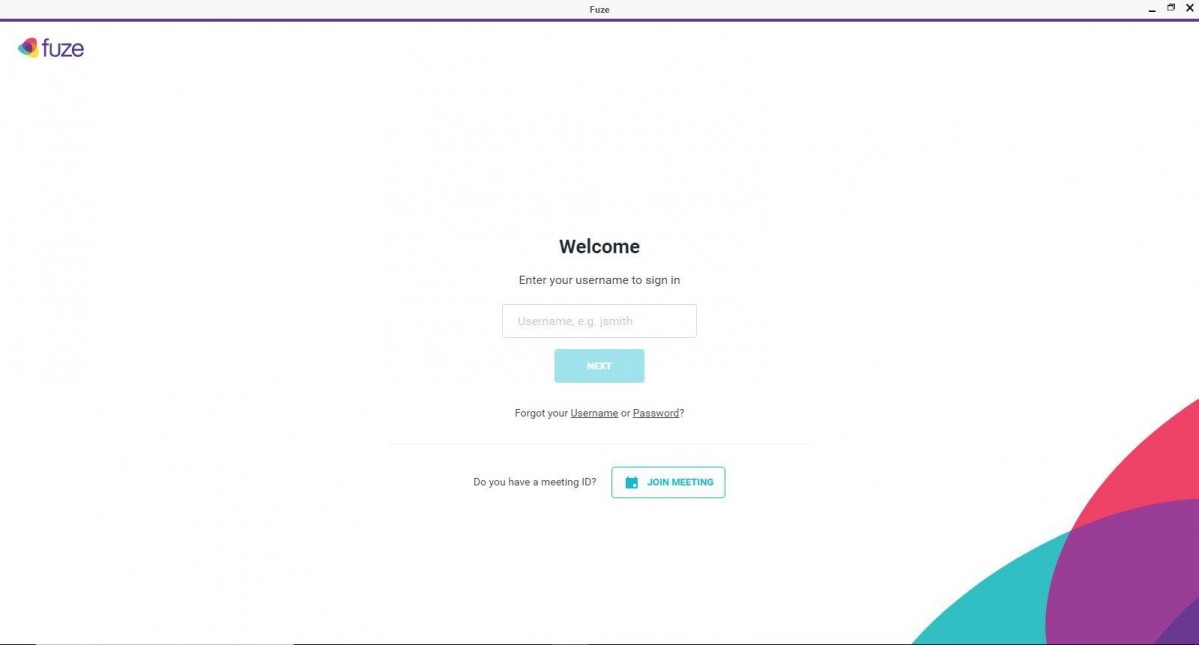
- Once installed, login to the Fuze app with appropriate credentials (which you used to authenticate in your Apptivo account).
How does it work?
Once you have completed the Fuze authorization, you are now ready to receive incoming calls and make outbound calls from within Apptivo via Fuze.
Initiating Outbound Calls
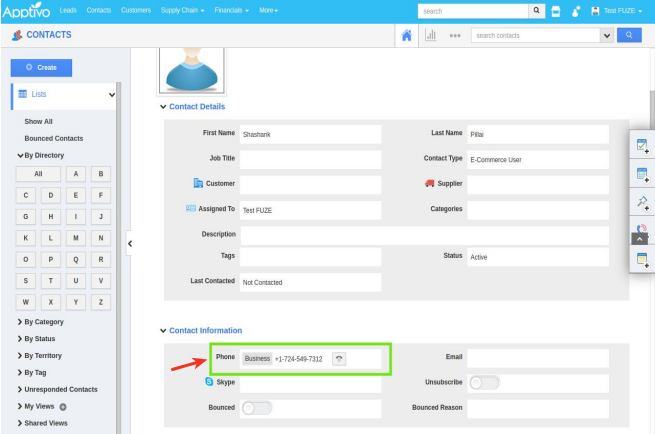
- Go to the Customers, Contacts, Leads or Distributors App in Apptivo and create a record with a Business phone number.
- Once created, you will see the icon of the telephone beside the phone number you would've previously entered.
- Click on phone icon for an outbound call, and the call will be established via the authenticated Fuze account.
- Fuze will now receive the call from Apptivo.
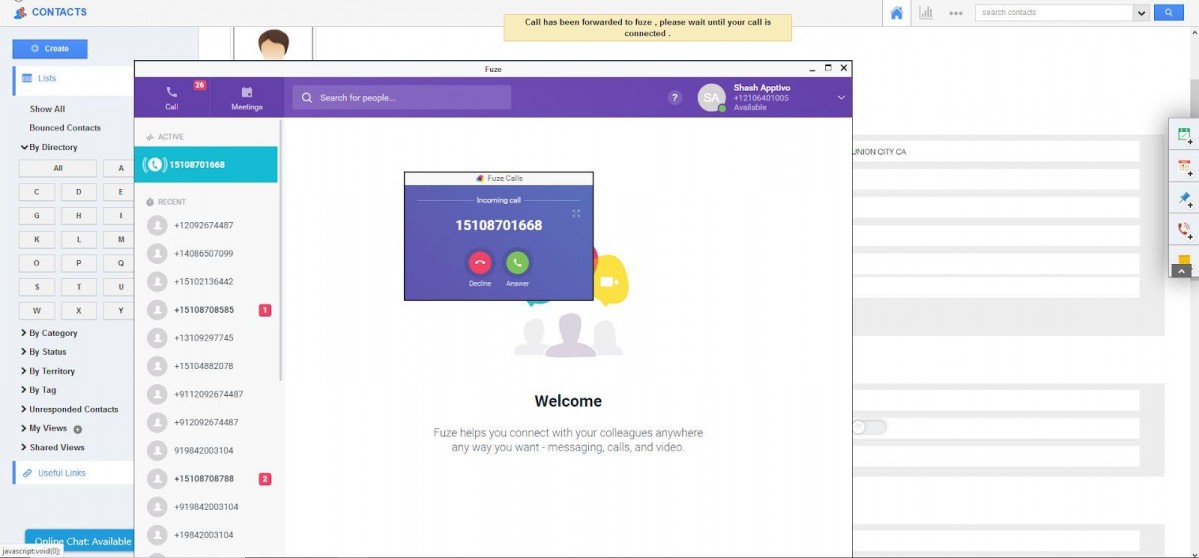
- Once you answer the call on Fuze, it will dial the respective Contact, Customer, Lead or Distributor. (That is, the call will first get established to Fuze and on approval will get connected with the end user)
Note: If the Auto Answer toggle is enabled in the Settings (mentioned in step 7), then the call is directly placed on your Desktop/Laptop without you having to answer.
Call Log Creation
After the call is ended, a Call Log gets created automatically for the relevant Customer, Contact, Lead or Distributor in Apptivo.
- At the end of the call, the follow-up options on the Call Details window lets you add call subject, Call summary and other details (Note: Type will be set to Outgoing by default). You can revisit the call log later if required.
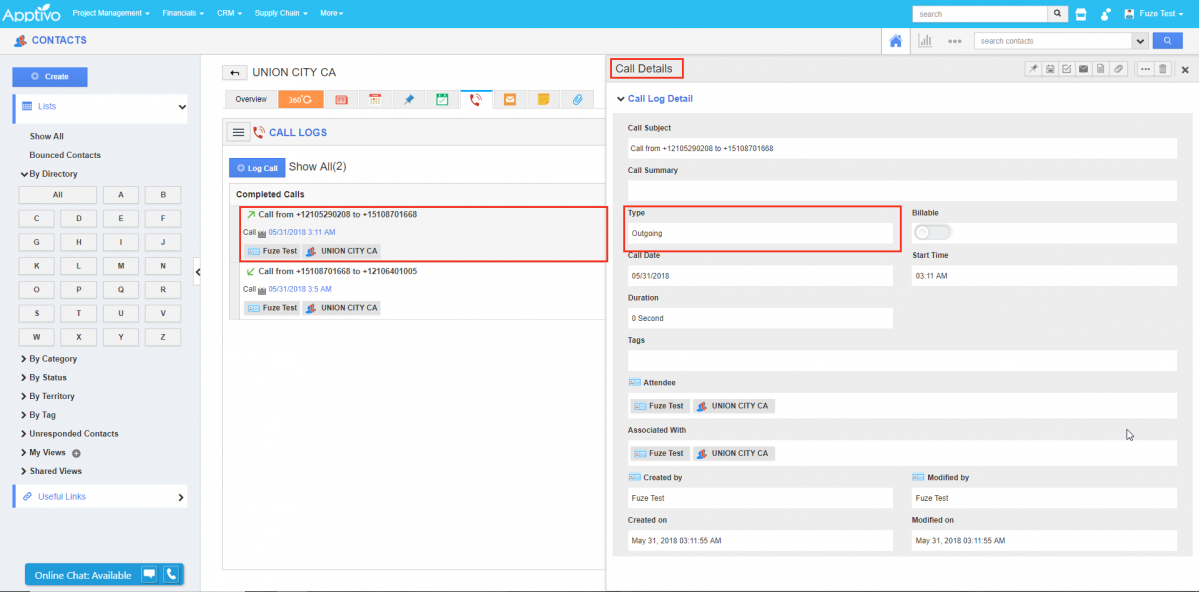
- To view the call logs, click on the Call Log tab where the history of the calls is recorded by the system, as shown in the image below:
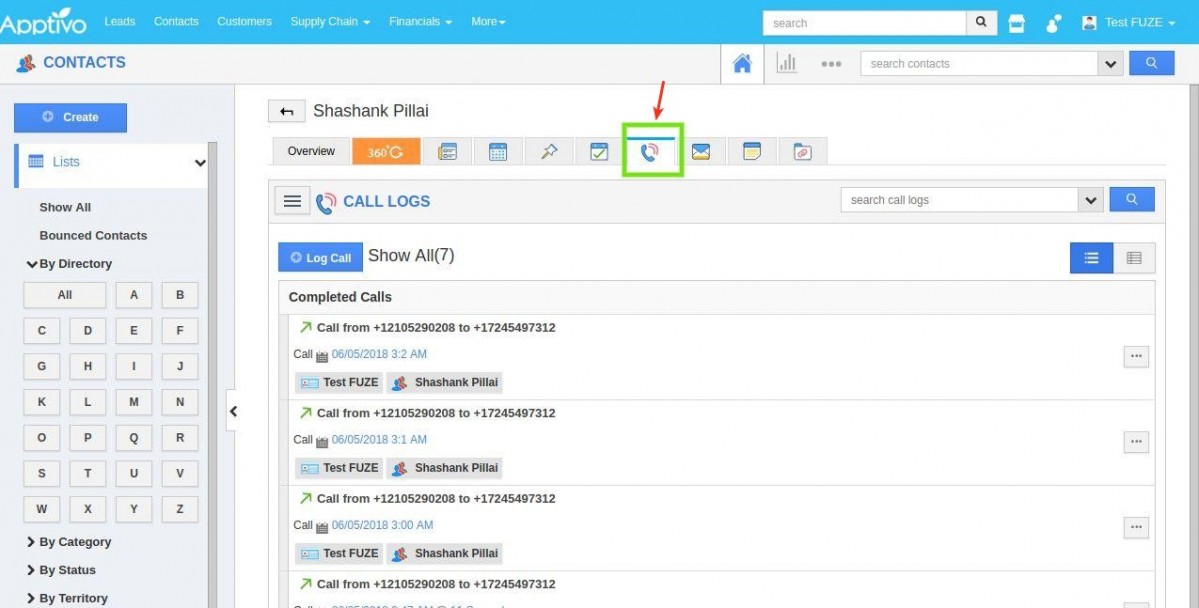
- Here, you can see a list of call logs.
Receiving Calls from an Unknown Number
When fuze receives a call from an unknown number (new number), a Contact, as well as a Call Log will automatically be created in Apptivo Contacts App.
Also, when you are making calls directly from Fuze and if the contacts are not in Apptivo Contacts App, a contact record is created automatically and a call log is generated.
To Summarize
- When you make a call to an existing contact in the database, Call Log is recorded in the corresponding application.
- When you make a call and the number is registered in more than one application within the Apptivo CRM App, then Call Log will be associated with all the corresponding objects.

