Integrating RingCentral with Apptivo CRM will make the life of those sales personnel who lives in the sales funnel, more fun and easy. A sales personnel can breeze through their work, while having the calls recorded in the CRM app as well as in all other apps he/she has entered his RingCentral number. Let's take a quick walk through Apptivo-RingCentral Integration to understand the key features.
What does the Integration of RingCentral with Apptivo CRM allows you to do?
Unlike the regular on-premise systems, RingCentral is a Cloud phone system . Apptivo CRM with this third party integration(RingCentral) allows you to do the following:
- Initiate a Web App Call - Make a call within the Apptivo Web App.
- Initiate a Mobile App Call - You can also make a call from Apptivo Mobile App.
- Enables Call Tracking - All the RingCentral calls can be tracked. Whether its incoming or outgoing, it will be automatically logged irrespective of whether they originate from Apptivo web or mobile apps.
- Display Contact Details - You can see the entire details of the existing contact in Apptivo CRM whenever you receive an incoming call or initiate an outgoing call to a CRM contact using Ringcentral.
There are a few things that you need to take note of, for the RingCentral to work with Apptivo CRM. Have a look!
- A RingCentral account is required for this integration. That is, you will be provided with RingCentral telephone numbers once you register with them.
- RingCentral softphone should be installed on your device (smartphone, tablet, desktop, or laptop)
- RingCentral integration can be enabled only by the administrator of the Apptivo CRM account.
- Once the Admin, activates the integration for the CRM users, they can log in to RingCentral with their unique login credentials.
- Last but not the least, you should have Apptivo CRM premium membership to enjoy the benefits of RingCentral- Apptivo CRM integrations.
Note : RingCentral - Apptivo CRM integration works best with Mac OS.
To Configure RingCentral in Apptivo CRM
The following are the three things that you should do to configure this cloud phone with the CRM:
- Enable RingCentral Integration
- Log in to your RingCentral account in Apptivo CRM
Enable RingCentral Integration
To enable RingCentral integration follow these steps:
- Log in to Apptivo CRM.
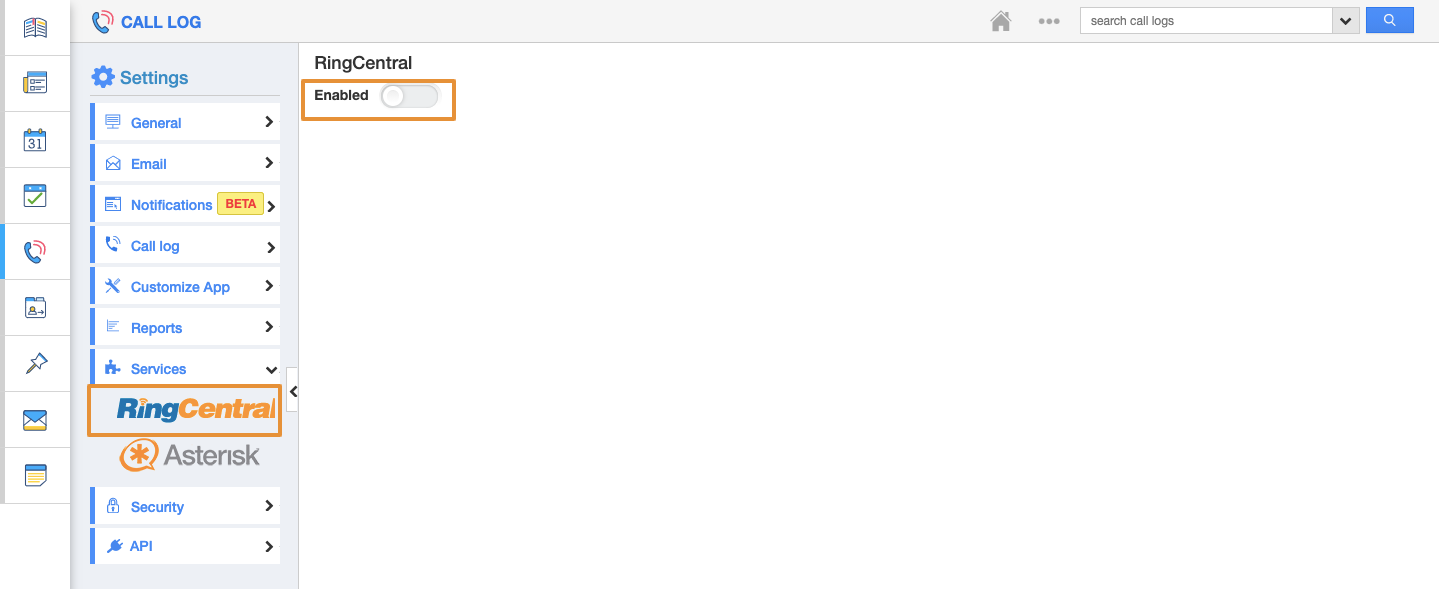
- On the Home Page, click on ”Call Log”. You can see this on the left Navigation bar.
- Go to “Call Log” -> “Settings”. (The panel opens on the right-hand side)
- Click on “Services” drop down under Settings. (This on your left Navigation Bar)
- Select “Services” -> “RingCentral”.
- To activate RingCentral Connection, slide the toggle button to Enable.
Logging in to RingCentral
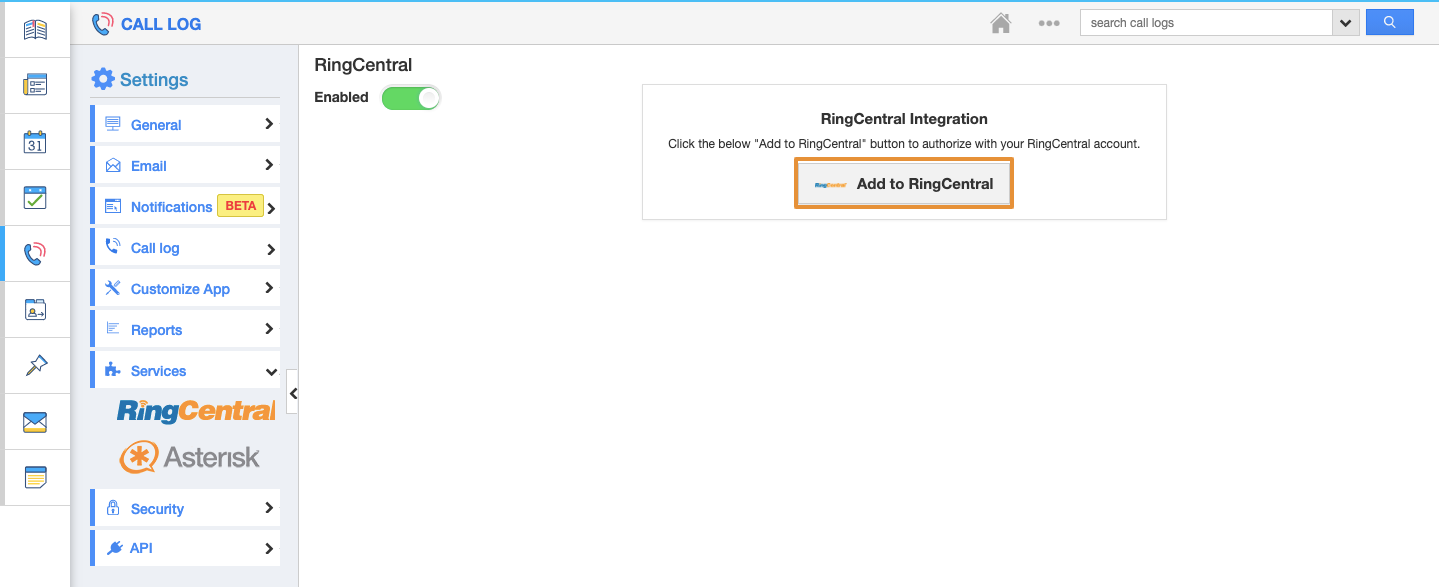
- On enabling, click on "Add to RingCentral" button.
- You will be redirected to "RingCentral" login page. Provide with the RingCentral phone number and click on "Next" button.
- By clicking on "Next" icon, it asks for Extension and Password. Provide with the authorized credential and click on "Sign in" button.
- You will be asked for the Access request. Click on "Authorize" button.
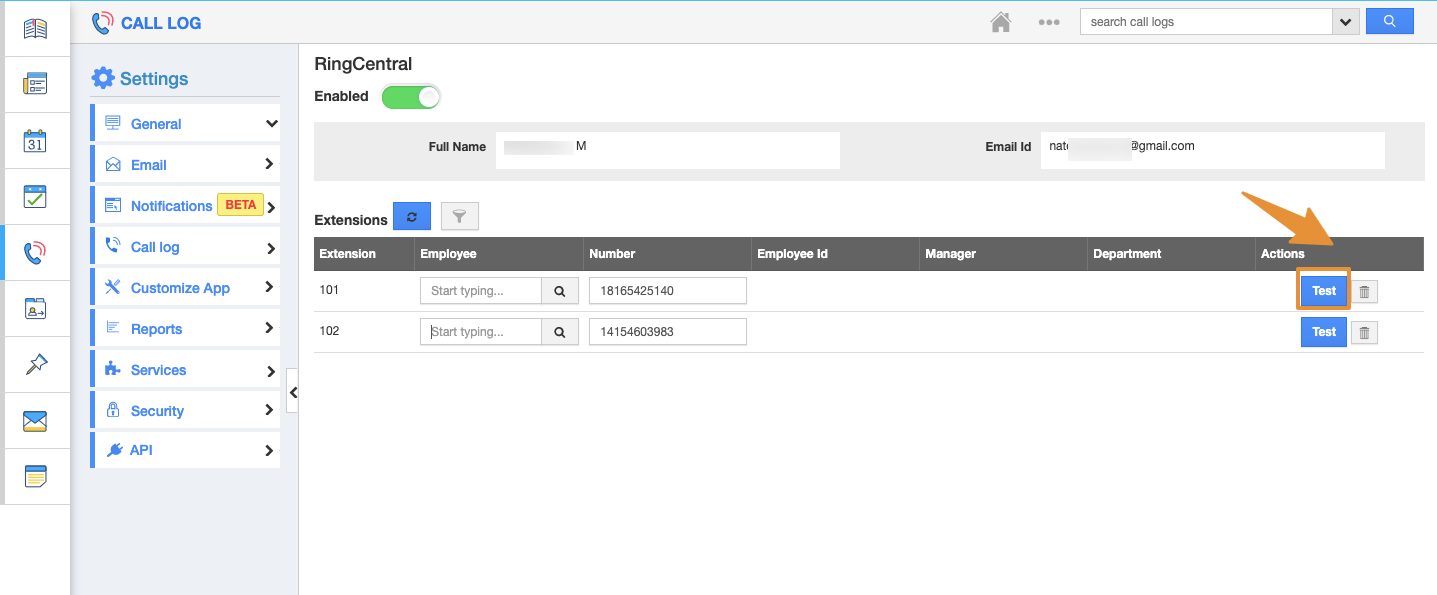
- Now the RingCentral app page gets displayed and their extensions are shown in the Extension column.
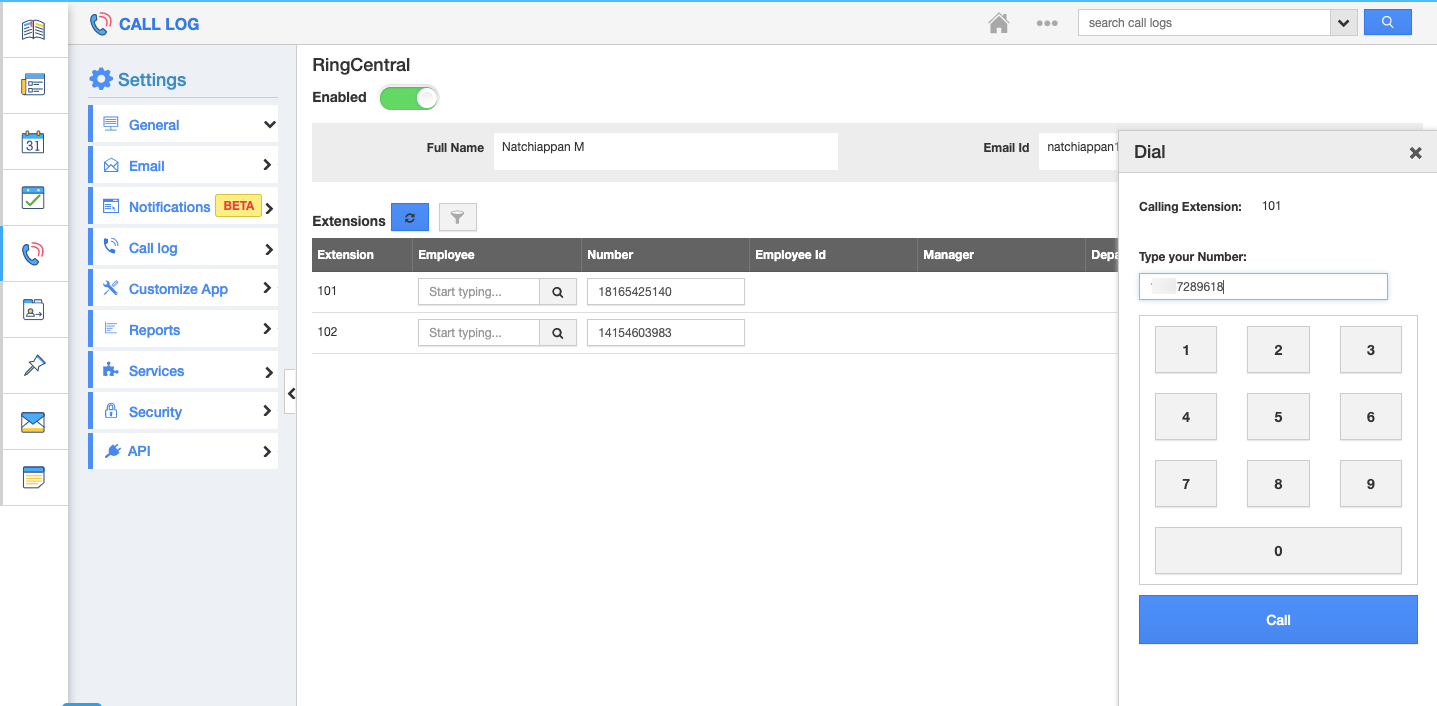
- After authentication, you can make a call in call log setting. Click on "Test" button.
- Test dial the Phone number.
Using RingCentral Apptivo CRM Integration
You are ready to use RingCentral, once the RingCentral in Apptivo CRM is enabled and you have logged into the RingCentral account. Now you can do the following tasks:
- Receive incoming calls
- Initiate outbound calls
- Make calls within the team (Make calls to those privileged members who are given the RingCentral telephone numbers)
- Add follow-up notes from Apptivo CRM against the contact you received the call from or you initiated the call to.
To Receive Incoming Calls
You need to follow these steps so RingCentral-Apptivo CRM works seamlessly and you can receive calls.
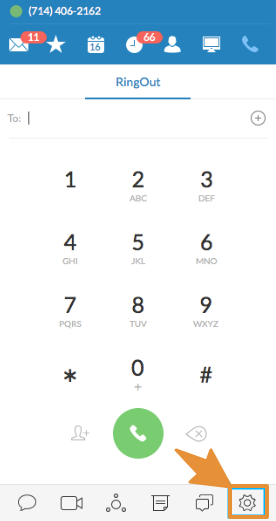
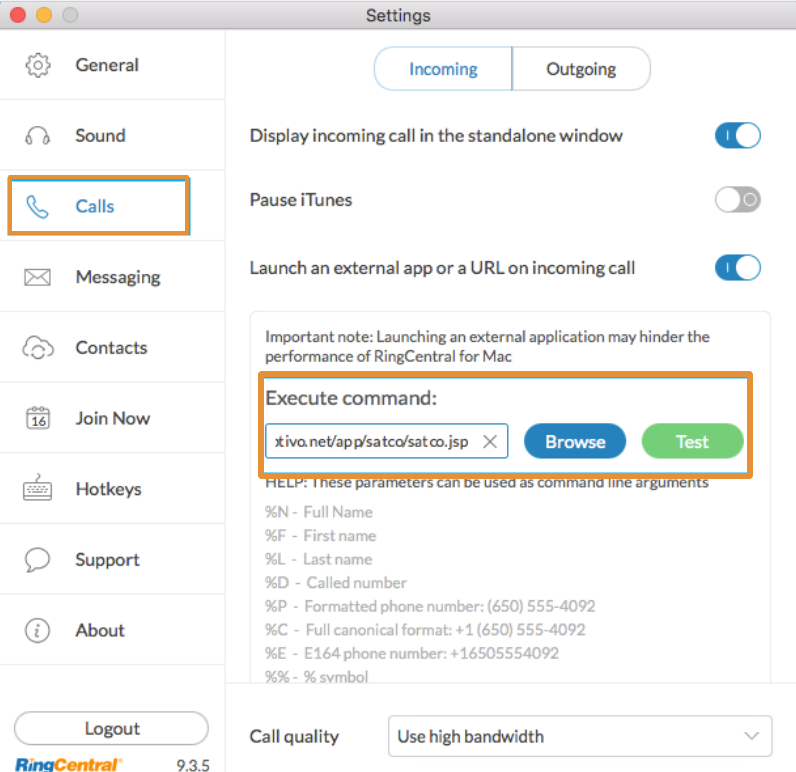
- Go to RingCentral App.
- Click on View Settings icon.
- Under View Settings, click on Call from the left panel.
- Enable the Launch External app or a URL on the incoming call option. (By default it will be disabled. Toggle on to make a call)
- In the text field "Execute Command " enter the URL:
https://www.apptivo.com/app/ringcentral.jsp?phoneNumber=%E&firstName=%F&lastName=%L
- Click on the “Test” button to test whether the execute command is functioning perfectly.
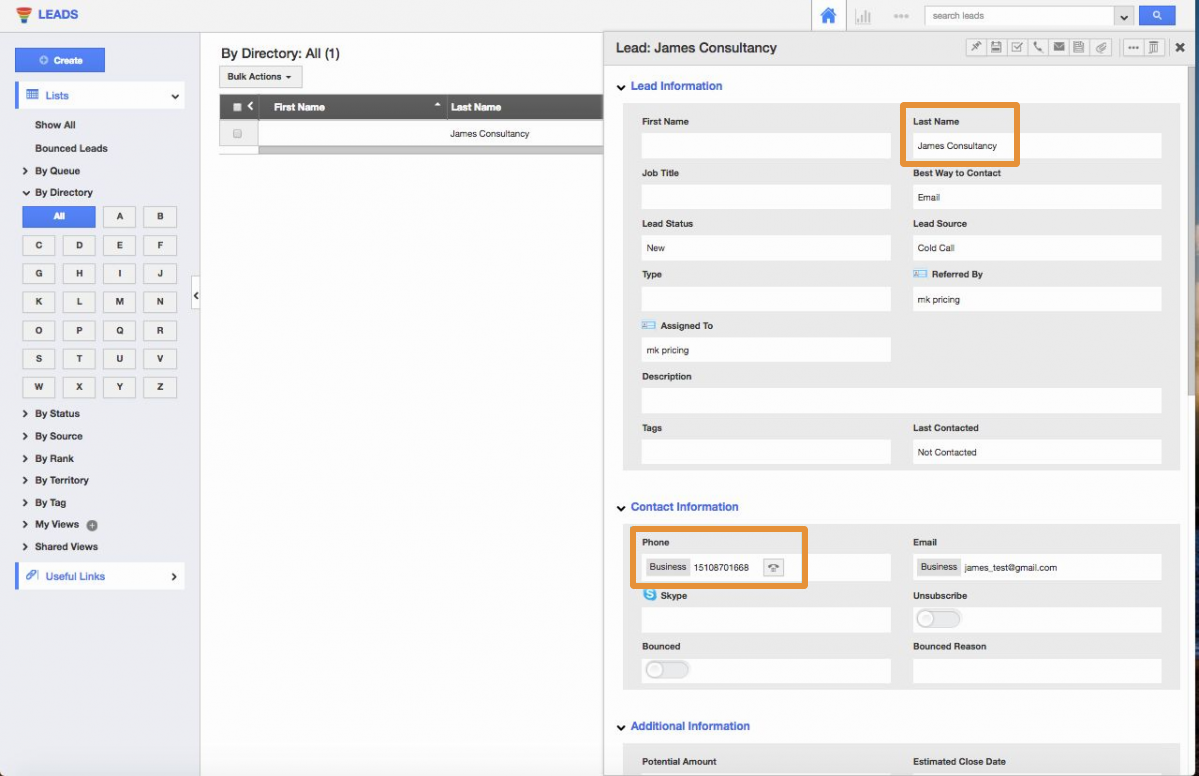
- On clicking the ”Test” button, a new tab opens up displaying the Leads Page.
How it Works?
Receiving Calls from a CRM Contact
- When you are receiving an incoming call from a lead or one of the team members then the receiver will be able to see the complete details of the caller.
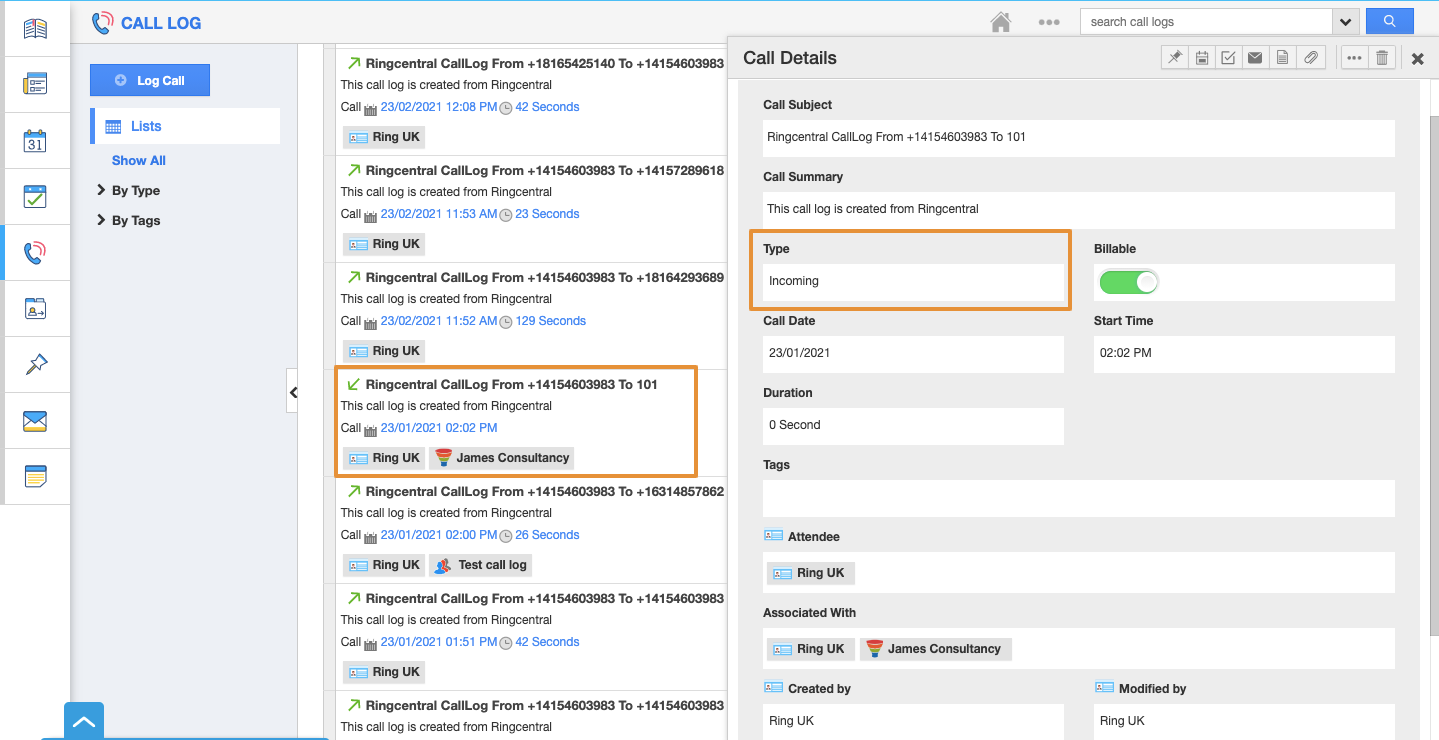
- Also the call log gets created in Log Call where the history of the calls is recorded by the system.
- At the end of the call, the follow-up options on the Log Call window lets you add call subject, Call summary and other details. You can revisit the call log later if required.
- The Log Call panel contains the following fields:
- Call Subject
- Call Summary
- Type of call - incoming/outgoing
- Billable - whether it's billable or not.
- Call Date
- Start Time
- Duration - where the duration of the call is recorded
- Tags - Where you can add tags
- Attendee
- Associated with
Receiving Calls from a New Contact
- Suppose you are receiving a call from a new contact, i.e. A contact whose details are not entered into the CRM Lead page. In this case, a new Lead Creation page panel is opened in a new tab. Here you can enter the required details of the new contact.
Initiating Outbound Calls
Follow these steps to initiate an outbound call:
- Click on the desired record of the lead.
- For the record along with the details you will see the icon of the telephone beside the phone number you would've previously entered.
- The call will be established via RingCentral.
Synchronizing Call Log Between Apptivo CRM and RingCentral
- If you want to see your call log history, it's necessary to log in to RingCentral website.
Follow this URL: https://service.ringcentral.com/login.asp
- Log in using the unique login credentials that are provided to you by the Apptivo CRM Admin.
- Once you successfully login, you should be able to see the call log history of all the calls you have received as well as initiated.
To Disable/Disconnect RingCentral
- Disable the Ringcentral toggle in Call Logs → Services” → “RingCentral.
- By disabling the toggle, all the connections from RingCentral will be disabled and you have to go through the Ringcentral integration to reconnect.
To Summarize
- When you initiate an outbound call to a new contact, the Leads creation Page will open on the new tab.
- When you make a call to an existing contact in the database, Call Log is recorded in the corresponding application.
- When you make a call and your number is registered in more than one application within the Apptivo CRM App, then Call Log will be created in the following order:
FAQ
-
When I place a call from Apptivo, why does it show the main company number instead of my personal line?
You need to log into the RingCentral website and change the Outbound Caller ID setting to reflect your personal line.
-
I configured RingCentral phone number, but I do not see the call icon beside the contact phone number. Why?
You need to ensure your authentication with RingCentral settings, on account of it not properly incorporated.
-
When I try to authenticate RingCentral, why it does not redirects me to Apptivo?
When you have some antivirus or malware programs installed and running in the computer, it may block some API calls of RingCentral hence there will be a failed authentication process. Try disabling that software and then start with RingCentral authentication.
The entire process of Call Log RingCentral Integration with Apptivo is very simple. At any point of time if you are stuck somewhere you can always reach out to the Apptivo customer care representative.

