Browse by Solutions
Browse by Solutions
How do I Create Tags in Orders App?
Updated on September 12, 2017 10:30PM by Admin
Tags in Orders App allows you to easily group your created orders according to your own preferences by giving it a label. This helps you to easily filter the specific properties you need from the group.
For instance: Consider an employee, who wants to view all his Supplier orders, then the “App Tag” namely “Supplier Orders” can be created.
Steps to Create Tags
- Log in and access to Orders App from the Universal Navigation menu bar.
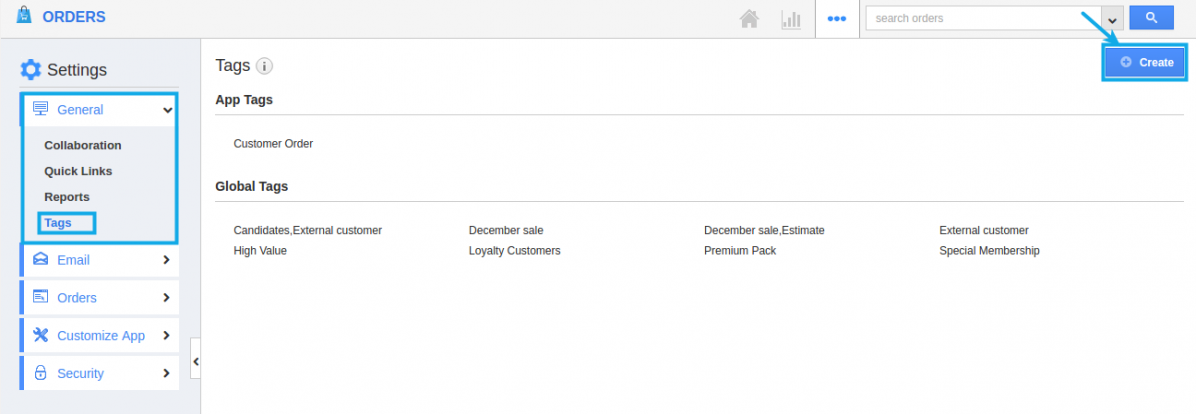
- Click on “More(...)” icon -> “Settings” from the App header bar.

- You will be redirected to the Settings page. Click on the General drop down and select Tags from Left Navigation panel.
- Tags page will be opened. Click on "Create" button.

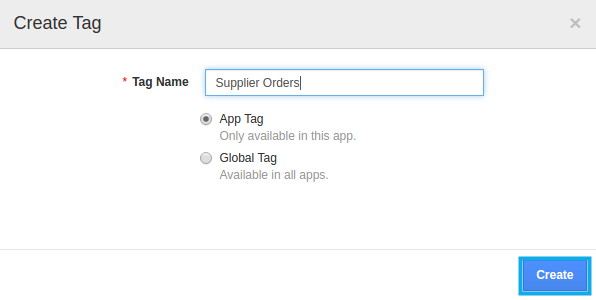
- “Create Tag” pop-up appears where you can fill in the required details.
- Tag Name : Name of the tag which is mandatory.
Specify whether the created Tag belongs to App tag or Global tag - App tag : Available only in the particular App.
- Global tag : Available globally on all Apps.

- Here, “Supplier Orders” tag is created as an “App Tag”.
- You can Edit or Delete the App tags when needed by pointing the mouse near the created tags.

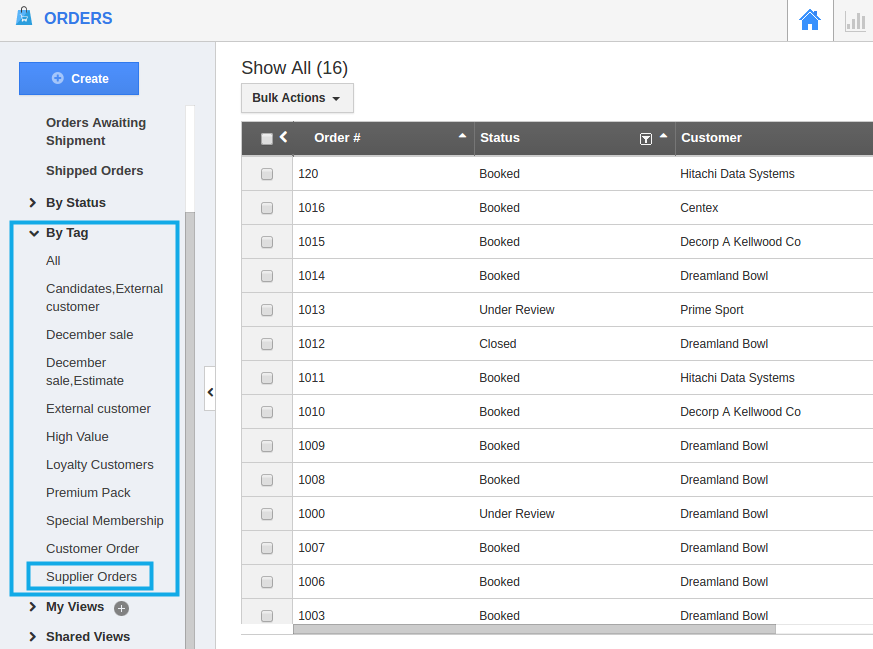
- Created App Tag will be visible only in the Orders App home page.

Related links
Flag Question
Please explain why you are flagging this content (spam, duplicate question, inappropriate language, etc):

