Browse by Solutions
Browse by Solutions
How do I Create Custom Attributes in the Insurance Tracker App?
Updated on May 31, 2017 01:42AM by Admin
Custom attributes are nothing but the fields which are unique on your Insurance Tracker App.They can be created, modified and customized. You will also find your attributes of different data types such as text, numbers, date, currency, etc.,. Master layouts in Insurance Tracker App allows you to add up the custom fields as per your requirement.
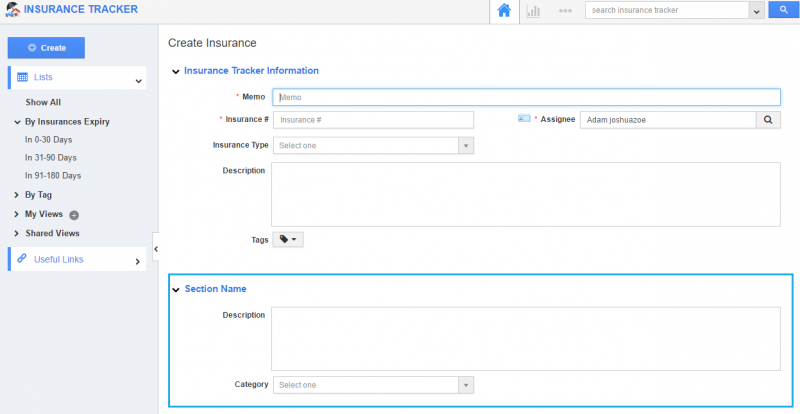
For instance: Consider an employee, who wants to add a custom section “Additional Information” with the custom fields “Description” and “Category”. In that case, he can add these additional attributes by customizing the master layout.
Steps to Customize
- Go to Insurance Tracker App from app header bar.
- Click on “More(...)” icon -> “Settings” -> “Customize App” -> “Master Layout”.
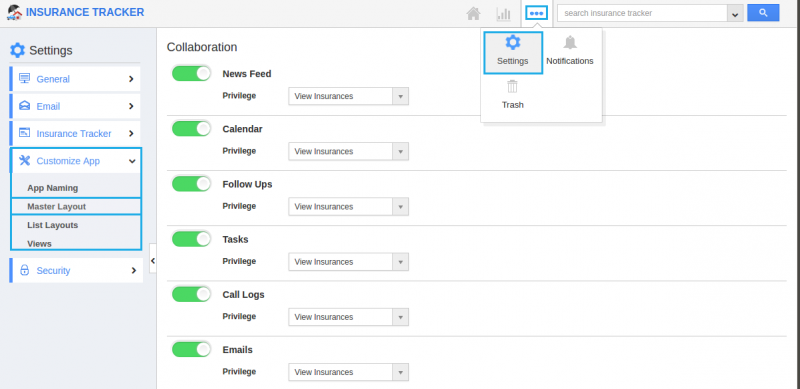
- If you are a standard plan user, then you need to upgrade your account to use this Master Layout feature. You will be notified with a popup as below:

- You can view custom attributes dashboard with following fields under "Palette" tab:
- Sections: Click on “One Column” or “Two Column” section to create custom sections.
- Attributes: Drag and drop attributes in sections.
- Text - Text field for entering text values.
- Date - Date field for choosing date.
- Number - Number field for entering number.
- Currency - Currency field for entering currency values.
- Radio - Radio fields for opting the values.
- Toggle - To enable or disable the values.
- Check box - For choosing multiple values.
- Drop down - Drop down field for choosing a specific value from a list.
- Link - Link field for entering URL’s.
- Text Area - In order to enter paragraph on the object.
- Address - Address information.
- File - File format can be inserted.
- Spacer - It allows to generate the space between attributes.
- In Master Layout there are another two tabs "Inspector" and "Revisions".
- Inspector tab allows to give the details of the selected field. Whereas, Revision tab allows to view the past changes made in the master layout and also restores that revision.
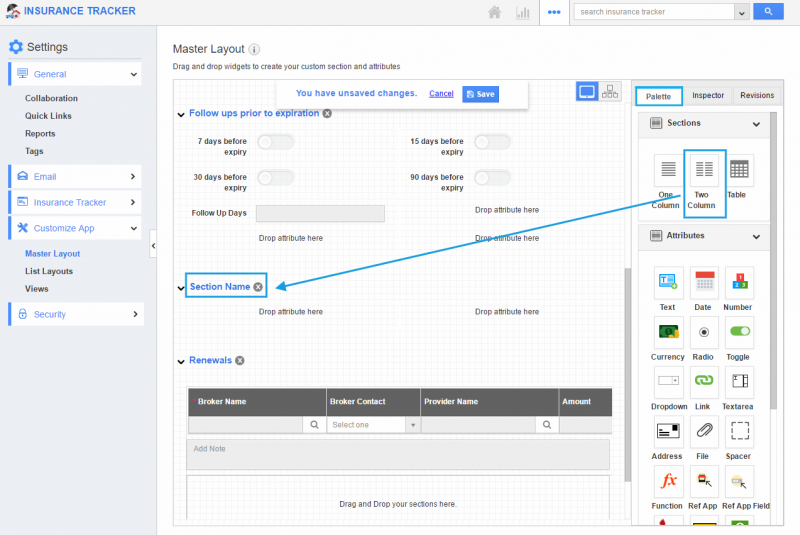
- Drag “Two Column” section from the “Palette” and drop it on the specified location.
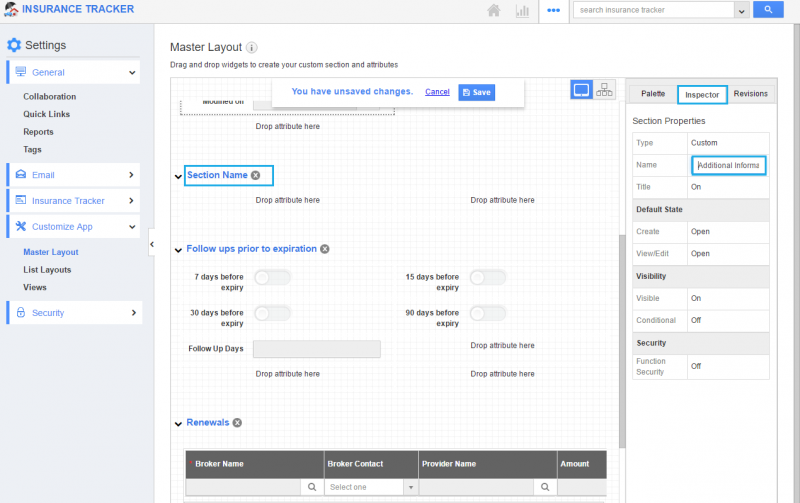
- Click on the section name and rename it as “Additional Information” in the “Inspector” tab.
- Now, to insert attributes, drag and drop the attributes from the “Attributes” section under “Palette”.
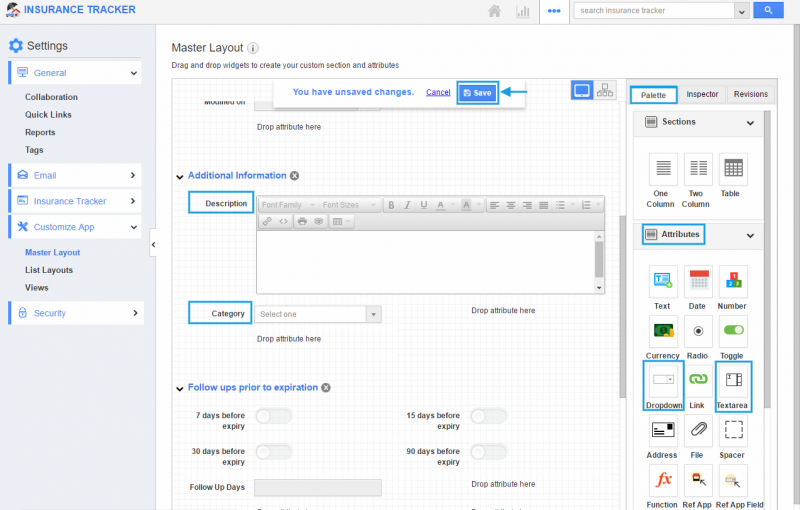
- Click on “Save” to save the changes made.
- Thus, you have created custom attributes in Insurance Tracker App.
Related Links
Flag Question
Please explain why you are flagging this content (spam, duplicate question, inappropriate language, etc):

