Browse by Solutions
Browse by Solutions
How do I Customize Reports in the Insurance Tracker App?
Updated on May 28, 2017 11:52PM by Admin
Insurance Tracker App allows you to keep in track the complete record of the insurance owned by your company. By customizing the report settings you can hide or show the reports. You can also give access privileges to your employees for reports.
The Reports in Insurance Tracker App are :
- Insurance Tracker List - Displays the reports of insurances created in a period.
- Insurance Tracker Activities - Displays the reports of insurance activities created in a period.
- Insurance Tracker by Insurance Type - Displays the report of insurances associated with the insurance type.
For instance: If the Manager does not want to have a view of Insurance Tracker List reports, then follow the below steps:
Steps to Customize Reports
- Go to Insurance Tracker App in the app header bar.
- Click on “More(...) -> Settings” from the app header bar.
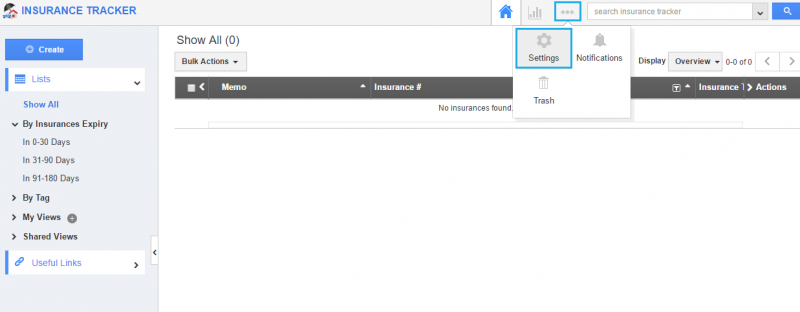
- Choose “Reports” from the “General” drop-down in the left navigation panel.
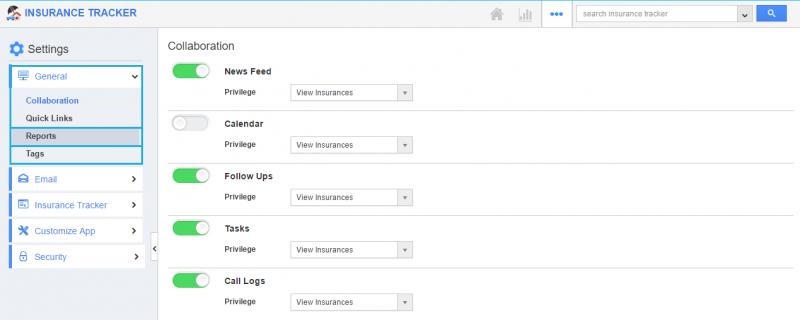
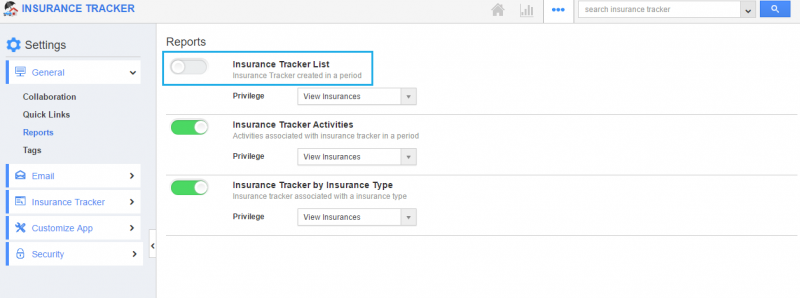
- Clicking on the Reports will display the Reports homepage, where all the objects will be in “Show” status by default.
- For instance, “Insurance Tracker List” can be hided by toggling off the button.
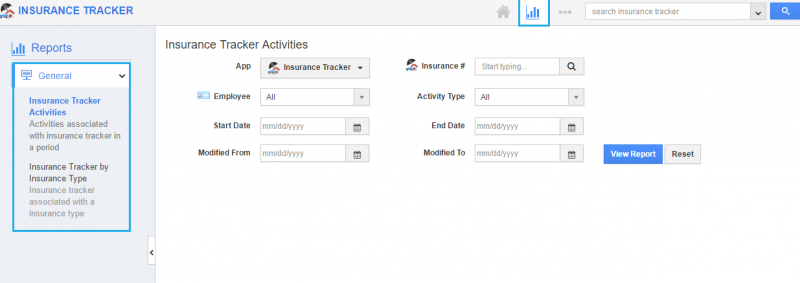
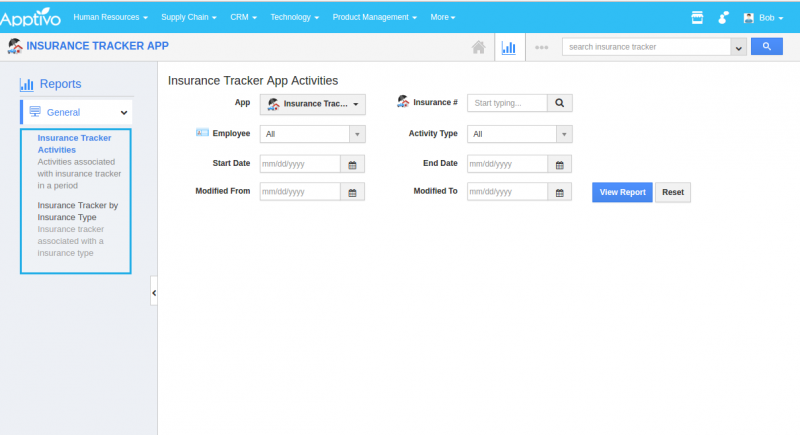
- In Reports section, you cannot view the “Insurance Tracker List”, since it is hidden.
Steps to Create Privilege
For instance, if the Manager does not want a specific employee “Bob” to have the view of reports on Insurance Tracker List, follow the below steps:
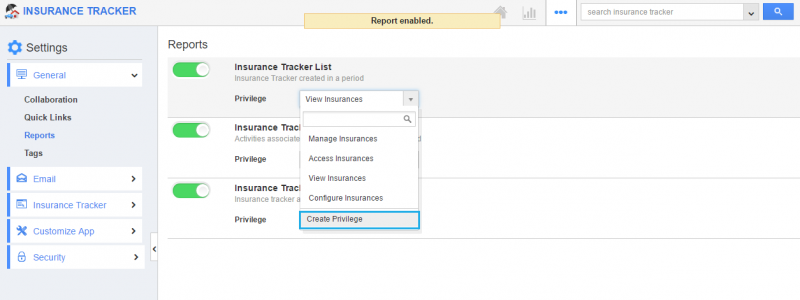
- In Reports settings dashboard, click on the “Create Privilege”.
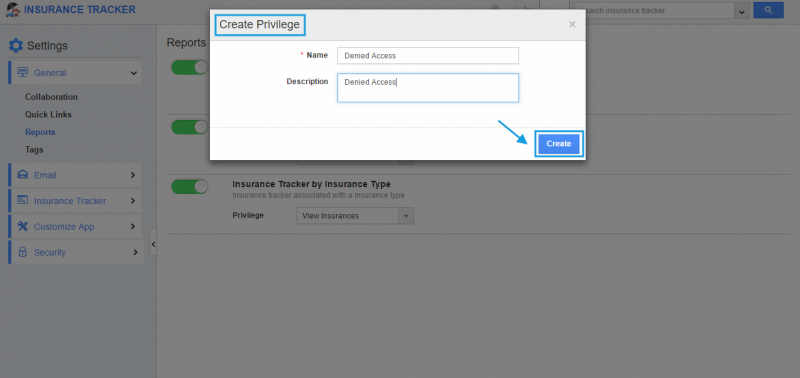
- Fill out the required details in the “Create Privilege” pop-up and select “Create” button.
- Name : Name of the privilege.
- Description : Description about the privilege.
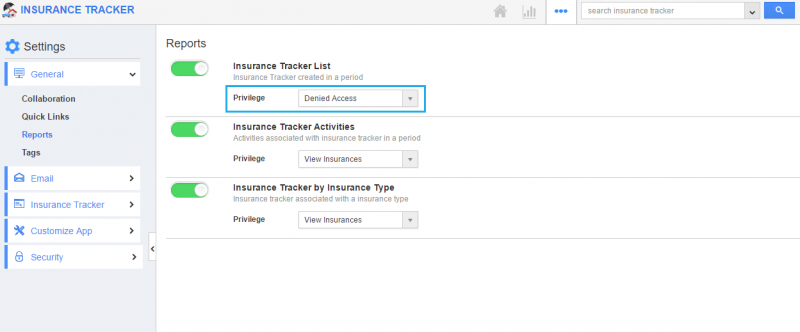
- Now, you can view the created privilege in the drop-down list of “Insurance Tracker List”.
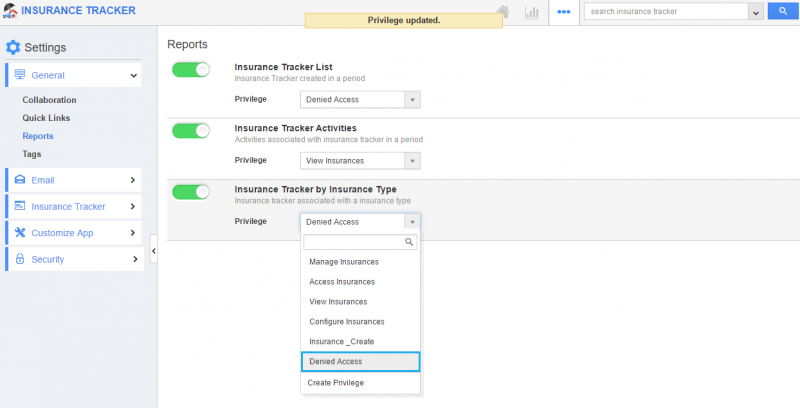
- You can also set this privilege to other objects, say “Insurance Tracker by Insurance Type”.
Steps to Create Roles and Set App Privilege
- Navigate to “Employees App” from the app header bar.
- Click on “More(...) -> Settings”.
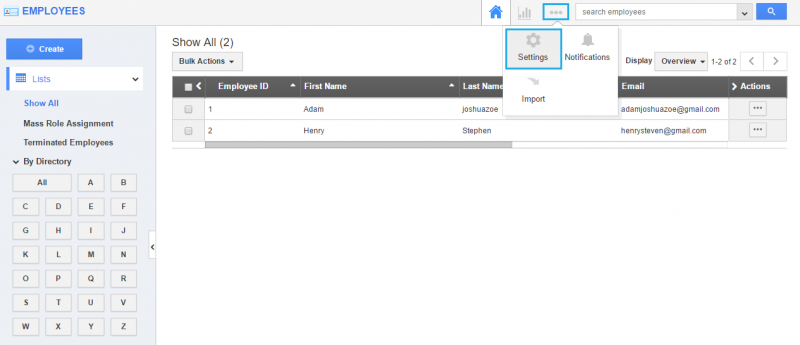
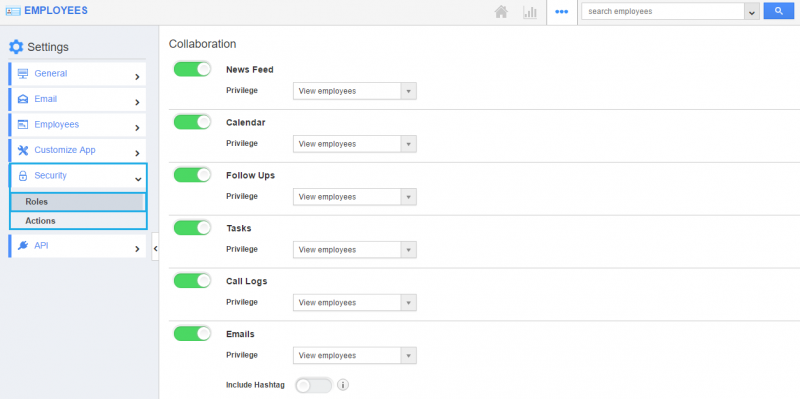
- Select “Roles” from the left navigation panel.
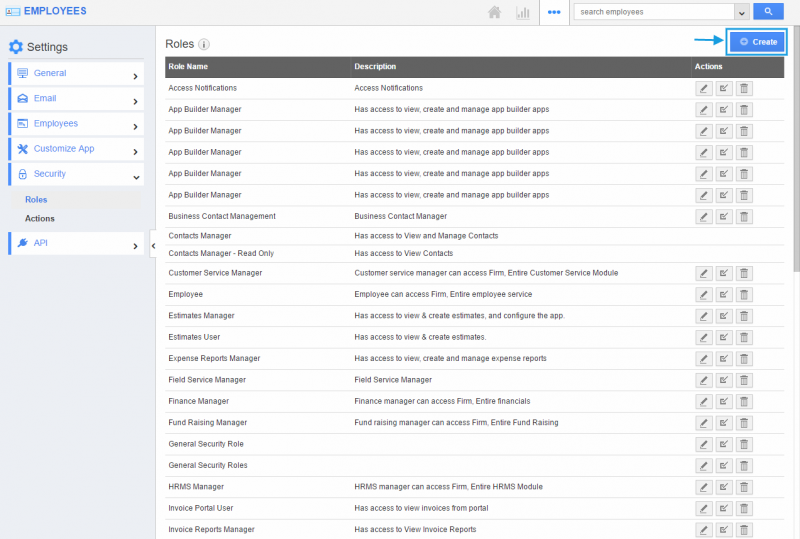
- Create a role which you assigned as a privilege in Insurance Tracker List by selecting the “Create” button.
- After selecting, “Add” the privilege to the super user and select the “Create” button.
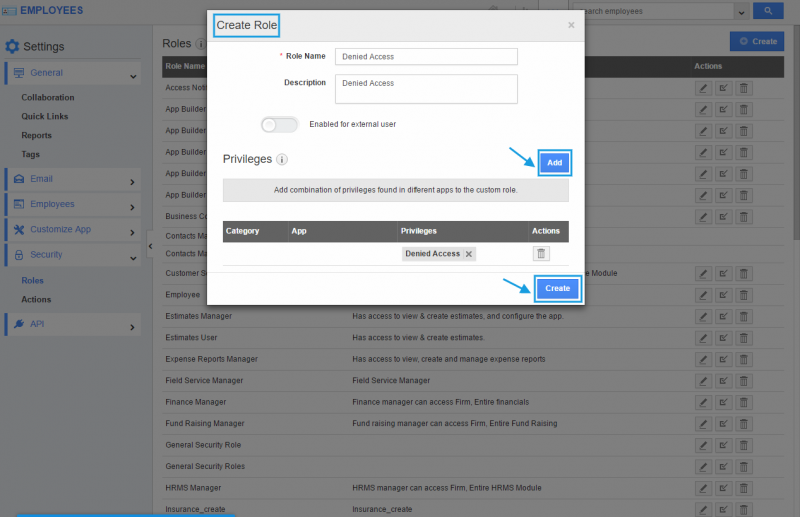
- Based on the privilege added, employees under the super user will be restricted to view general reports in Insurance Tracker App. Here, the employee Bob cannot access Insurance Tracker List as shown in the image below:
Related Links
Flag Question
Please explain why you are flagging this content (spam, duplicate question, inappropriate language, etc):

