Browse by Solutions
Browse by Solutions
How do I Configure the QuickBooks Integration?
Updated on September 25, 2024 04:00AM by Admin
In Apptivo, We can set up an Invoice /Expense Report that has been synced with QuickBooks. In order to successfully sync the journal records with QuickBooks go through the following steps.
- Invoices App configuration
- Journal Entry Creation based on Accounting Rule
- Journal Entry Sync from Apptivo to QuickBooks
Ledger App Configuration
Before you start with the QuickBooks configuration process, you need to ensure whether the following things are set right in the Ledger App.
- Create a Calendar
- Security Actions
- Current Account Period
Calendar Setup
- Access the Ledger App.
- Click on "More (...)" icon -> "Settings" -> "Ledger" -> "Calendar".
- When you click on "Create", you can view the create pop up. Fill in the required fields.
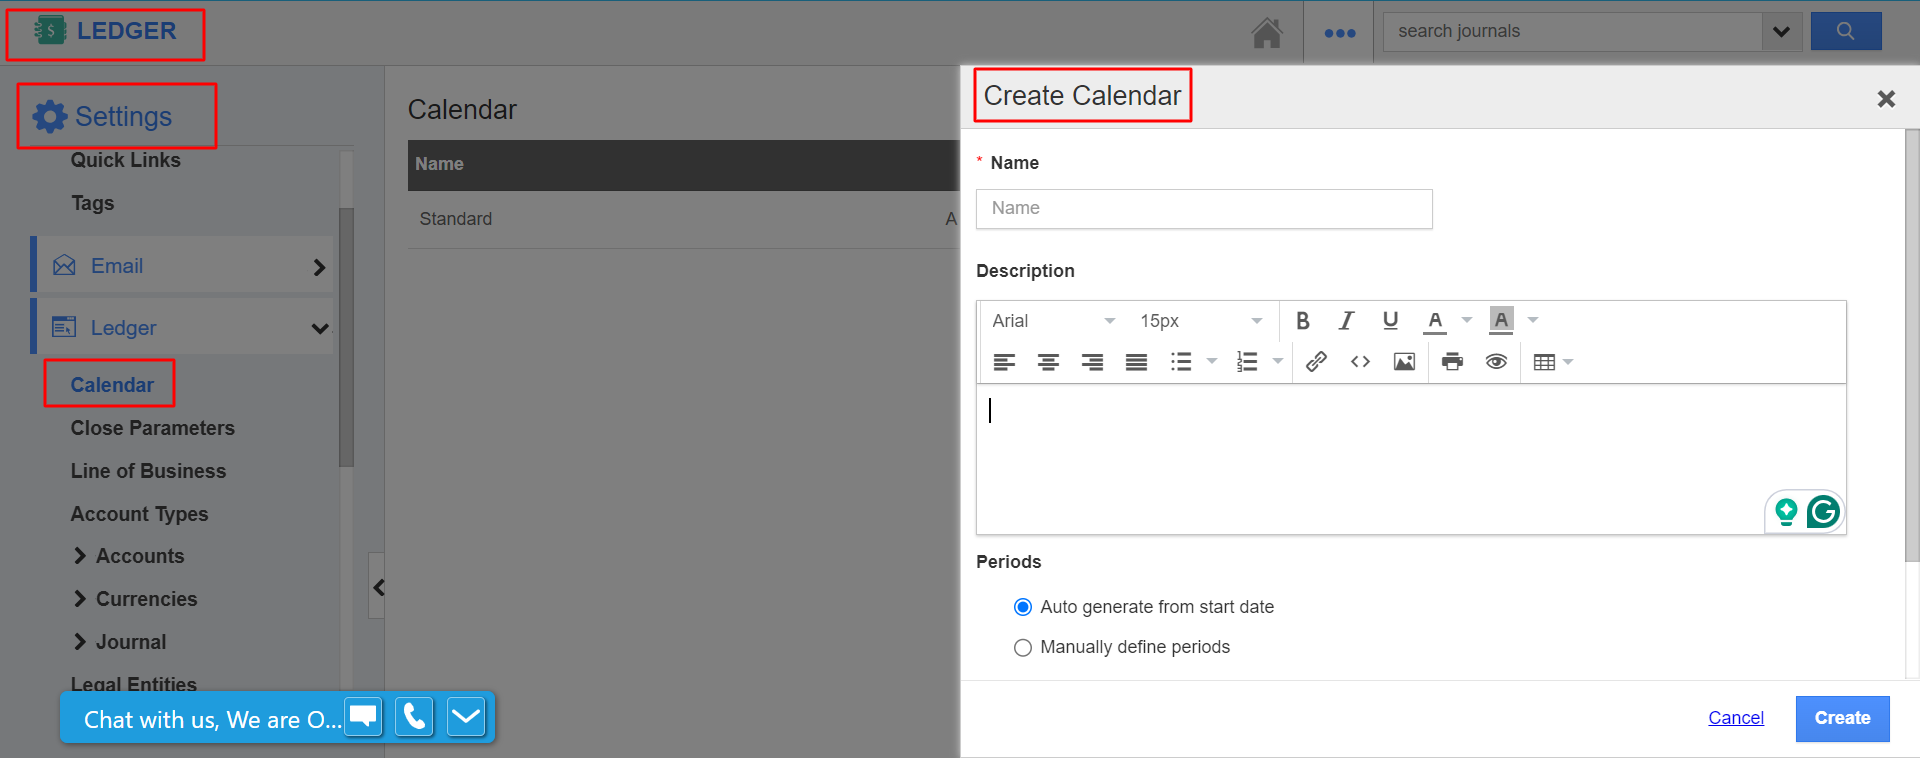
- You can now view the calendar that you have created.

Note: Make sure that your Period status is opened.
Security Actions
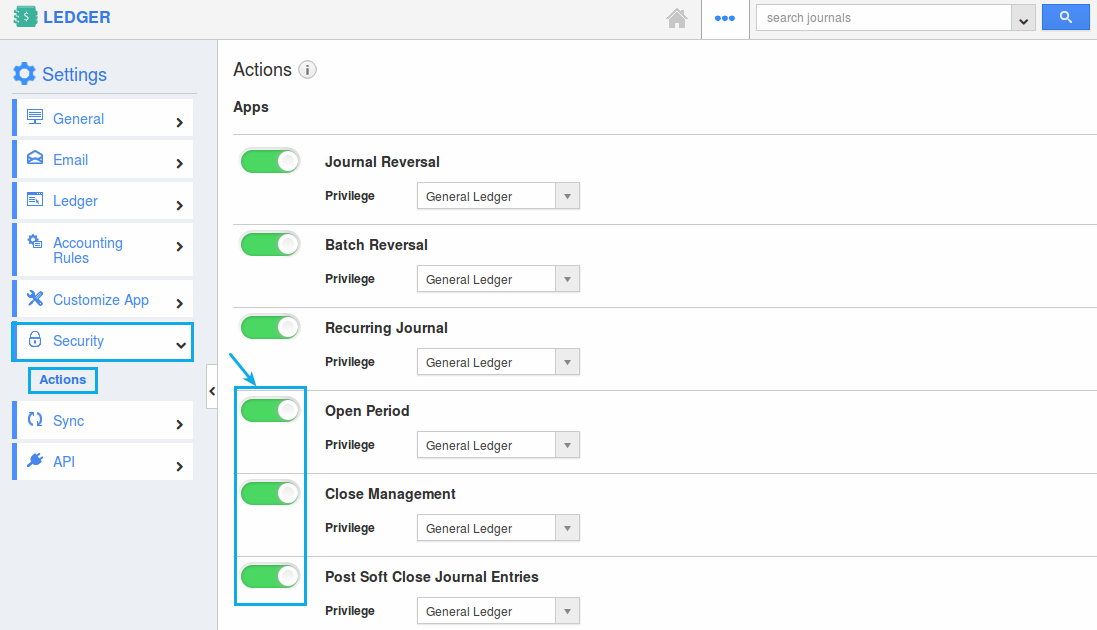
- Click on "More (...)" icon -> "Settings" -> "Security" -> "Actions".
- Make sure that the "Open Period", "Close Management" and "Post Soft Close Journal Entries" are in the enabled state.
Current Account Period
- Go to Ledger's home page.
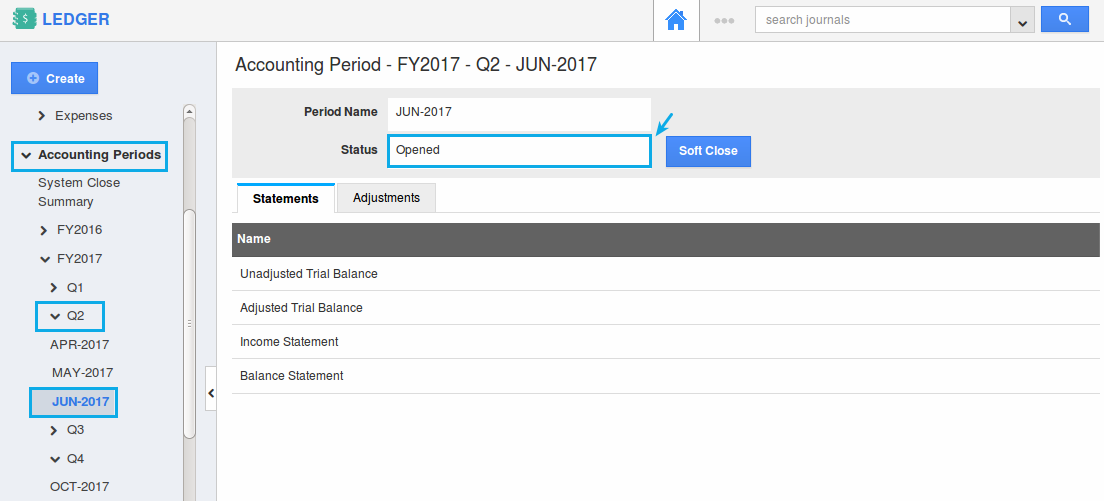
- Click on the "Accounting Periods" dropdown.
- Click on the current account period. (Say, Jun-2017)
- Make sure that the period status is in "Opened" status.
Invoices App configuration
Follow the specified steps in the post for Account type configuration from the Invoices App: https://answers.apptivo.com/questions/13089/how-do-i-integrate-invoices-with-quickbooks
Once done, follow the steps mentioned below:
- Click on "More (...)" icon -> "Settings" -> "Accounting Rule" -> "Invoices" .
- An accounting rule will be created automatically in the Invoices App as shown:
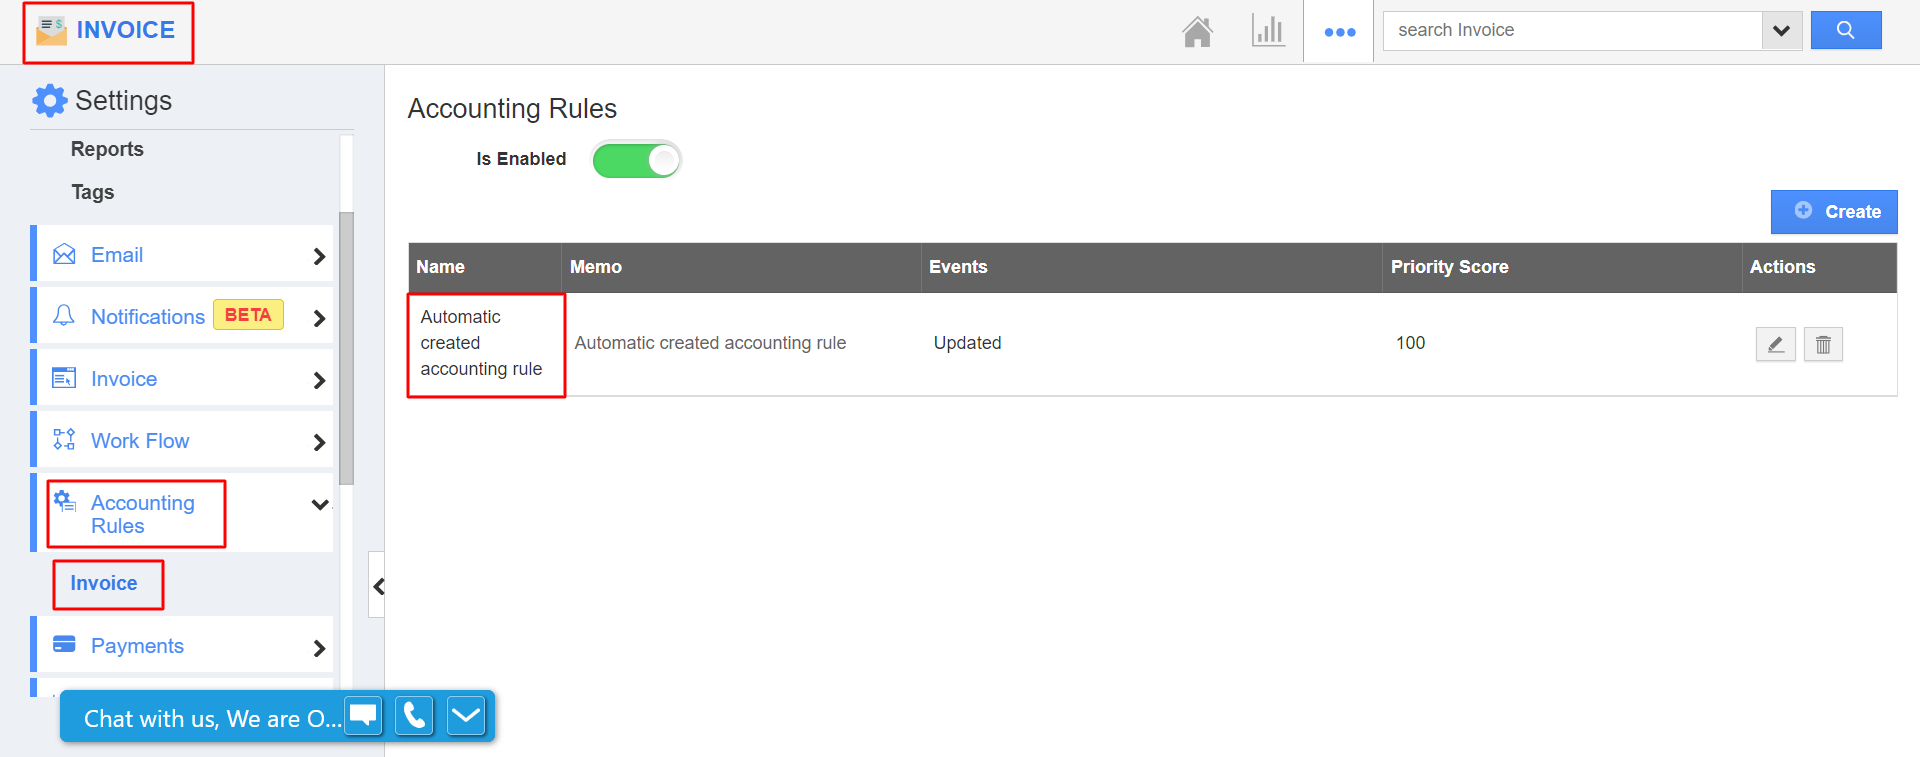
- You can see a predefined accounting rule. Set "Status = Paid".
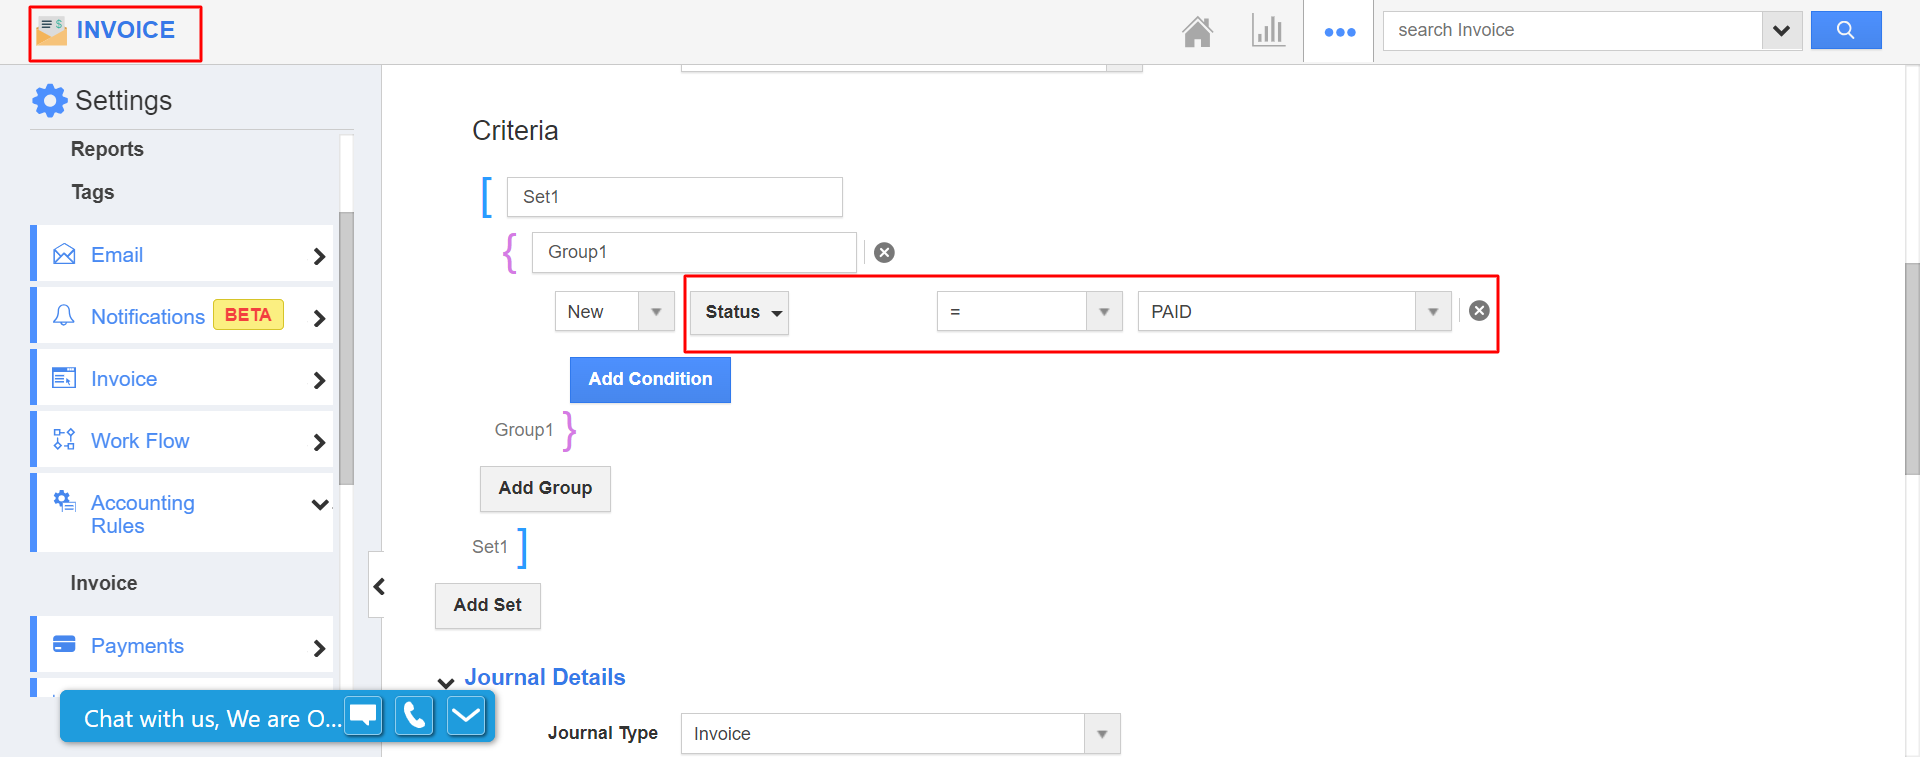
- Once all the changes are done, click on the "Update" button to complete.
Journal Entry Creation based on Accounting Rule
- Create a new invoice.
- Click on the "Record Payment" option and mark the Invoice as "Paid".
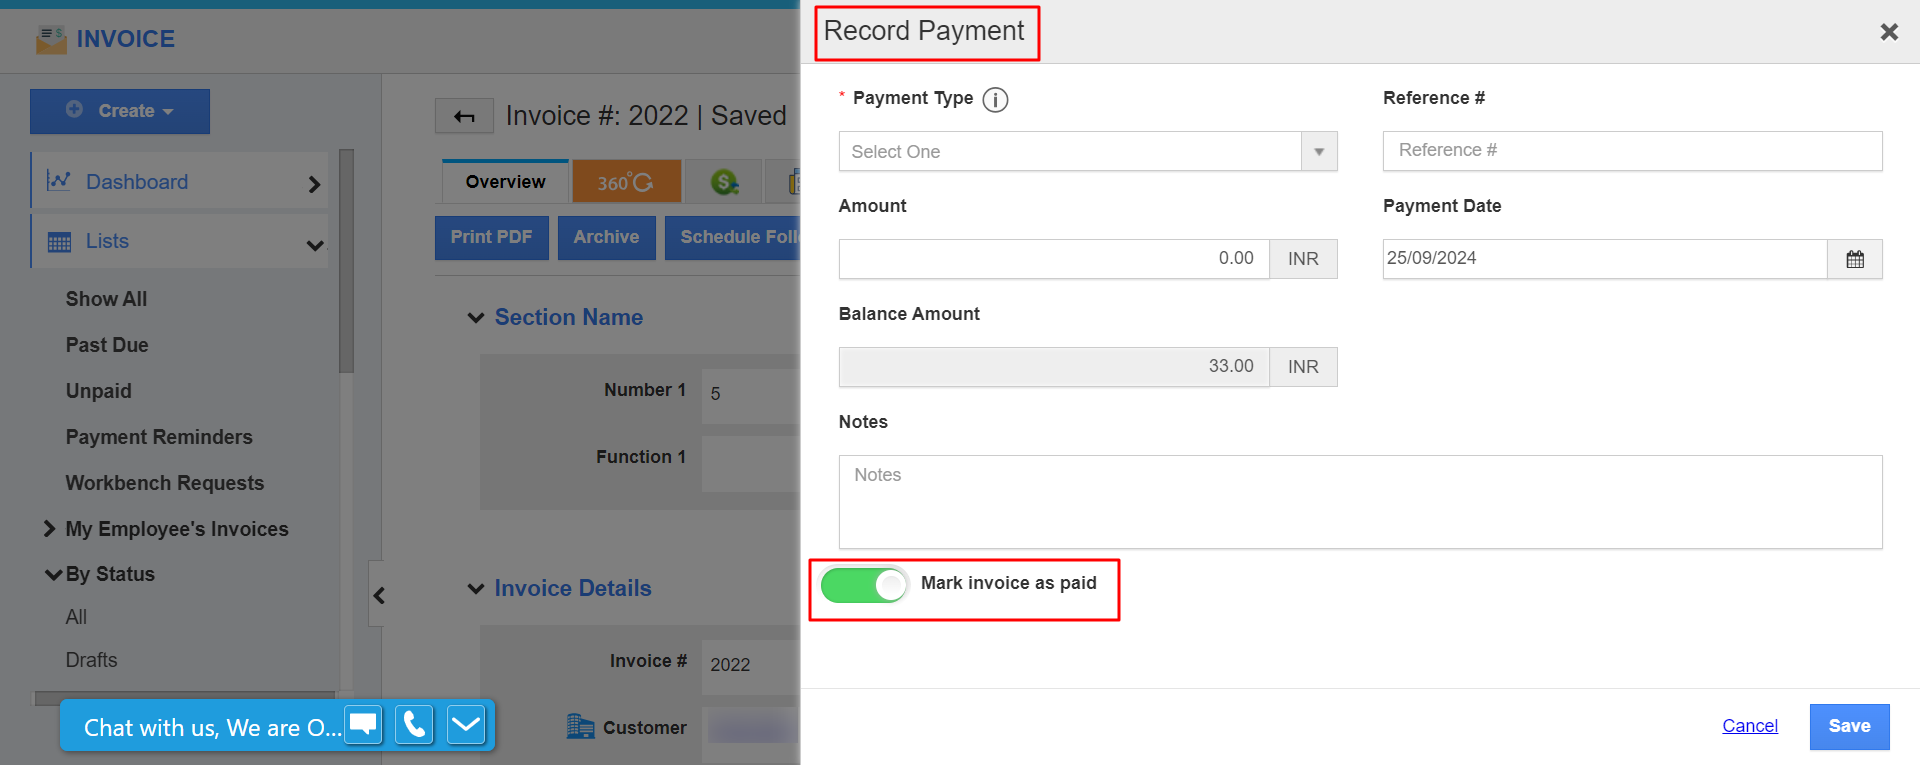
- The status will now be automatically set to "Paid".

- Now, according to the accounting rule, a journal will be automatically created in the Ledger App as shown:

Journal Entry Sync from Apptivo to QuickBooks
In general, created Journal in Apptivo will get sync automatically in QuickBooks, but it may take some time.
- Go to the QuickBooks Home Page.
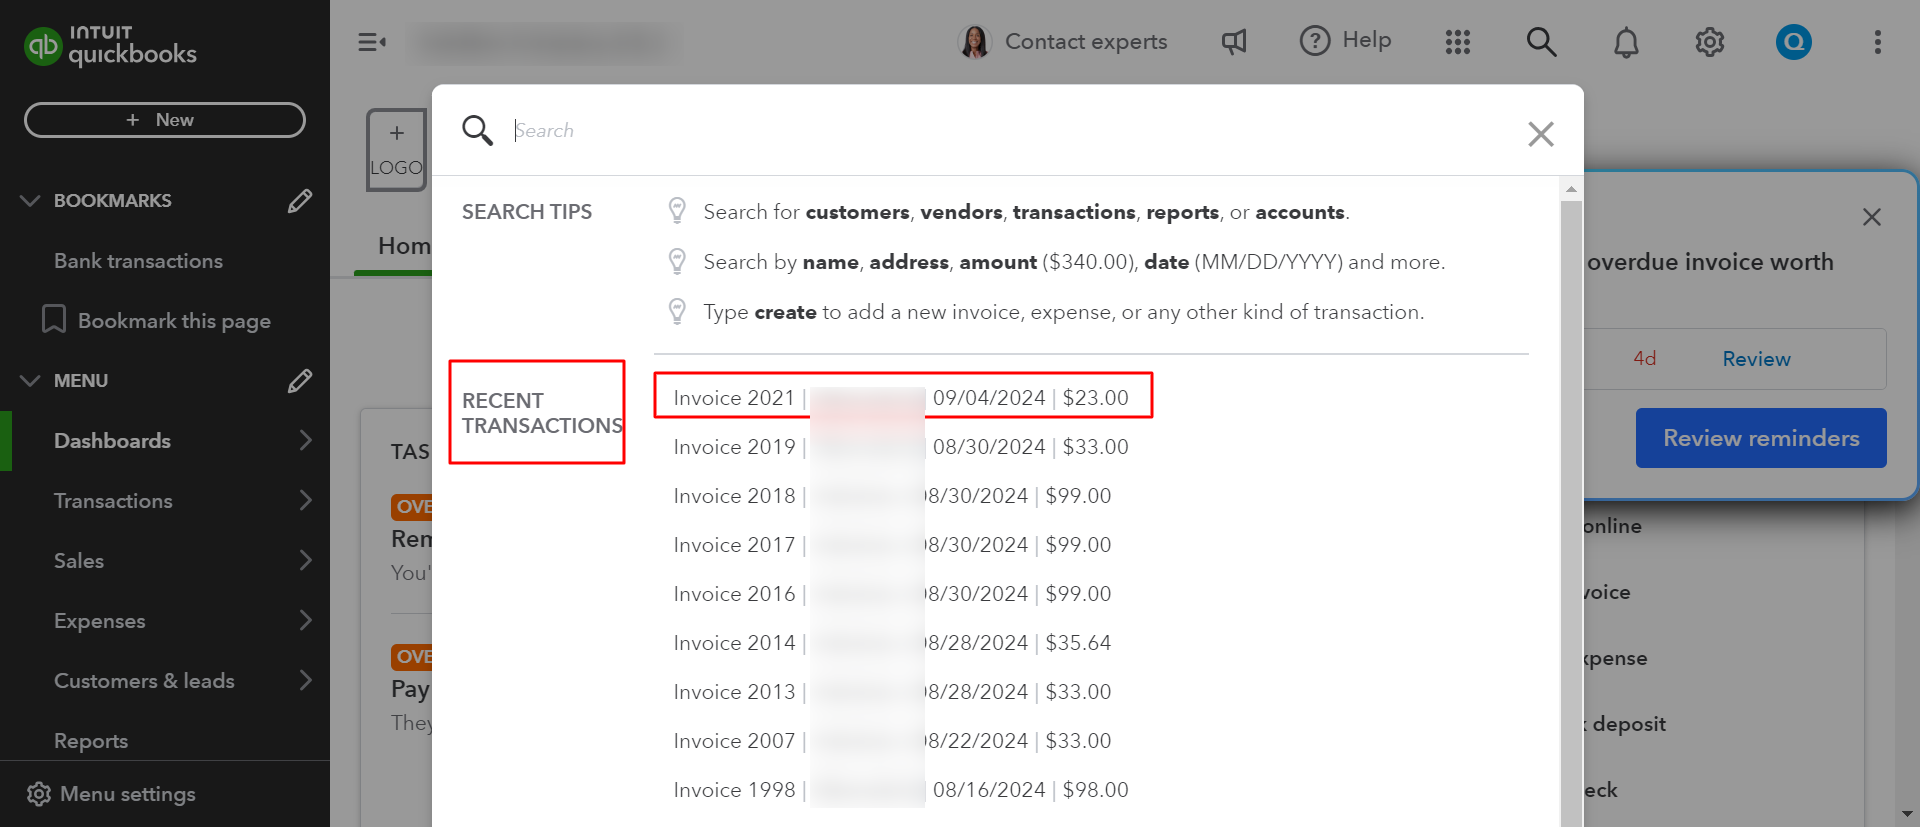
- Click on Search Icon from Top right header bar.
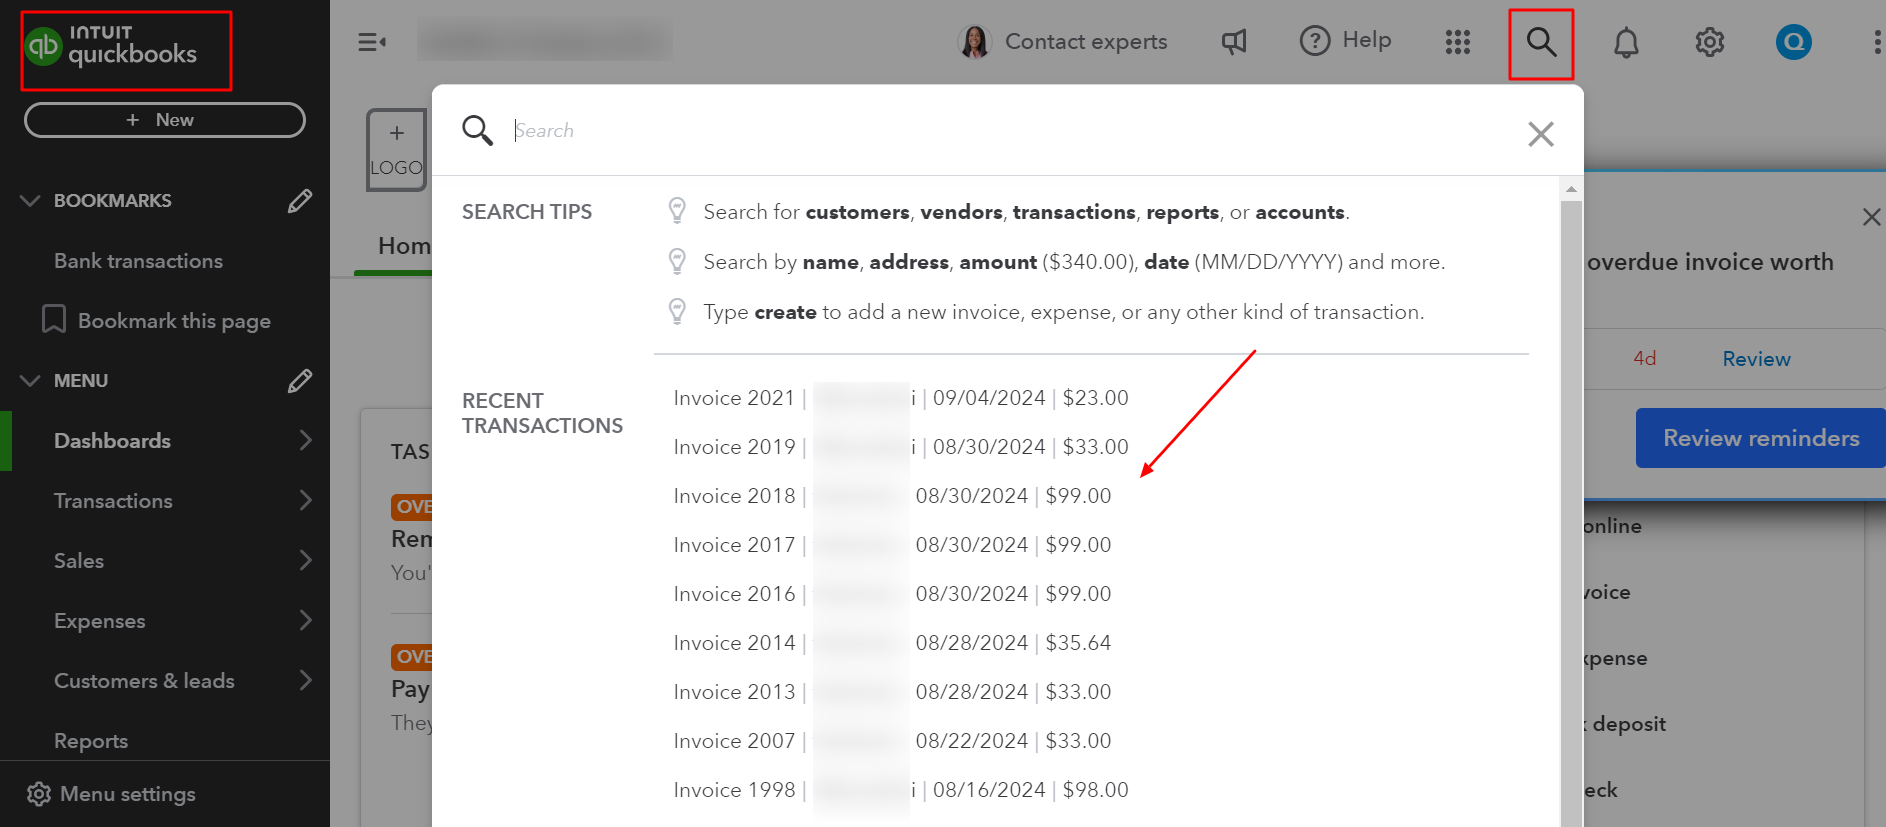
- It will display recent transactions.
- We can find synced journal entries from Recent Transactions.
