Browse by Solutions
Browse by Solutions
How do I Sync my Events with Office365 Calendar?
Updated on September 23, 2024 07:17AM by Admin
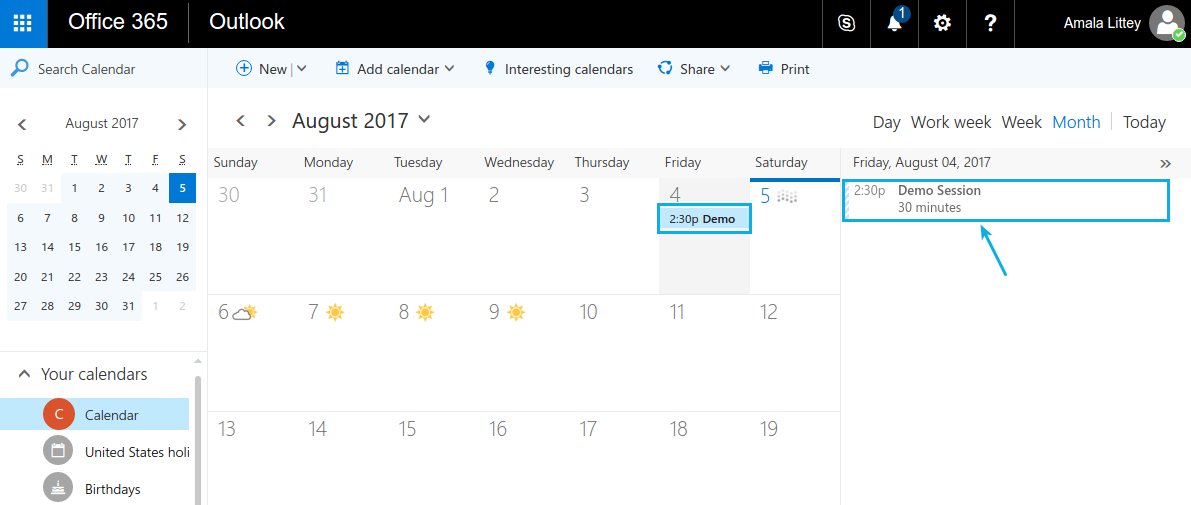
Apptivo offers automatic two-way sync, providing enhanced productivity for business people, enabling data synchronization between Apptivo and Office 365. Different applications usually manage business data. With this integration, an ample amount of time is saved as one can synchronize the calendar events instantly.
To have this synchronization process work, you will need to follow the following process:
- Steps to Install Apptivo App
- Enable Calendar Sync in Apptivo
- Share and Manage Apptivo App with Users and Groups
- Create Employees (Users) in Apptivo
Steps to Install Apptivo App
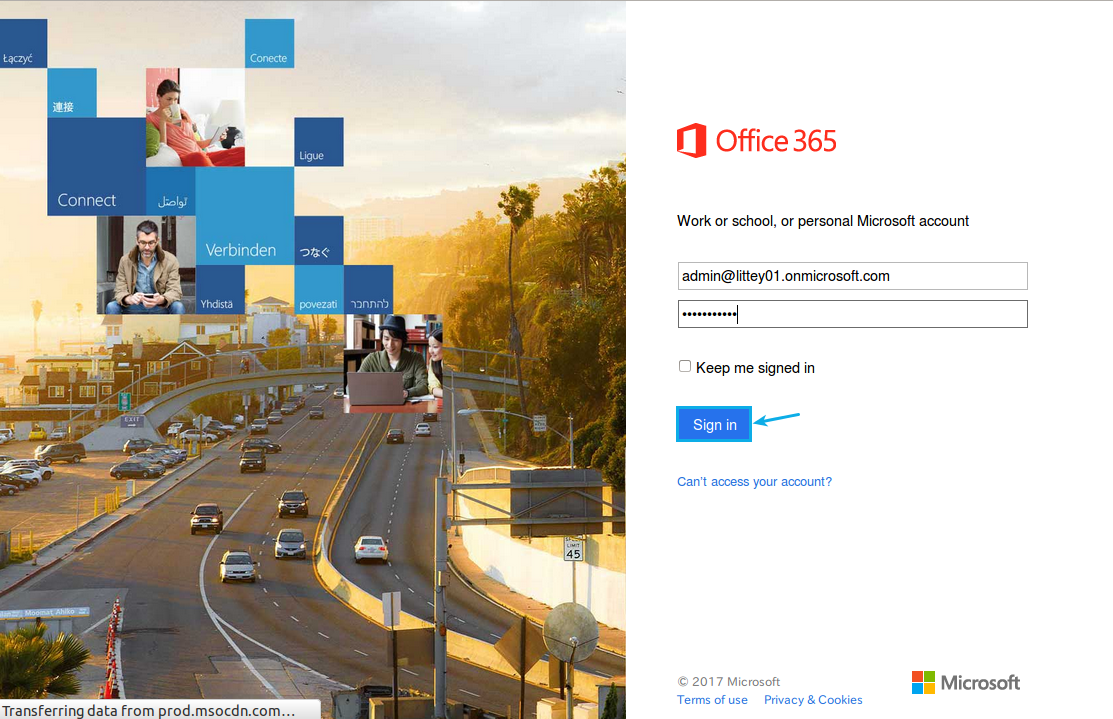
- Sign in to your Office 365 account.
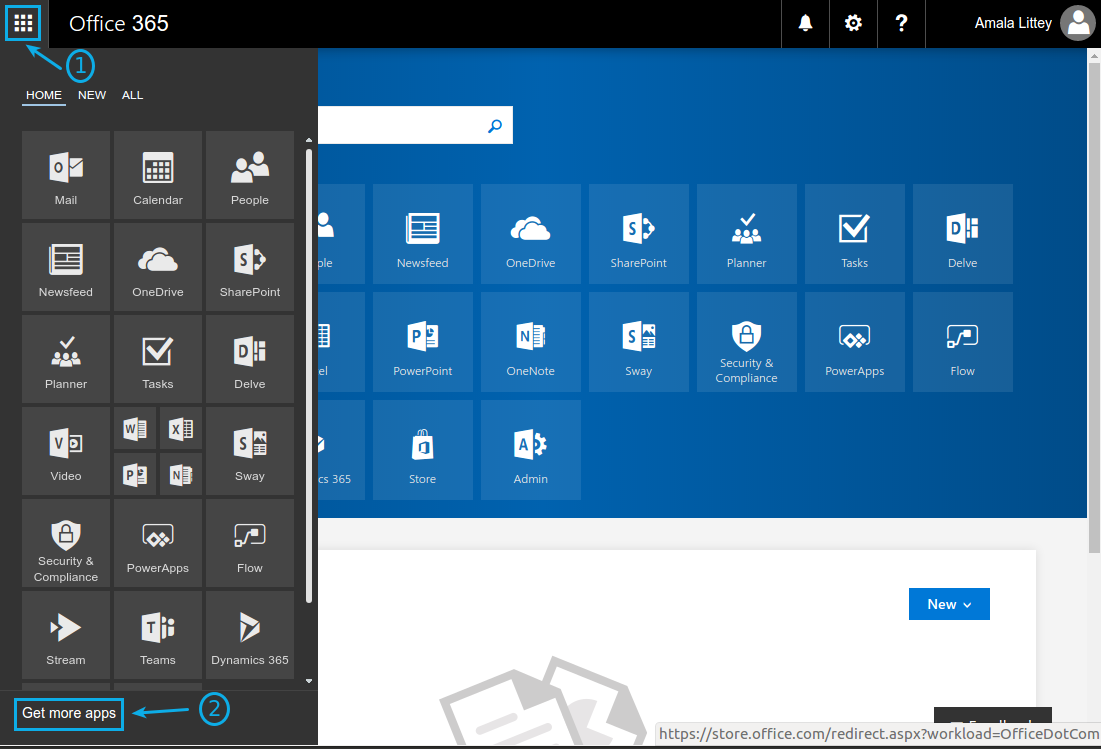
- Click on the “App Launcher” icon found in the left panel and click on “Get more apps.”
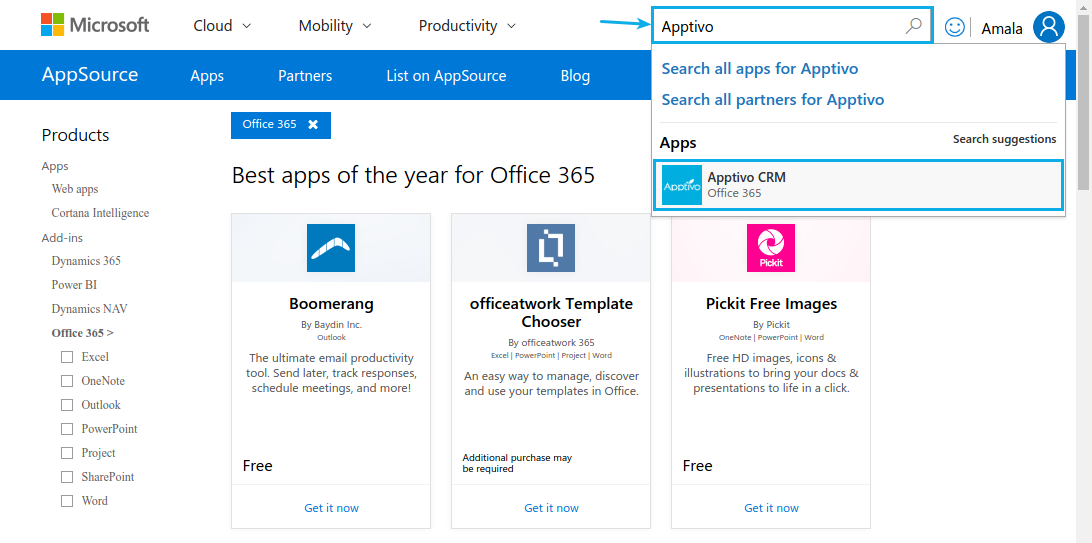
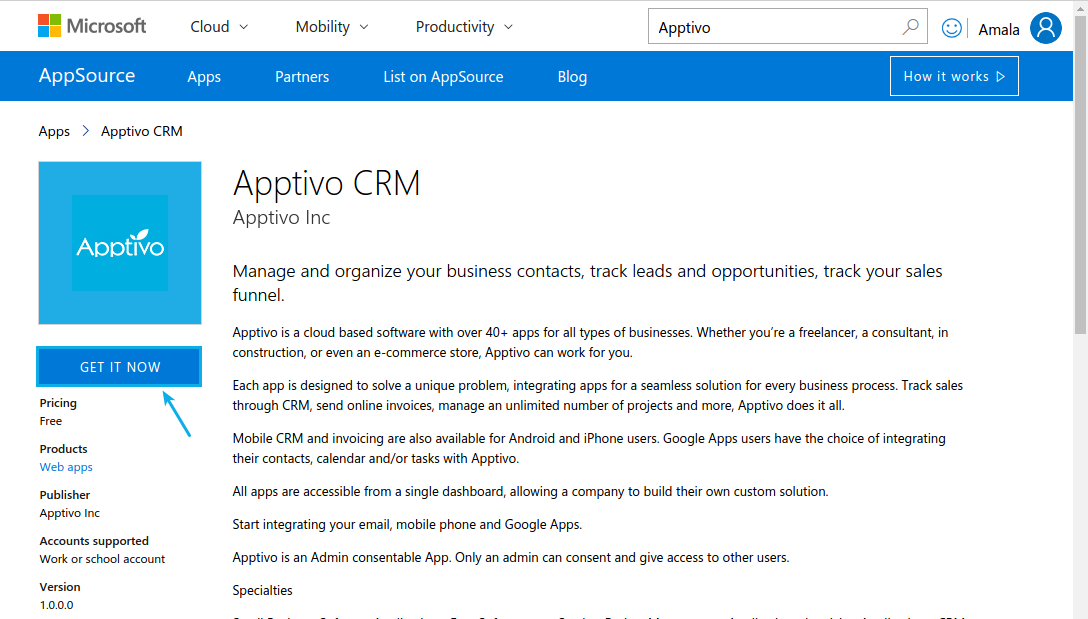
- Now, you will be directed to the AppSource page. Here, search for the “Apptivo CRM” app from the search box and click on it.
- Click on “GET IT NOW” button.
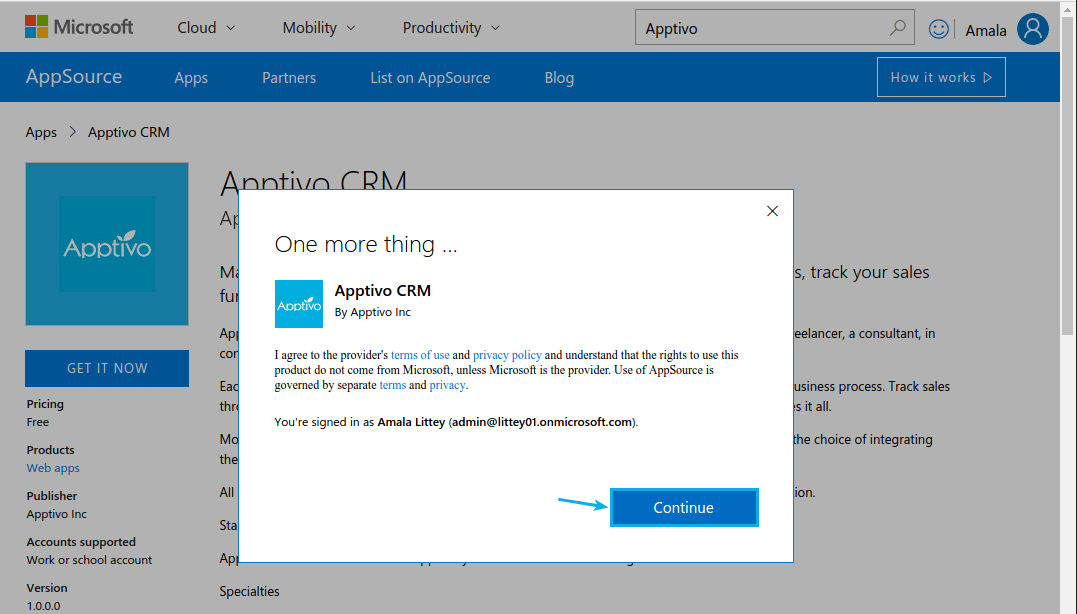
- On clicking, a pop-up appears where you need to select the “Continue” button.
- It will take a few seconds to load.
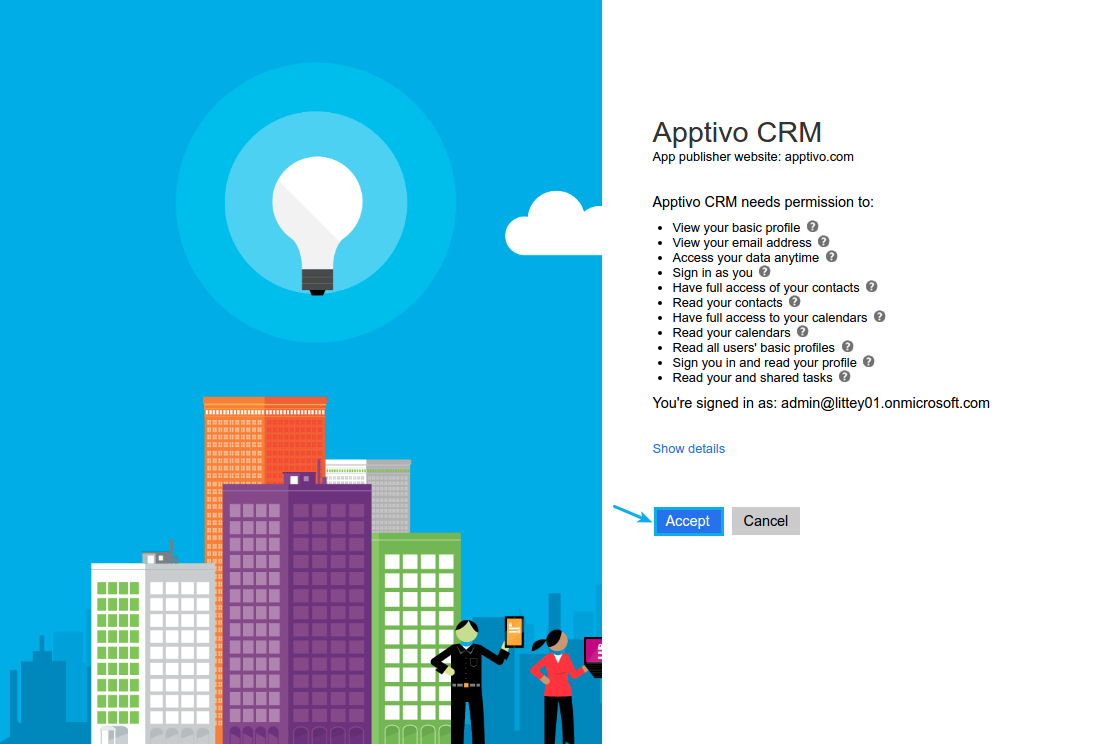
- Now, you will be directed to the authorization page of Apptivo. Click on "Accept."
- On accepting, what happens next depends on whether you have an existing Apptivo account or not.
Note: If you already have an Apptivo account with the same id which was used for Office 365, then you will be automatically directed to your Account. Else, a new account will be created. - Here, you will be directed to the Signup page, as shown below:
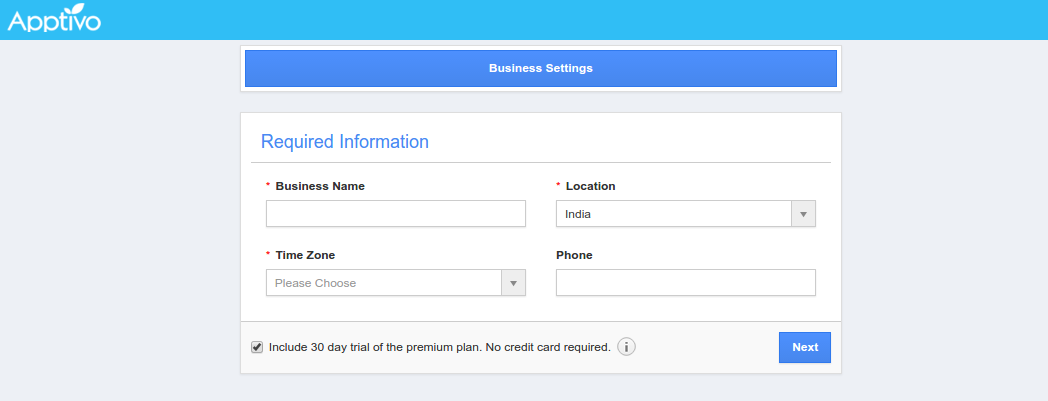
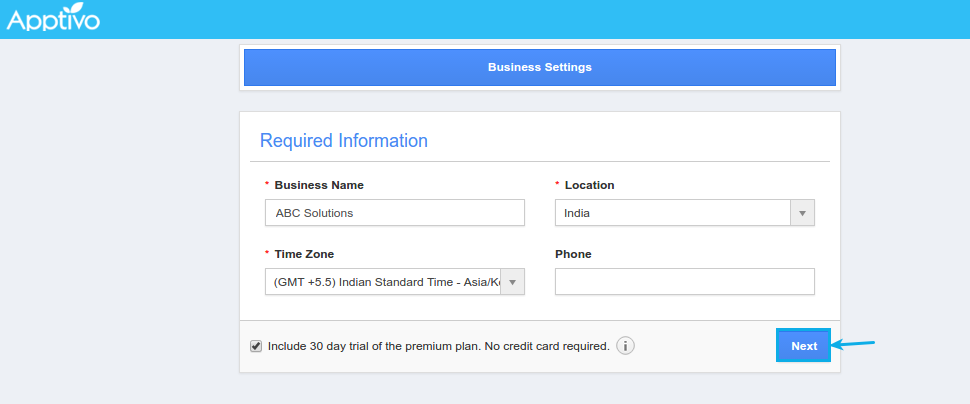
- Enter the required information and click on “Next.”
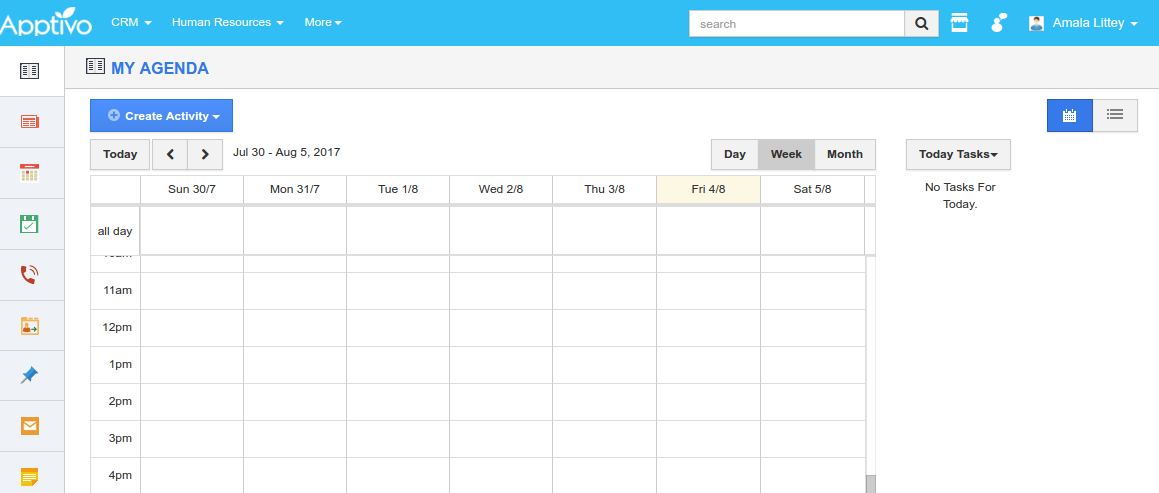
- Apptivo account will be successfully created, and you will be directed to the Apptivo Homepage.
Enable Calendar Sync in Apptivo
With Office365 Calendar sync, you can synchronize the events efficiently between the two applications.
(Note: log out once and login to your Apptivo account through Office 365)
To enable sync in Apptivo:
- Click on “Preferences” found in the top right corner under your name.

- Go to “Services” -> "Office 365". Slide the toggle ON for “Enable Calendar sync.” Once enabled, Apptivo will start to sync your events with Office 365 Calendar.

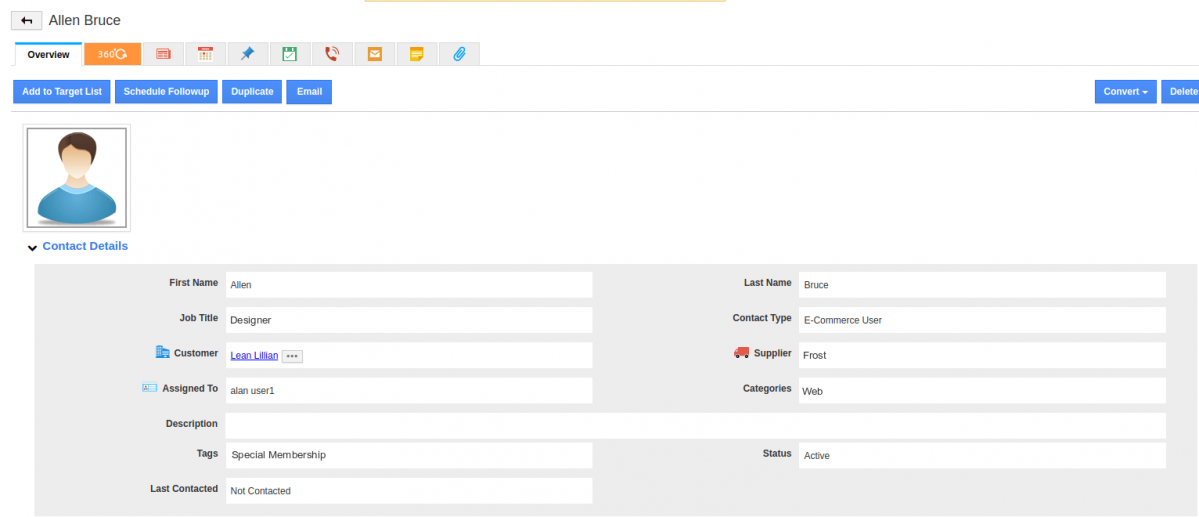
- Now create a contact in the Contacts App, and associate it with a customer as shown in the image below:
- Now create an event from the Office 365 Calendar, adding the above-created contact and wait for a few minutes.

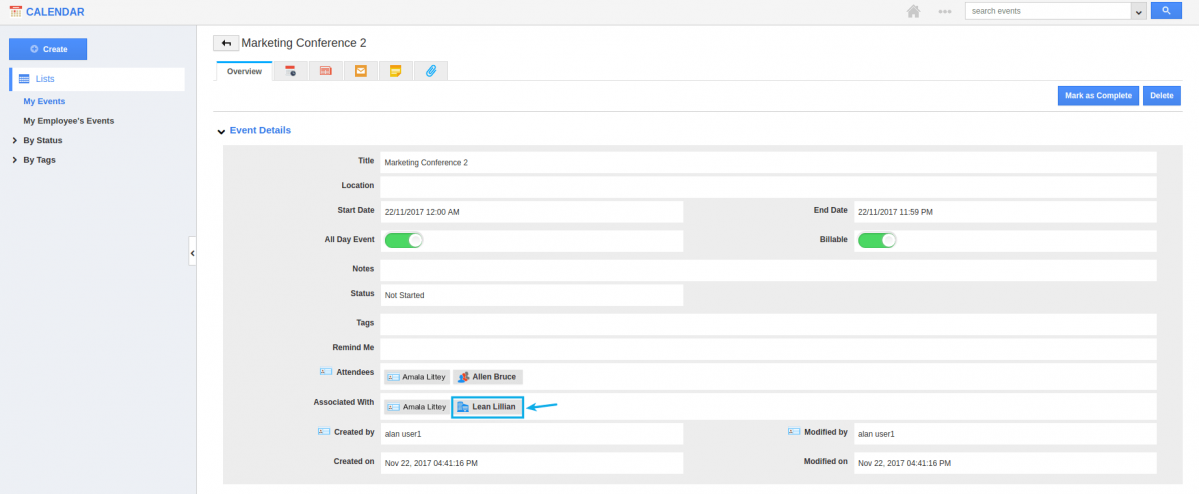
- Once created, go to your Apptivo Homepage. Navigate to the “Calendar” section. You’ll be able to view the event in Apptivo synced from Office 365, with the associated customer (Lean Lillian) added in the "Associated With" field as shown:
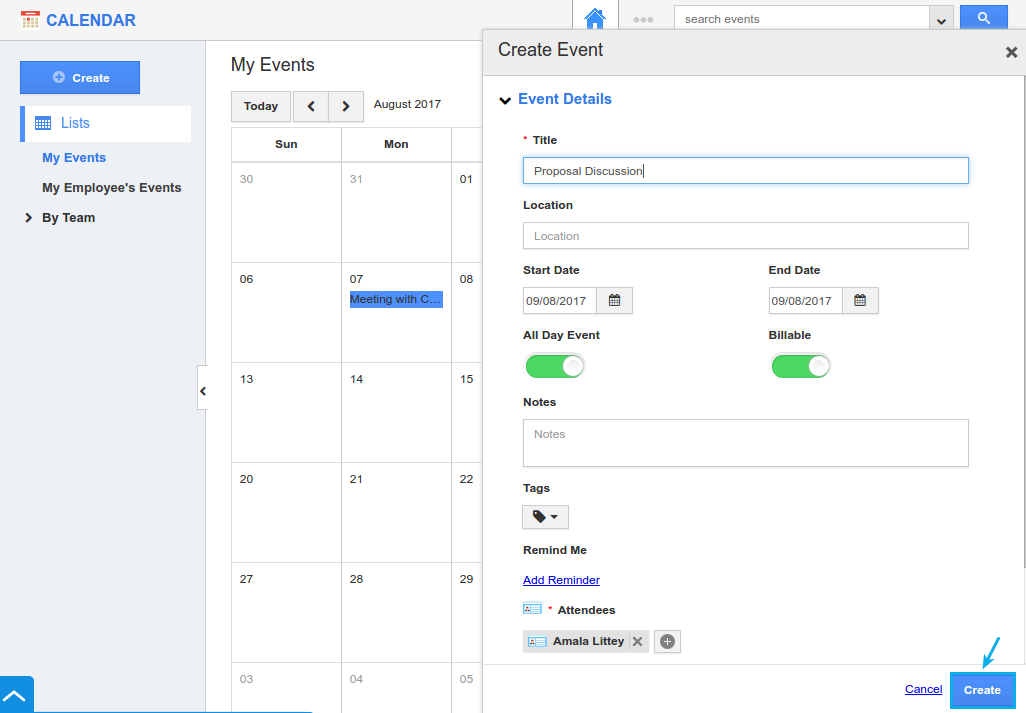
- Also, create an event in Apptivo.
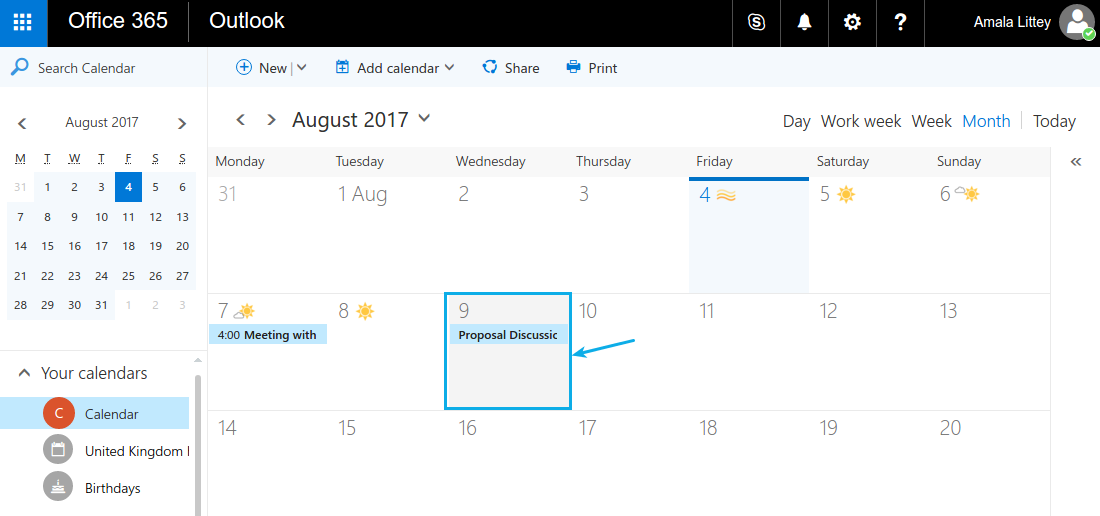
- It will be synced to Office 365, within seconds.
Share and Manage Apptivo App with Users and Groups
Now that the Apptivo CRM has been successfully enabled by the Admin (Superuser), to make the users and groups get access to the Apptivo CRM, it must be shared with them. To do so, follow the below-mentioned steps:
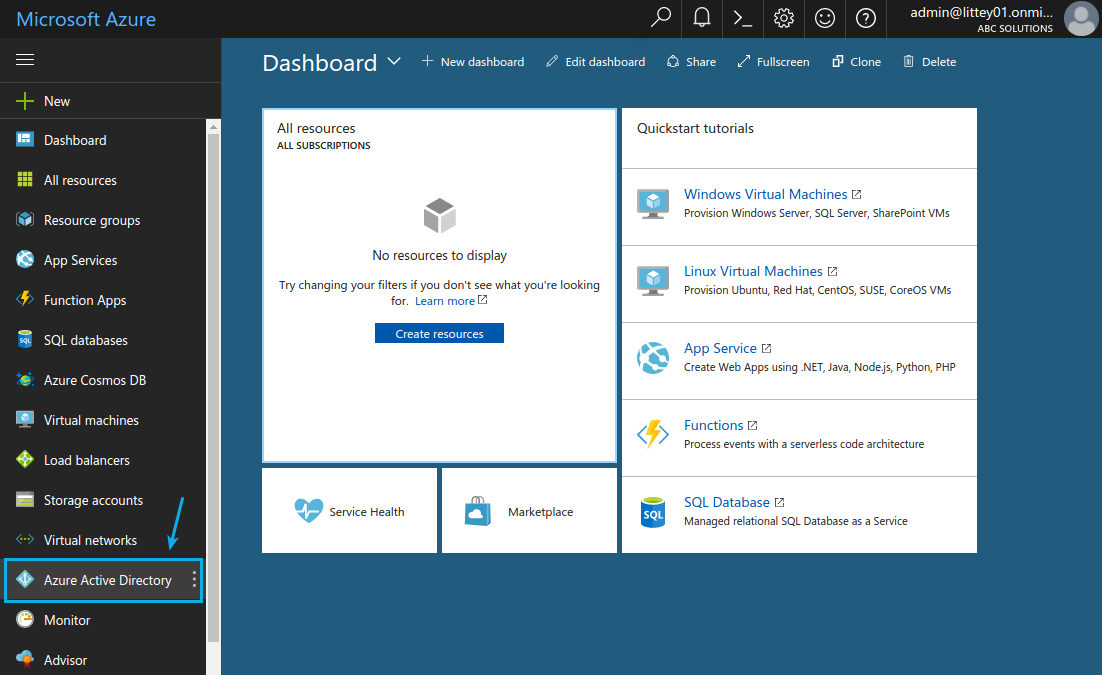
- Go to portal.azure.com (open it in a new tab)
- Click on the “Azure Active Directory” from the left panel.
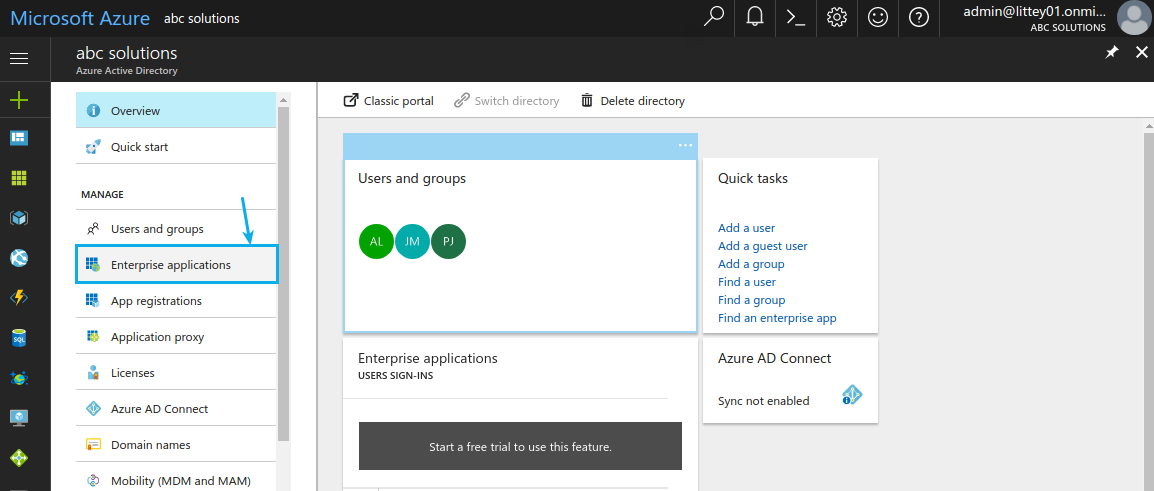
- Click on “Enterprise applications.”
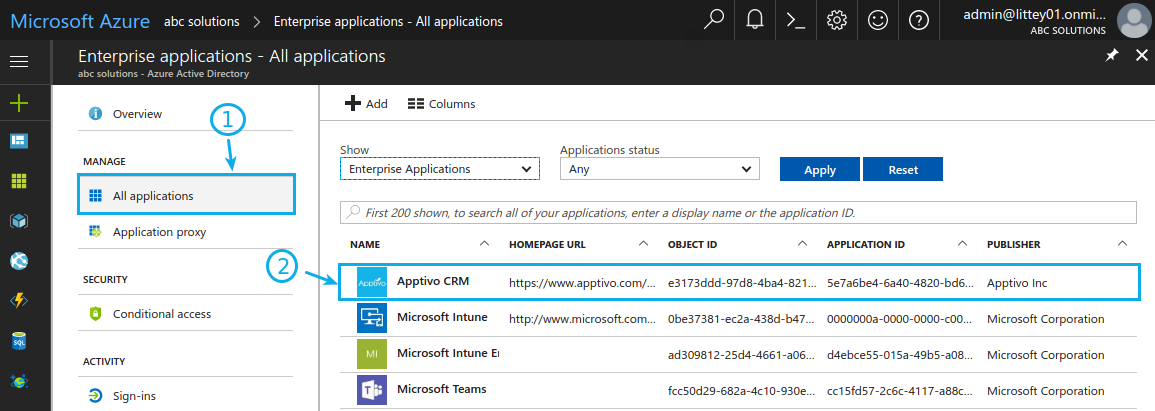
- Click on “All Applications.” Choose the Apptivo CRM in the list of All Applications.
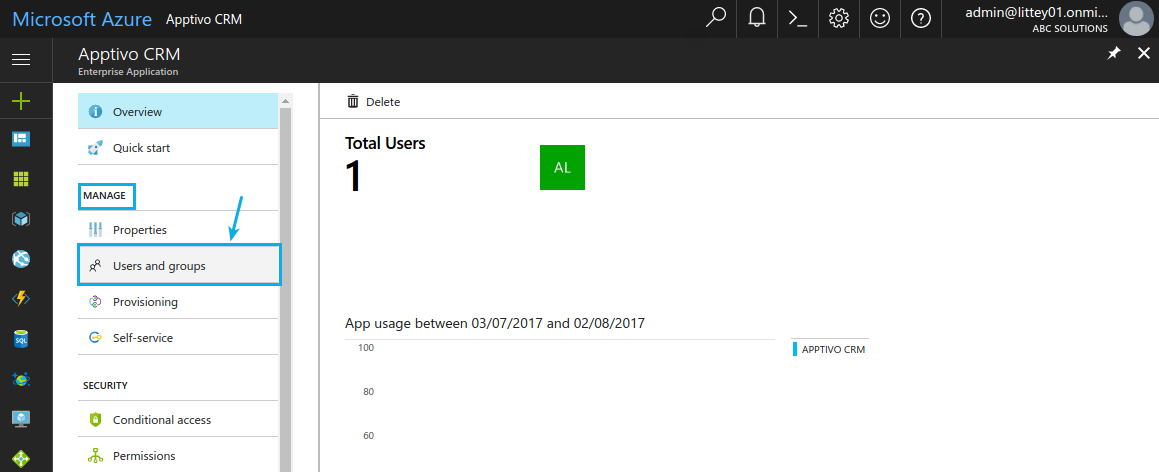
- Now click on “Users and Groups” under the “Manage” option.
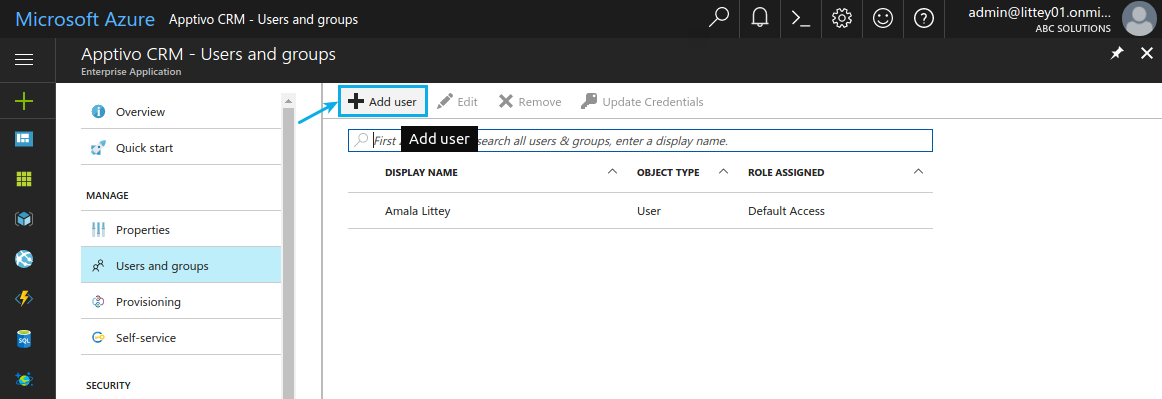
- It allows you to select the required users by clicking on the “Add User.”
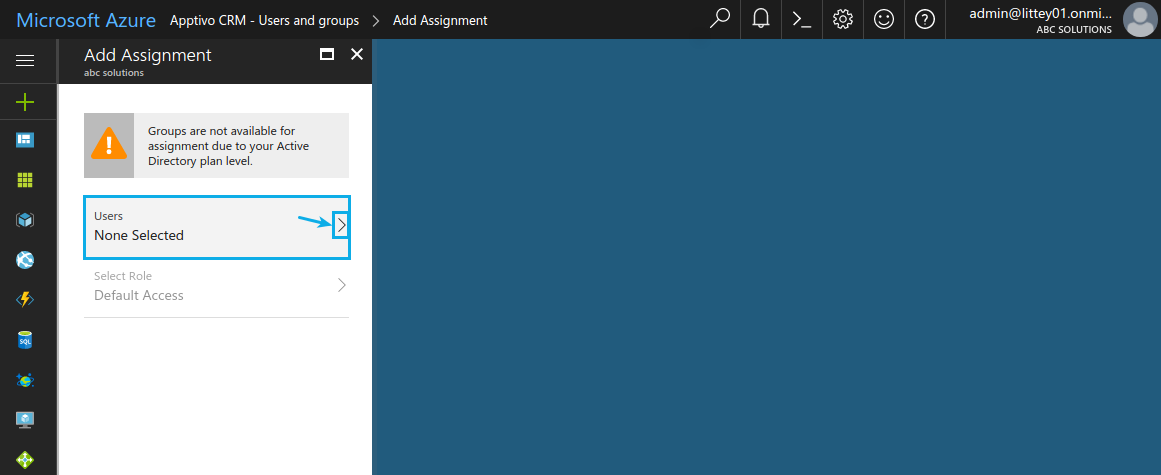
- Click on the “Arrow” to select the desired users. Initially, none will be chosen.
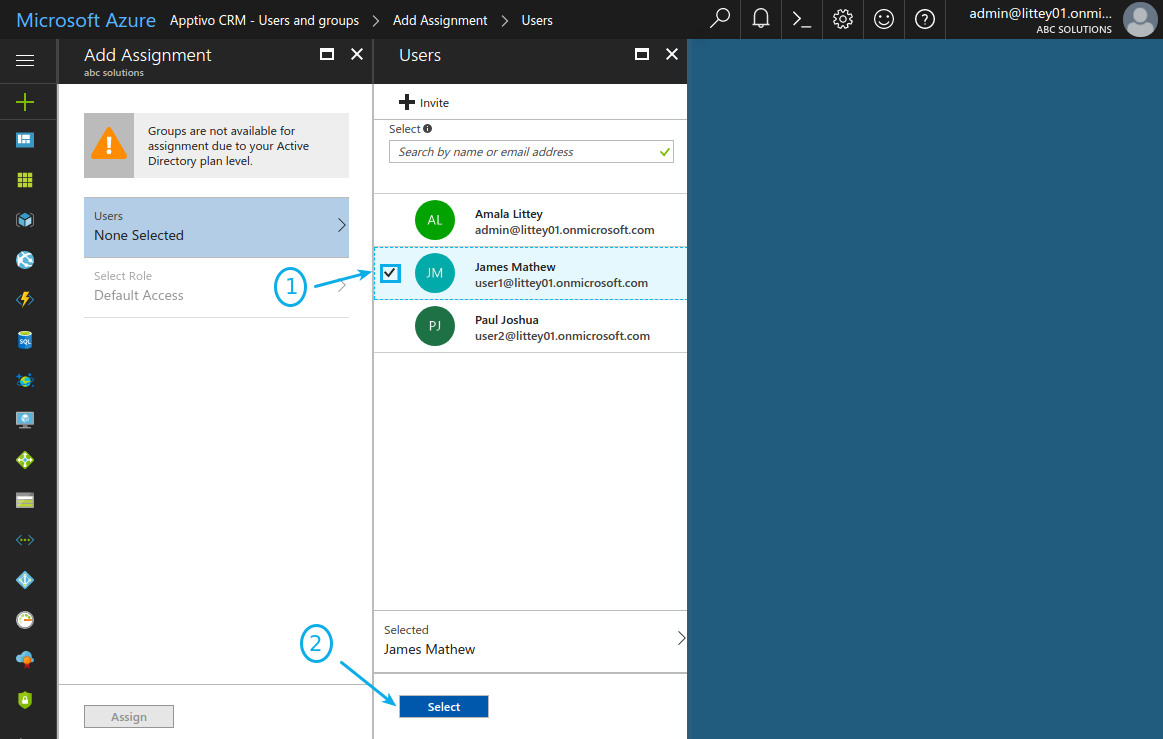
- Enable the checkbox corresponding to the user and click on “Select.”
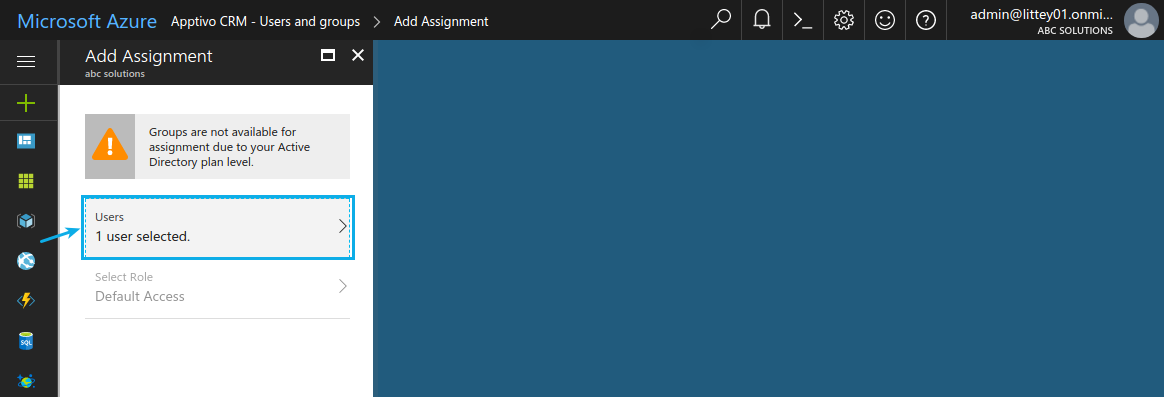
- Now that user will be selected as shown:
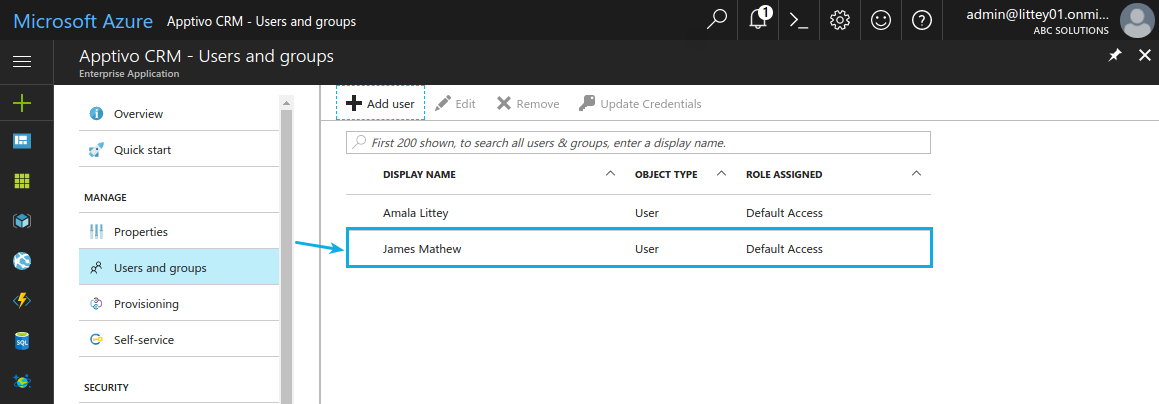
- You can also view the added user under “Users and groups” section.
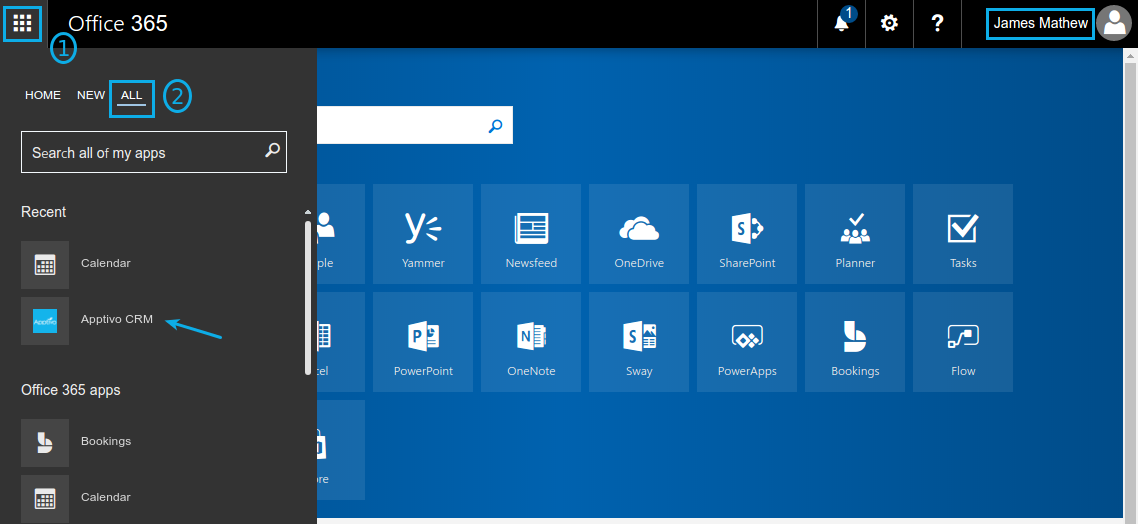
- Now in the Office 365 login of the user, click on “All Apps” found at the bottom.
- The user can now view the Apptivo CRM app, as shown:
Create Employees (Users) in Apptivo
Now that the Apptivo CRM is successfully shared with the user, he/she must be added as an employee in Apptivo account of the Admin. Only then, the user will be directed to his Apptivo account, when clicking on the Apptivo CRM shared by his Admin.
Steps to Create Employees
- Go to the Employees App.
- Click on “Create” from the left panel.

- In the Create Employee page, fill in the required details, and click on the “Create” button.
Note: Ensure the Name and Email id of the created employee should match with the user to whom the Apptivo CRM is shared.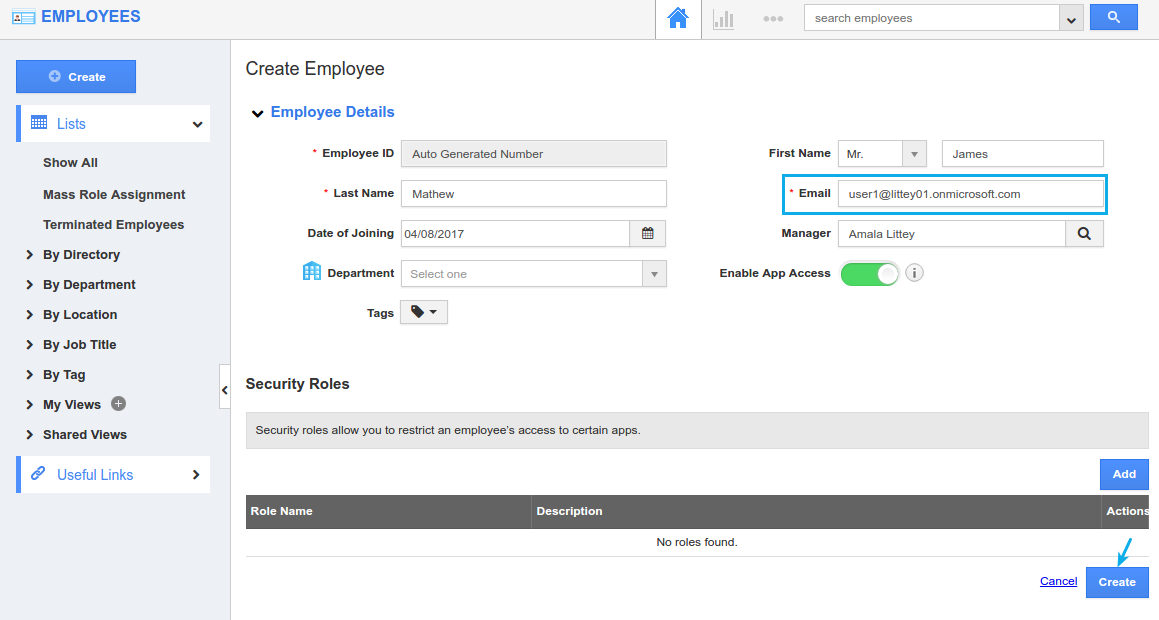
- The employee will now be successfully created, as shown:
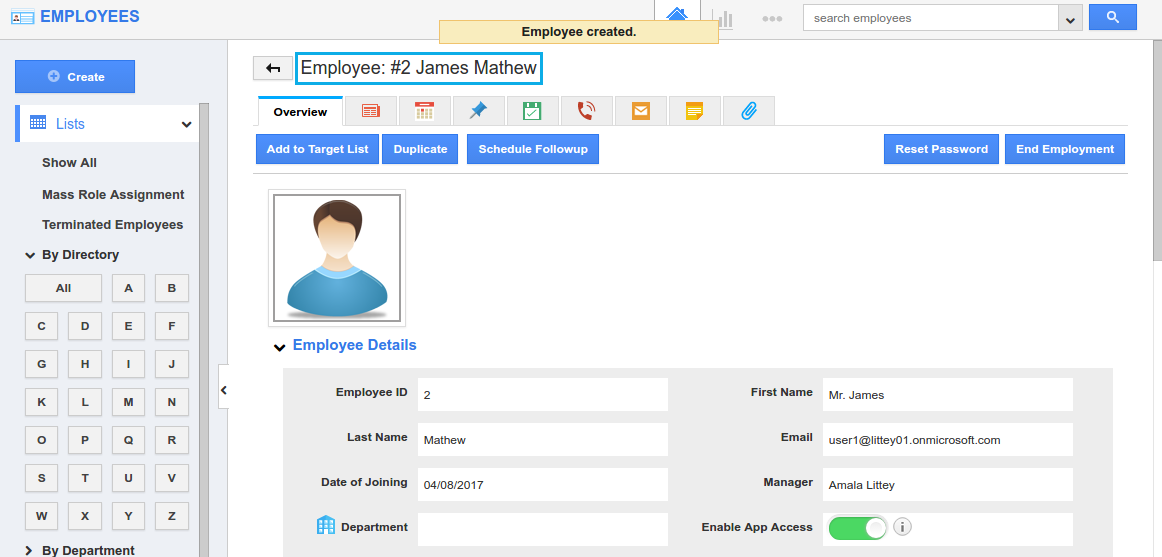
Now that the user is added as an employee, he can now create events that will get synced in both Apptivo and Admin Calendar from Apptivo to Office 365 and vice versa.
- The user should now click on the shared Apptivo CRM.
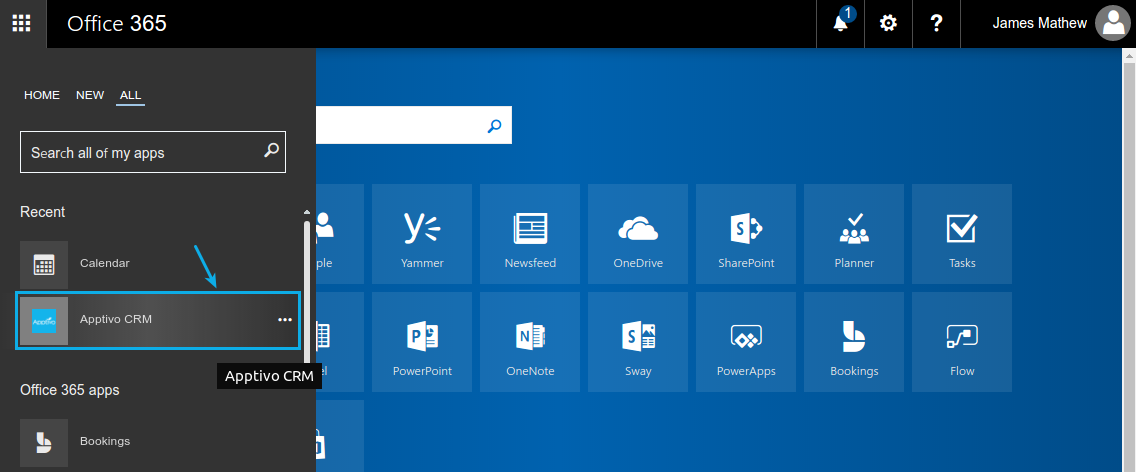
- Wait till it loads completely.
- Now the user will be directed to his Apptivo account.
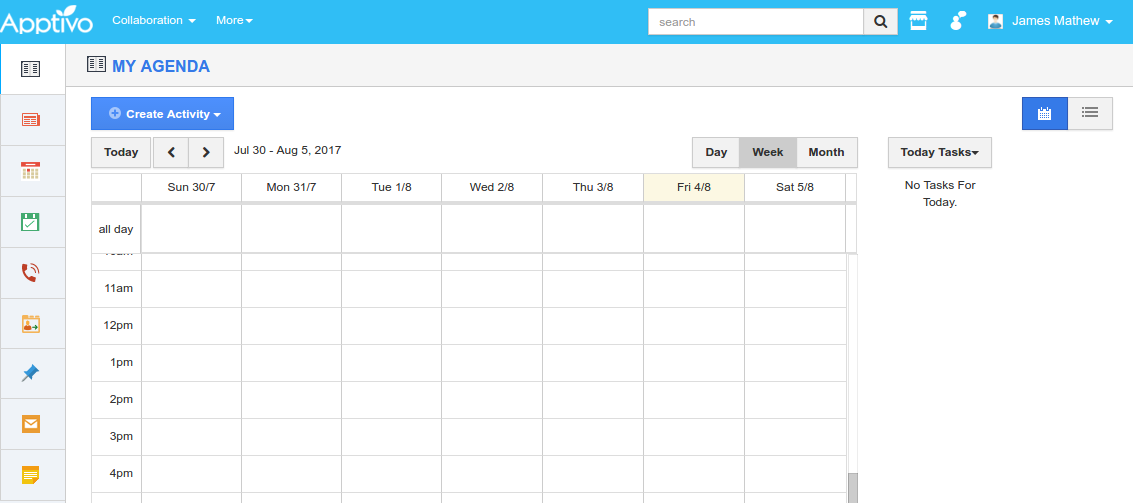
- Initially, the user creates an event from his Apptivo login.
Note: Ensure that the admin (superuser) is added as an attendee to that event.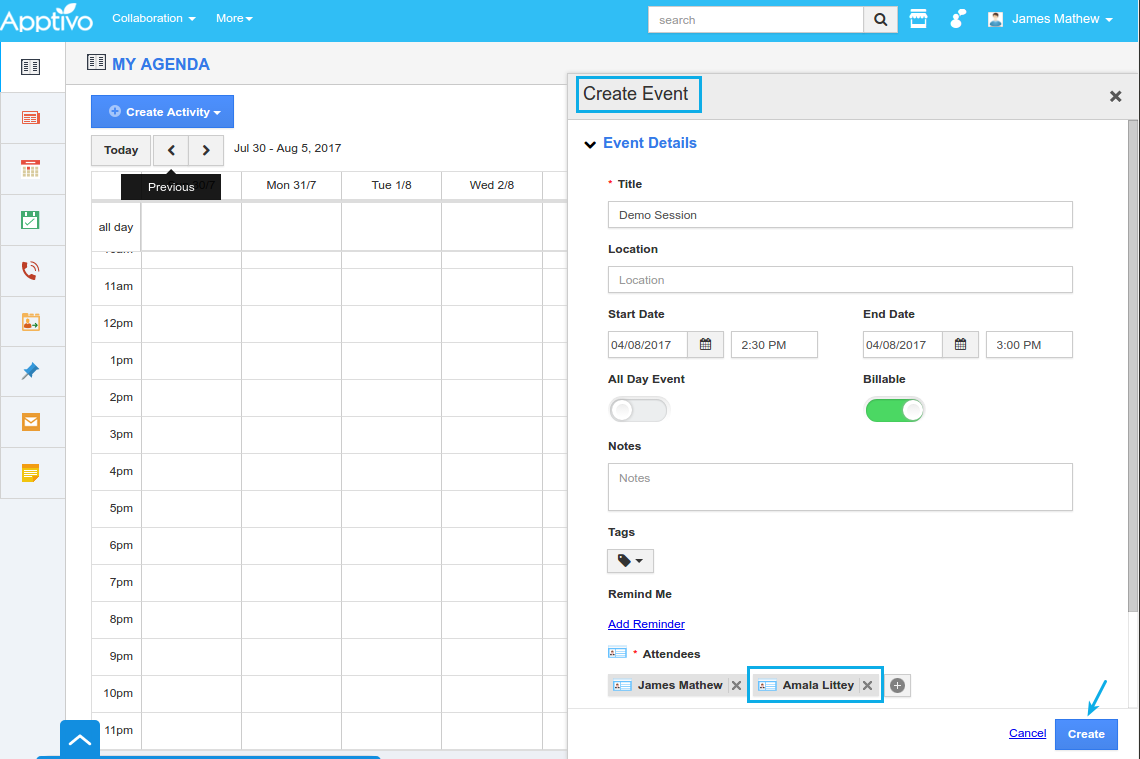
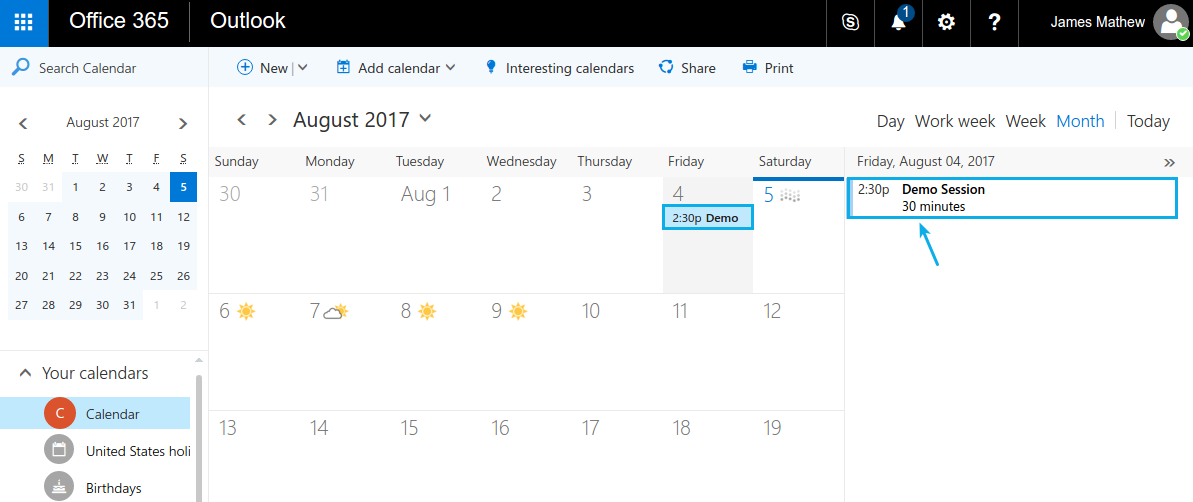
- Now, that created event will first get synced in his own Office 365 calendar as shown:
- Next, the event created by the user (employee) will get synced in Apptivo’s calendar of the Admin.
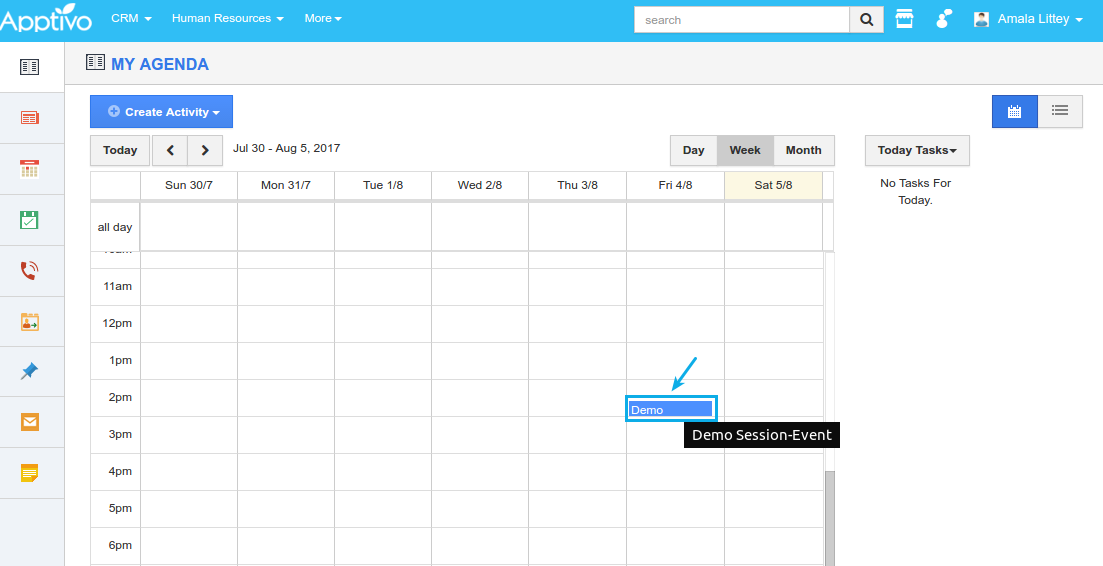
- Finally, this will now be synced in the Office 365 calendar of admin.
