Browse by Solutions
Browse by Solutions
How do I Customize Reports in Targets App?
Updated on January 25, 2017 05:52AM by Admin
You can customize reports settings in order to hide or show your reports. You can also give privileges to your employee in order to access reports from their account.
Steps to Customize Reports in Targets App
- Log in and access Targets App from your universal navigation menu bar.
- Click on “More” icon and select “Settings” located at the app header bar.

- Click on “Reports” from "General" drop down in the left navigation panel.

- In Reports dashboard, you can view "Reports".
- By default, all reports will be in “Show” Status.
- You can hide any report by Sliding the "Green" button. For Instance: Target List.

- In Reports section, you cannot view “Target List” link (Due to “Hide” enabled) as shown below:

Steps to Create Privilege to Reports
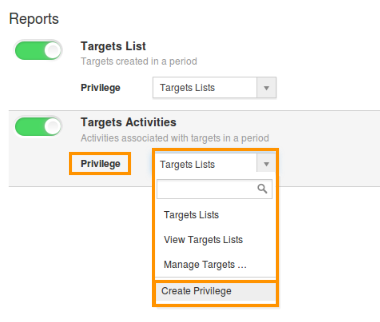
- In Reports settings dashboard, click on “Create Privilege” to create privilege.

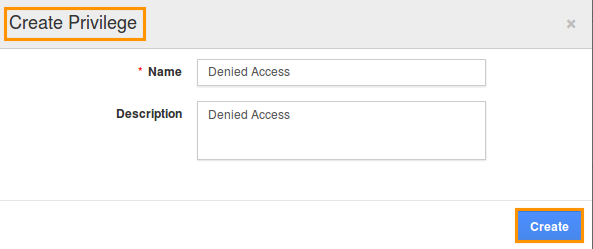
- You can view "Create Privilege" pop-up page, as shown in the image below.
- Name - Name of the Privilege.
- Description - Description of privilege.

- Click on “Create” button to finish, now created privilege will be listed in the drop down. For instance: Denied Access.
- Now you can set this privilege to General Reports. For instance: Target Activities.

Steps to Create Roles and Set App Privilege
- Navigate to your Employees App from your universal navigation menu bar.
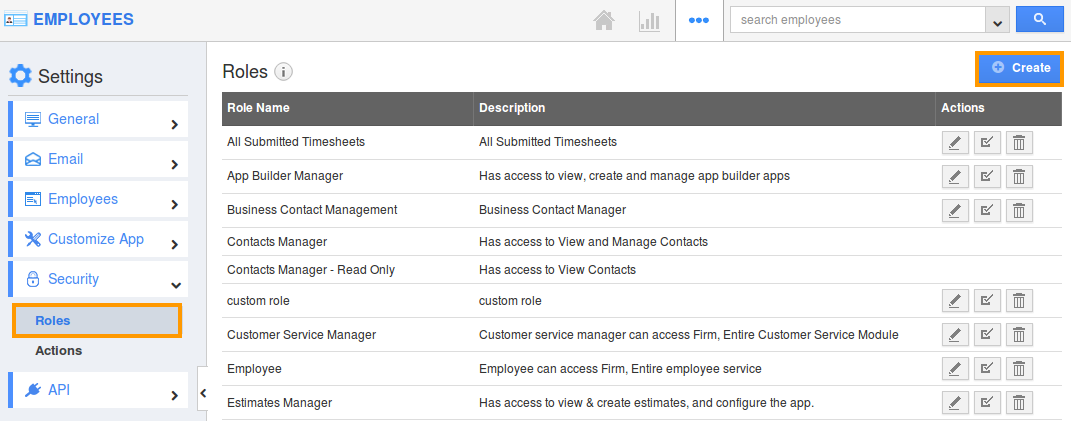
- In Employees App “Settings”, select “Roles” from the left navigation panel.

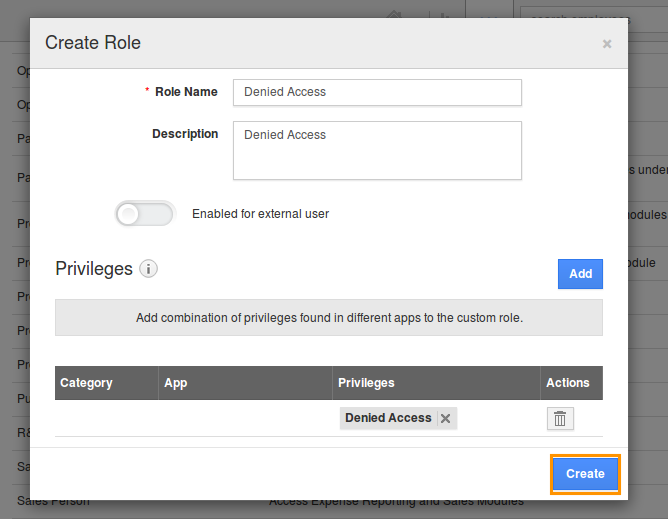
- Create a role, which you assigned as “Privilege” in target reports settings. (i.e.) “Denied Access”

- Add the role to the Super User.
- Based on Privilege added, employees(Under super user) will be restricted to view general reports in Targets App as shown below(“Target Activities" will not be shown)

Related Links
Flag Question
Please explain why you are flagging this content (spam, duplicate question, inappropriate language, etc):

