Browse by Solutions
Browse by Solutions
How do I Create Privilege to the Associated Objects and Give Access to My Employee in Contacts App?
Updated on October 10, 2024 02:51AM by Admin
There are times when you would have to give privilege to one of your team members to access to the objects and modules of the other application that is associated with your Contacts App. In order to view associated objects information in the other apps you need to create a privilege for associated objects.
Have a look at the steps.
To Create Privilege to the Associated Objects
- Log in and access Contacts App from the universal navigation menu bar.
- Click on “More” icon and select “Settings” located at the app header bar.

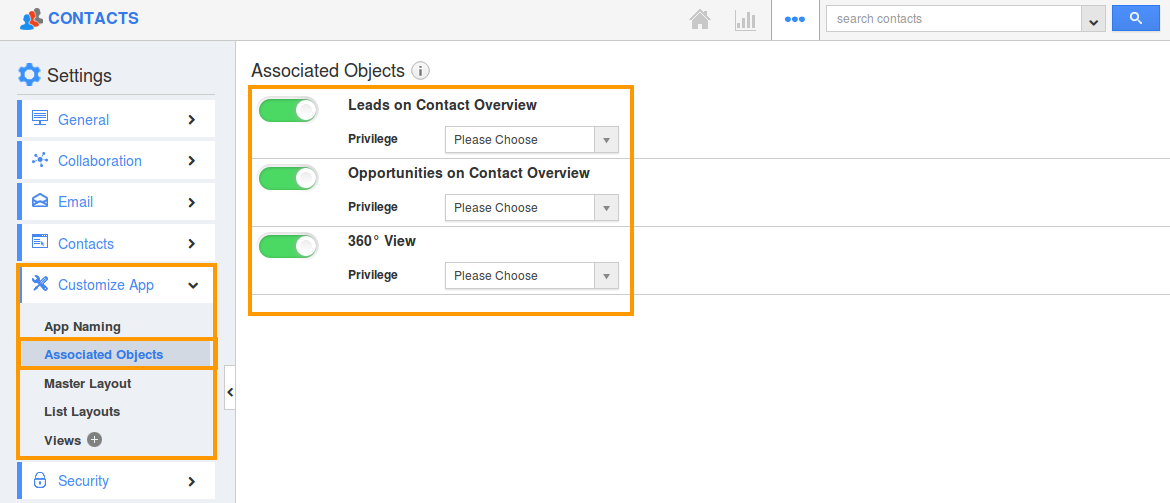
- Select “Customize App” drop-down and click on “Associated Objects” from the left navigation panel.

- Now you can view three enabled options, which are:
- Leads on Contacts Overview
- Opportunities on Contact Overview
- 360 degree View
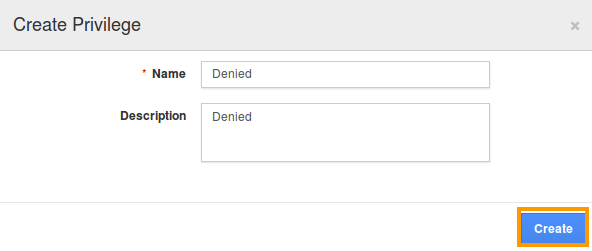
- Click on “Create Privilege” under "Privilege" dropdown and provide:
- Name - Name of the privilege
- Description - Description of the privilege

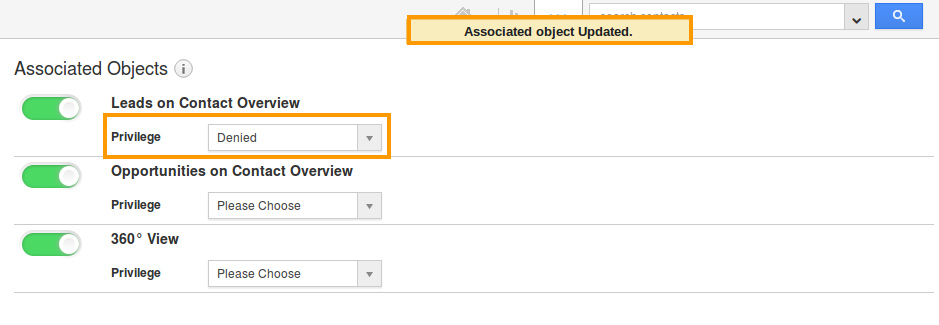
- Click on “Create” button to finish, now created privilege will be listed in the drop down. For instance, the created privilege "Denied" will be listed

- Now you can set this privilege to associated object.
To Create Roles and Set App Privilege
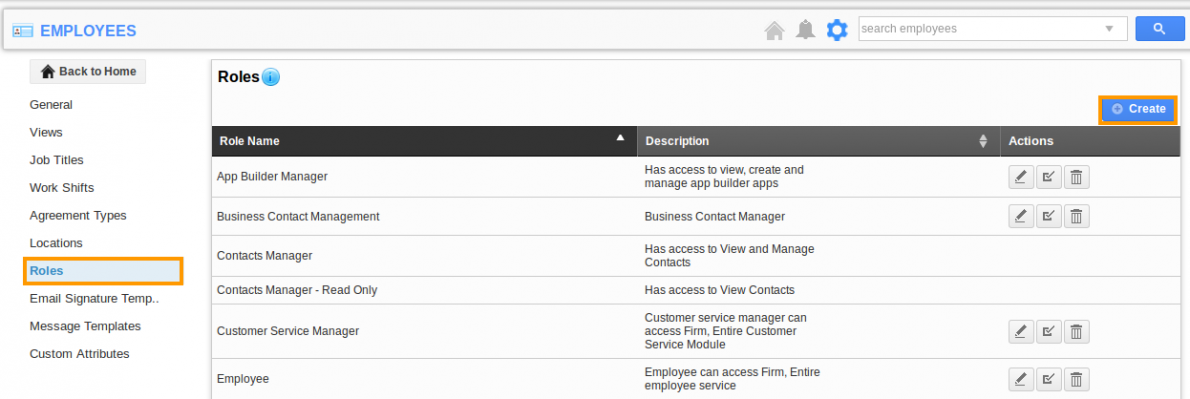
- Navigate to Employees App from your universal navigation menu bar.
- Click on "Settings" from the App header bar.

- In Employees App settings, select “Roles” from left navigation panel and click on "Create" button.

- Create a role, which you assigned as “Privilege” in associated objects settings. (i.e.) “Denied”.
- Add the role to employee who need to access associated information.
- Once the role is added to employee, in his log in he can view the associated objects.
Flag Question
Please explain why you are flagging this content (spam, duplicate question, inappropriate language, etc):

