Browse by Solutions
Browse by Solutions
How do I Create Custom Email Templates in CRM Apps?
Updated on January 23, 2019 09:05PM by Admin
The Email/Message Templates are pre-defined message formats that you can send to your contacts. You can design an email template, to make your email look standardized rather than sending plain text.
Note: All the created email templates, are app-specific. That is, an email template created in the Leads App cannot be accessed from the Opportunities App.
Consider an employee (Katie Dustin), who wants to send followup emails to her team members or potential customers. In that case, she can create an email template in the corresponding apps. This allows her to choose the layout, and include the required message content and send emails quickly.
Go through the following steps.
- Log in and access Leads App from your universal navigation menu bar.
- Click on "More (...)" -> "Settings" -> "Email" -> "Email Templates".
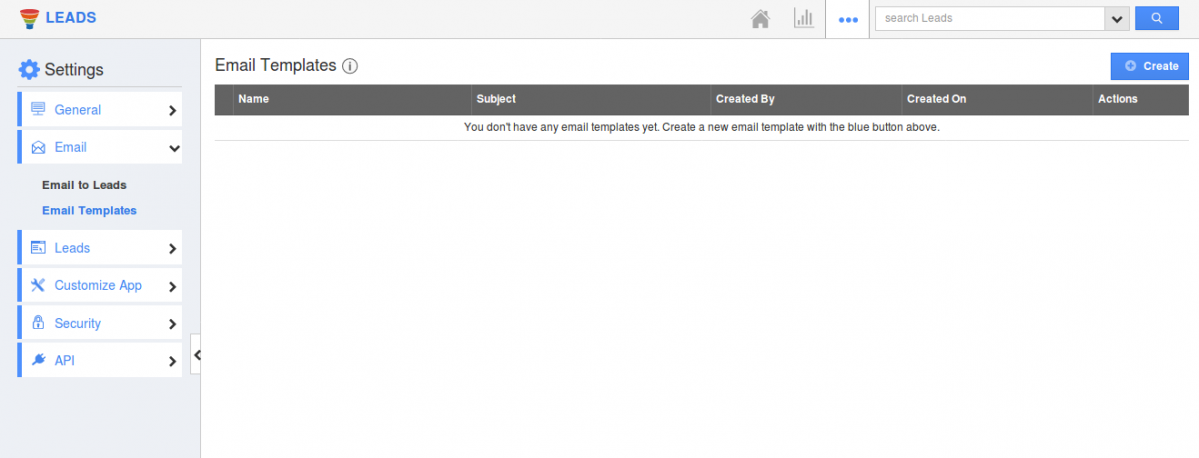
- Click on "Create" and specify:
- Template - Name of the Email template.
- Subject - Subject of the Email template.
- Message - Content of Email template.
- Insert Attributes - This special feature, allows you to insert the default attributes found in the leads app. These are the attributes which are standard and also customized based on your requirement.
- Available for Compose Email - Sliding the toggle ON, will make this template as the default one when composing emails.
- Available for Notes - Sliding the toggle ON, will make this template available when creating notes.
- Attachments - You can browse Files, Folders, and Attachments from local (computer), Dropbox, Onedrive and Google Drive.
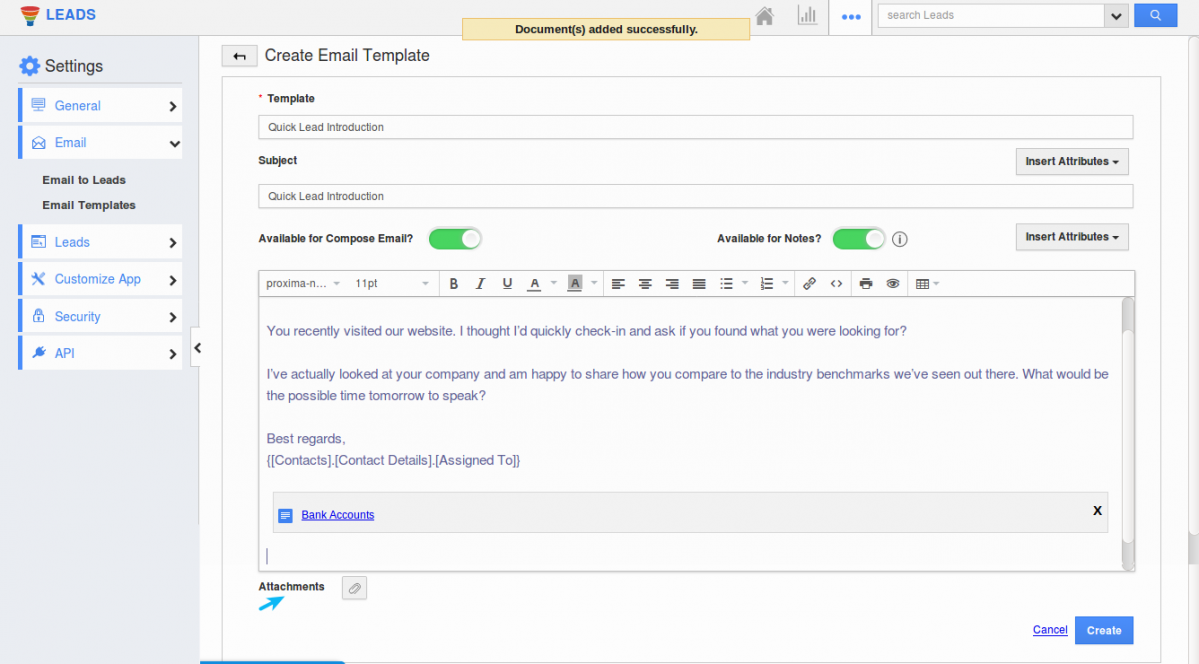
- Click on “Create”.
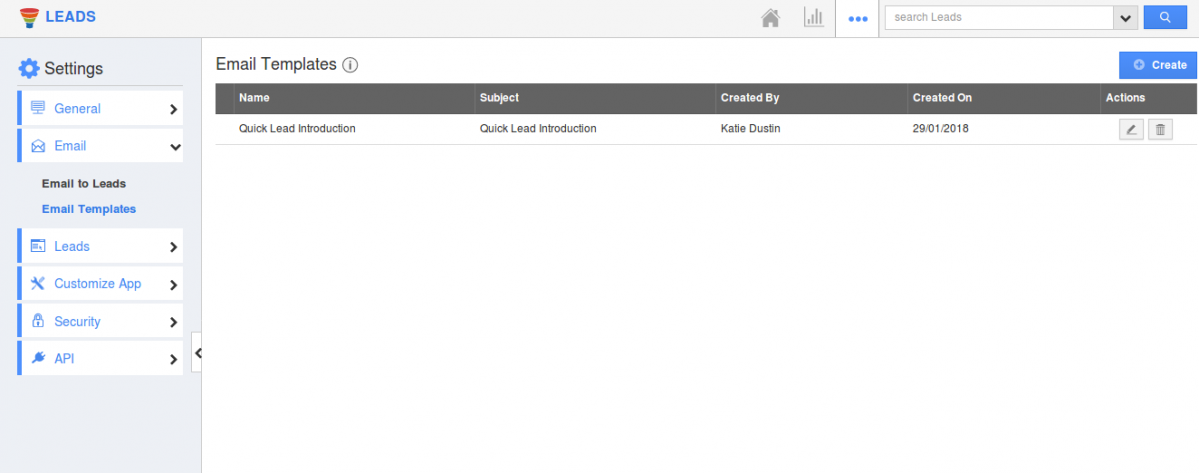
- Once created, you can update the email template by clicking on "Edit" icon. Also, you can delete it by using "Delete" icon, if needed.
- Log in and access Opportunities App from your universal navigation menu bar.
- Click on "More (...)" -> "Settings" -> "Email" -> "Email Templates".
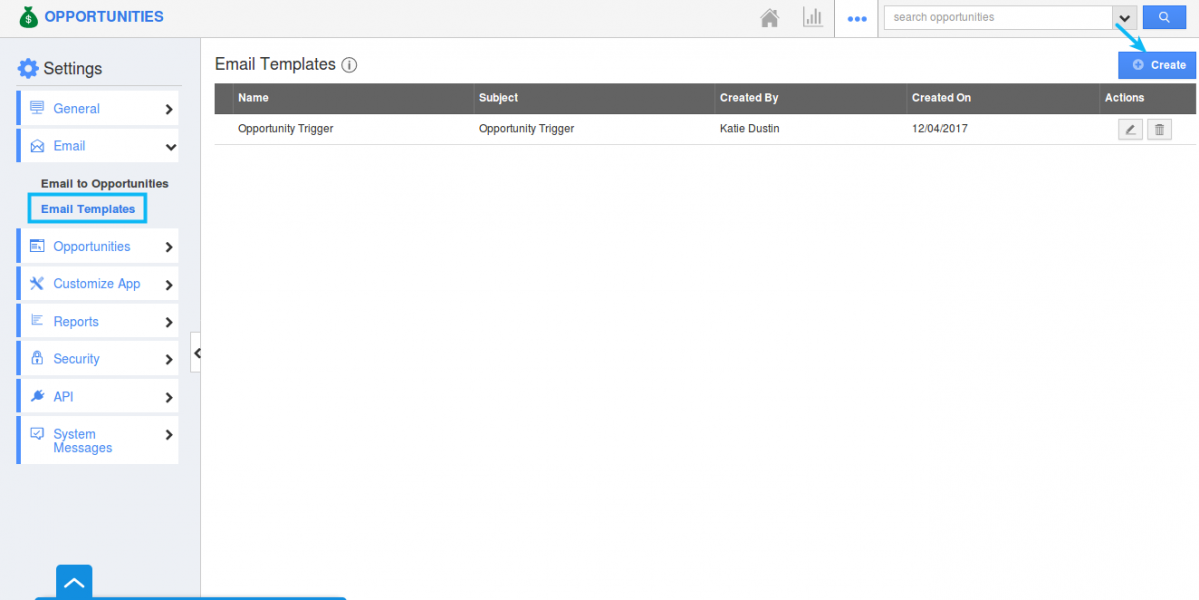
- Click on "Create" and specify:
- Template - Name of the Email template.
- Subject - Subject of the Email template.
- Message - Content of Email template.
- Insert Attributes - This special feature, allows you to insert the default attributes found in the opportunities app. These are the attributes which are standard and also customized based on your requirement.
- Available for Compose Email - Sliding the toggle ON, will make this template as the default one when composing emails.
- Available for Notes - Sliding the toggle ON, will make this template available when creating notes.
- Attachments - You can browse Files, Folders, and Attachments from local (computer), Dropbox, Onedrive and Google Drive.
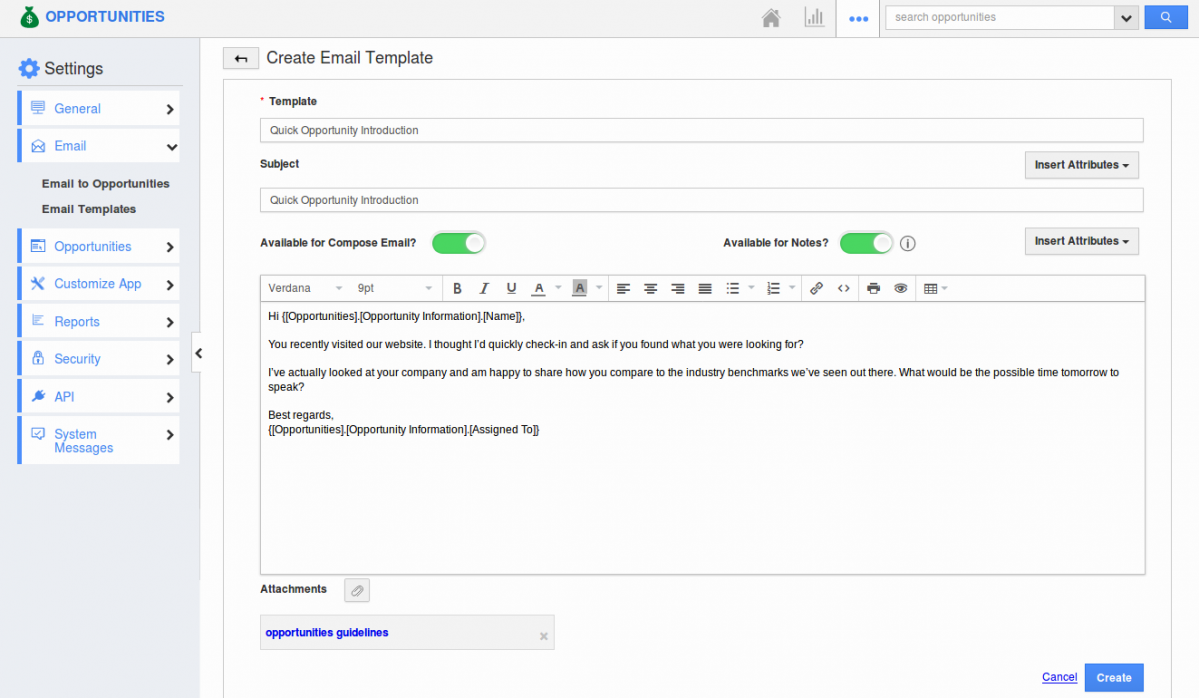
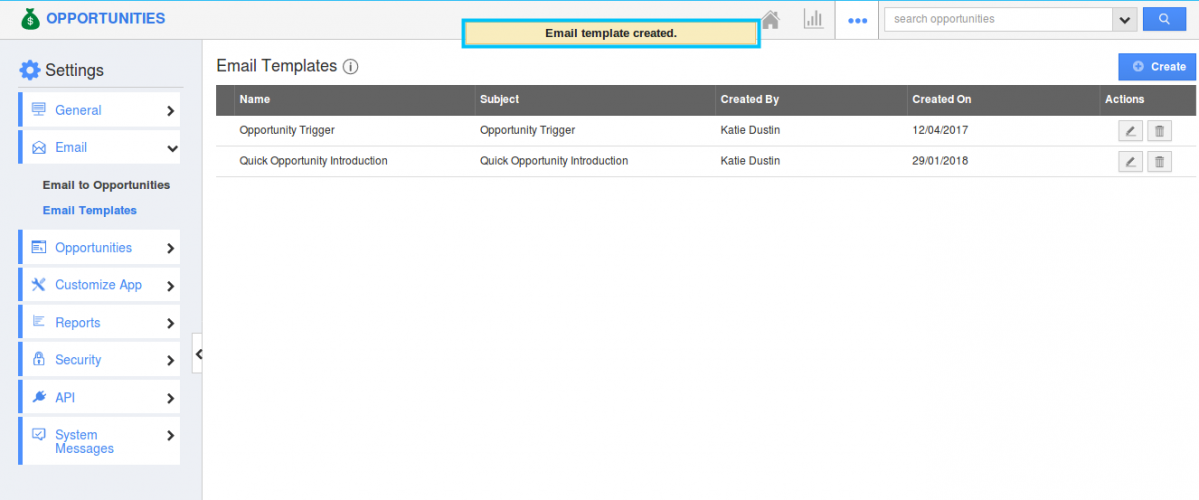
- Click on “Create”.
- You can update the message template information by clicking on "Edit" icon if needed.
- Log in and access Customers App from your universal navigation menu bar.
- Click on "More (...)" -> "Settings" -> "Email" -> "Email Templates".
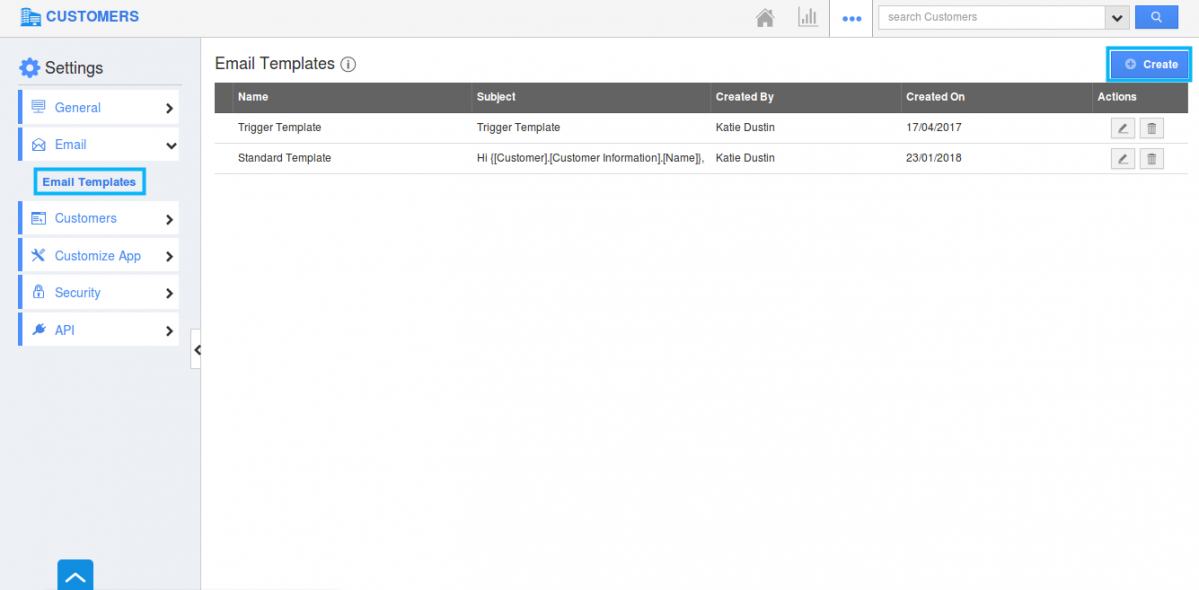
- Click on "Create" and specify:
- Template - Name of the Email template.
- Subject - Subject of the Email template.
- Message - Content of Email template.
- Insert Attributes - This special feature, allows you to insert the default attributes found in the customer's app. These are the attributes which are standard and also customized based on your requirement.
- Available for Compose Email - Sliding the toggle ON, will make this template as the default one when composing emails.
- Available for Notes - Sliding the toggle ON, will make this template available when creating notes.
- Attachments - You can browse Files, Folders, and Attachments from local (computer), Dropbox, Onedrive and Google Drive.
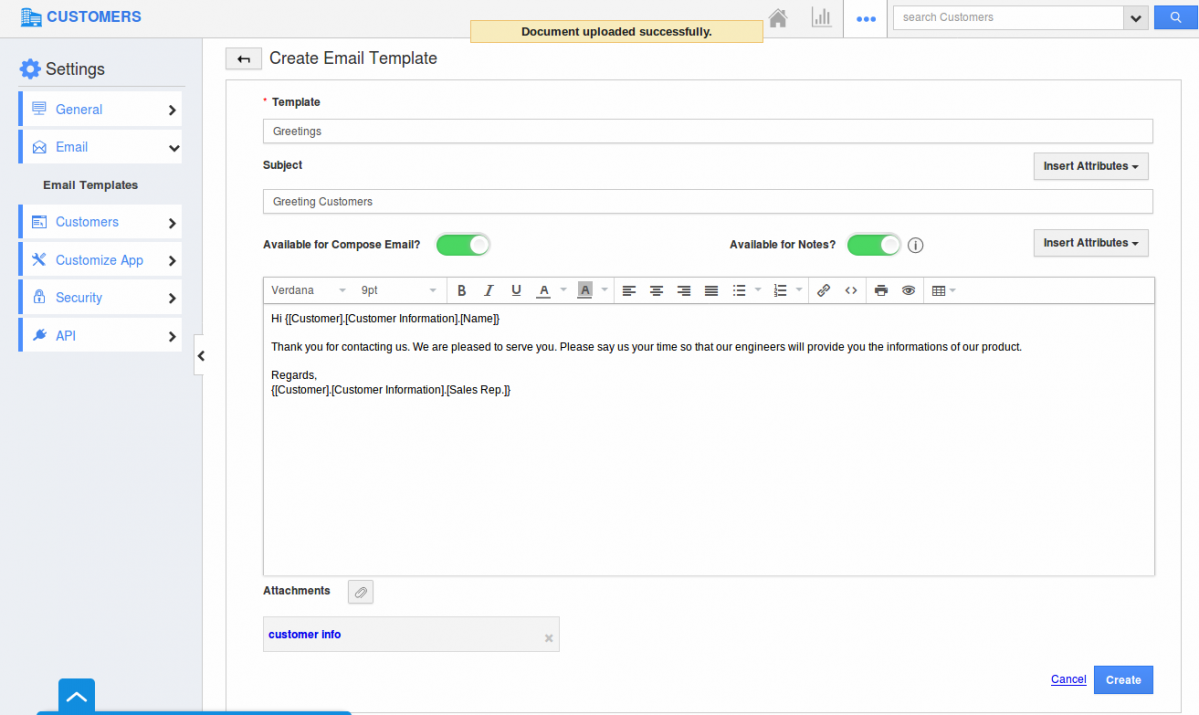
- Click on “Create” to complete.
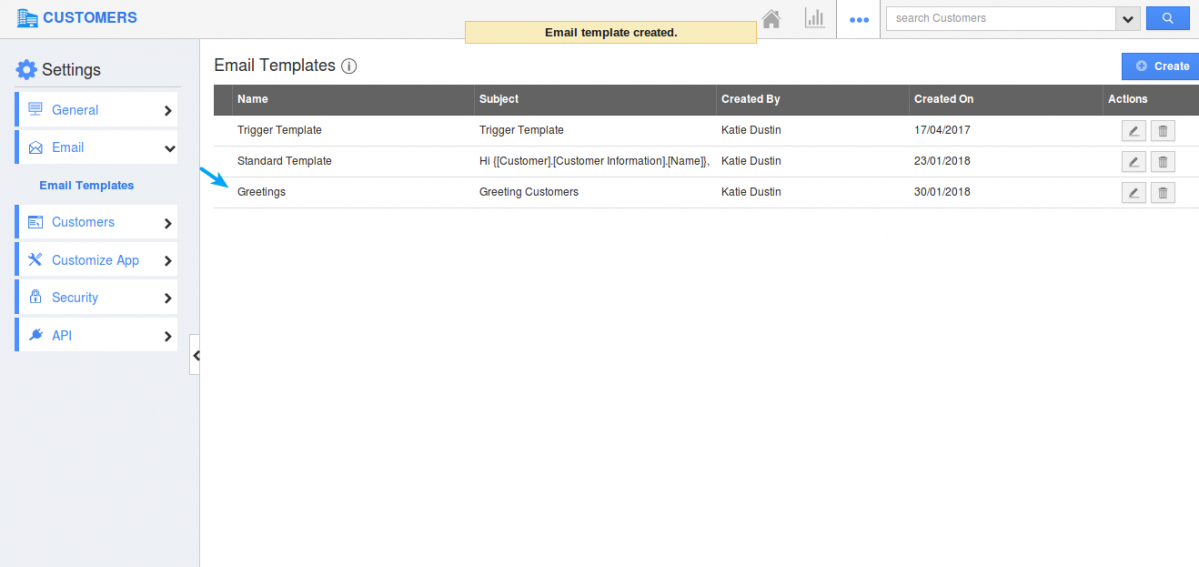
- You can also edit the created message template information using "Edit" icon if needed. You can also delete the created template using "Delete" icon.
- Log in and access Contacts App from your universal navigation menu bar.
- Click on "More (...)" -> "Settings" -> "Email" -> "Email Templates".
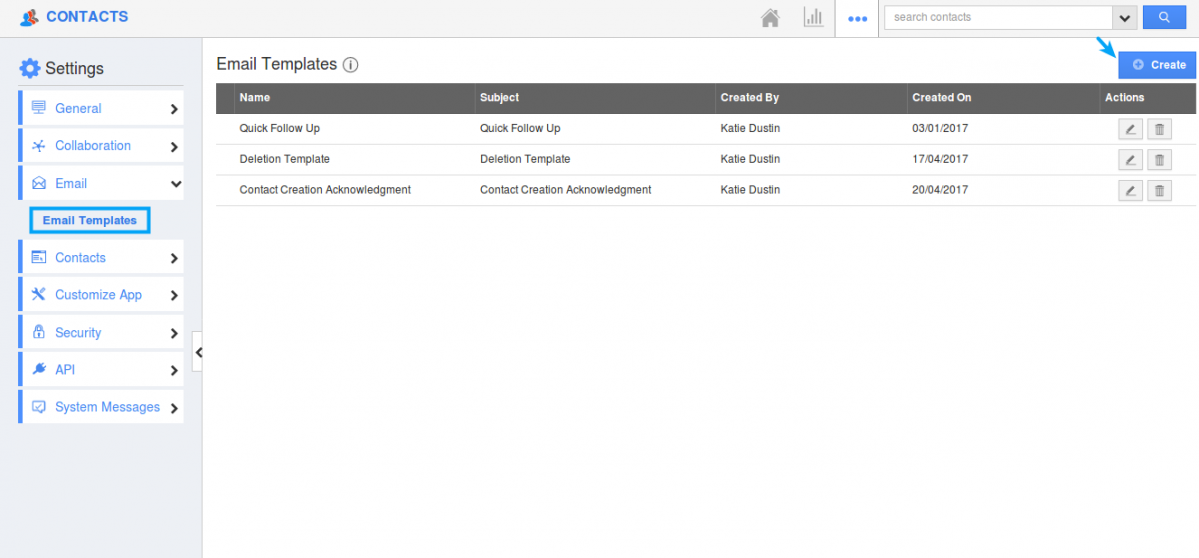
- Click on "Create" and specify:
- Template - Name of the Email template.
- Subject - Subject of the Email template.
- Message - Content of Email template.
- Insert Attributes - This special feature, allows you to insert the default attributes found in the contacts app. These are the attributes which are standard and also customized based on your requirement.
- Available for Compose Email - Sliding the toggle ON, will make this template as the default one when composing emails.
- Available for Notes - Sliding the toggle ON, will make this template available when creating notes.
- Attachments - You can browse Files, Folders, and Attachments from local (computer), Dropbox, Onedrive and Google Drive.
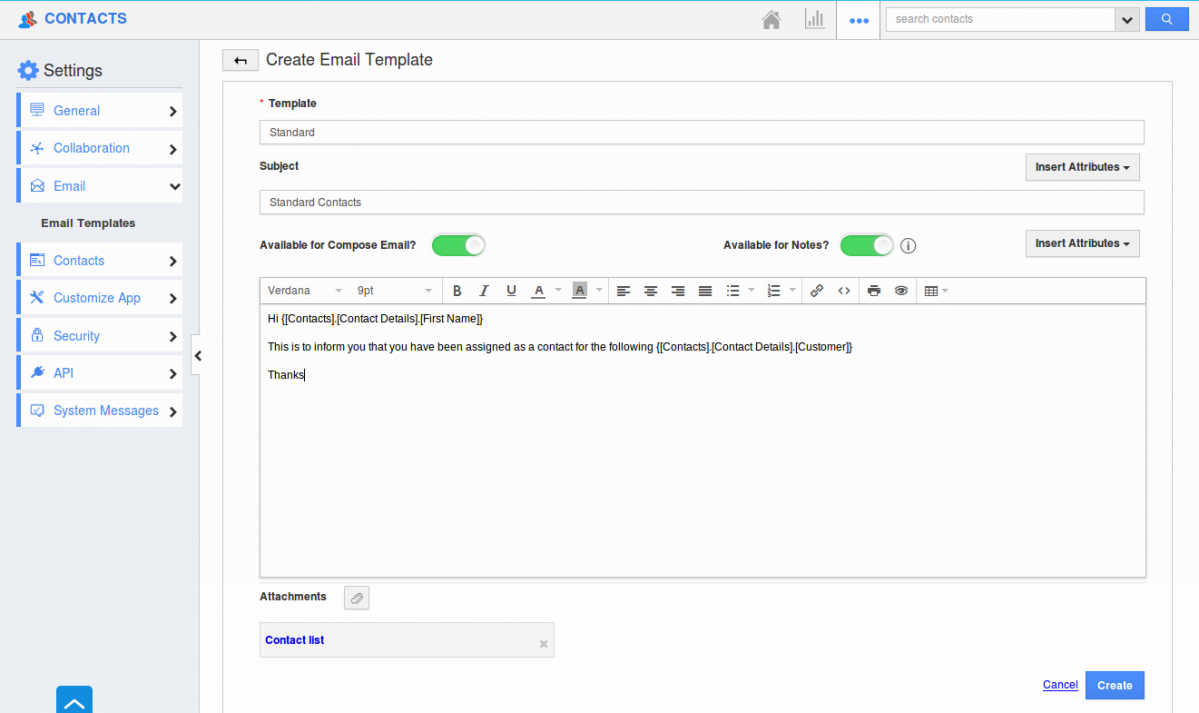
- Click on the “Create” button to complete.
- You can update the message template information by clicking on "Edit" icon if needed. You can also delete the created message template using "Trash" icon.
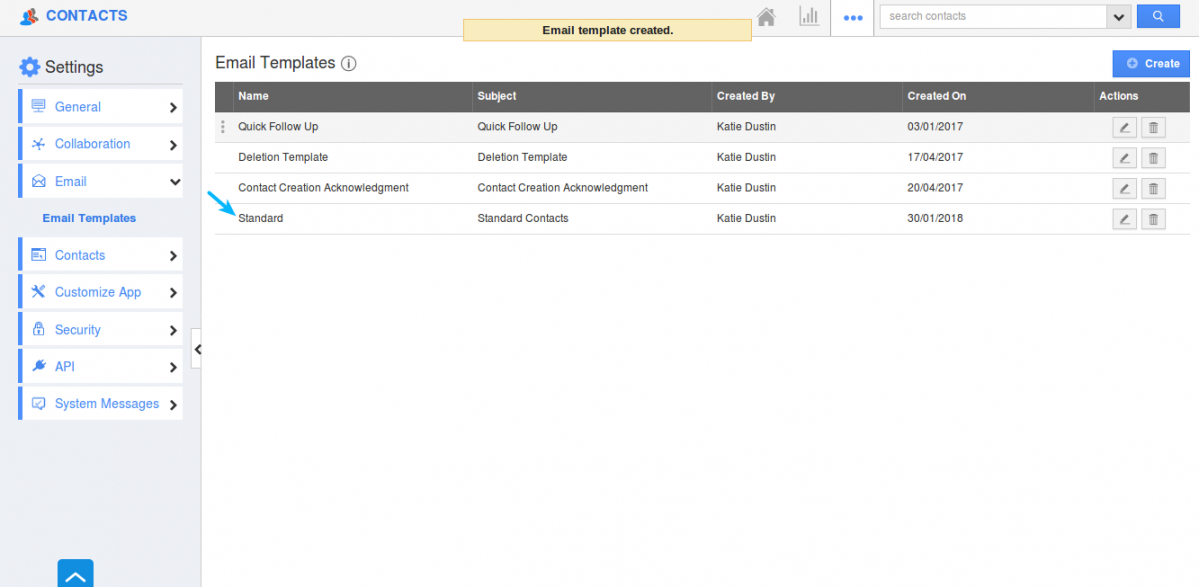
- Log in and access Cases App from your universal navigation menu bar.
- Click on "More (...)" -> "Settings" -> "Email" -> "Email Templates".
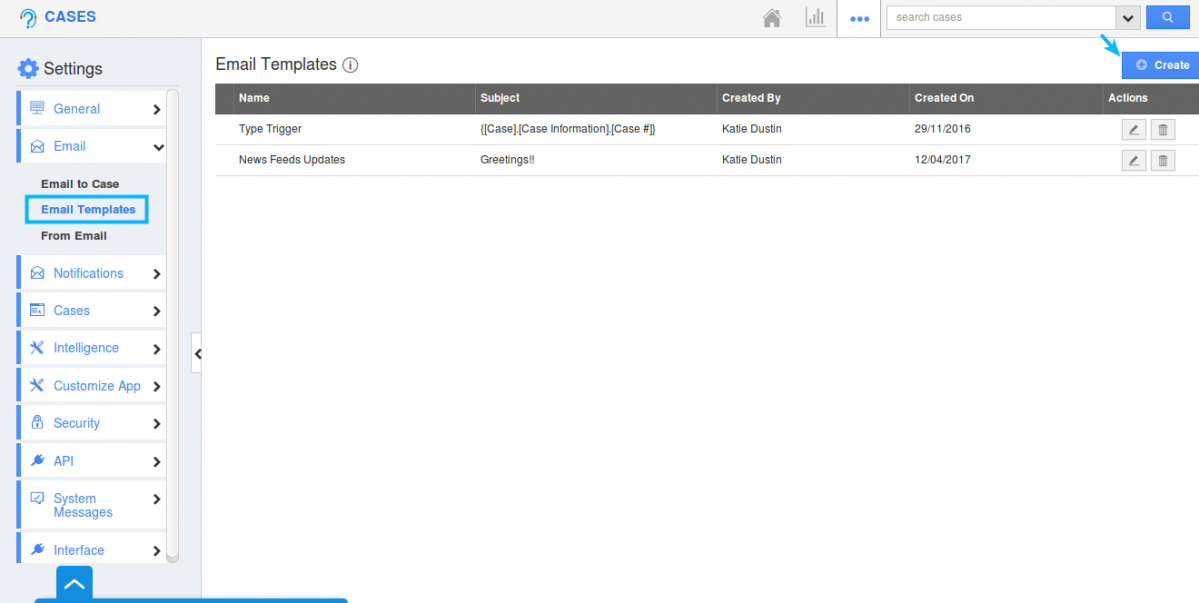
- Click on "Create" and specify:
- Template - Name of the Email template.
- Subject - Subject of the Email template.
- Message - Content of Email template.
- Insert Attributes - This special feature, allows you to insert the default attributes found in the cases app. These are the attributes which are standard and also customized based on your requirement.
- Available for Compose Email - Sliding the toggle ON, will make this template as the default one when composing emails.
- Available for Notes - Sliding the toggle ON, will make this template available when creating notes.
- Attachments - You can browse Files, Folders, and Attachments from local (computer), Dropbox, Onedrive and Google Drive.
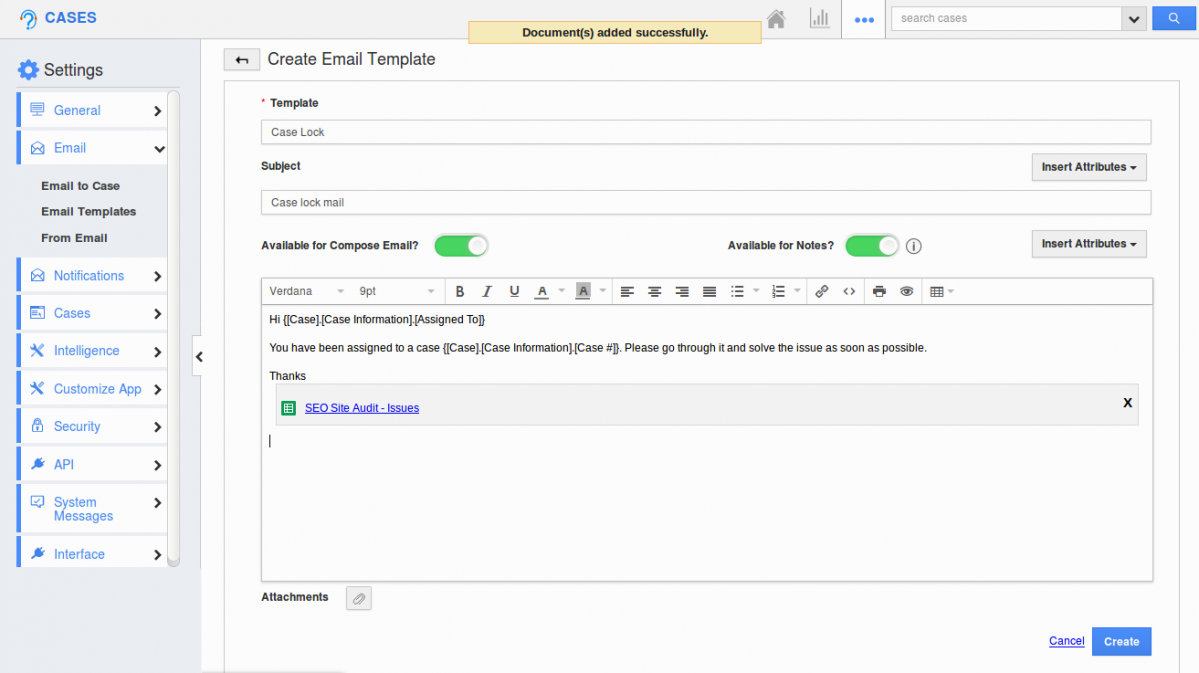
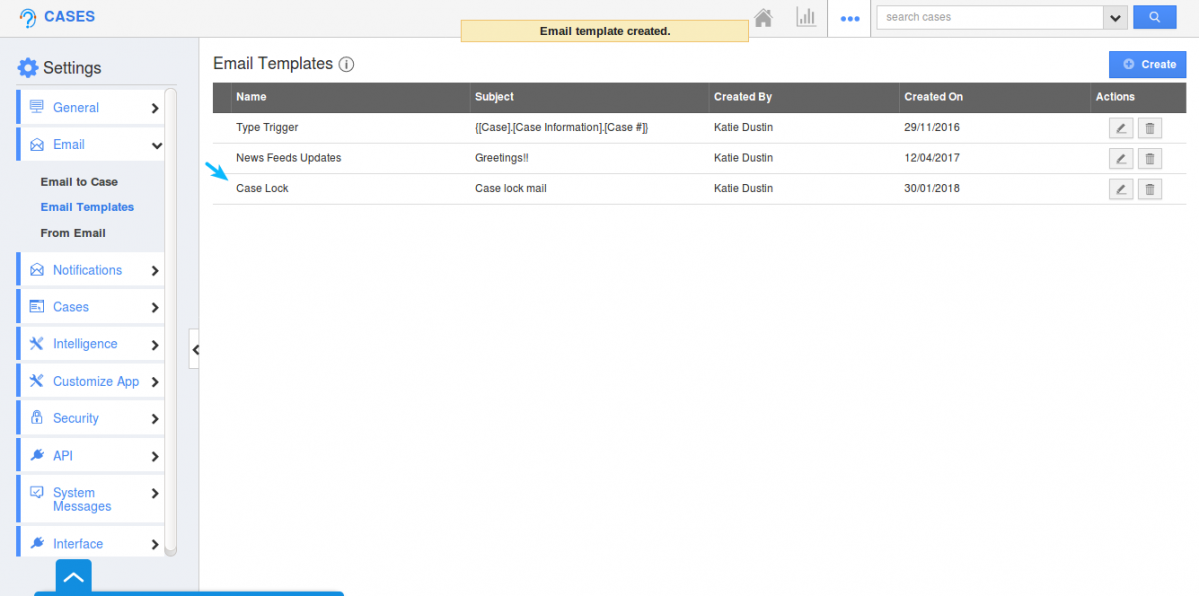
- Click on the “Create” button to complete.
- You can update message template information by clicking on "Edit" icon if needed.
