Cases can be automatically created in Cases App when a customer emails you for support. You can use email ids or aliases to receive emails from your customers. In order to receive cases through emails, your account requires the Premium or Ultimate plans.
How do I Authenticate My Email Address?
- Log in and access Cases App from your universal navigation menu bar.
- Click on the "More" icon and select “Settings” located at the app header bar.
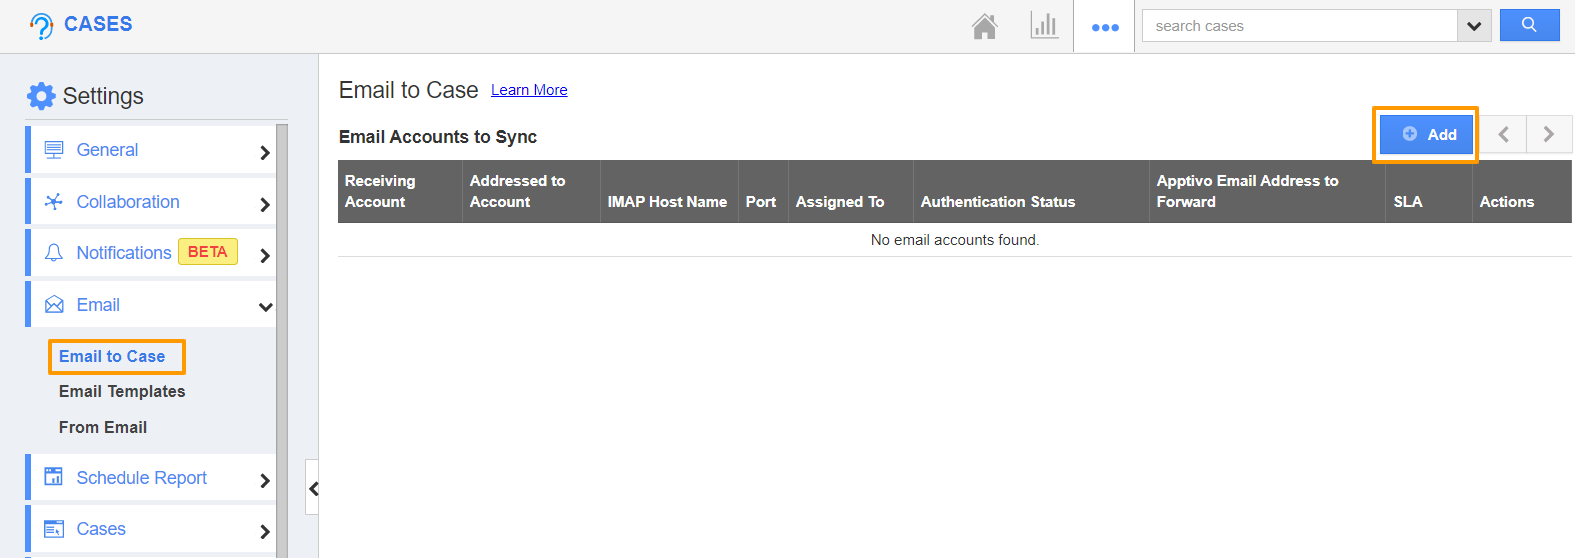
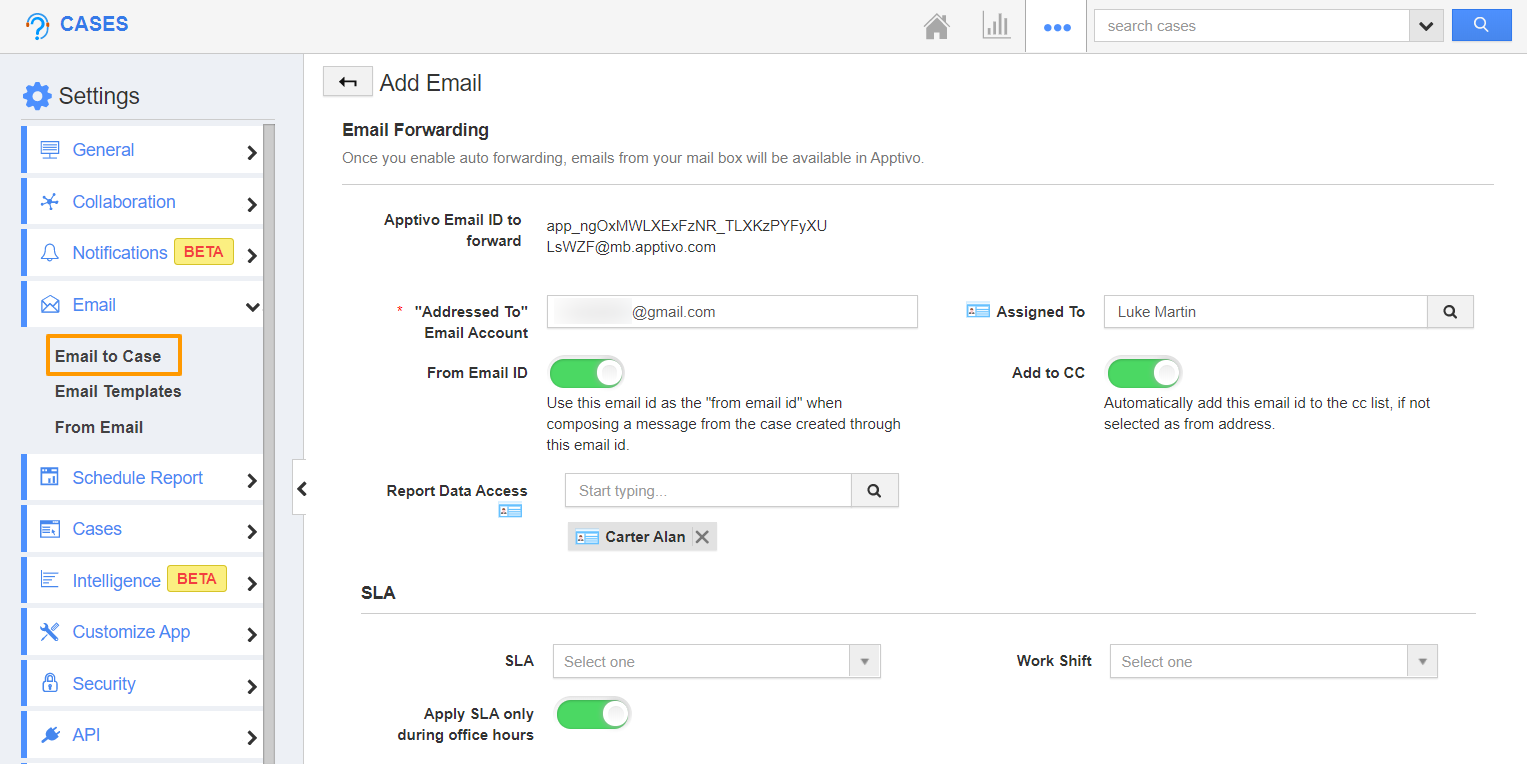
- In the Settings page, go to Email → Email to Case. In the Email to Case page, select Add to add an email address.
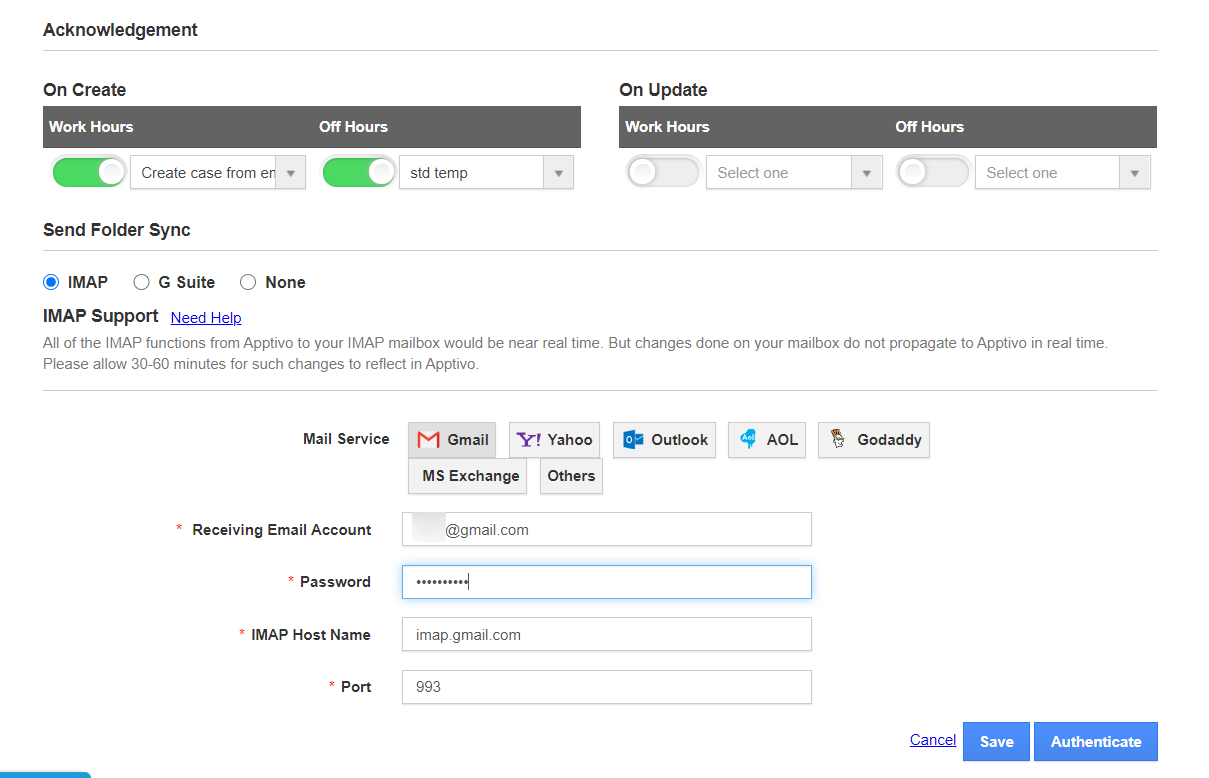
- Fill in the following details:
- Receiving Email Account – Your Email address for authentication.
- Password – Enter the password of your email address.
- “Addressed To” Email Account – Either you can choose the same account or can redirect to the email list.
- IMAP Host Name – Hostname of your email address for example: if you have a Gmail account then the hostname is “imap.gmail.com”.
- Port – Port number of the domain. (993, 143) for example, the port number for Gmail is 993.
- Assigned To - Select an Employee or team to whom it should be assigned automatically.
- From Email Id – When composing a message you can set this authenticated email address. If you want to use this email id when composing click on the “Off” button and to enable “On”.
- Add to CC – Add the authenticated email id to the CC list, if it is not selected as from address.
- SLA - Service level agreement which applies for emails associated with this email address.
- Work Shift - Work shift applied for the cases created through this email address.
- Apply SLA only during office hours - This hour will be calculated based on work shift hours.
- Report Data Access - Select the employee whom you want to give access to the Report data.
- On Create - When cases created the acknowledgment email will be sent automatically; If you enable this option "ON" with the message template.
- On Update - When cases updated the acknowledgment email will be automatic; If you enable this option "ON" with the message template.
 |
Send Folder Sync
- The Send Folder Sync allows you to sync using IMAP and GSuite.
IMAP
- Click on the “Authenticate” button to authenticate your email address.
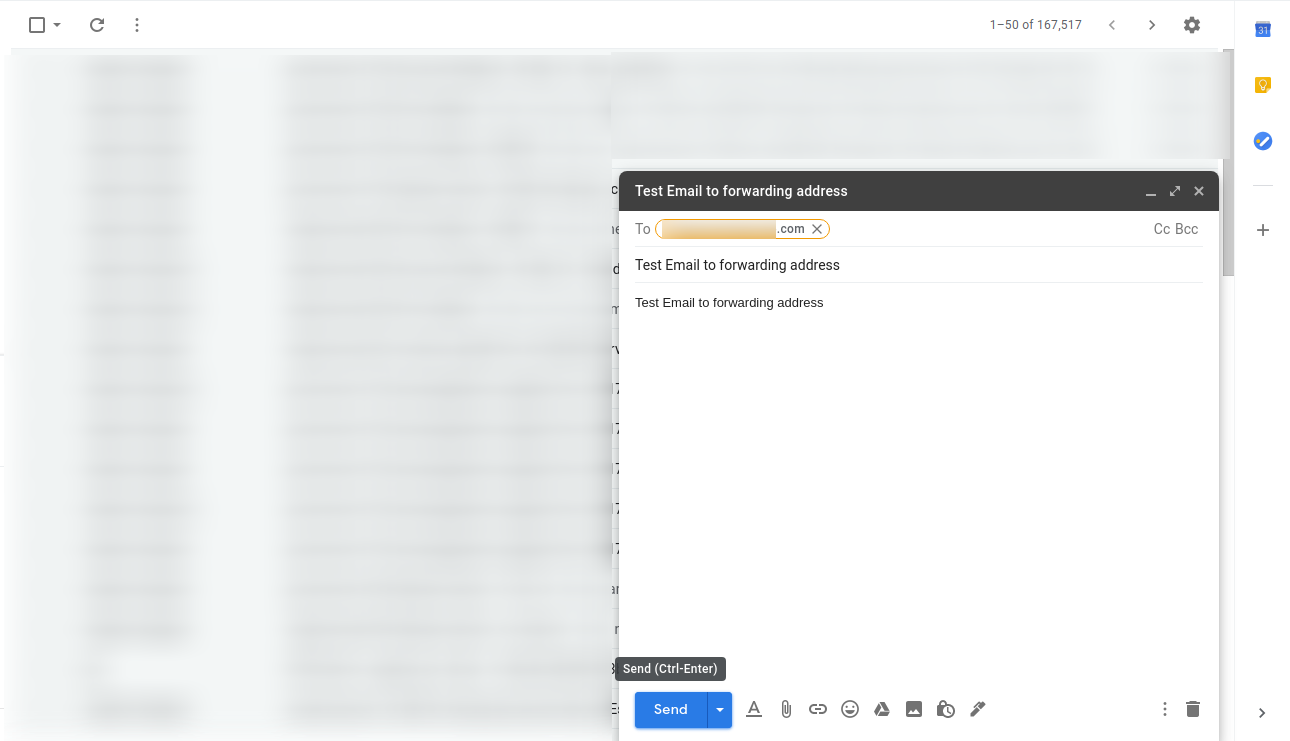
- After that, you have to do "Email Forwarding" to get all your emails into Apptivo.
G Suite
- Enter your G Suite email address and click authenticate.
- The email address will be authenticated automatically. Please note you cannot enable sync for an existing email address. You have to add another email address to perform the sync.
For Example:
- A contact named “Patrick Leon” composes an email from "Patrick@berijam.com" and sends it to the authenticated email address "xxxxxxx@gmail.com".
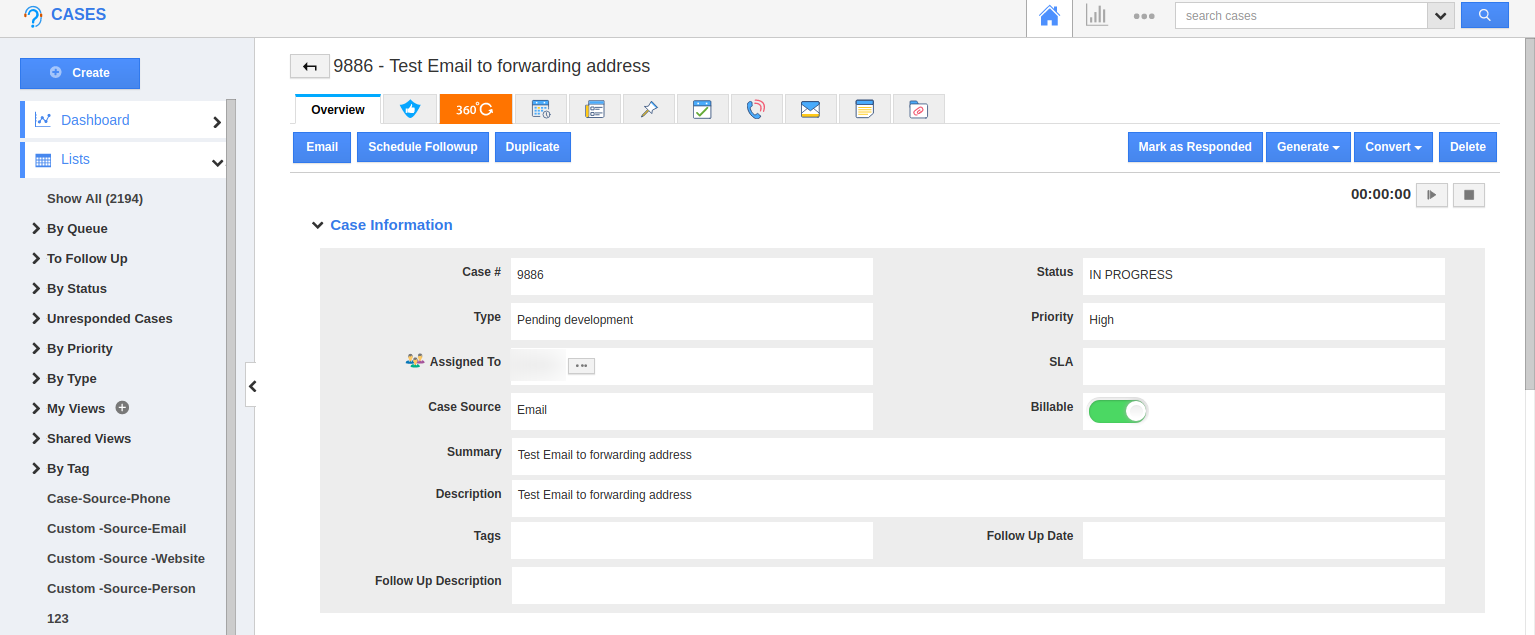
- His email will be converted as a case in Cases App.
- An email will be sent to the configured email address as an acknowledgment.
Related Links

Notes:
- If the case is reopened, the Assigned To, SLA, and Work Shift fields of a case will be updated automatically based on the "Email Address" to which the end user/client/contact replies to.
- As for the reports, the recently updated field values of a case will be considered.
