Browse by Solutions
Browse by Solutions
How to Automatically assign a Task to the Lead Owner in the Leads App?
Updated on September 1, 2023 01:54AM by Admin
The Leads App from Apptivo is your go-to option for streamlining lead management. You can use the trigger functionality to start actions in reaction to specified occurrences. This allows you to establish numerous collaborative activities such as tasks, events, and notes that take effect when certain criteria are met.
Take Alex, a sales manager at RiseUp Construction. Alex wants to eliminate the manual process of assigning tasks to his team members whenever a new lead enters the system. To expedite this process, he leverages the triggers feature, which automatically generates a task whenever a new lead is added and assigned to the lead owner.
Steps to Create a task
- Log in and access the Leads App from your Universal navigation menu bar.
- Click on the “More (...)” icon -> “Settings” -> “Leads” -> “Triggers”. Select Create to create a new trigger.
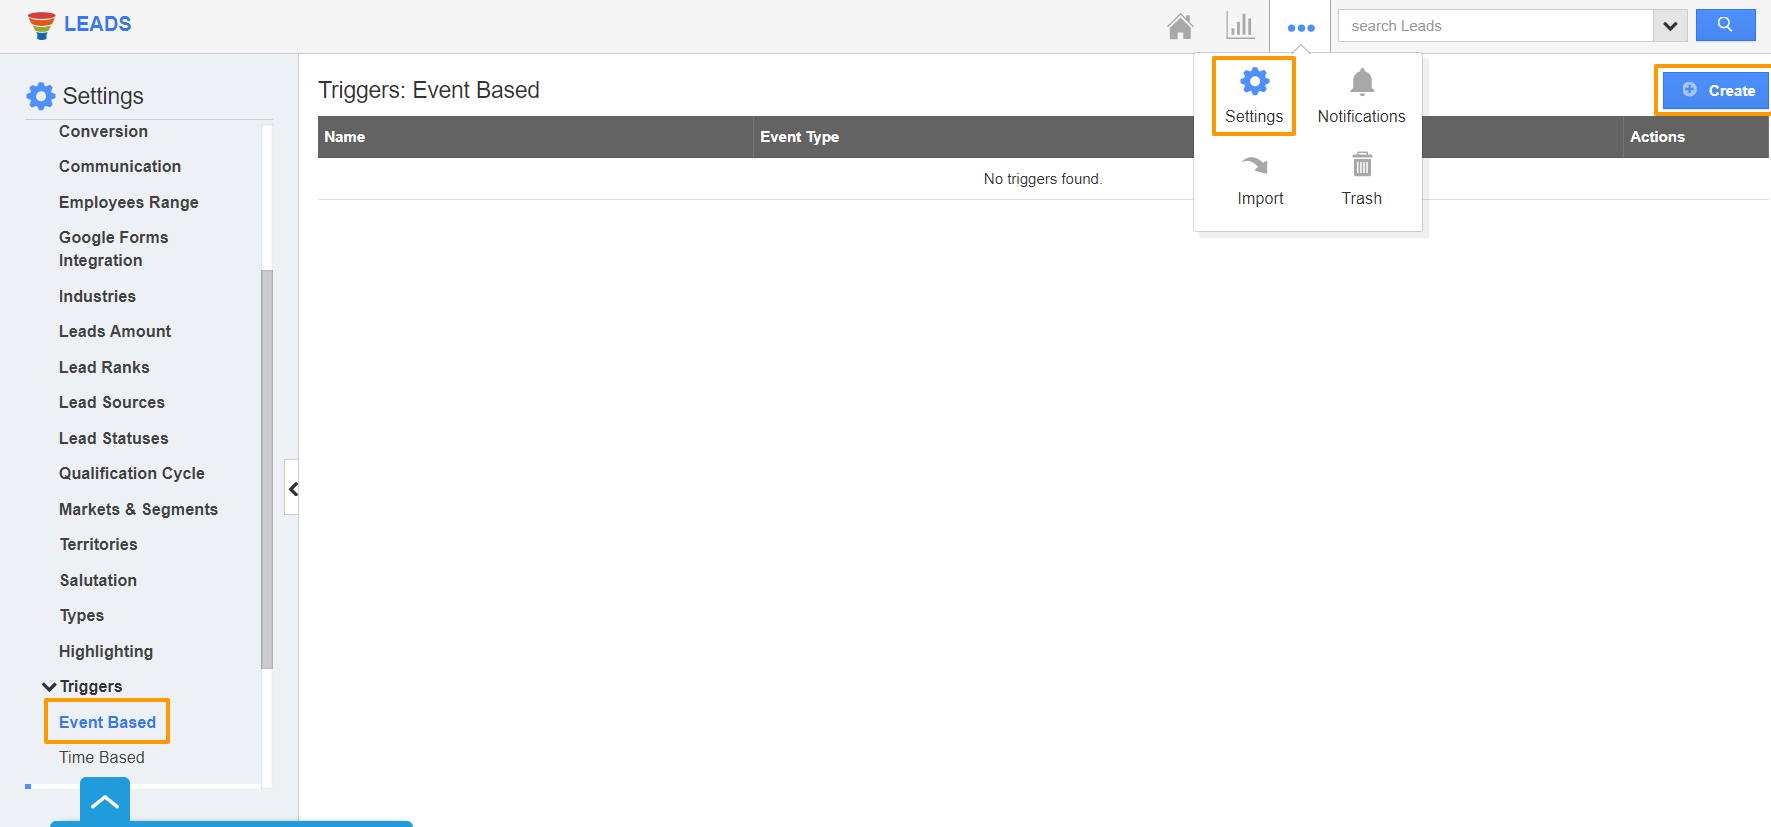
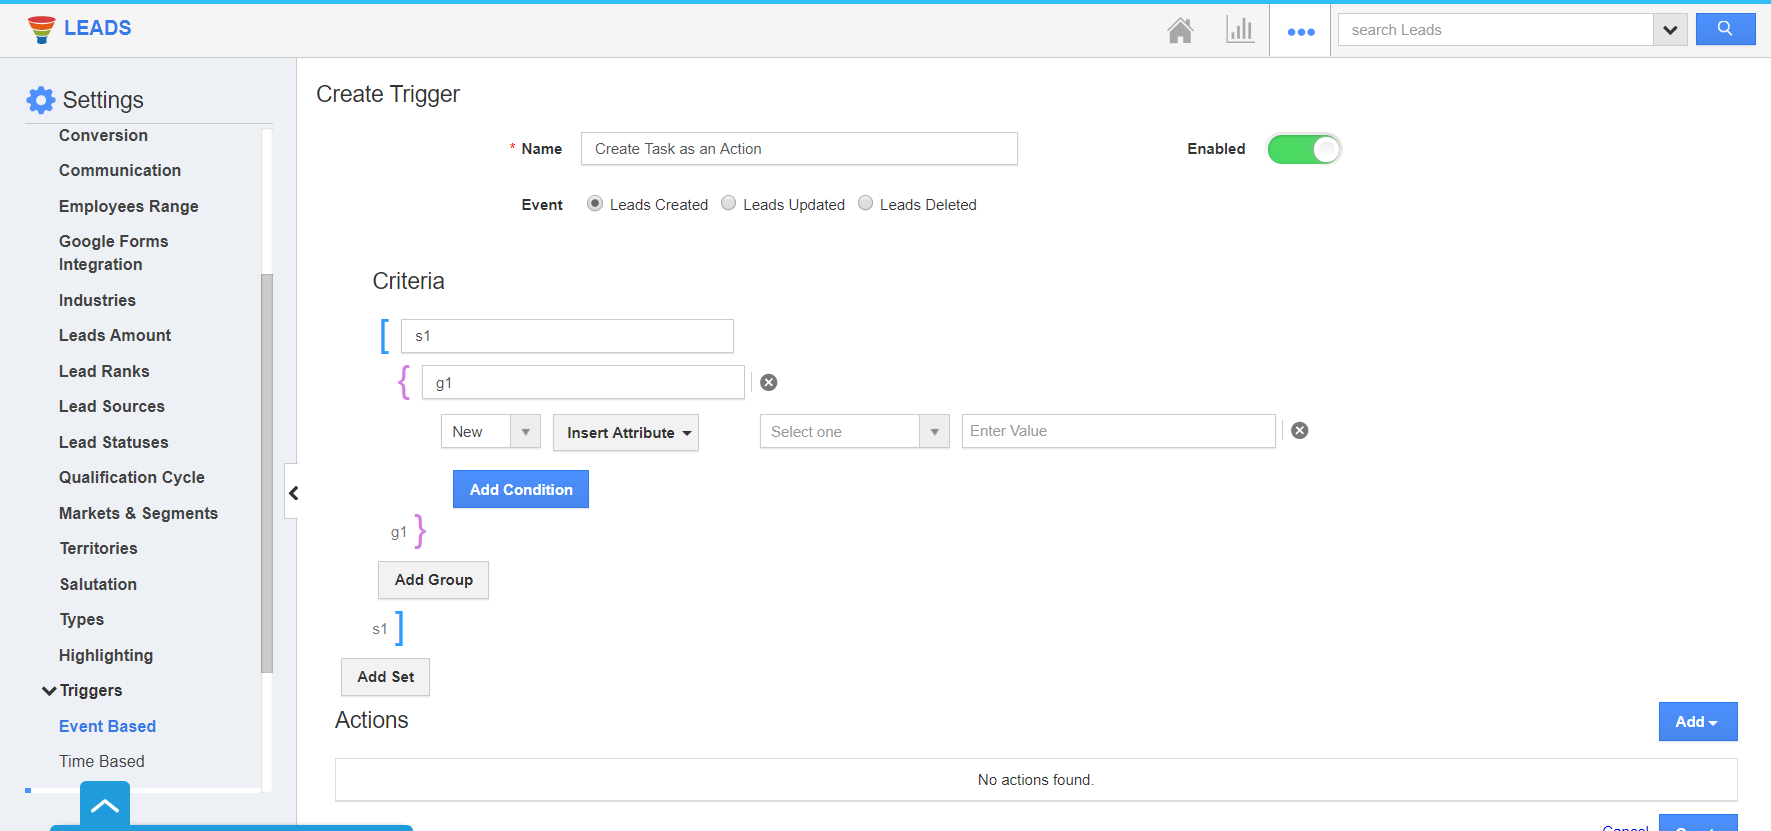
- In the Create Trigger page, define the following:
- Name - Enter the name of the event-based trigger.
- Enabled - Slide the toggle ON, to keep this trigger working.
- Event - Choose an event for the trigger. Here, Leads Created.
- In the Criteria section, define the condition that must be met for the trigger to activate. For instance, the trigger could be set to activate when the Lead Status is "New."
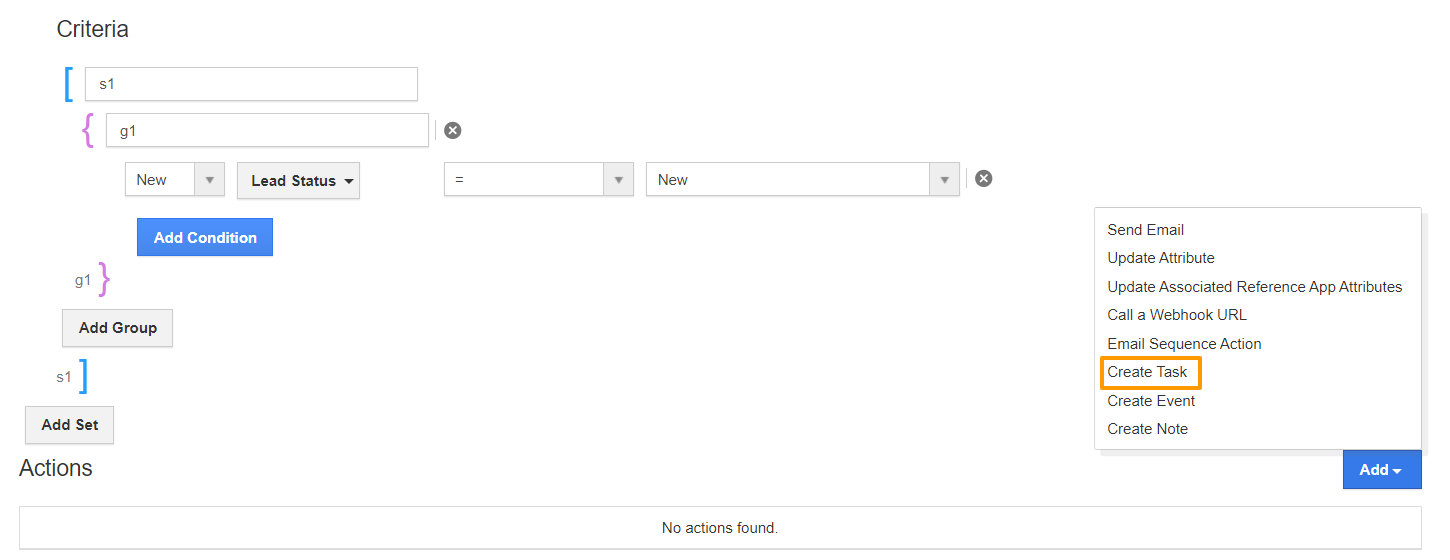
- You can make use of the Actions to set the type of trigger. Since a task is to be created, the action chosen is Create Task.
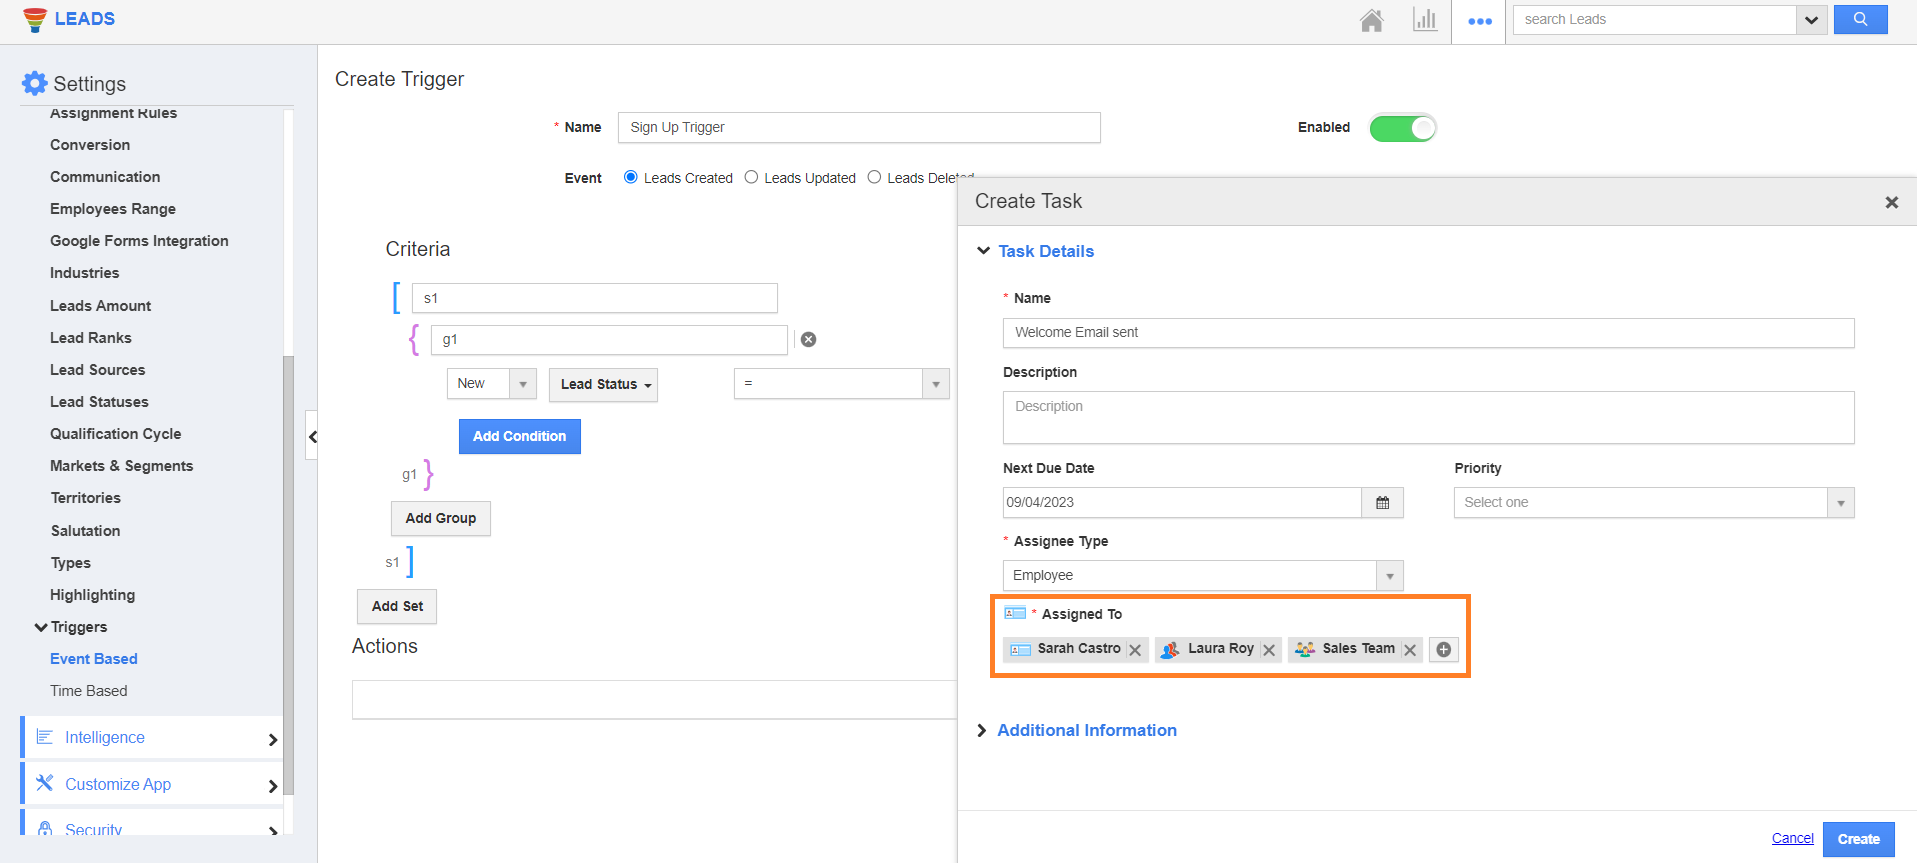
- In the Create Task side panel, input the relevant task details. This includes the task name, start date, Estimated duration, Status, Priority, and Category of the task. Now, let's address the task assignment.
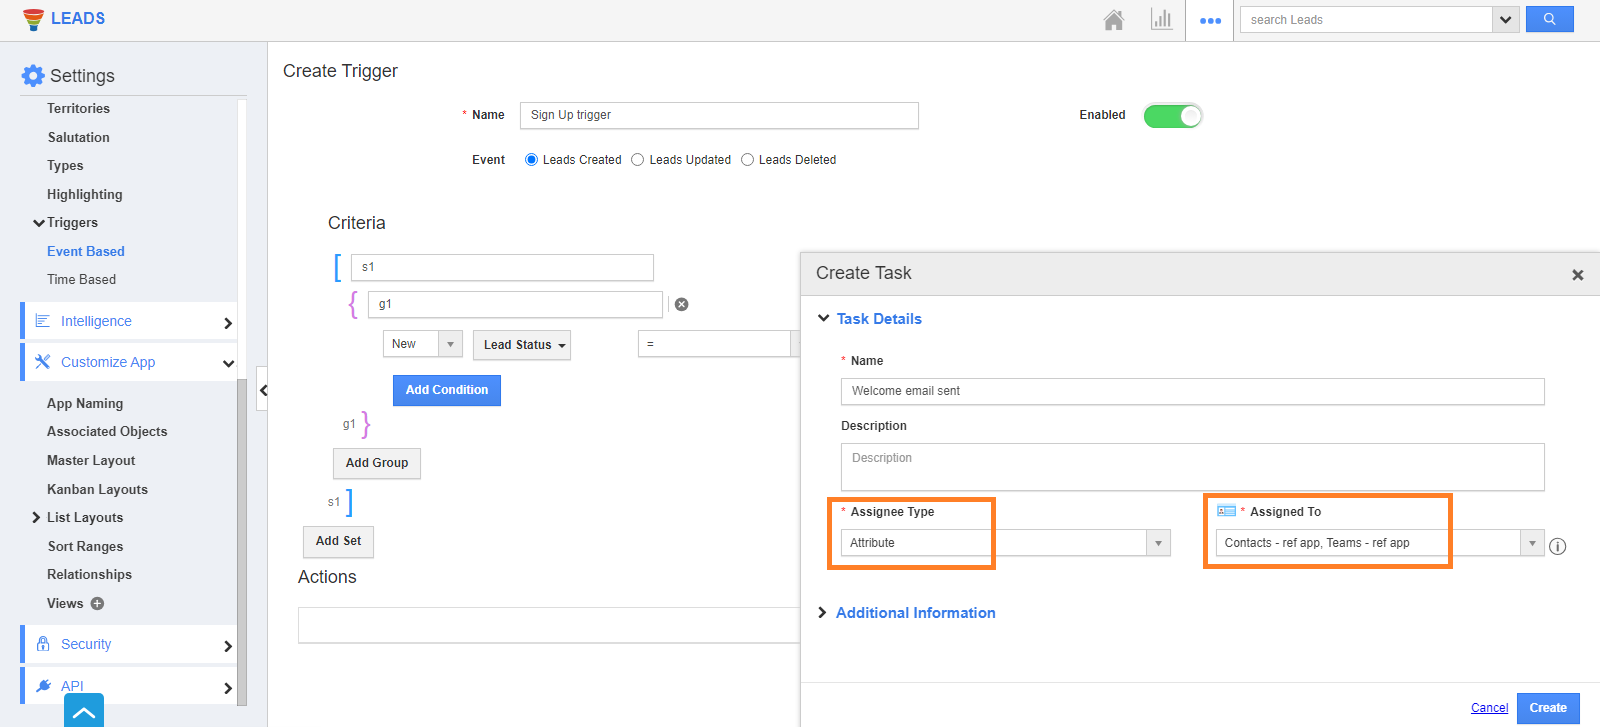
- You have two options for the assignee type from the dropdown, Employee & Attribute.
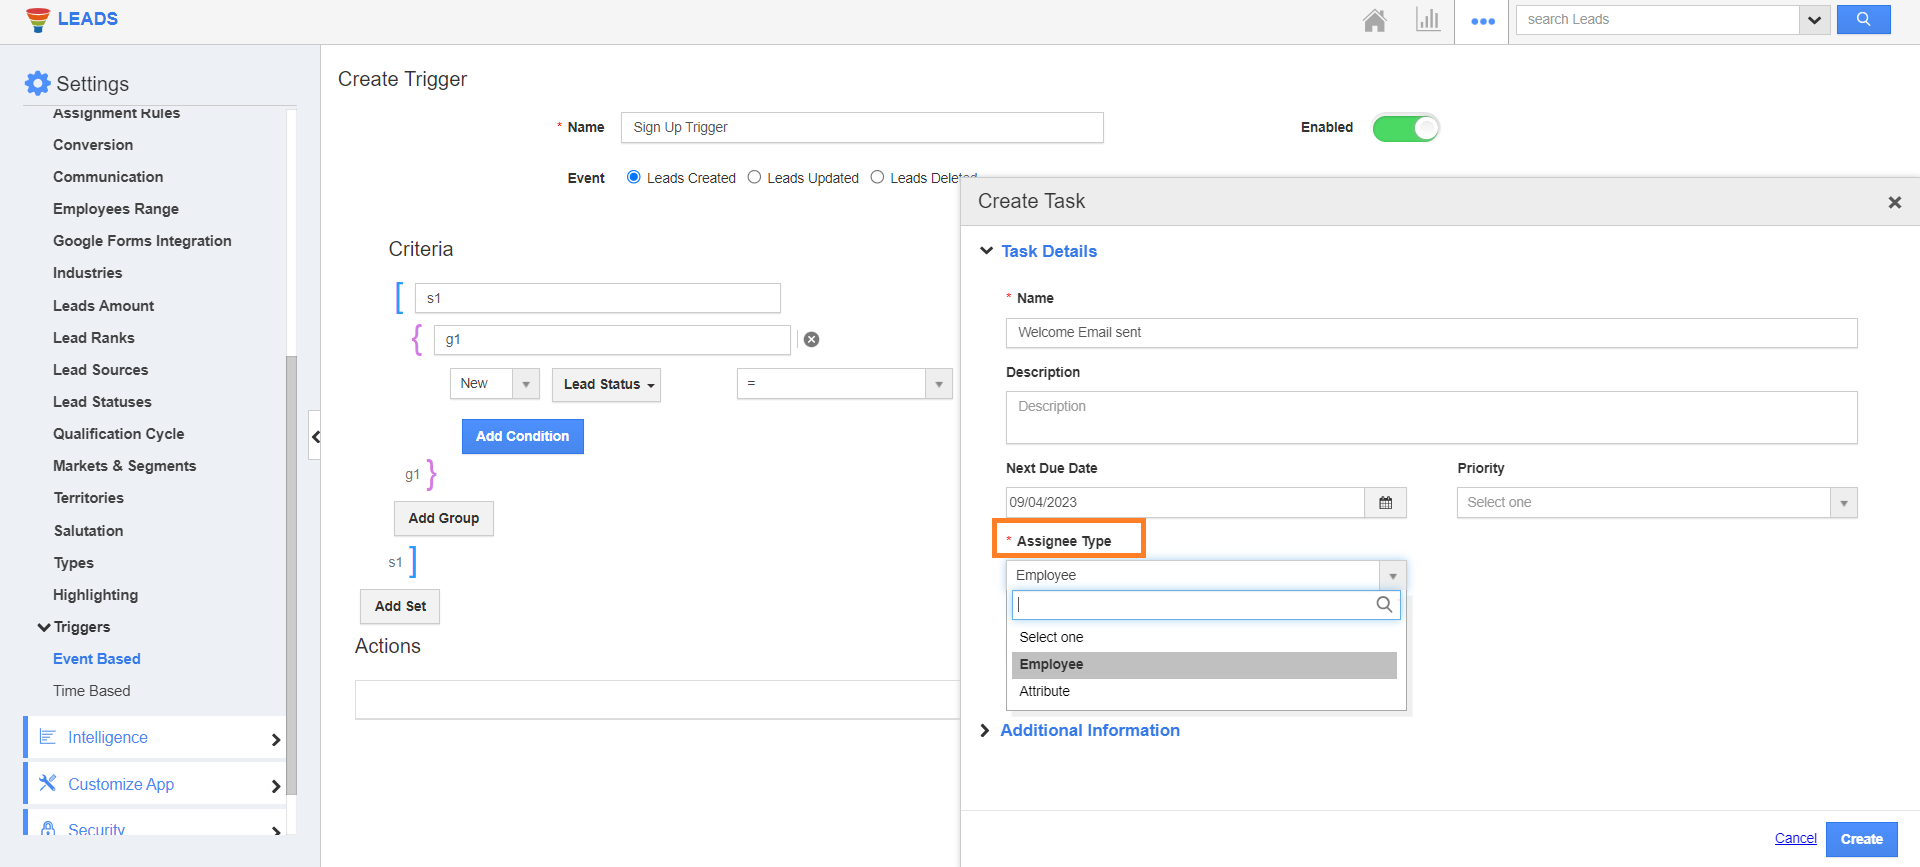
- Employee: This option provides static assignees drawn from employees, teams, and contacts. By default, the assignee will be a Logged-in user. You can modify this by clicking the '+' button next to the field, searching for the desired name, and selecting it.
- Attribute: This allows you to dynamically set the assignee based on certain attributes from Lead. When you choose "Attribute," the "Assigned To" field dropdown will display with the Lead's Ref. App attributes, such as Employee, Team, and Contacts.
- Select "Create". This action is added to the trigger.
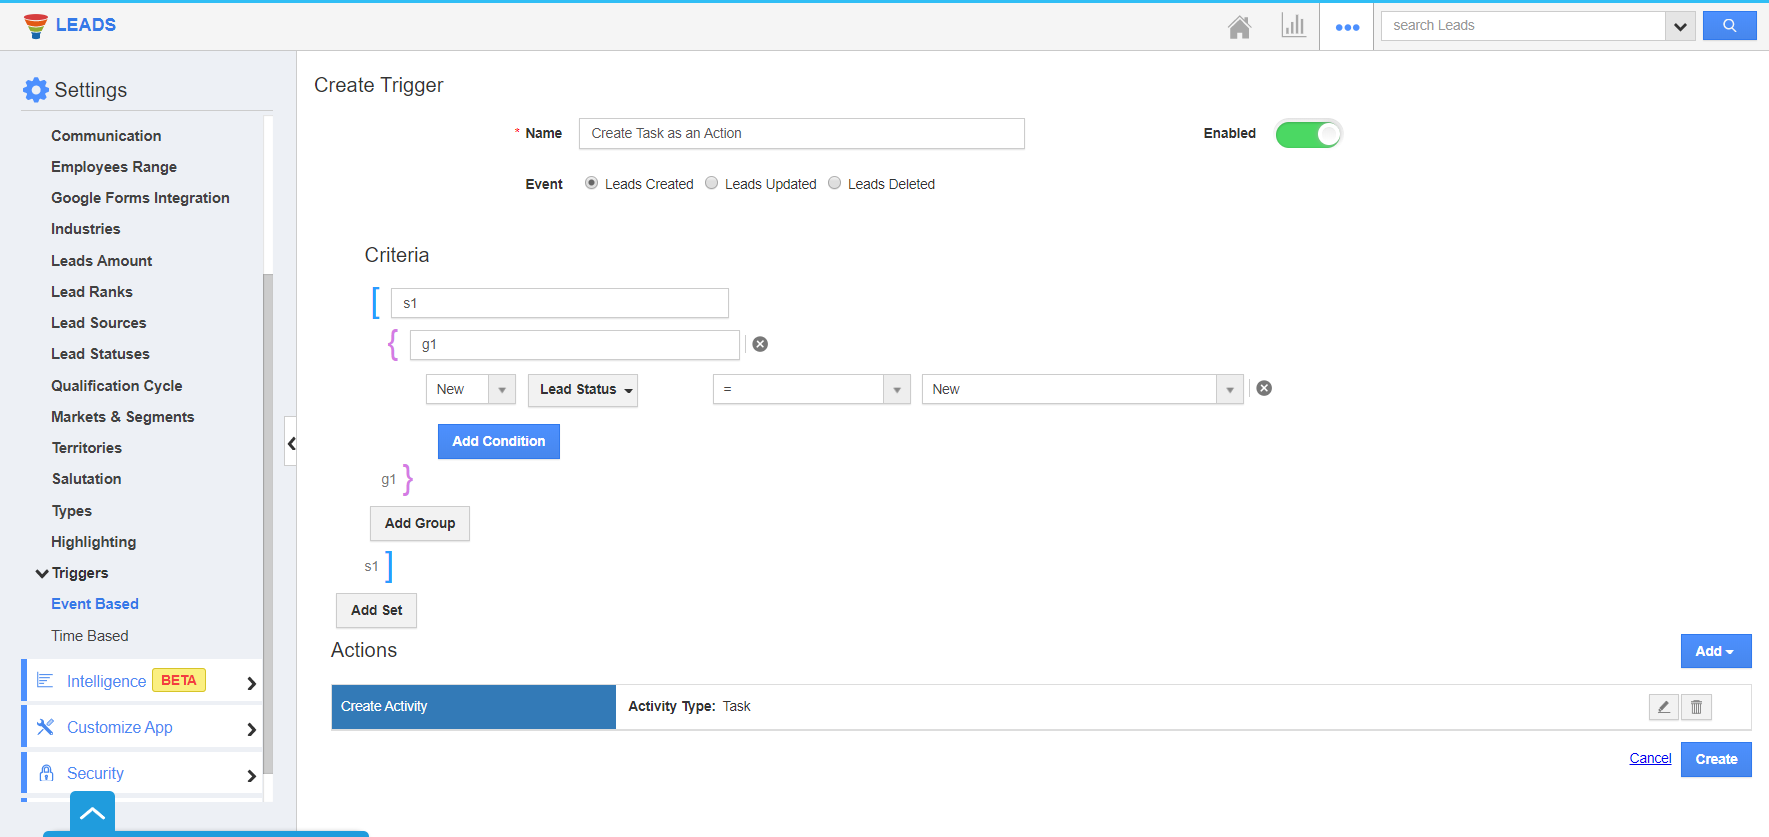
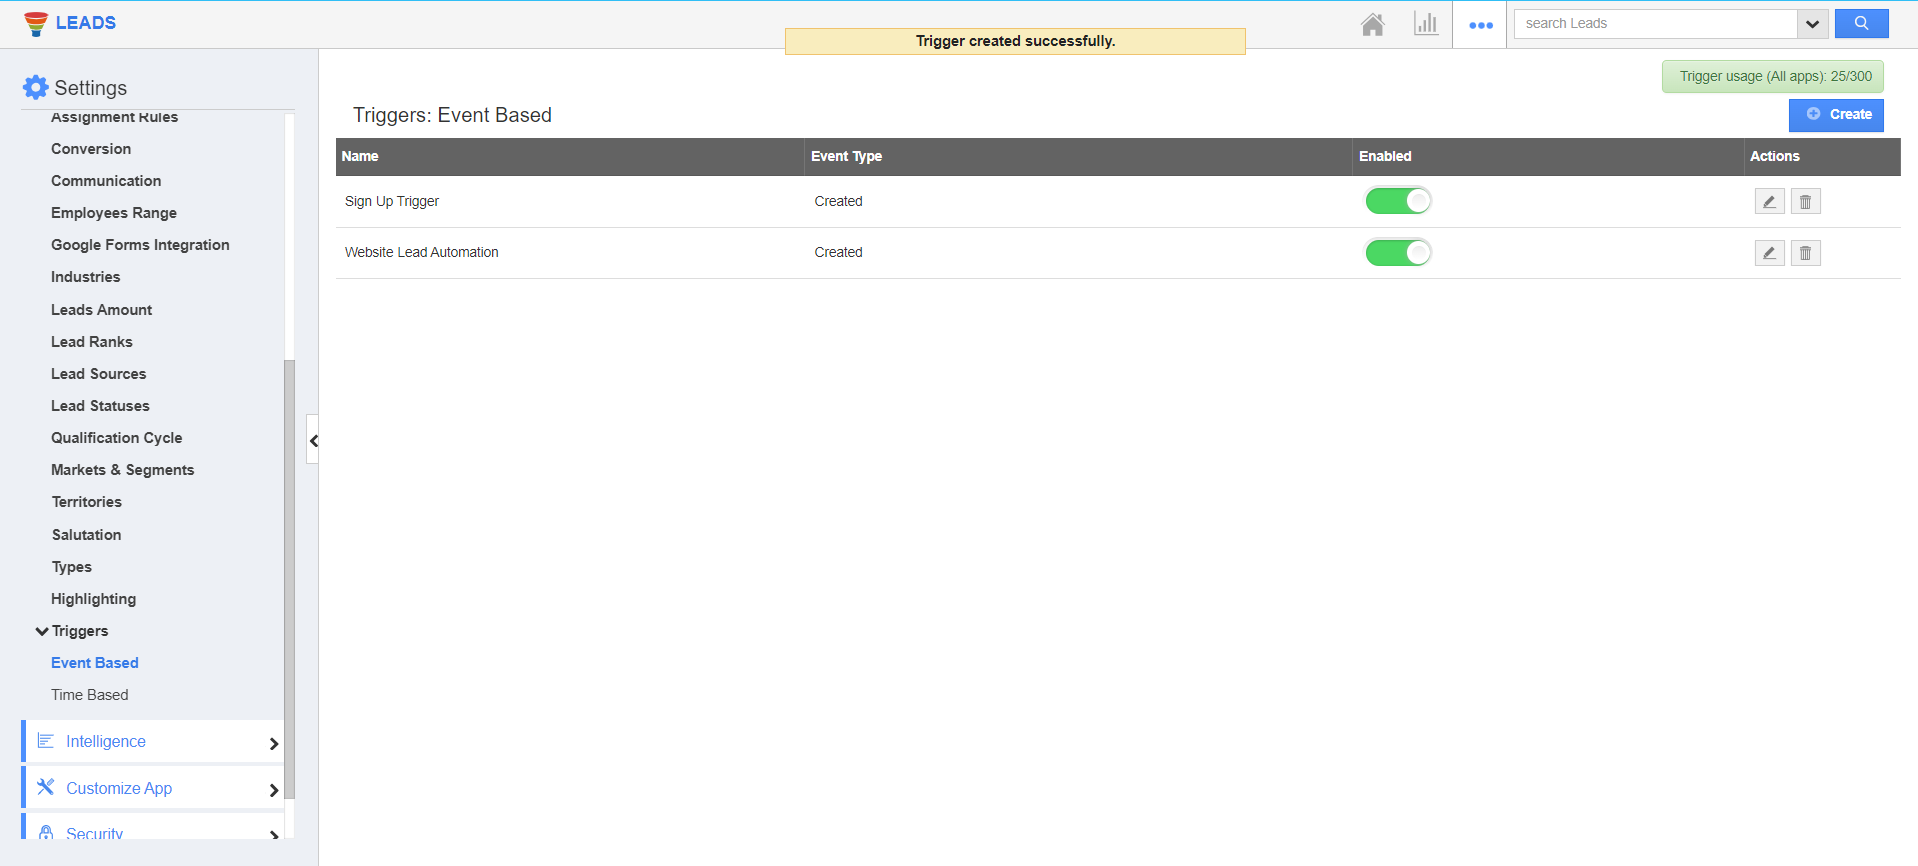
- Once the changes are made, select Create. A new trigger is created.
- Now, when you create a new lead within the Leads App and set its status as "New”.
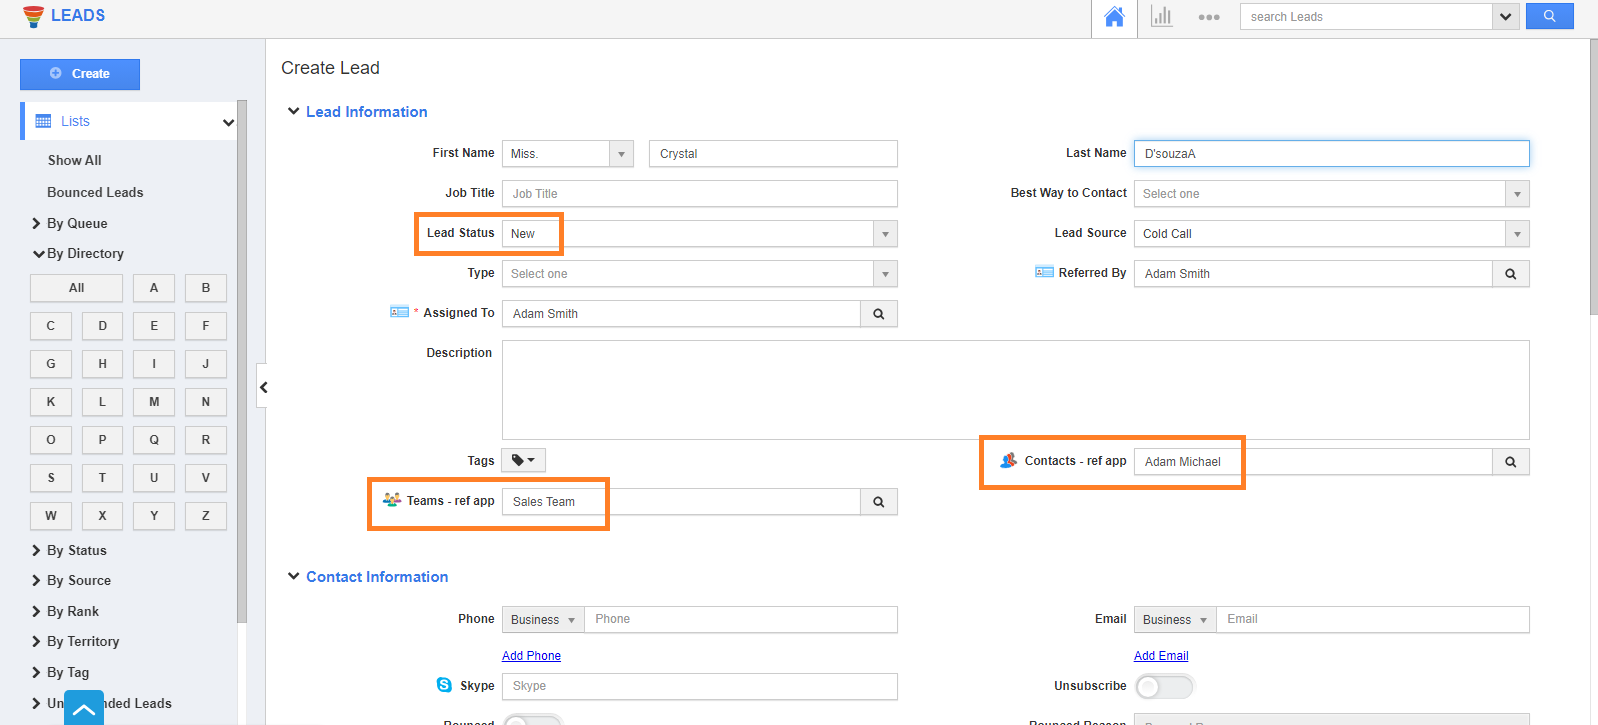
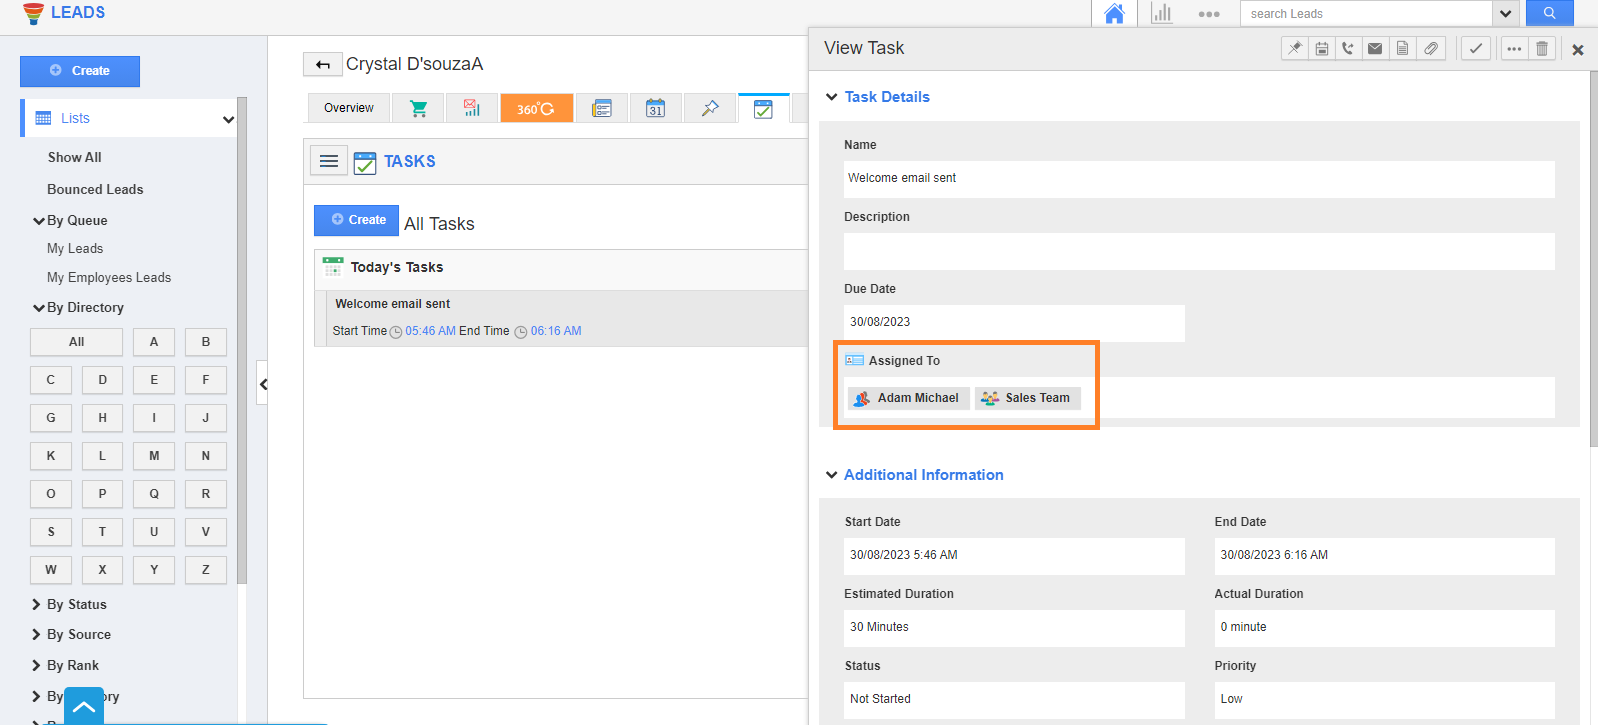
- As per the trigger configuration, a new task will be automatically generated in the Tasks tab and it will be assigned to the team and contact associated with the lead.
- Click on the Task Tab from the leads overview page to view the task information.

Note:
- If the Reference App doesn't have the value, then the task will be automatically assigned to the owner of the record (i.e., If the lead is not assigned to the sales rep, then it will be assigned to the person who created the record).
- More than one action can be added for a trigger.
- Dynamic task assignment can be configured for Event-Based and Time-Based Triggers.

