Browse by Solutions
Browse by Solutions
How to Customize Table Layout with “My Layout” Feature?
Updated on September 1, 2023 03:29AM by Admin
Unlocking seamless customization across all applications, users can now effortlessly tailor their table layout using the 'My Layout' feature. This powerful functionality empowers individuals to personalize their table layout by adding or removing fields, strategically arranging their placement, and fine-tuning the layout to meet their precise needs. Traditionally, the process of customizing and reorganizing fields was laborious, often necessitating intricate coding. However, with this innovative feature at your disposal, the complex and time-consuming task of field customization is made super easy.
Users have the flexibility to effortlessly shape their App table layout according to their preferences, offering a significant enhancement in efficiency and usability.
Steps to Configure
- Login and Go to the Leads App.
- In the Leads Home dashboard, Click the Display dropdown to locate “My Layout”.

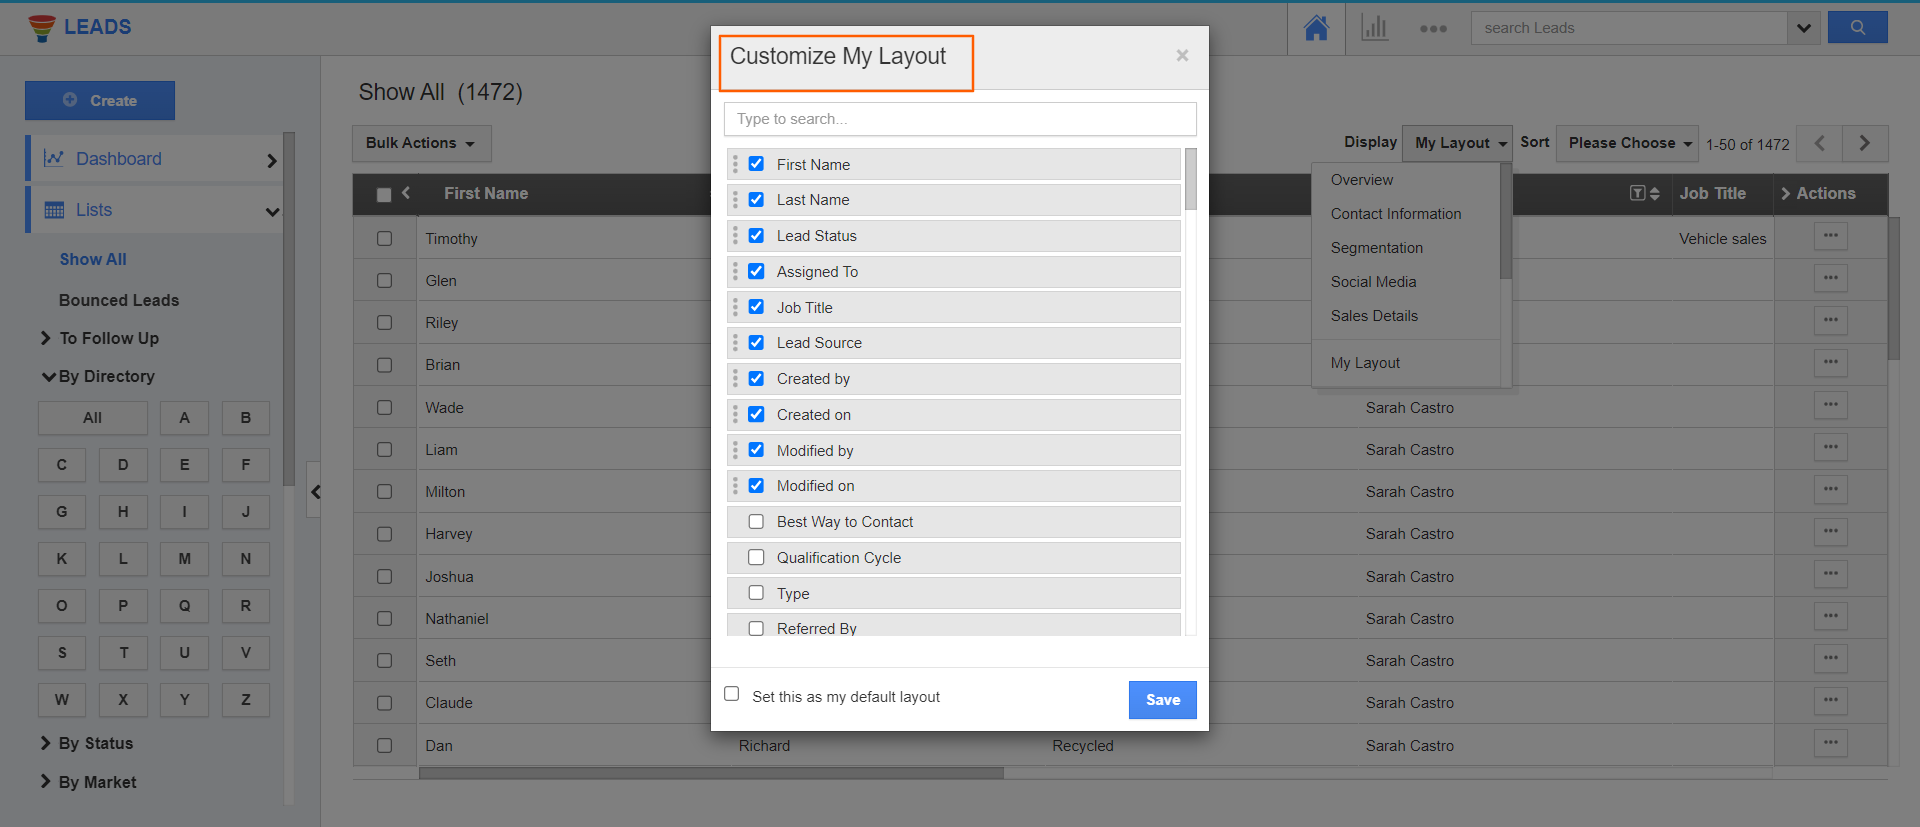
- Click the edit icon next to the “My layout” Option. A popup “Customize My layout” will appear.

- Use the search bar to find the specific fields. For example, if you're looking for the "Shipping Address" field, type it into the search bar. Fields associated with the keyword "Shipping Address" will appear.
- Check the fields you want to include in your table layout and then click the "Save" button.

- You can also check or uncheck the fields needed to customize their table layout, as per their requirements.
- For instance, a marketing company can streamline their workflow by selecting essential fields like First Name, Last Name, Lead Source, Qualification Cycle, Last Contacted, Status, and Phone Number.
- This customization not only declutters the view but also ensures that vital lead information is readily accessible, leading to more efficient lead management and communication

- Additionally, You have the flexibility to rearrange the placement of fields based on their priority by simply clicking the '...' icon located at the beginning of each field.

- Traditionally, only "Super Users" could modify the layout through the "Settings" menu, saving it as the default layout. However with this feature, Every user can personalize and customize their table layout for each of the apps within Apptivo, aligning it precisely with their preferences.
- When making layout changes, remember to click the "Save" button. It's essential to note that saving the layout won't set it as the default. When the user logs back into the system, the previous layout will remain intact, not the one that was saved.
- To establish the customized layout as the default view, simply click the "Set this as my Default Layout" option and confirm by clicking "Save." This action ensures that the personalized layout becomes the default display for future logins, enhancing the user's overall experience.

- The Layout has been Updated and set as a “Default Layout” in standard and custom views.

- Customizing the table layout offers users the flexibility to tailor their interface to meet specific needs.

Note:
- My Layout feature is established at the user level and is accessible to all users.
- Each individual user has the capability to create a single "My Layout" for each application they use.
- Users are provided with the option to designate their "My Layout" as the default layout, and this choice will take precedence over the default settings set by the Admin.
- Users have the flexibility to customize their "My Layout" at any time to suit their specific needs and preferences which can be applied to standard and custom views within the application as desired.
- You have the option to remove the currently applied default "My Layout" by unchecking the "Set as my Default layout" checkbox within the Customize My Layout pop-up.

