Browse by Solutions
Browse by Solutions
How to share 'My Views' with specific employees or teams ?
Updated on August 31, 2023 05:14AM by Admin
Whether you're a small business owner or part of a larger enterprise, a customized Table View becomes a strategic asset. It empowers you to shape business strategies, propelling growth to new heights.
Customization extends to column selection, letting you handpick fields for a tailored view of information. These Table Views are fully customizable, allowing you to focus solely on the data that matters to you.
You have the ability to share these tailored views with specific teams or employees. This targeted sharing streamlines tasks and boosts efficiency. By following straightforward steps, you can enhance data visibility and foster teamwork, driving your business endeavors forward.
Steps to share "My Views" with Employees/Teams in the Contacts App
- Log in and access Contacts App from your universal navigation menu bar.
- Click on the Advanced Search (Down Arrow) icon located at the app header bar.
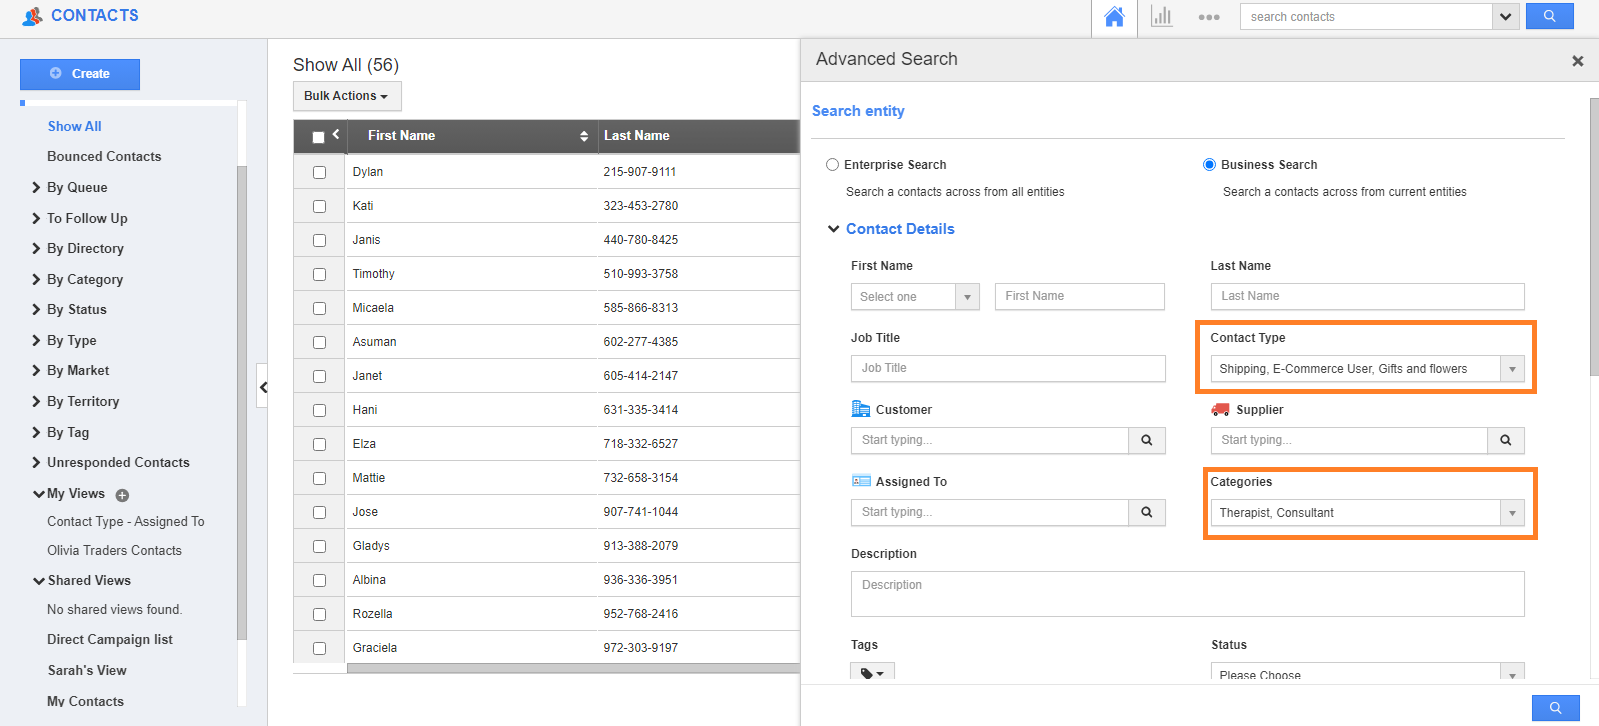
- Customize your search by inputting specific criteria, which can involve multiple fields. These criteria will be treated as an "AND" condition, meaning all specified conditions must be met.
- Once you've set your search criteria, the search results will be displayed as shown in the image below:
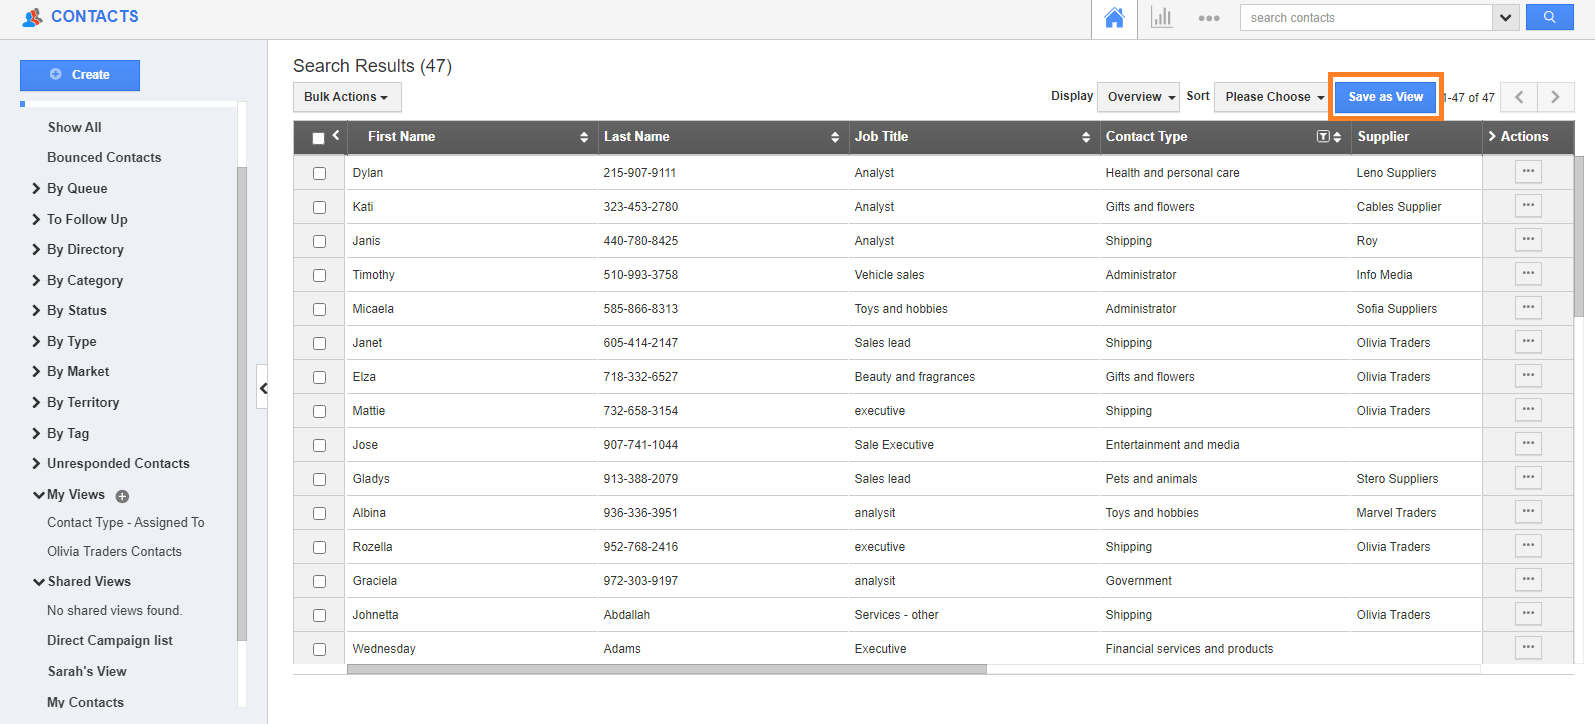
- Click on the Save as View button.
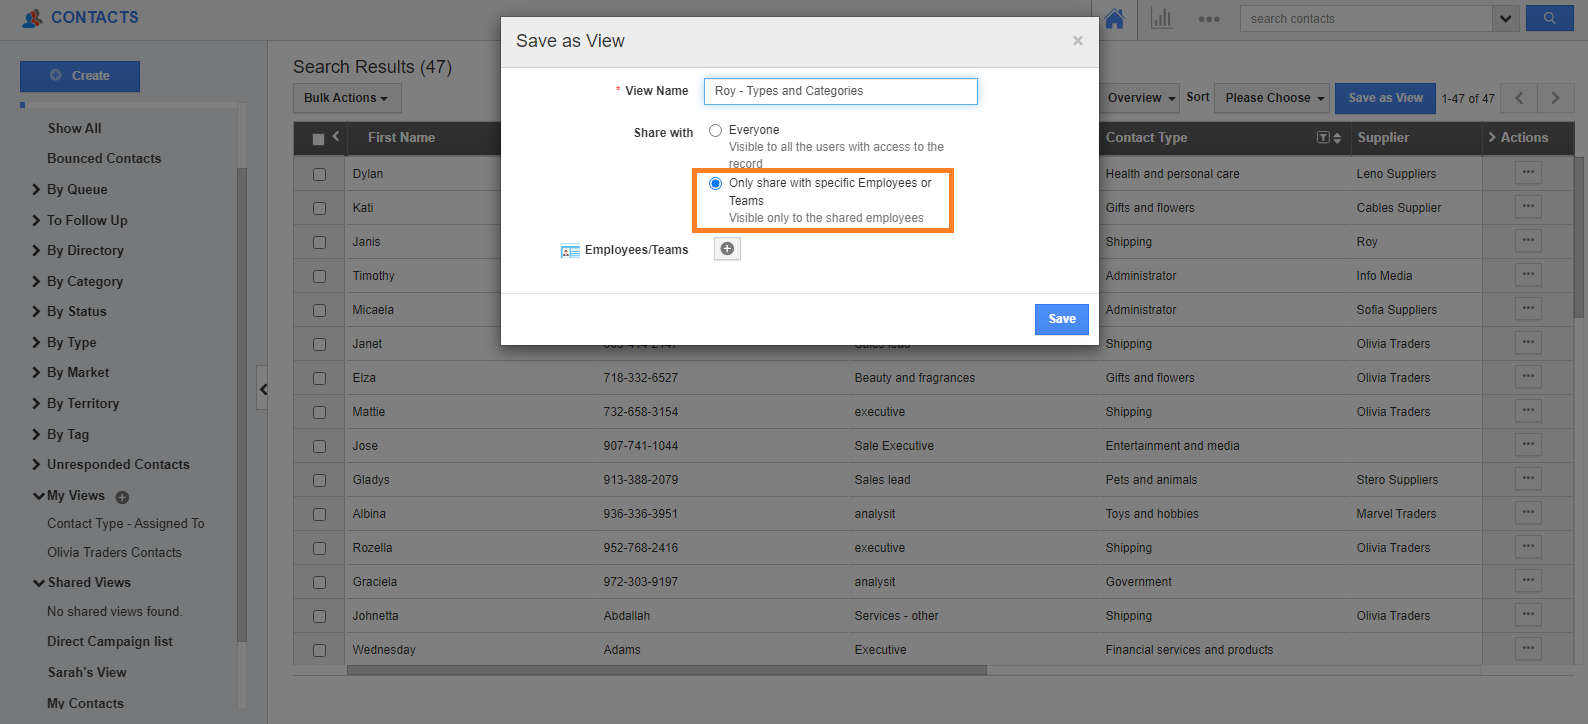
- The Save as View popup will appear, where you need to provide the following information:
- View Name –When creating a view, it is essential for the user to remember the importance of a unique view name; using a similar view name is not recommended.
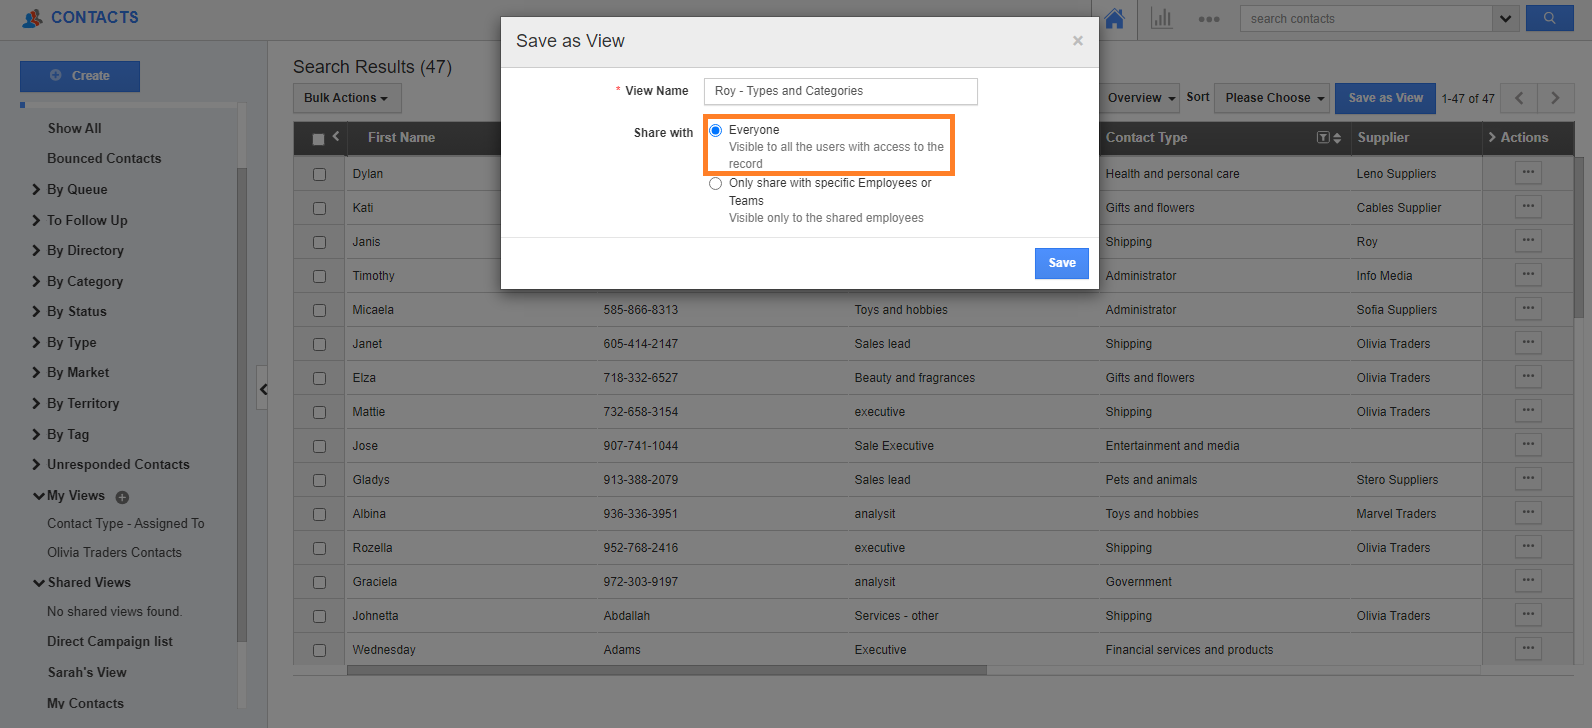
- Share with - You can define how and to whom you want to share the created view. You have two options:
- Everyone - By selecting this option, the view will be shared with all the employees in your organization.
- Only share with specific Employees or Teams - By selecting this option, , you can choose individual employees or teams to share the view with. To do this, click on the "+" icon, which will open an employee search and select pop-up. From there, you can add multiple employees according to your preferences.
- For Example, here I have added Jensen Rose, Stemphany John and Sales Team.
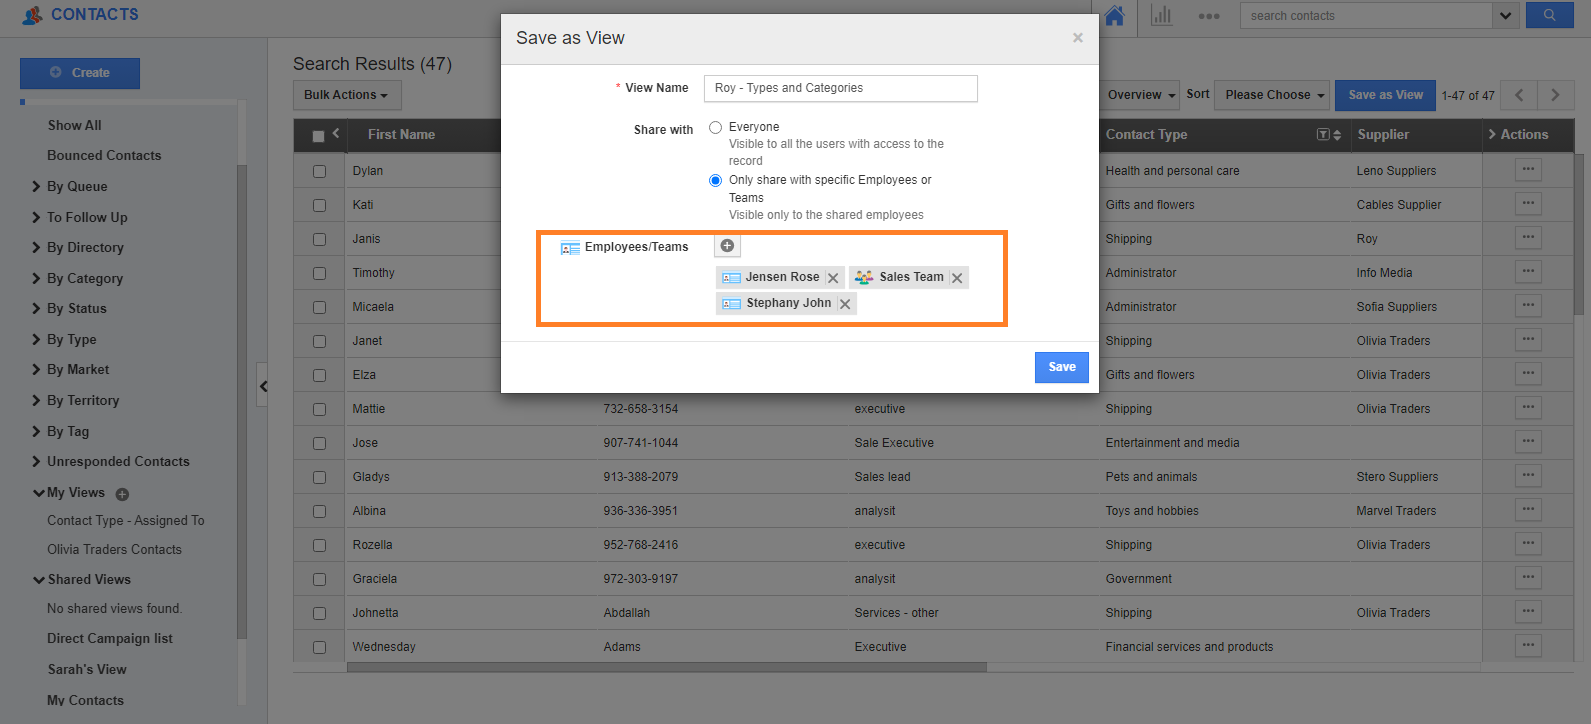
- After specifying the view name and sharing options, click the "Save" button. The view will now be shared with the selected employees and teams.
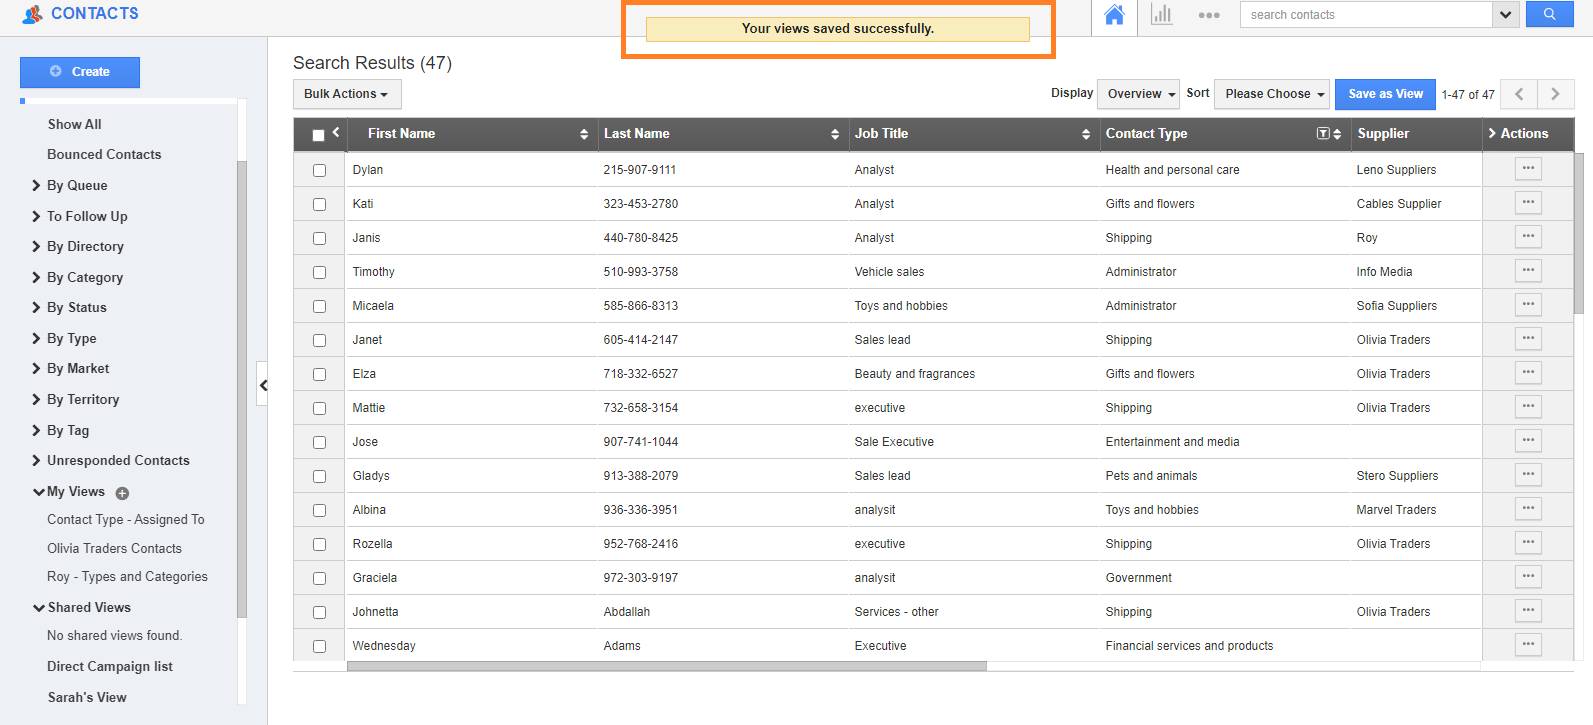
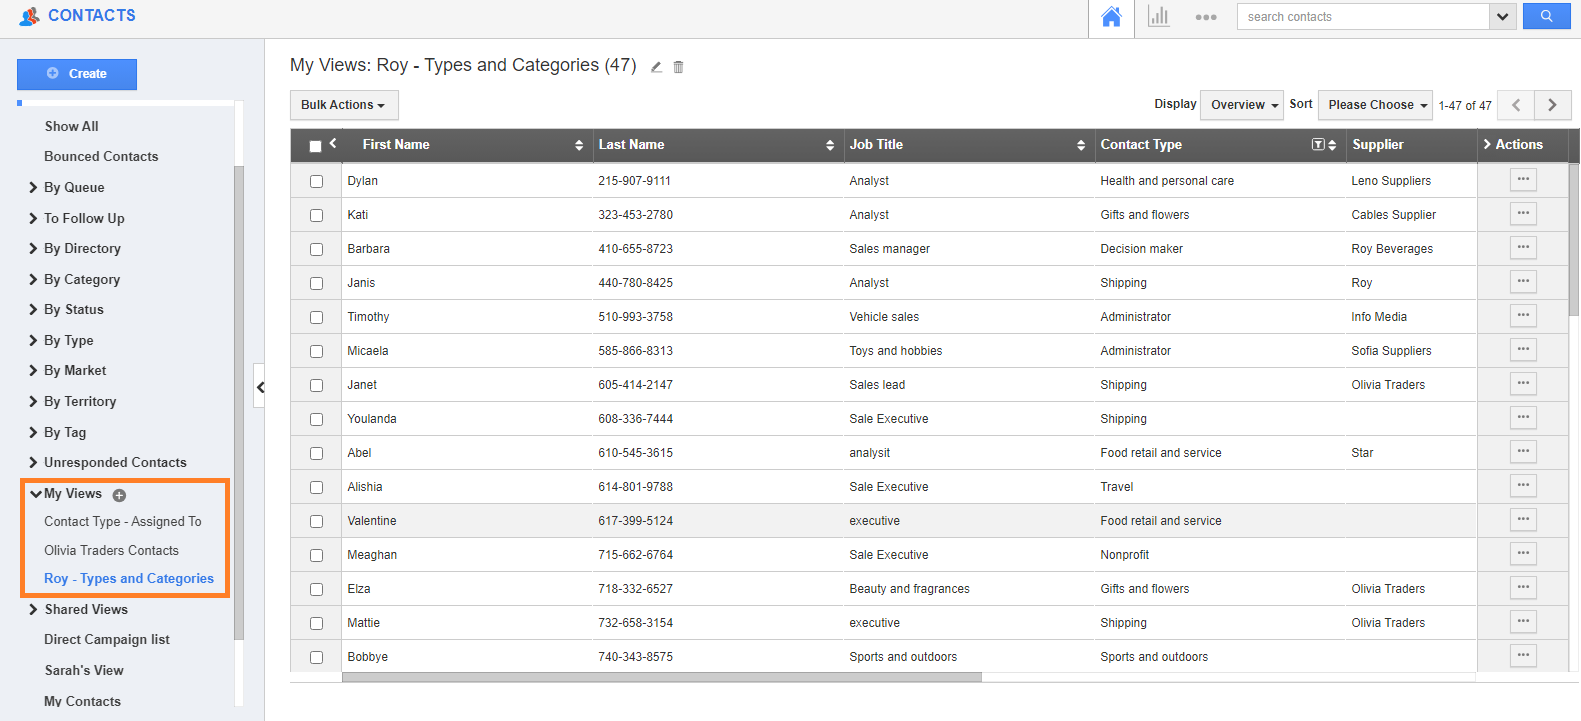
- You can access the created view under the "My View" section in the Left Panel.
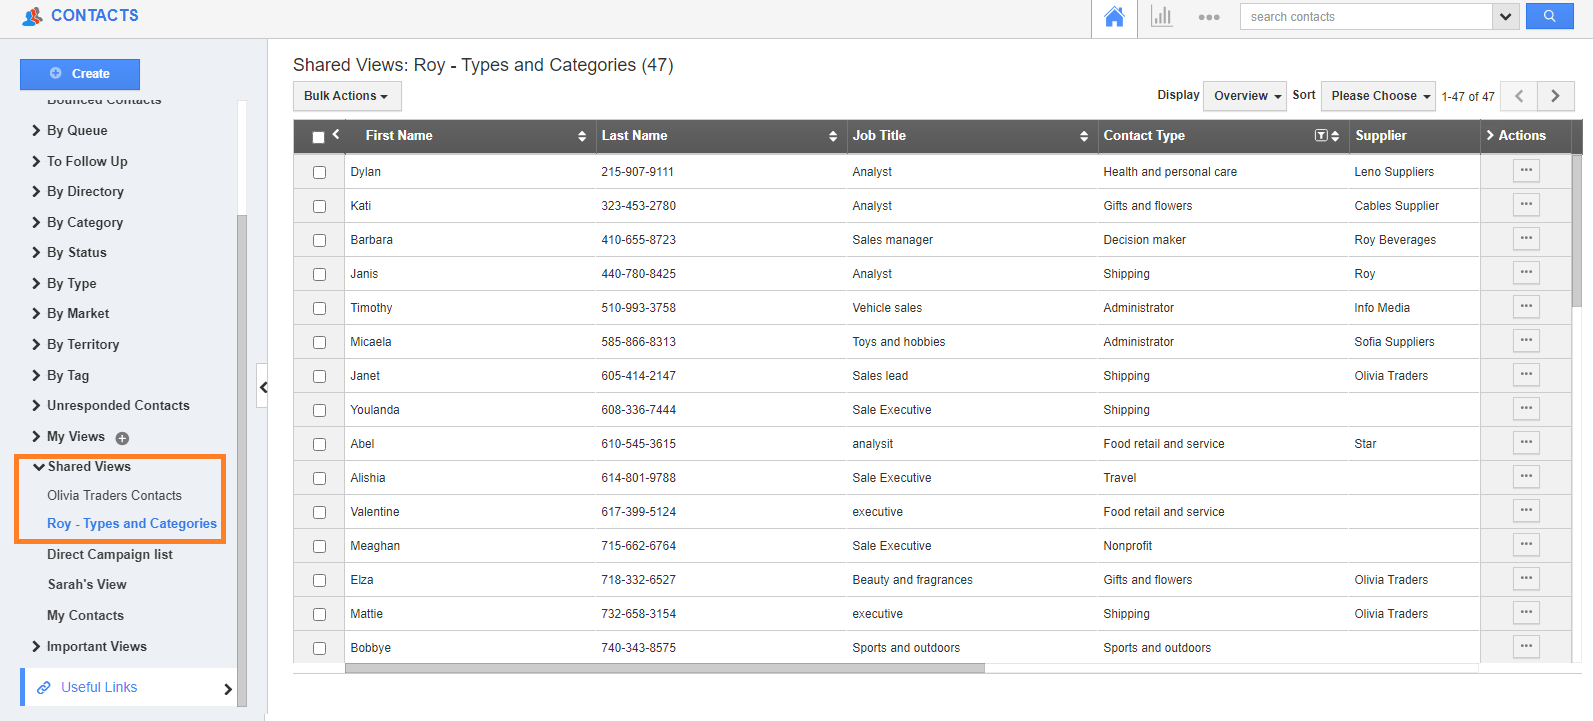
- Any views that have been shared with other employees can be found in the "Shared View" section.

Note:
- The view that has been shared with an employee can be accessed and managed based on their access level.
- The view shared with other users can be managed and deleted at any time by the owner of the view.
- The default option is "Only share with specific Employees or Teams." If you believe the view should be shared to all those employees, you can choose on the “Share with Everyone” option.
- The view you've created will appear in the "My View" section, while the individual it was shared with will access it from the "Shared View" section.

