Apptivo Triggers allows you to perform automated actions like triggering an email or updating an attribute based on a particular criterion. With triggers, you are able to specify exactly how automation will be initiated. You can add multiple triggering conditions so that the same automation is initiated for multiple events.
Apptivo apps allow setting two types of triggers. They are listed as follows:
Event Based Triggers
The Event Based Triggers in the Apps are initiated when we have to execute an action after the occurrence of a certain event. Event Based Triggers are built upon concerning three major events in the object.
Once trigger criteria are set, these are the automatic actions that can be triggered:
- Send Email - An email can be triggered to the Referred By, Assigned To, Customer, Employee, or a Team.
- Update Attribute - Updates a particular attribute value.
- Update Associated Object Attributes - Updates the attribute values of its associated objects.
- Call a Webhook URL
- Tasks - New Tasks can be created on criteria matched on the trigger.
- Event - New Event can be created.
- Note - A new Note also can be created based on the trigger criteria.
Note: More than one action can be added for a trigger.
Steps to Create an Event-Based Trigger
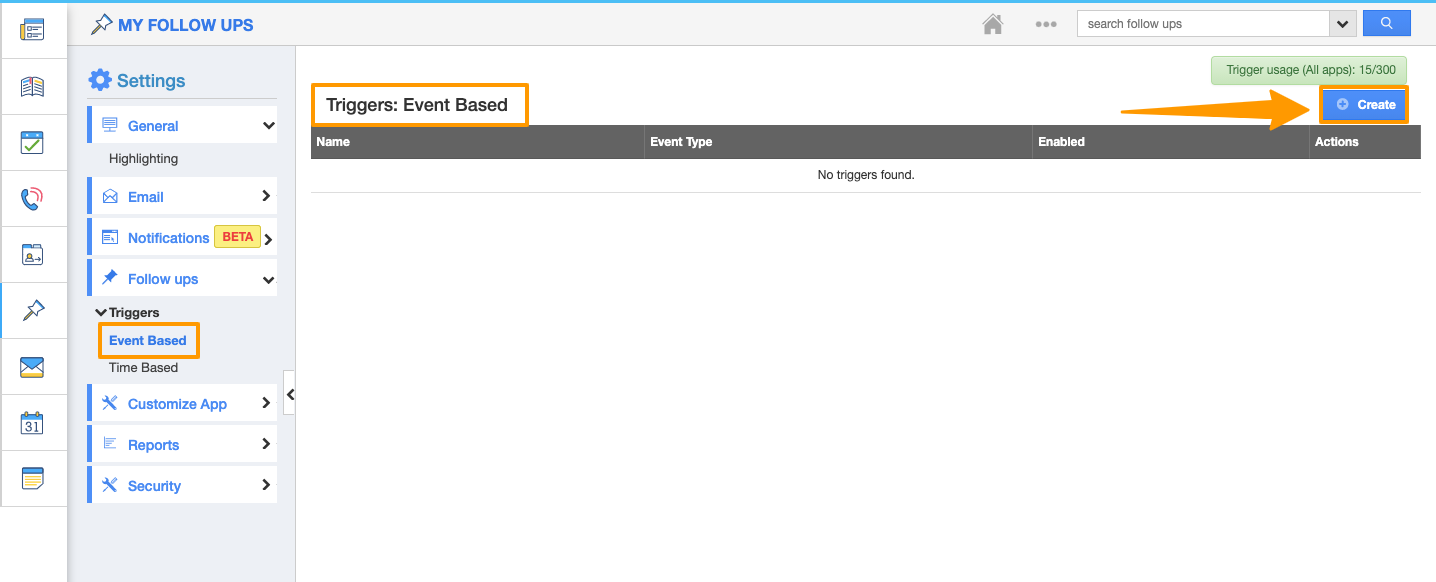
- Log in and access Follow-up activity from your Universal navigation menu bar.
- Click on the “More (...)” icon → “Settings”.
- From the Settings page, click on the “Follow-Ups” → “Triggers”. Select Create to create a new trigger.
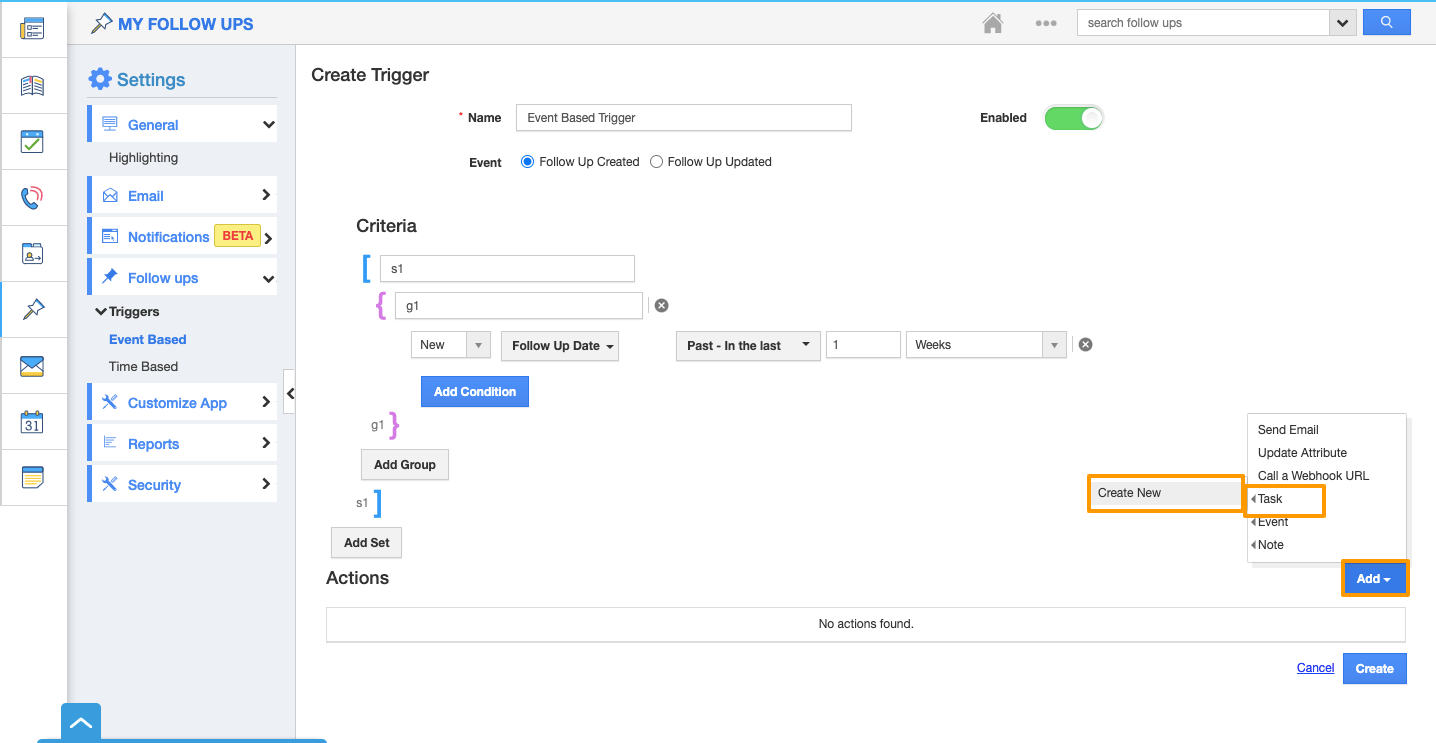
- In the Create Trigger page, define the following:
- Name - Enter the name of the event-based trigger.
- Enabled - Slide the toggle ON, to keep this trigger working.
- Event - Choose an event for the trigger. Here, Follow Up Created.
- In the Criteria section, mention the condition during which the action has to occur. Here, a trigger is to be generated when the Follow-Up Date in the next Week.
- Set the type of trigger from the Actions page. Here, Create Task is selected.
- The Create Task side panel will appear. Add the task details and save the trigger.
- Click on the create button to create a trigger.
- Create a new follow-up in the Follow-Up App.
- As the criteria match, a new task is created automatically on the Tasks.


