The Invoice app of Apptivo enables you to configure e-invoicing in your account. With this, businesses can effortlessly integrate their account in Invoice Registration Portal with Apptivo. The invoices submitted in Apptivo will automatically be recorded in Invoice Registration Portal thereby establishing an effective synchronization.
Note: This feature is available only in the Ultimate and Enterprise plans of Apptivo and can be accessed only by the users in India.
Steps to configure e-invoicing
Integrating with Apptivo
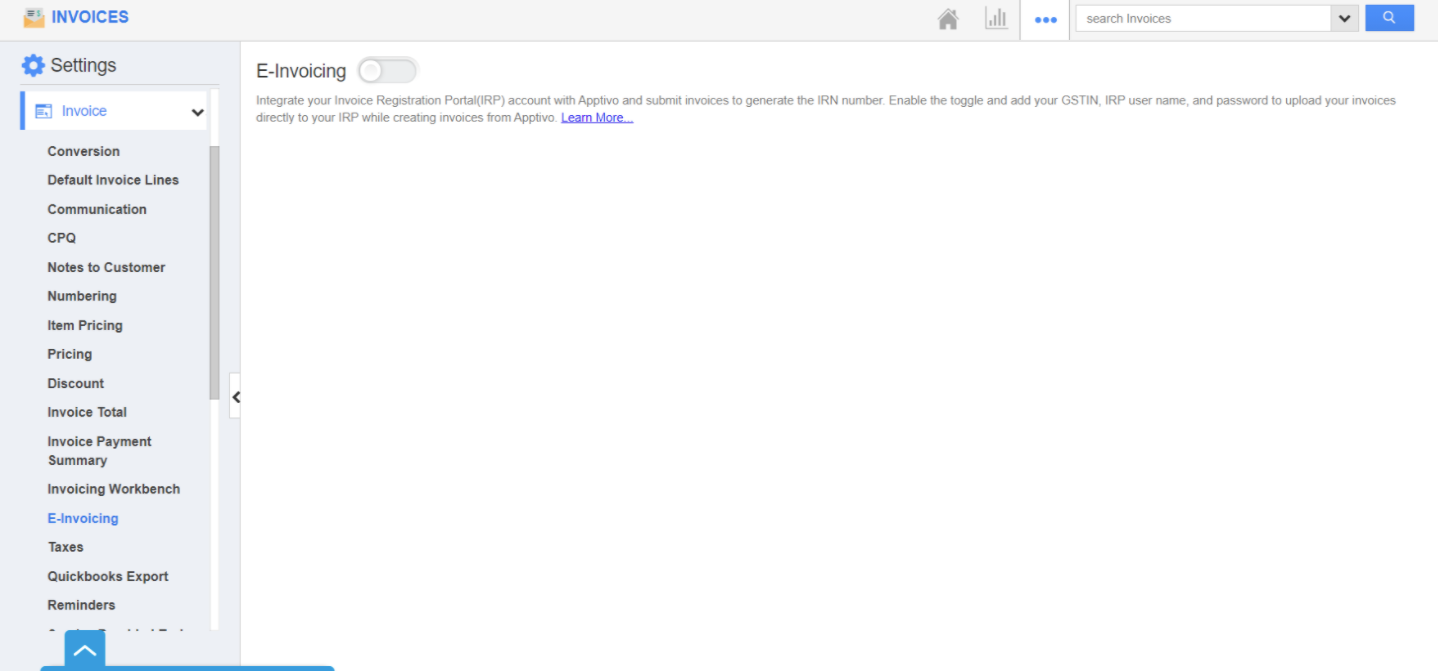
- Log into your Apptivo account and navigate to the Invoice app. Here, select Settings from the App Header.
- Go to Invoice → E-invoicing from the left navigation panel.
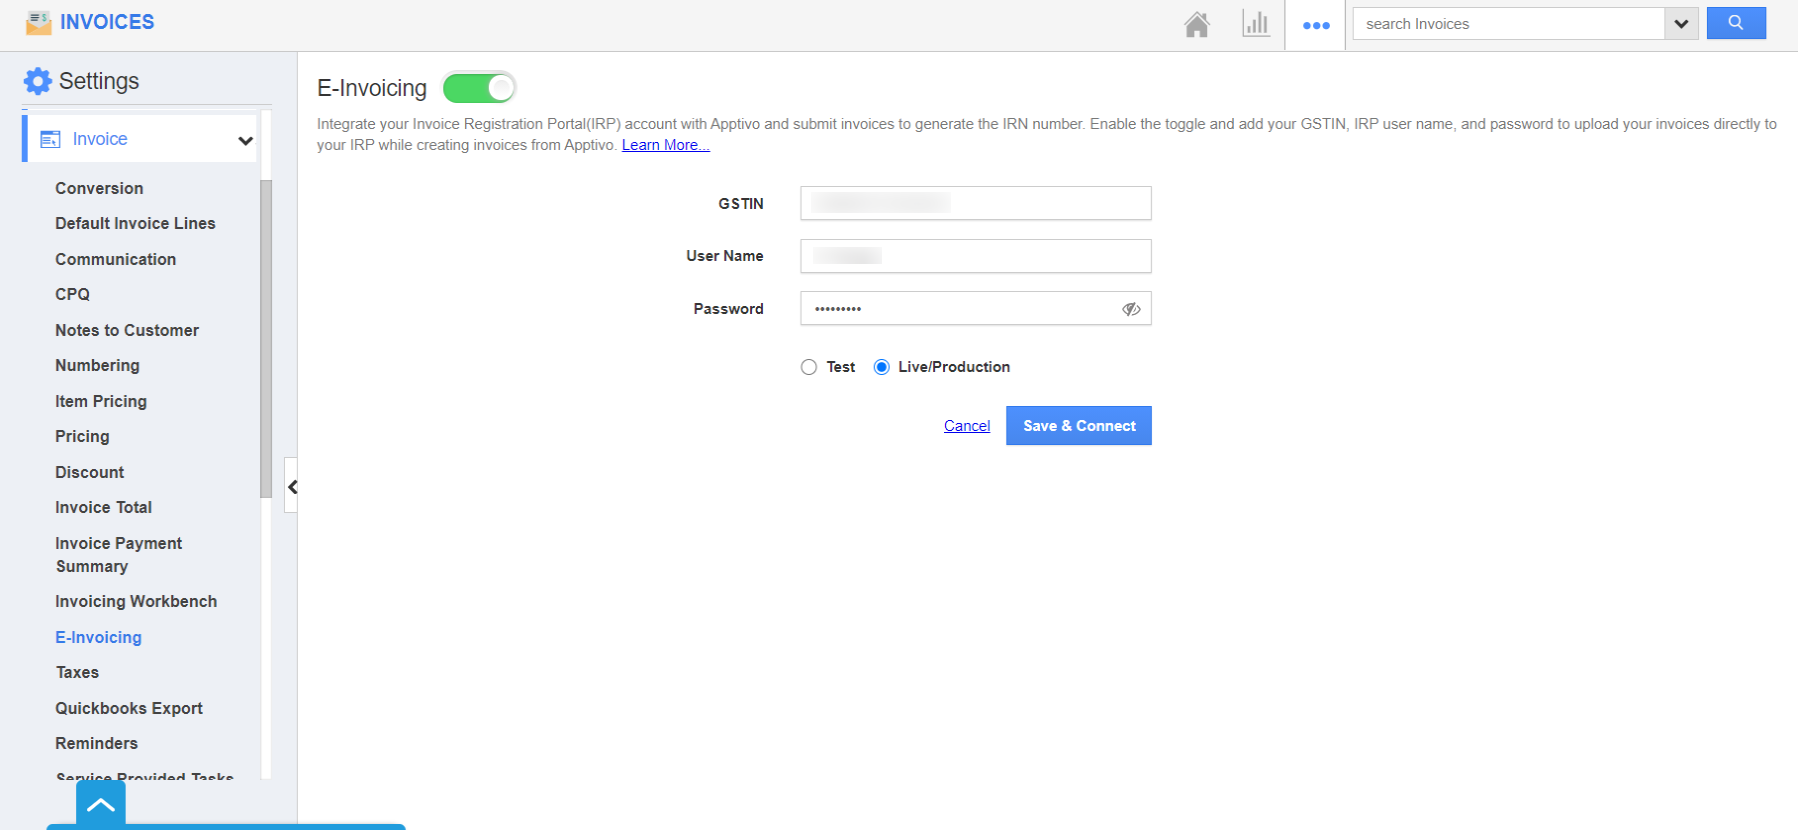
- Once the toggle is enabled, Integrate your account with Invoice Registration Portal by adding the below information:
- GSTIN (Number Field)
- User Name
- Password
- Once the credentials are added, choose the Live/Production radio button. Click the Save & Connect button.
- Your account will be integrated directly with the billing portal.
Note: To authenticate the IRN with the Apptivo account, you have to register your Apptivo account with the e-Way Bill portal, and generate the username and password.
New Sections in the Master Layout
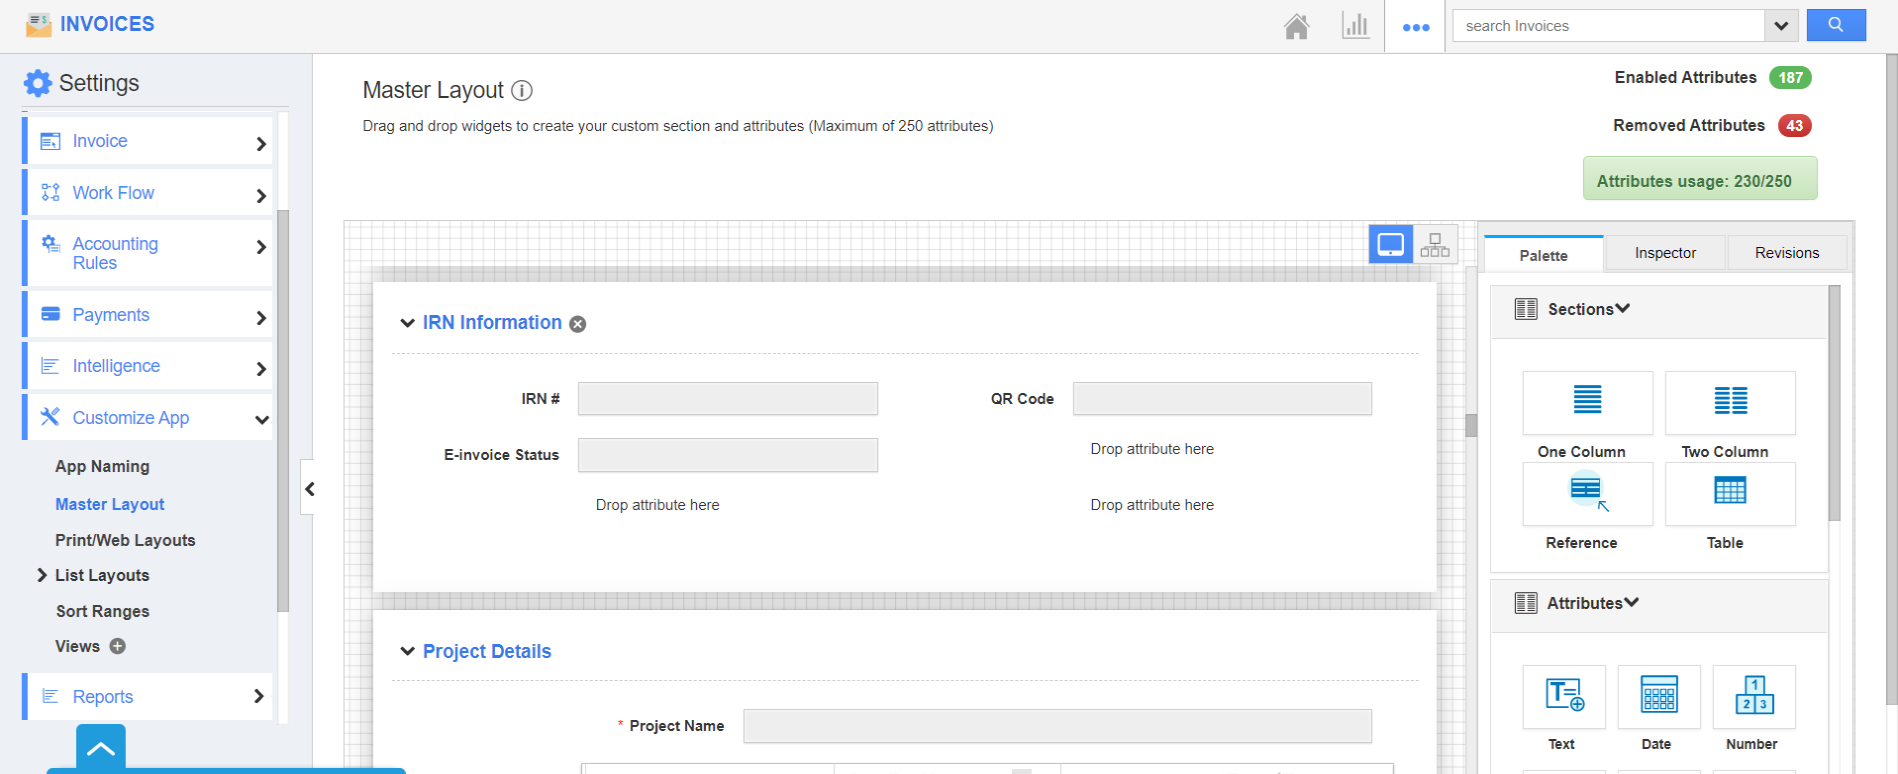
Once the toggle is enabled, an integration is established, new sections are added to your Master Layout in the Invoice app.
- To view the Master Layout page, go to Settings → Customize App → Master Layout.
- Two sections, E-Invoice Information and IRN Information are added to the Master Layout.
- Along with this, a new field called HSN Code is available in both Products/Items Sold and Services Provided table.
Applying in the Overview page
The sections included in the Master Layout after enabling the toggle will be visible only while viewing an invoice. These sections do not come into view while creating new invoices.
- Create a new invoice in the Invoice app of Apptivo. Here, the E-Invoice Information and IRN Information sections are not visible.
- Once the invoice is created, the two sections come into view.
- Now, edit the fields in the E-Invoice Information with appropriate values and save the changes.
- The IRN Information section is an uneditable field. The IRN# will be generated once the invoice is submitted.
- Also, add the HSN Code in the Products/Items Sold table and/or Services Provided table based on your configuration.
Please note the E-Invoice Information section, IRN Information section, and HSN Code fields are mandatory and should be filled with the right values.
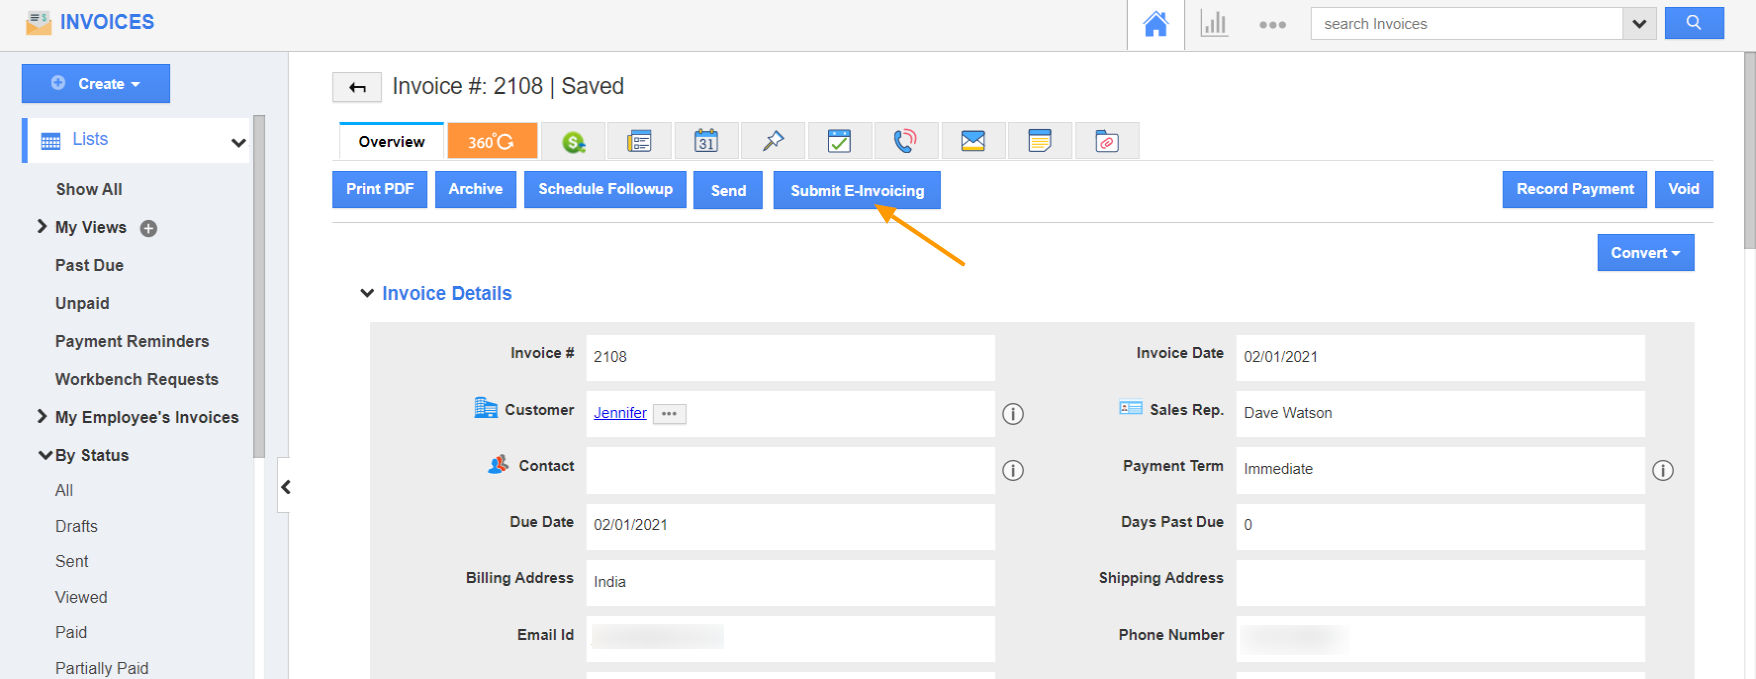
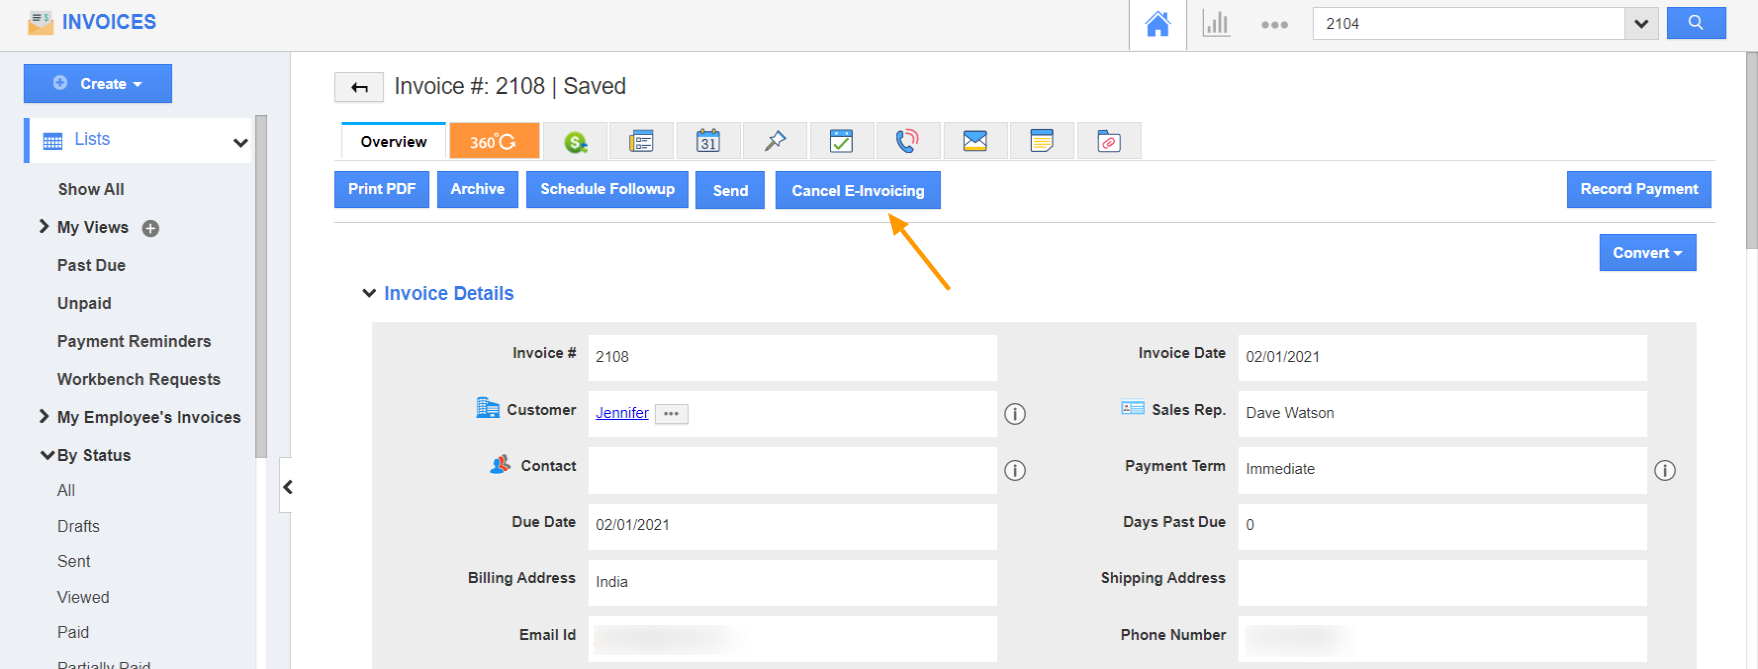
- Save the changes. Click the Submit E-Invoicing button to submit the invoice in the Invoice Registration Portal.
- As soon as the invoice is submitted, the IRN section is filled automatically.
- Here, you can view the IRN# and QR Code.
Note: The submitted invoices can be canceled only within 24 hours of submission.
Left Panel Views
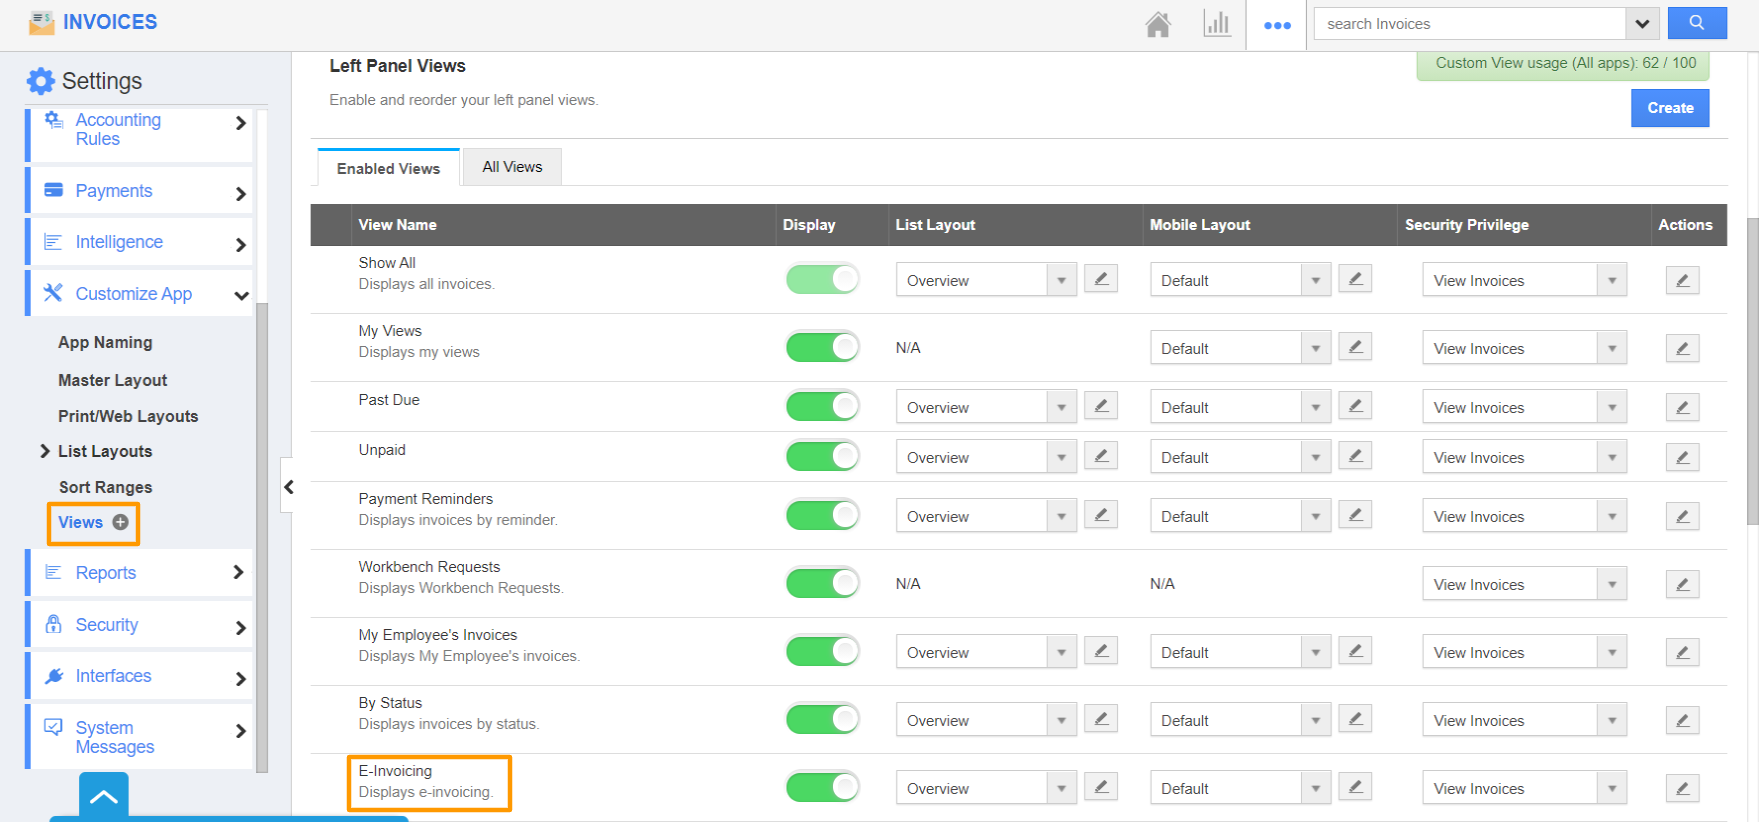
Now, you can view your e-invoices in the left navigation panel based on their status. The invoices can be filtered smoothly based on their statuses:
- Not Submitted
- Submitted
- Canceled
- Failed
- This left panel view is configured from the Settings → Customize App → Views in the Invoice app of Apptivo.
Supported Sections in Print/Web Layouts
The sections displayed in the Master Layout are also available in the Print/Web Layouts. Here, the invoices are printable with the two added sections along with the QR code.
- To view the Print/Web Layouts page, go to Settings → Customize App → Print/Web Layouts.
- The two sections are available here also.
- Also, the HSN Code field is also added in both Products/Items Sold and Services Provided table.
