The Teams app of Apptivo enables you to create a custom view that meets your business purpose. It is a great method to easily list out the desired records and remove any redundancy.
Steps to create a view
- Log into your Apptivo account and select the Settings from the App Header of Teams app.
- On the Settings page, go to Customize App → Views in the left panel. The View page will come into view.
- Click create to create a new custom view.
- The Create View side panel will appear. Add the title and description of the view.
- You can also set the privileges for the view. Only those employees who have the selected privilege can access the view.
Note: The privileges for the employees are configured from the Employees App.
- Choose a list layout for the view. Based on the selected list layout, the attribute will appear.
- Enable the display toggle to keep the view active.
- In the criteria section, add the condition based on which the records should be filtered.
- Once the configuration is complete in the View Builder, select Create. The Custom View is added to the View Builder.
- Go to the Home page of the Teams app. Select your created custom view from the left panel.
- The records that satisfy the criteria will be displayed.
HOW TO DELETE CUSTOM VIEWS IN TEAMS APP?
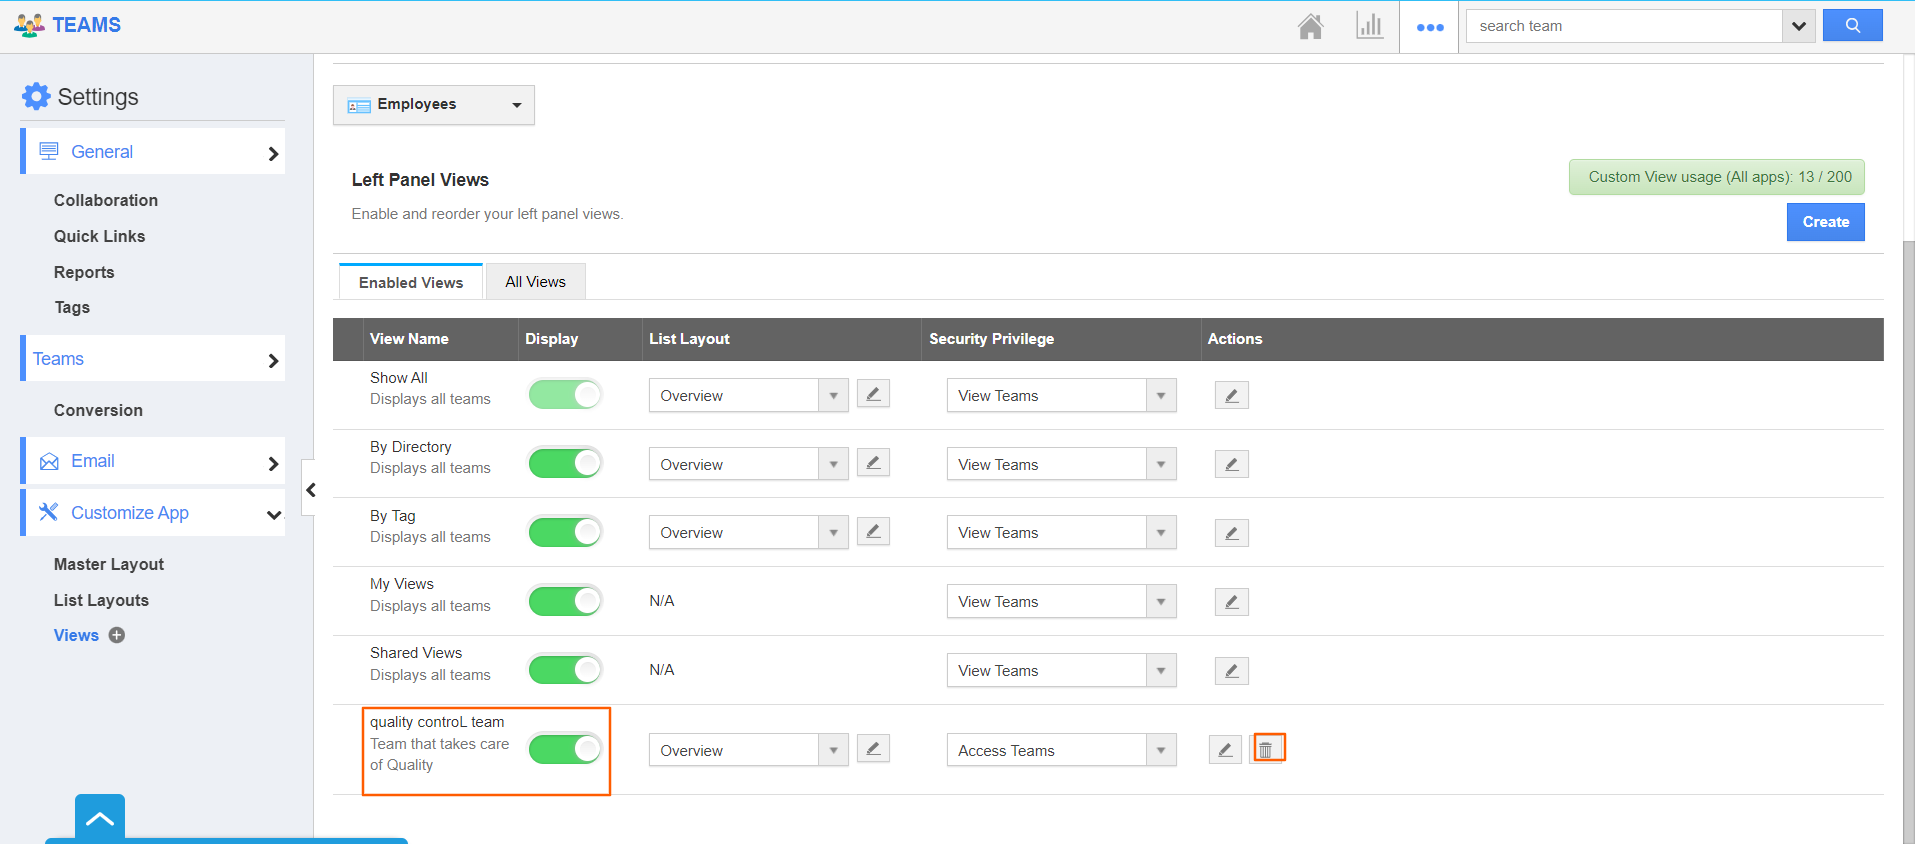
- To delete the view, click on More→ Settings from the App Header Bar.
- The User will be directed to the Settings Page. Click on “Customize App → Views” from the Left Navigation Panel.
- One can see the list of custom views along with the delete icon on the action column.
- The user can click on the “Delete” icon to delete the custom view which is no longer needed.

- Upon successful deletion, a confirmation alert will be displayed.

Note:
- If the custom view is deleted, it will be removed for all the users.
- If the view is associated with the Scheduled report or default view or both, the user needs to remove the association in order to proceed with the deletion of that corresponding view.


