The Google Maps integration in Apptivo allows you to view the addresses in the Map View. While viewing the addresses in the Map View in a particular application, you can determine the attributes that are displayed while hovering over a particular address location.
Note: The Google Maps Integration is available only in the Enterprise plan of Apptivo.
Steps to customize the fields
- Login and access your Apptivo account. Click on the User Menu and select the Business Settings.
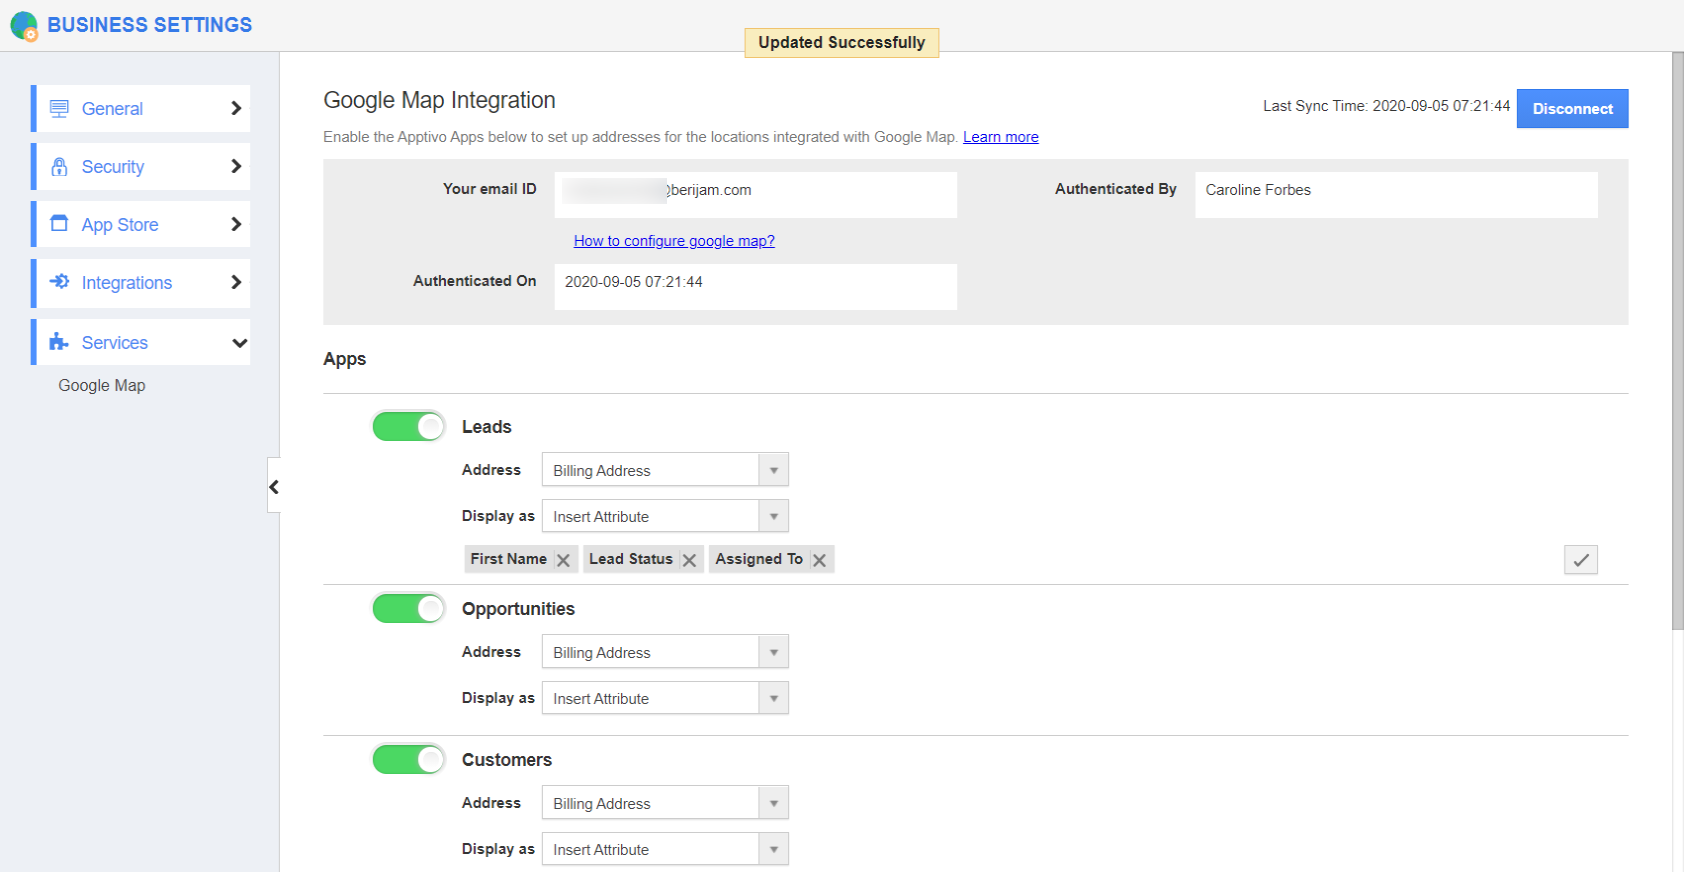
- In the Business Settings, click on the Services and select Google Map. Integrate your Google Maps account and select the app in which the fields are to be customized on the Google Map Integration page.
- Here, Leads App. Select the “Display as” dropdown and choose the fields that are to be displayed while hovering over a check pin in the Map view.
- You can add more than one field to display and select the tick icon.
Steps to view the fields in Map View
- Go to the Leads App. Select Settings → Customize App → Views.
- Navigate to the view in which the leads are to be displayed in the Map View. Here, Show All.
- Enable the Map View toggle in the Update View side panel.
- Go to the Show All page in the Leads App and select Map View.
- When an address is viewed in the Map View of the Show All page, the configured fields are displayed by hovering the mouse over the check pin.


