In addition to the fields (attributes) present by default in the Contacts App, you can also add new fields to the records based on your business purpose.
- Login to your Apptivo account and navigate to the Contacts App of Apptivo. Select Settings from the App Header.
- In the Settings page, choose Customize App → Master Layout. The Master Layout page comes into view.
Different Attributes in the Contacts App
- Text - You can use this attribute to add the text field to the Master Layout.
- Date - Adding date to the records becomes easier with this attribute.
- Number - Generate numbers to your records with Number attribute.
- Currency - Currency attribute enables you to add Currency values.
- Radio - Opting a particular value from a number of values becomes simpler with Radio feature.
- To Words - To Words allows you to convert numbers to words.
- Toggle - Toggle enables you to answer true or false for a particular attribute value. It is a modern way of yes/no option.
- Dropdown - Add dropdown to your layout with this feature.
- Multi-Select - Select a number of options from a list with Multi-select feature.
- Link - Adds website addresses or any other link to your Master Layout.
- Textarea - This attribute adds custom text area to the Layout.
- Address - You can add an address with this attribute.
- File- Use this attribute to browse files and attach it to your records.
- Spacer - Add space to your Master Layout with this attribute.
- Function - Mathematical calculations are done with this attribute.
- Ref App Field - Fetch data from a reference app using this attribute.
- Ref App - Use this feature to link your record with a reference app.
- Phone - Add additional phone numbers to your record with this attribute.
- Email - Add additional emails to your record with this attribute.
- Account - Link accounts to your contact record with this.
- Counter - You can add pre-defined counter values so that the numbers are auto-increased.
Steps to Create Custom Field
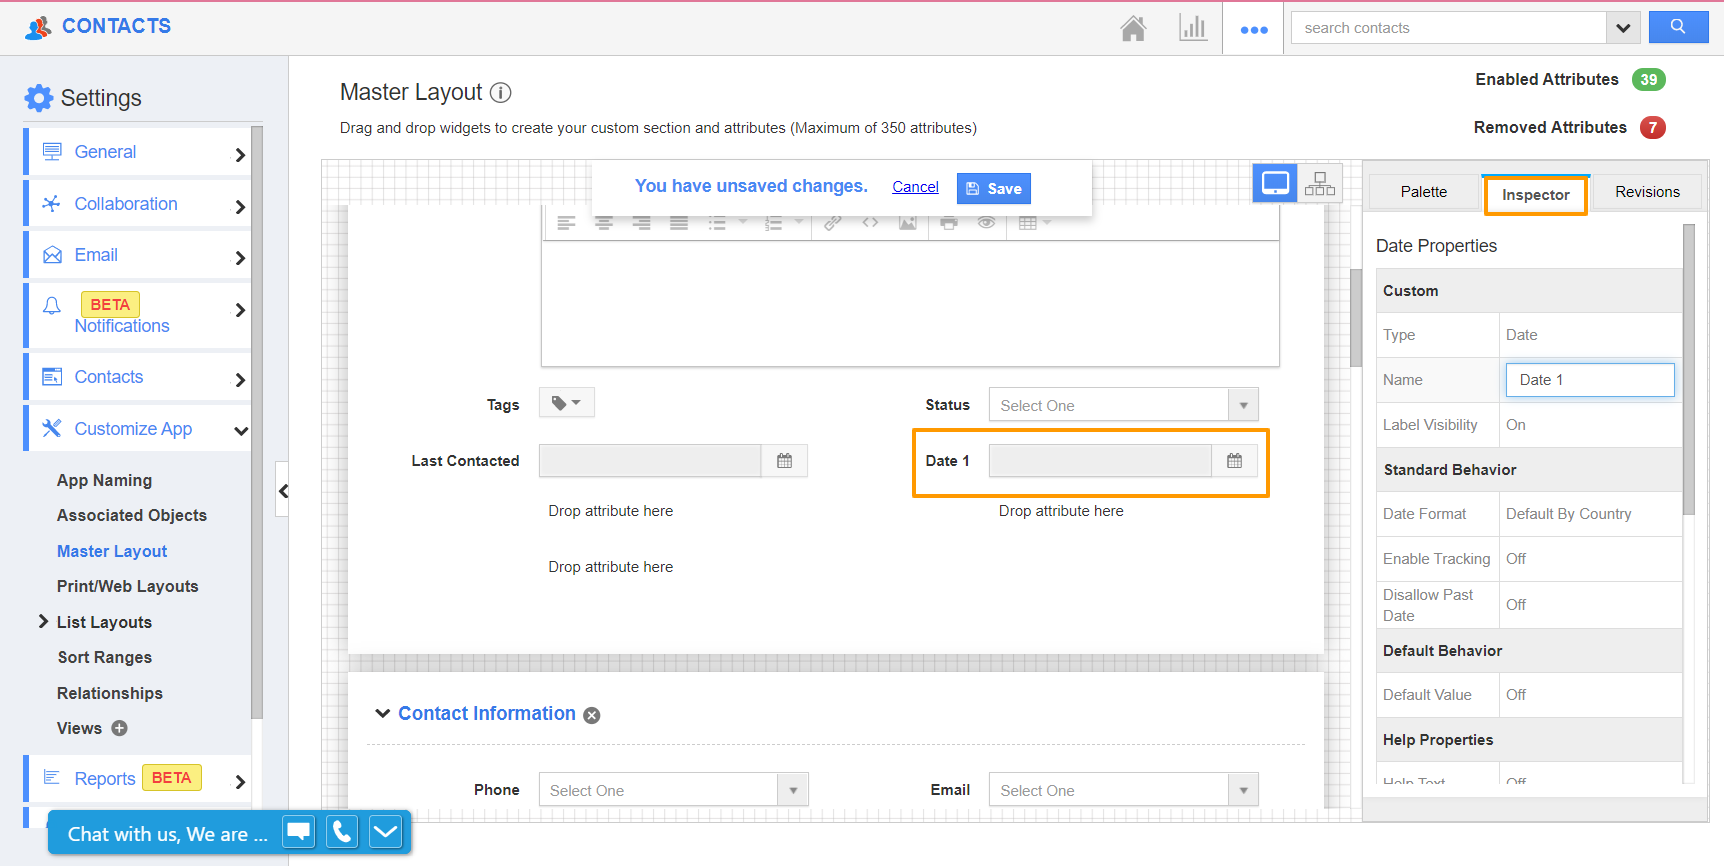
- To add a new field, drag and drop any attribute from the Palette section in the right panel. Consider adding a date attribute to the Master Layout.
- Once the date attribute is added, click on it to view the Inspector tab.
- In the Inspector tab, you can customize your custom date attribute.
Custom
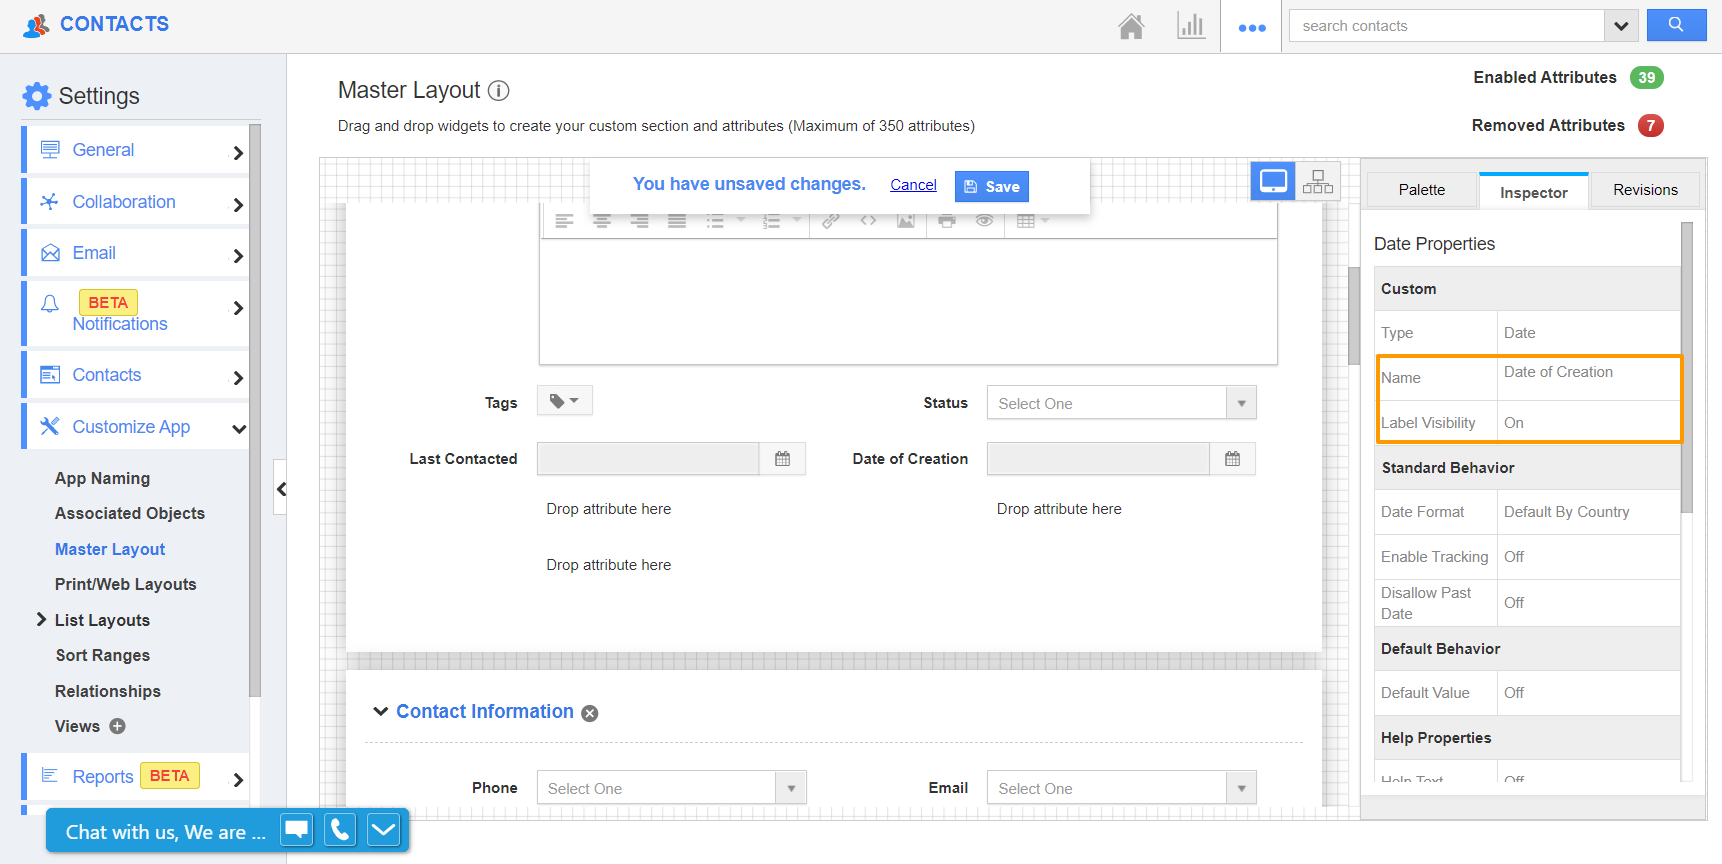
- In the Custom section, you can change the name of the date attribute. You can also set the Label Visibility.
- Label Visibility can be used to configure whether the name of the date attribute should be displayed or not.
Standard Behaviour
- From Standard Behaviour, you can set the natural behavior of the attribute. By default, the date format is set to Default by Country. It is a non-editable field.
- You can decide whether to enable tracking or not. If tracking is enabled, you can see the history of values associated with the date attribute.
- On enabling the Disallow Past Date, you can add past dates from the date of creation of the contact.
Default Behavior
- In this section, you can set a default value for the date attribute. You can set the date to be a static or dynamic value.
- If static is selected, you can set a default date value.
- If dynamic is selected, you can set a custom date criteria that changes according to your configuration. For instance, you can set the date to be today’s date.
Help Properties
- Using Help Properties, you can add help text for the date attribute.
Visibility
- You can set the visibility conditions of the date attribute.
- If the toggle is disabled, then the attribute is hidden while creating or editing contacts.
- If you want the date attribute to be visible only during particular circumstances, enable the conditions toggle after enabling the visibility toggle.
- In the Conditions section, you can set the Driving attribute and Driving values.
- It refers to the attribute and the corresponding values to check the condition.
Mandatory
- To make the date attribute as a mandatory field, enable the toggle.
Search
- In the search section, you can decide whether the date attribute should appear in the advanced search.
- You can also set the privileges based on which the employees can access.
- By enabling the mandatory toggle, the employees must by default add the date value while conducting Advanced Search.
Function Security
- You can control who can view and access the date attribute by enabling the Function Security toggle.
- Only those employees who have the selected privileges can create, view, or edit the custom date attribute.
- Once the configuration is complete, save the changes. The attribute will appear as per your modification while creating or editing a contact.


