Browse by Solutions
Browse by Solutions
How to create a List Layout in the Customer Payments App?
Updated on May 27, 2020 07:36AM by Admin
- Login and access the Customer Payment App from the Universal Menu.
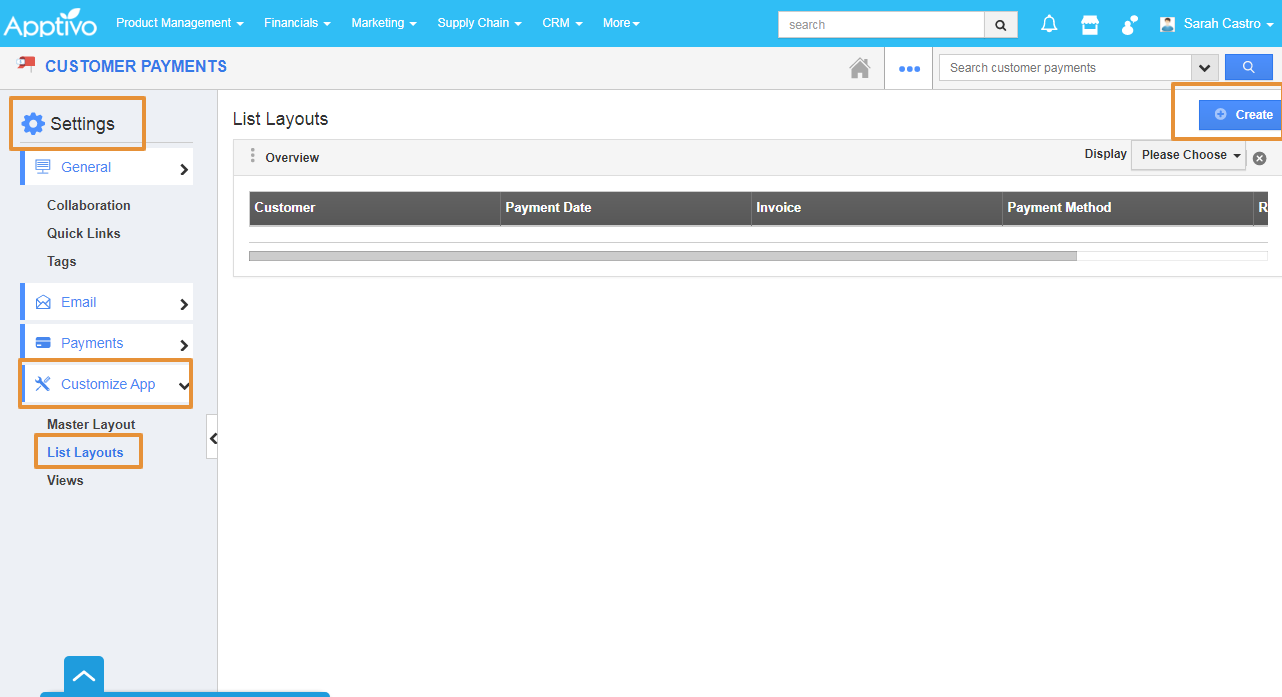
- Click on the More(...) icon and select the Settings.
 |
- Click on the Customize App from the left panel and select the List Layout.
- You can view the Default view, click on the Create button to create an own set of views.
 |
- A default list view table will appear. By clicking on the Display Dropdown you can select the values that are needed to be added in the view list.
 |
- For example, you want to view the list with the Created By, Customer, Invoice, Amount, Status, and Created On.
- By Selecting the preferred attributes from the Display dropdown, you can customize the list as per your preferences.
 |
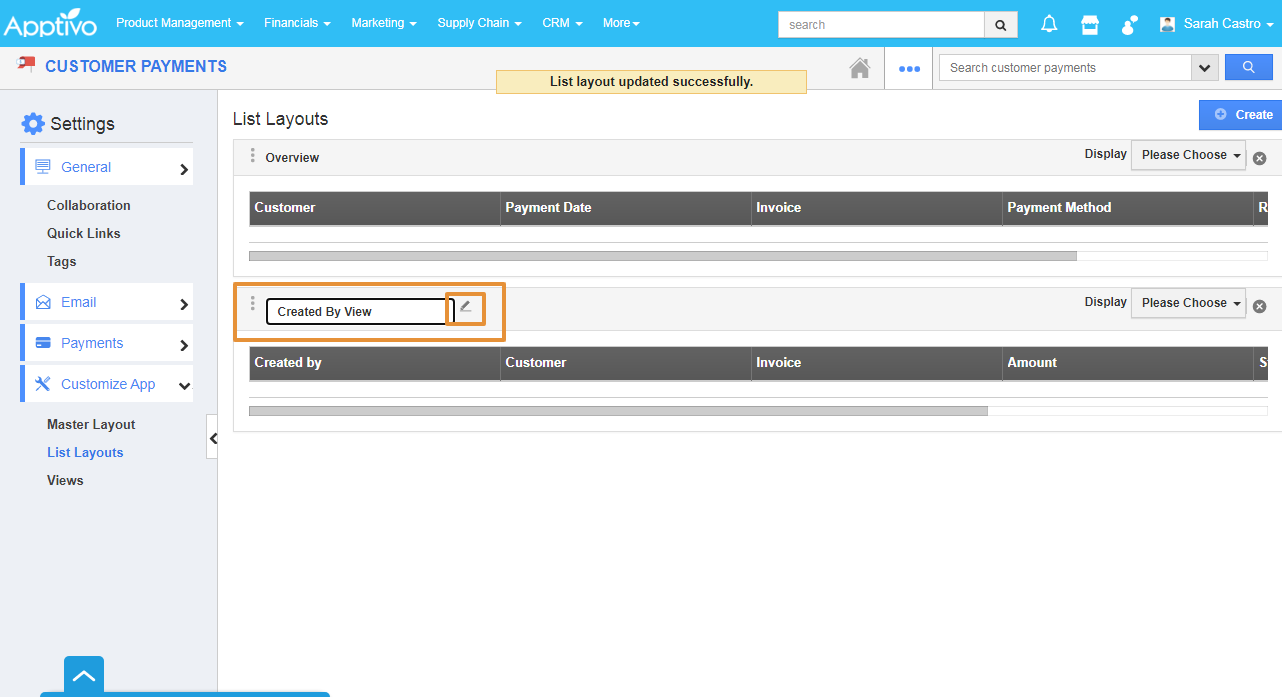
- You can customize the name of the view by clicking the pencil icon that will appear when you hover over the Default name.
 |
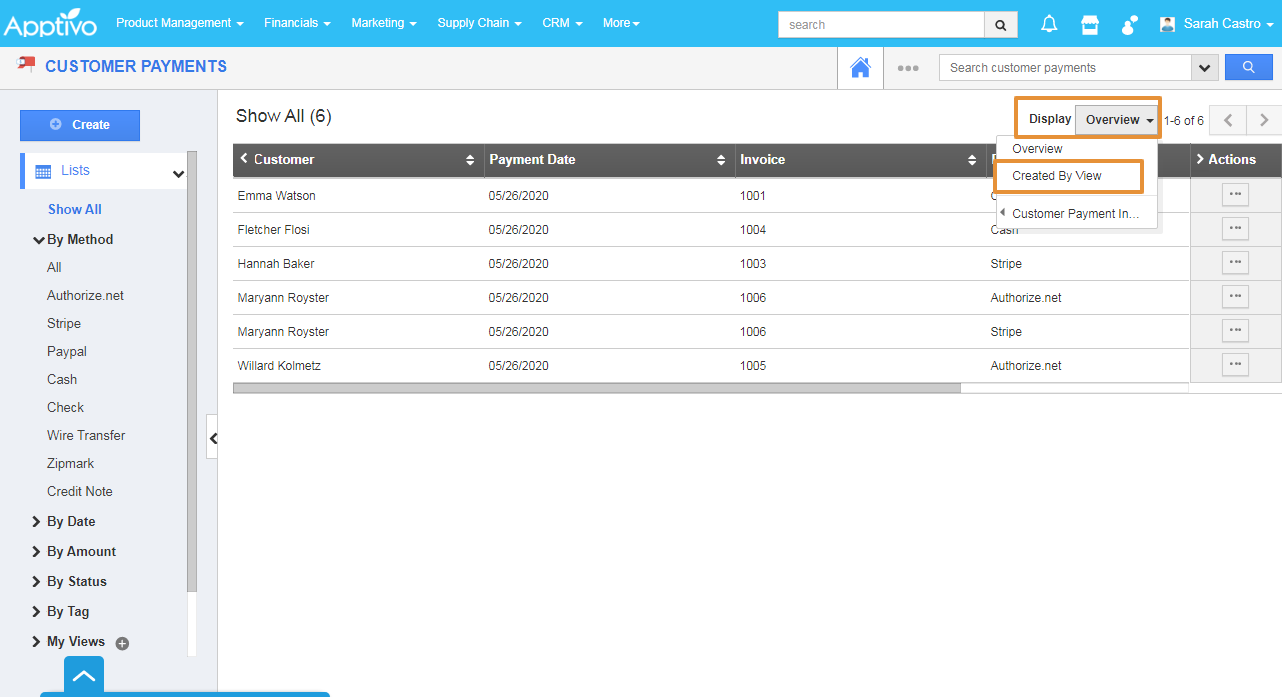
- To view the Custom Layout, go to the Home page and select Show All.
 |
- Click on the Display Dropdown and select the Created view - Created by View.
 |
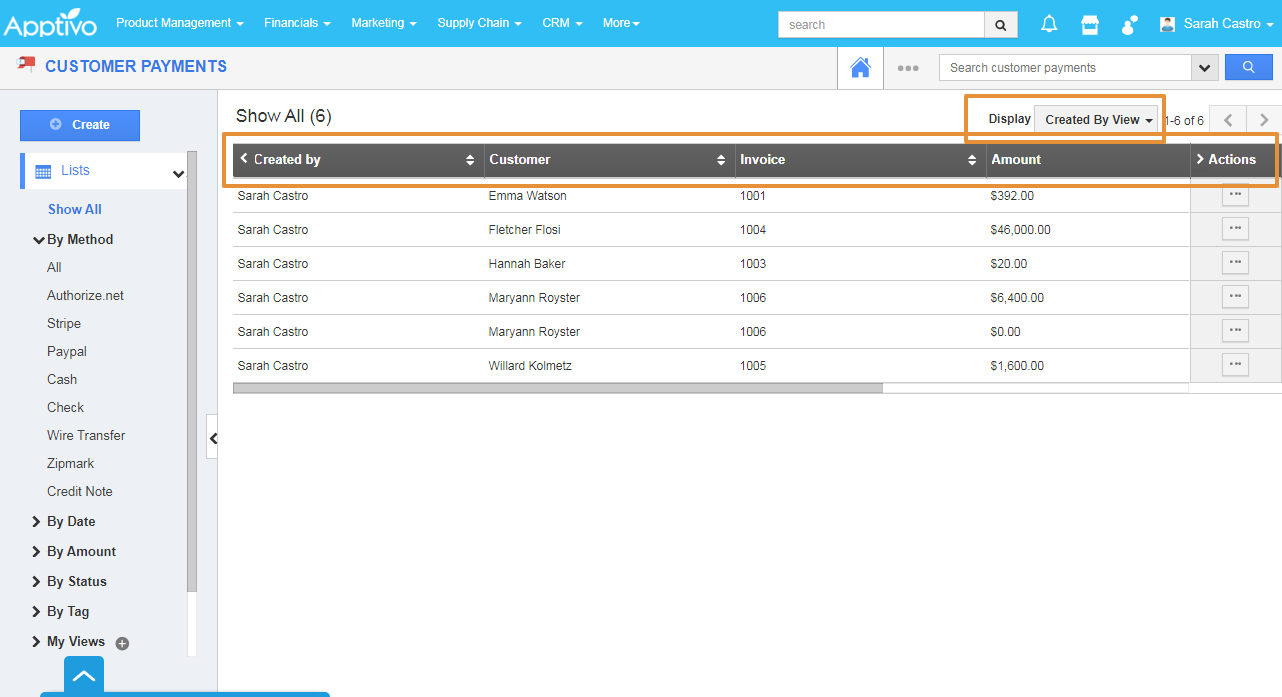
- By selecting the View, the list will get updated as per the Custom view created.
 |
Flag Question
Please explain why you are flagging this content (spam, duplicate question, inappropriate language, etc):

