Apptivo lets you create a Retainer Contract via Contracts app. Service providers can sign contracts with their customers on services rendered. By creating a Retainer Contract you can easily follow-up with the contract based business moves. To create an effective Retainer Contract follow the below-mentioned steps.
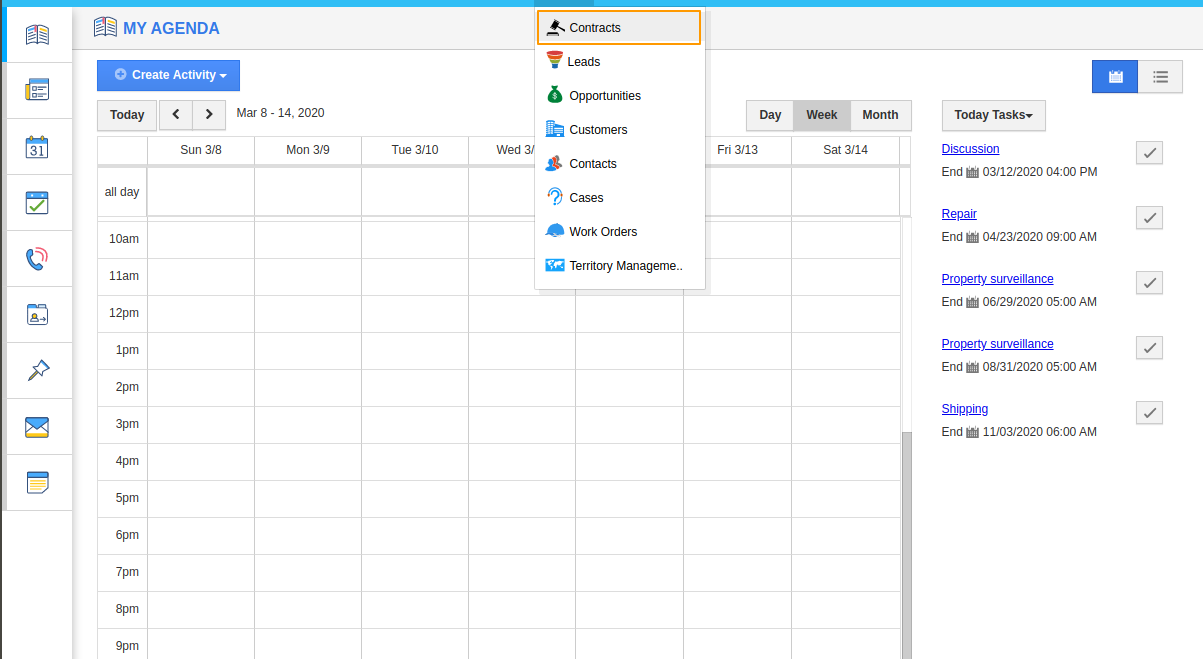
- Login and access CRM → Contracts app from the Universal navigation menu bar.
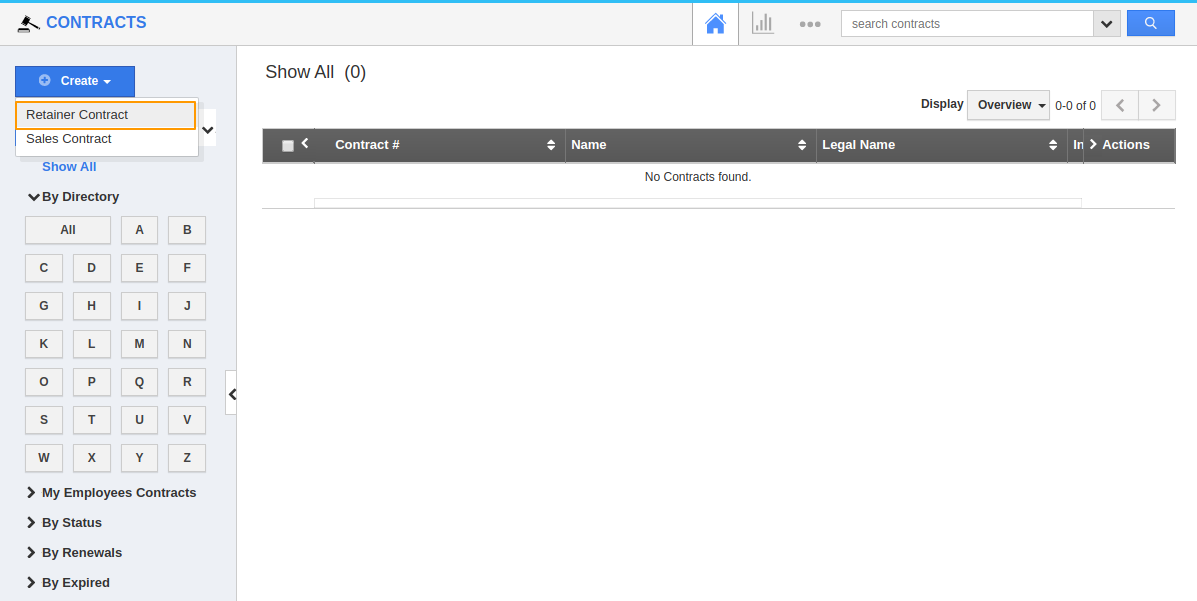
- In the Contracts app home page, Click on Create → Retainer Contract option from the left panel.
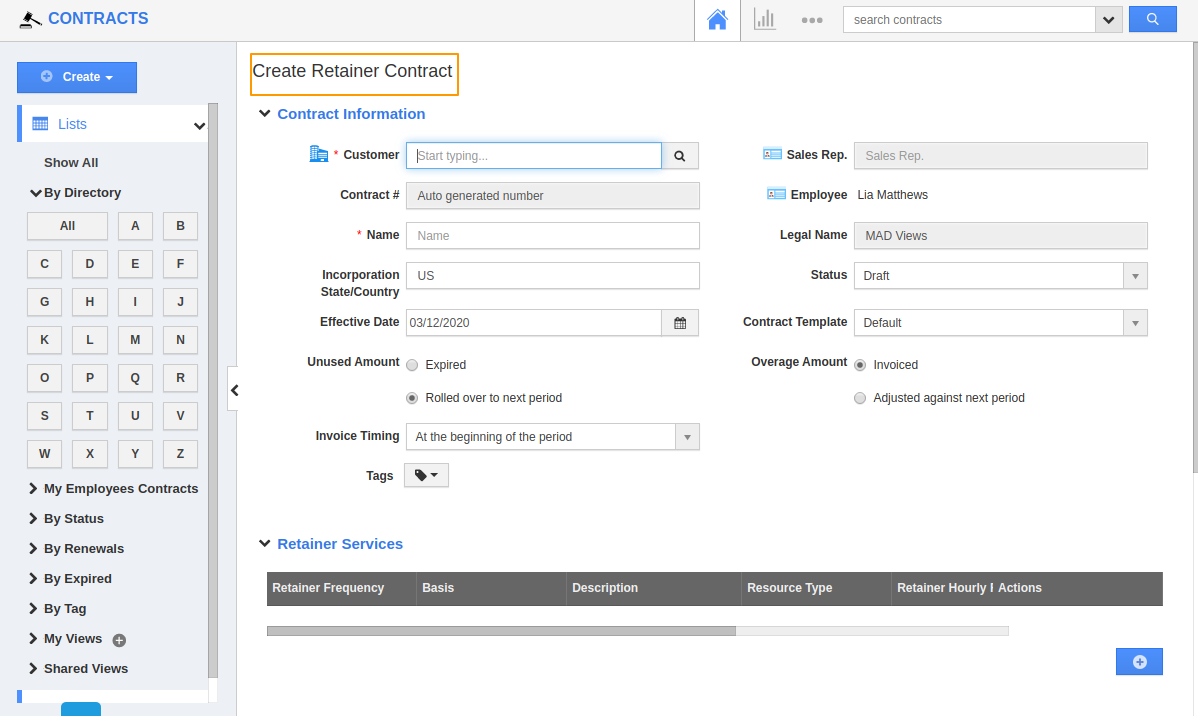
- Create Retainer Contract page will appear. In that Select the Customer with whom you need to sign a contract.
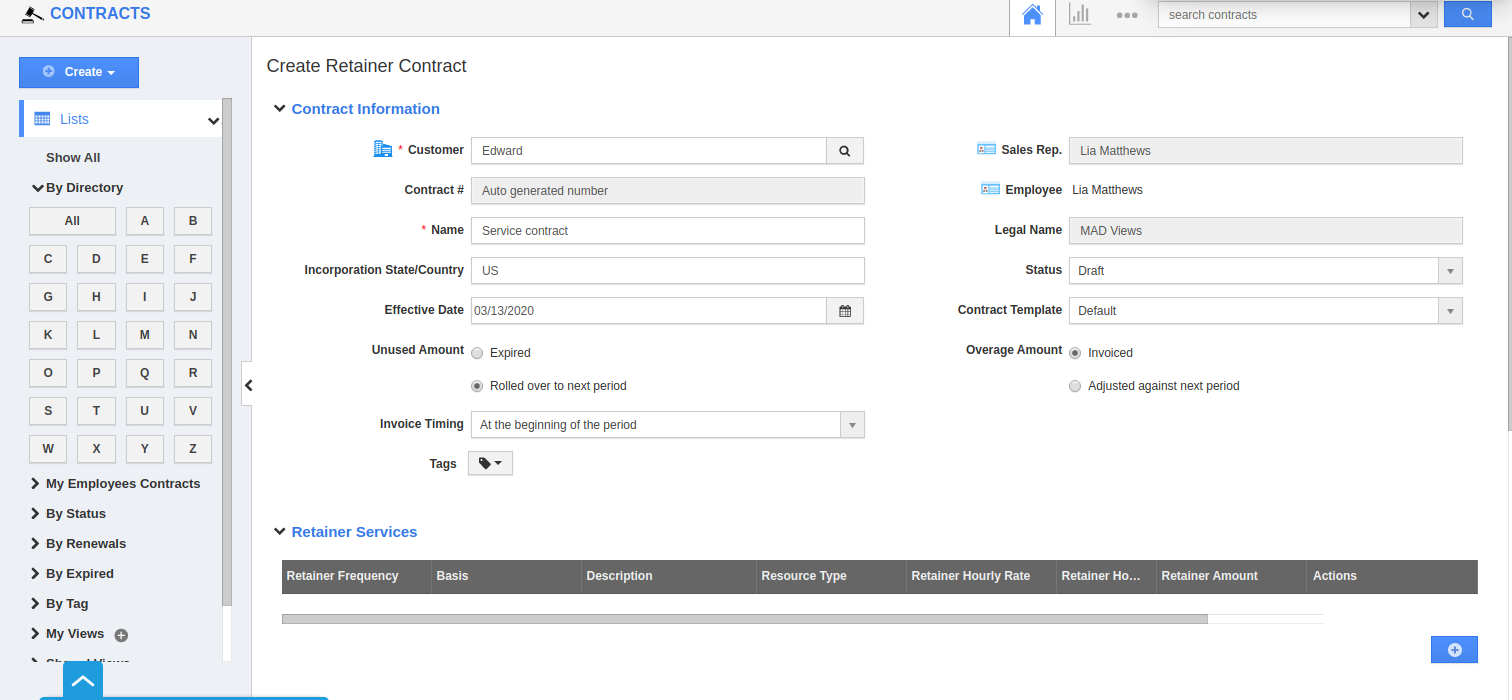
- Here a Customer named Edward is selected.
- Now fill in the other details in the Contract form.
- Name: Assign a name to the contract. Here it is mentioned as Service Contract.
- Legal Name: The official name of your business.
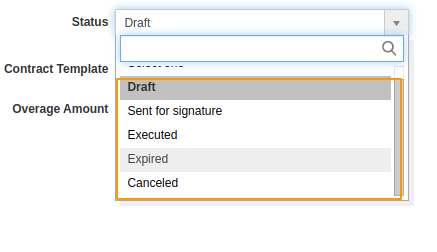
- Now select the Status of your contract. Click on the dropdown, you will be provided with the list of status that you can update. Here it is selected as Draft, hence the Approval status will be Not submitted.
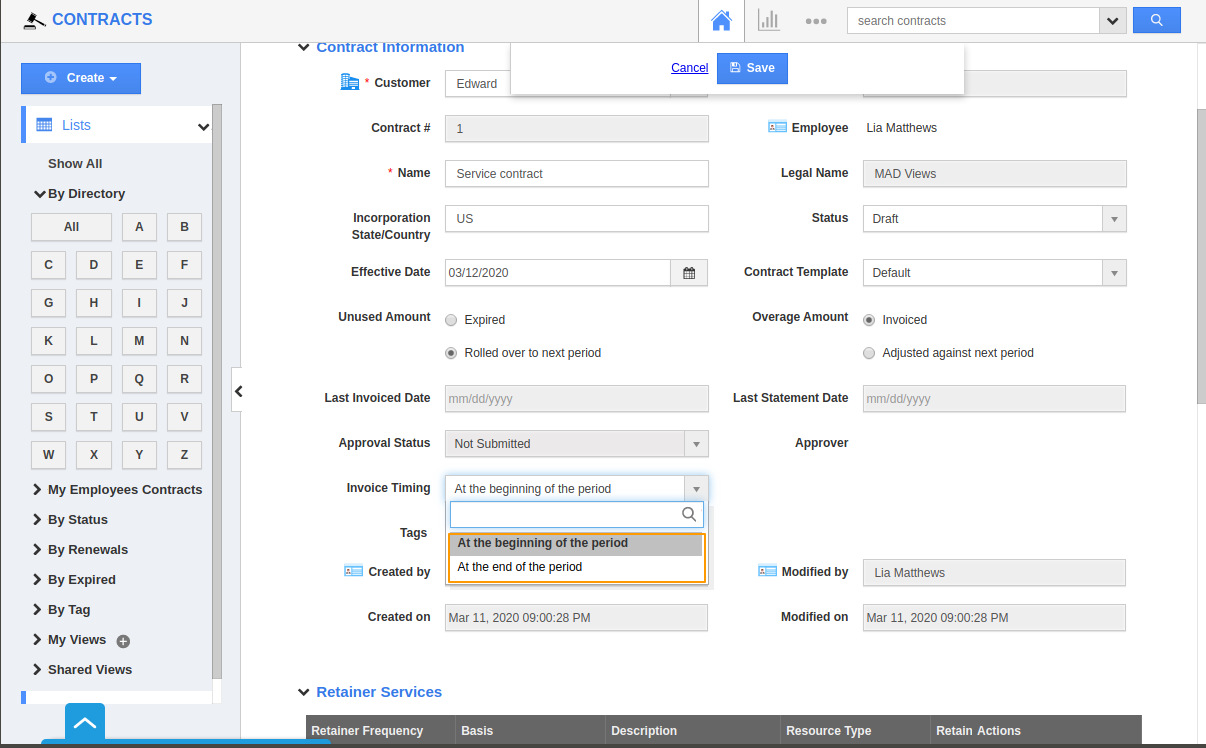
- You can select when the Invoice should be generated.
- At the beginning of the period: An Invoice will be generated at the beginning of the period that you mentioned in the contract.
- At the end of the period: An Invoice will be generated at the end of the period that you mentioned in the contract.
- Tags: You can select the Tags from the list of Tags that have been already created.
- As we have signed Service Contract you should create a record under the Retainer services column.
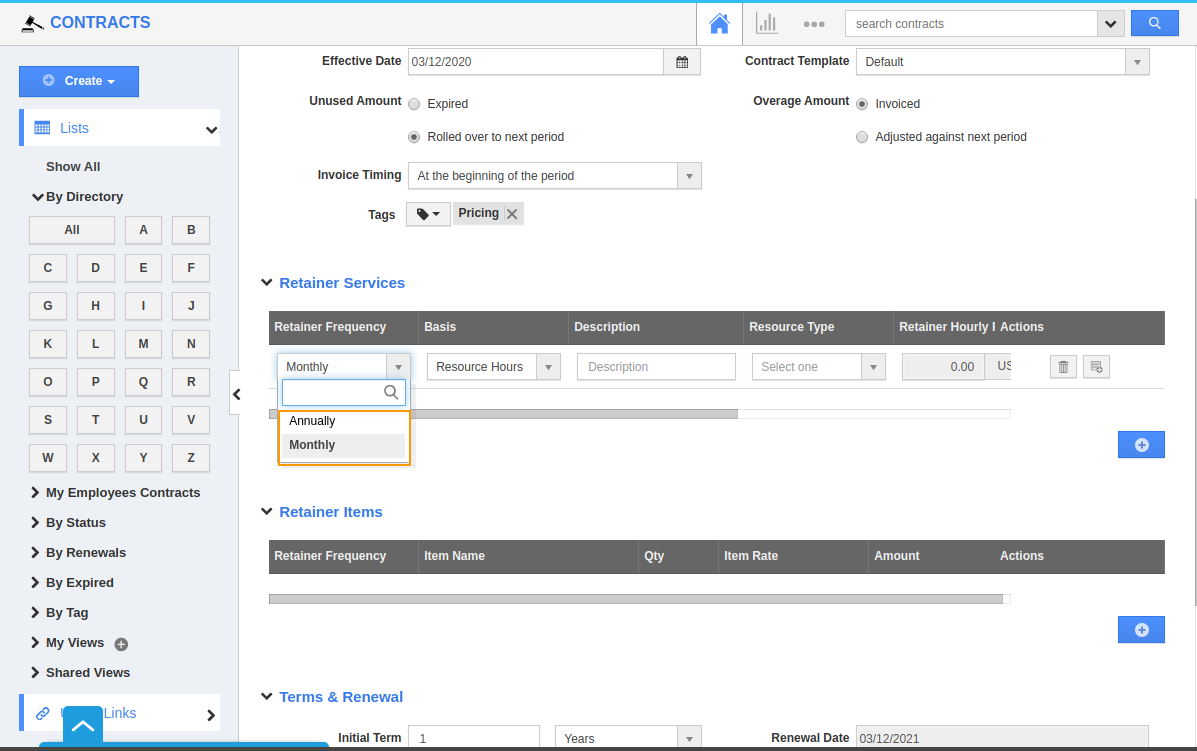
- Now select the Retainer Frequency like whether you want it to be Monthly or Annually.
- If you select Monthly An invoice will be generated every month. If its Anual, the invoice will be generated every year depending on the time period of the contract.
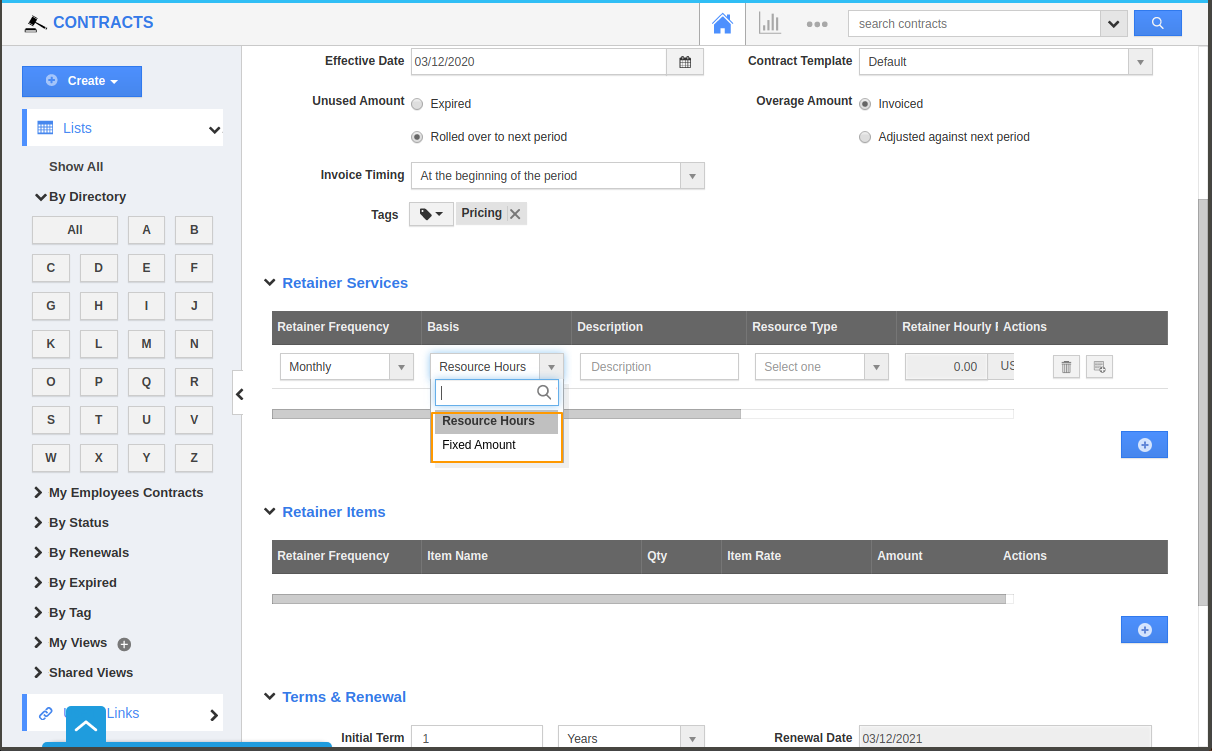
- The Basics column lets you choose the amount based on Time.
- Resource hours: The payment will be made on an hourly basis.
- Fixed amount: The payment will be made based on a fixed amount.
- Description: You can describe the kind of service for which you are signing a contract.
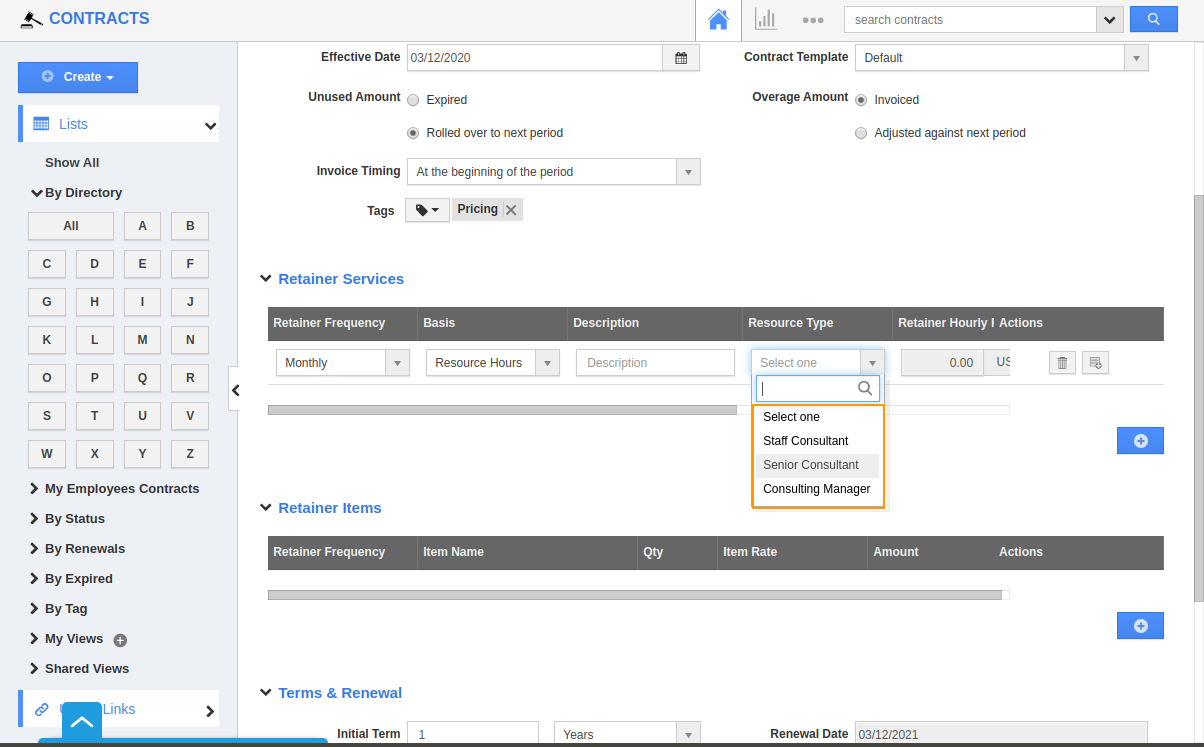
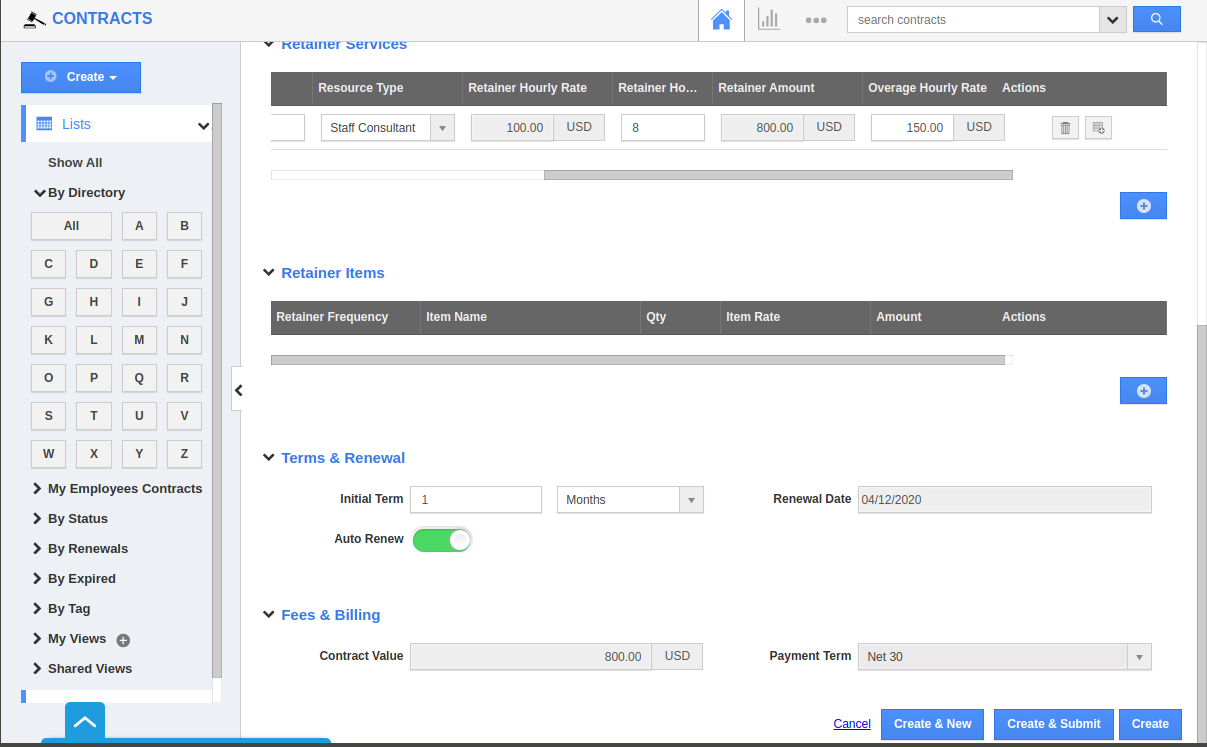
- Resource Type: Selecting Resource type will provide automated pricing based on their designation. The Quality of Service and the price varies depending on the seniority of the Resource employee.
- Here, the Staff consultant is selected, hence the price is automatically generated as 130/hr. The price will increase for Senior Consultant and Consulting Manager.
- You can also change the price if you want to either increase or decrease the amount based on their designation.
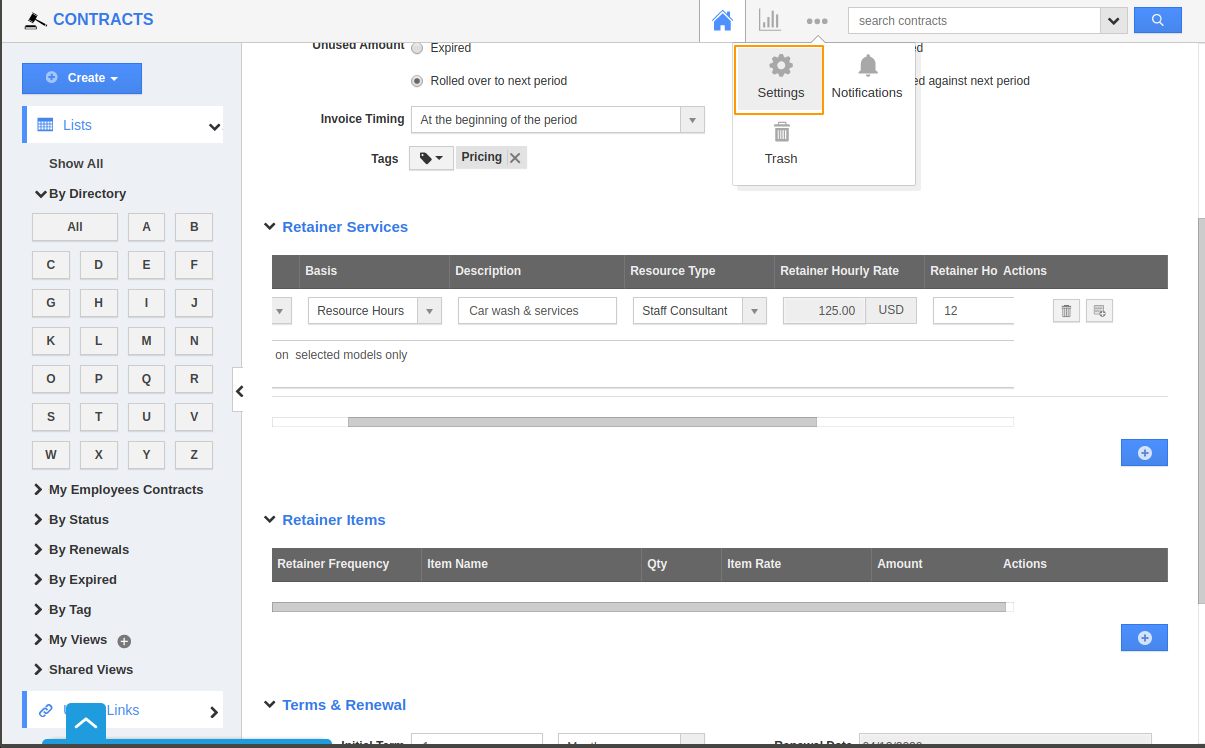
- In case if you want to change the price, Go to Settings in the app header.
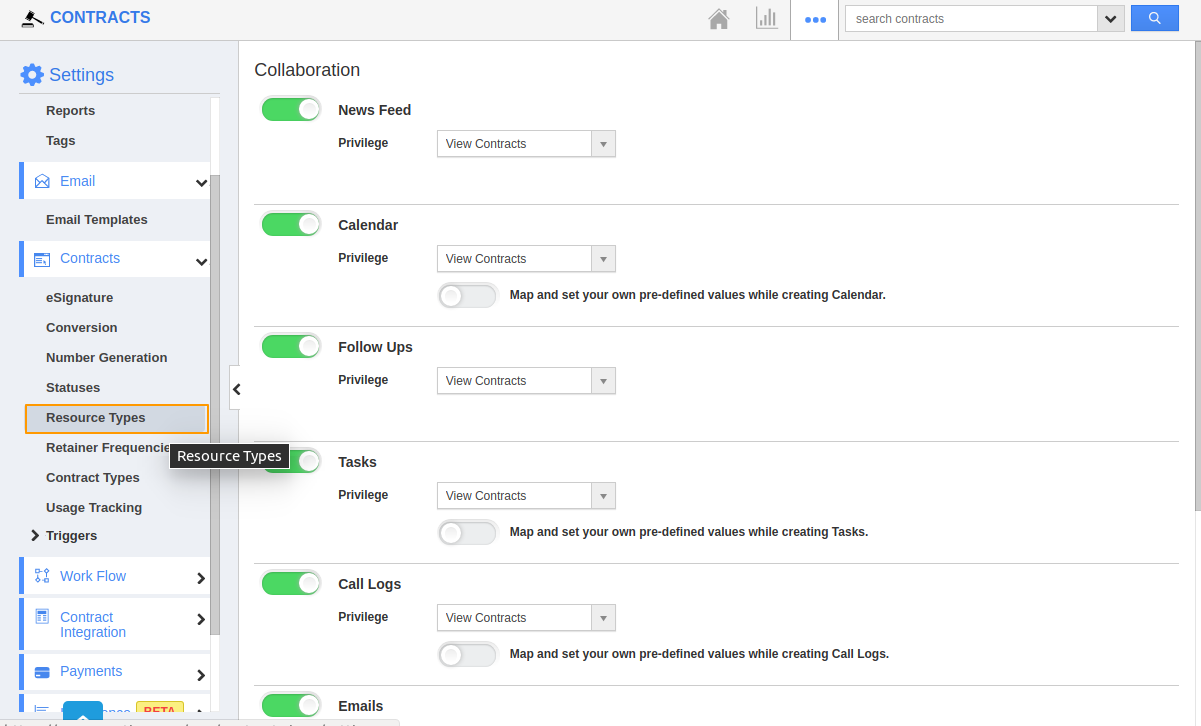
- Now select Contracts→ Resource Types from the left panel.
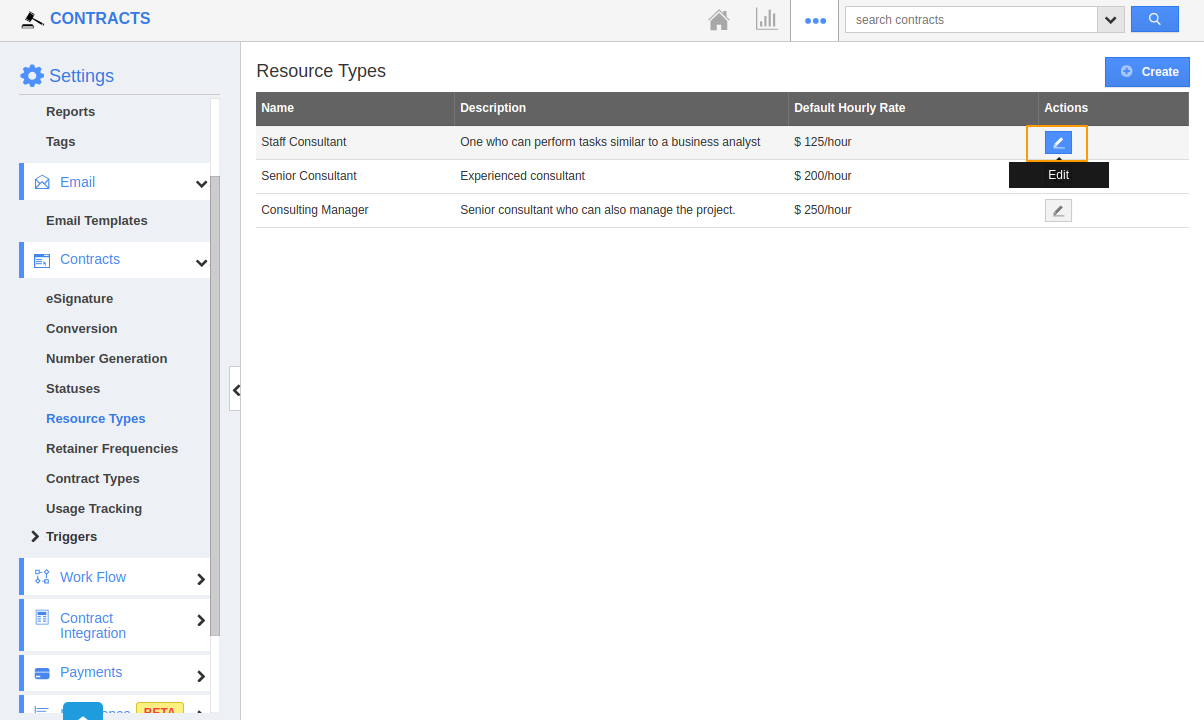
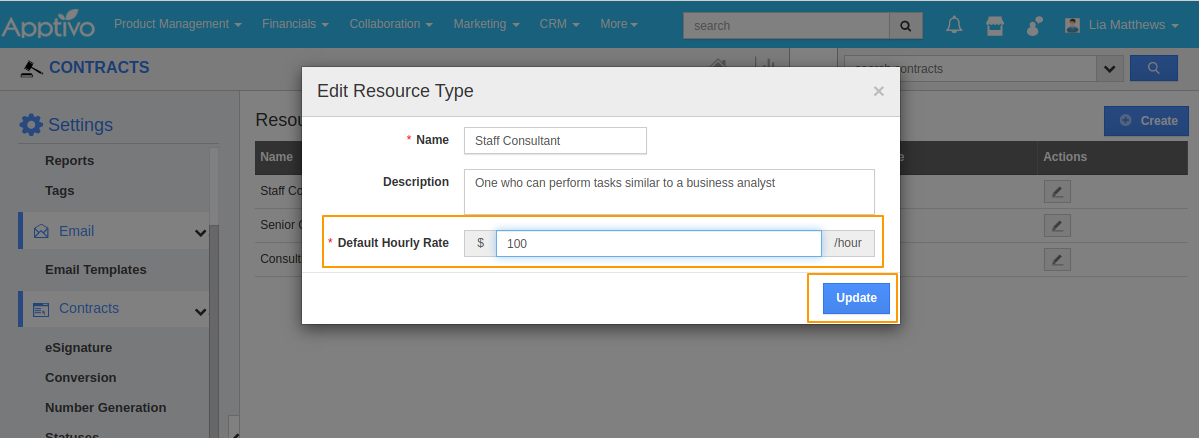
- The Resource Types page will appear, Choose the Designation for which you want to change the price. We have selected Staff Consultant, So click on the Edit option.
- Here the price is Changed to 100 $. Click on Update.
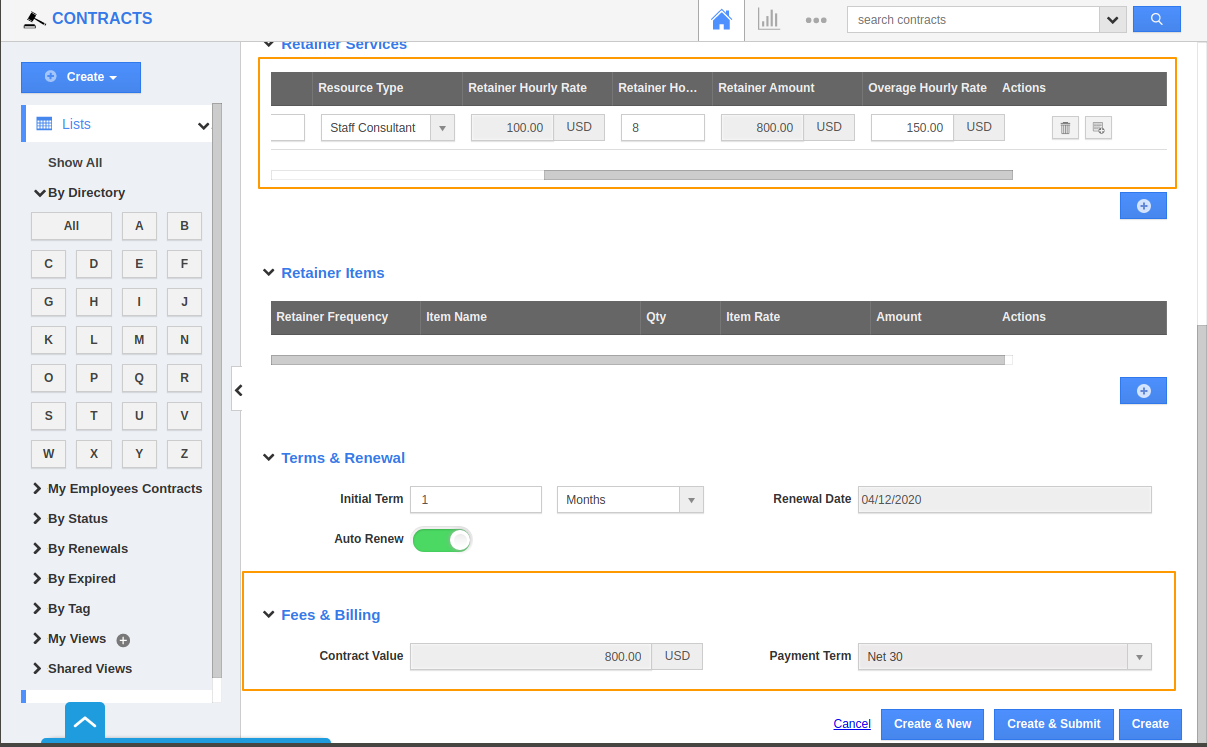
- Here you can see the Price is changed to 100 $, and the Retainer Amount is changed based on the Hours and the Hourly rate. You can also set the Overage Hourly Rate in case if the Service exceeds the timing for which the contract has been signed.
- In the Terms & Renewal section Fill in the other details like Initial Term, Months and periods and the Renewal date. You can enable and disable the Auto Renew toggle depending on the needs.
- Based on the Retainer amount, the Current value will be generated automatically under the Fee & Billing column. With all these details filled, a Retainer Contract will be created.
