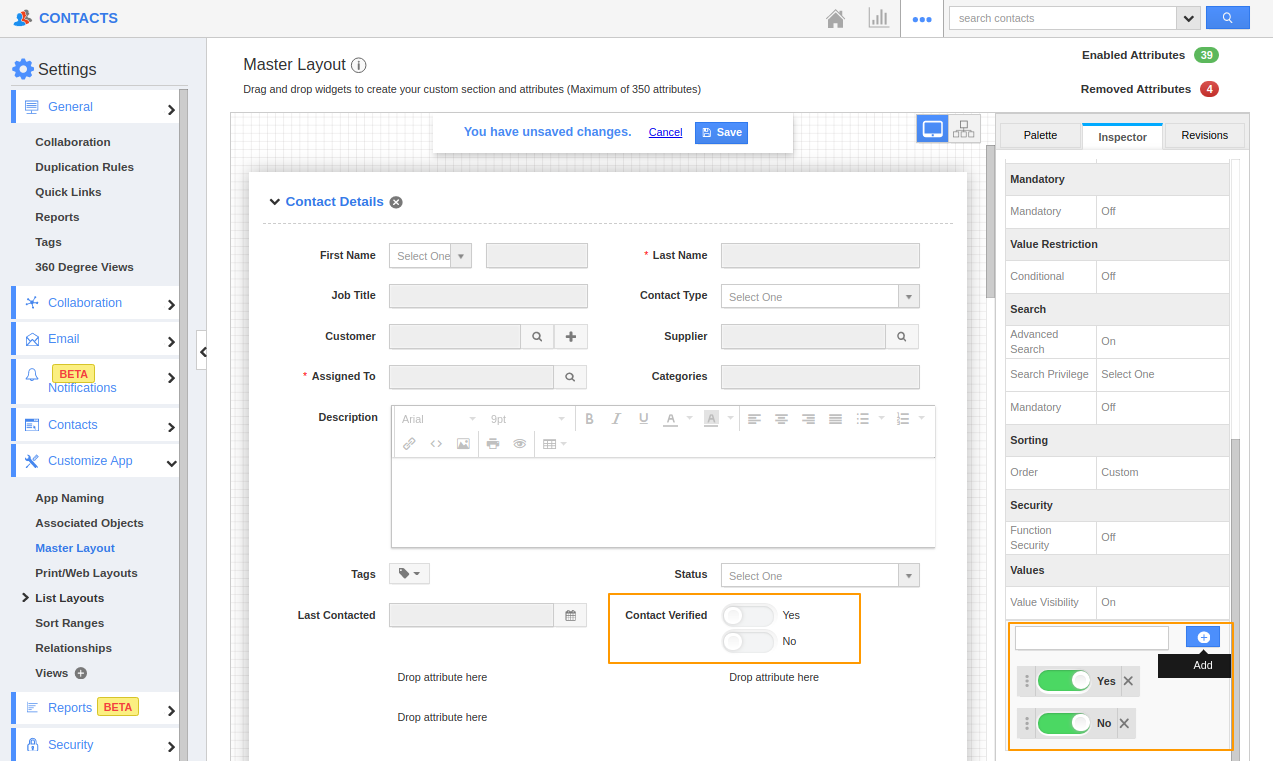
Consider customizing the filter option for a custom toggle in the Contacts App.
- In the Contacts App, navigate to Settings → Customize App → Master Layout.
- Drag and drop the toggle attribute to the Master Layout. Here, click on it to see the Inspector tab.
- In the Inspector tab, you can change the name of the toggle. Then, scroll down in the Inspector tab to add values for the toggle. Add a value in the values section and click (+) option to save it.
- Then, perform the same step to add another value. Another toggle button will be created automatically.
Adding Filter
- Now, turn on the filter from the Standard Behavior in the Inspector tab.
- Once the layout is saved, navigate to Show All page in the Contacts App.
- Here, click the Display icon to view the dropdown. You can see the toggle Contact verified created as an attribute to display in the Show All page.
- Select Contact Verified. You can see the Contact Verified as an attribute. Since the filter is enabled, you can see a filter icon for Contact Verified toggle in the Show All page.
- On clicking the filter icon, you can see the assigned values. You can untick anyone to see the filter results of the other.
- On clicking apply, you can see the contacts whose contacts were not verified.
- You can also remove both the options by selecting clear or select all the options using the Select All feature.
Removing Filter
- Now, turn off the filter option from Standard behavior in the Inspector tab in Master Layout.
- You can see that the Filter icon is removed from the Show All page for Contact Verified.
Note: The filter feature is supported only in the default Apps available in Apptivo. This feature is not available in the Custom Apps created using the App Builder.


