Recently we have been getting a lot of questions about how to integrate G Suite to the Apptivo Emails app. So you can use G Suite for your business email, which can be set up through the Apptivo Email app.
Steps to Install Apptivo Emails App
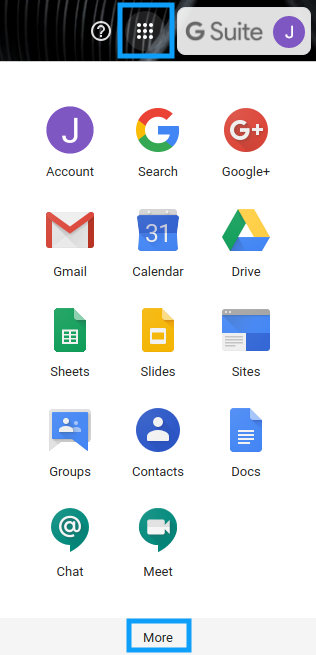
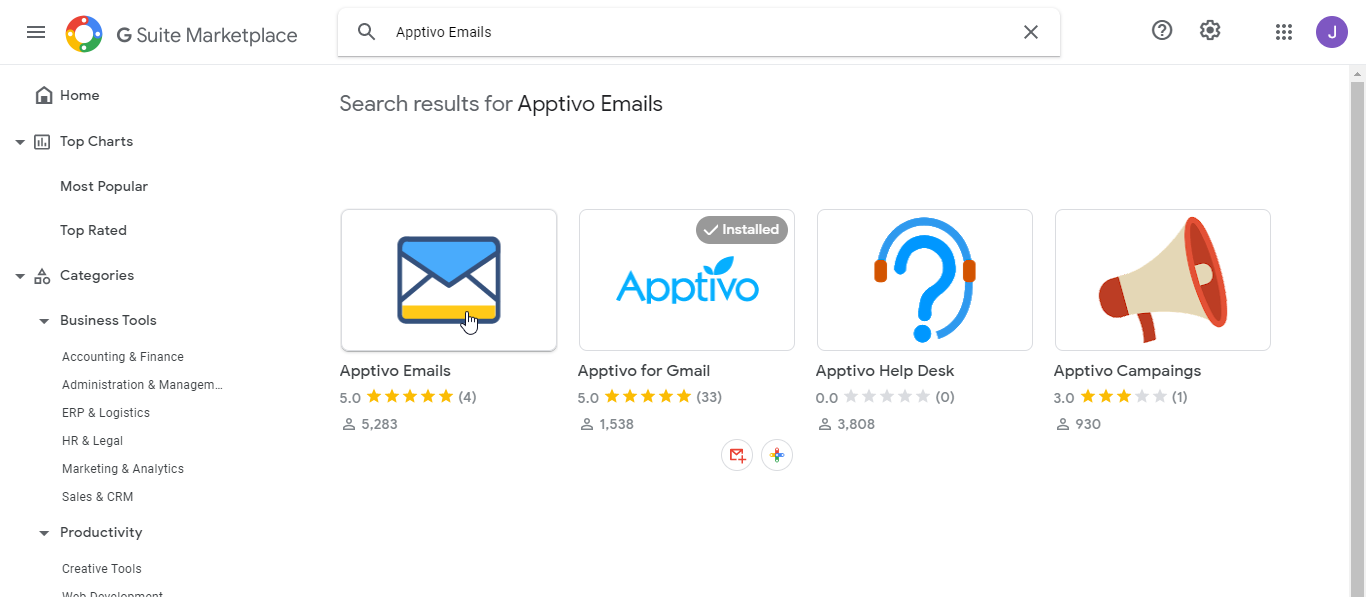
- You need to install the Apptivo Emails App from the G Suite Marketplace to start syncing your emails. Go to G Suite Marketplace and search for the Apptivo Emails app from the search box and click on it.
- The Apptivo Emails App will come into view. Click on it.
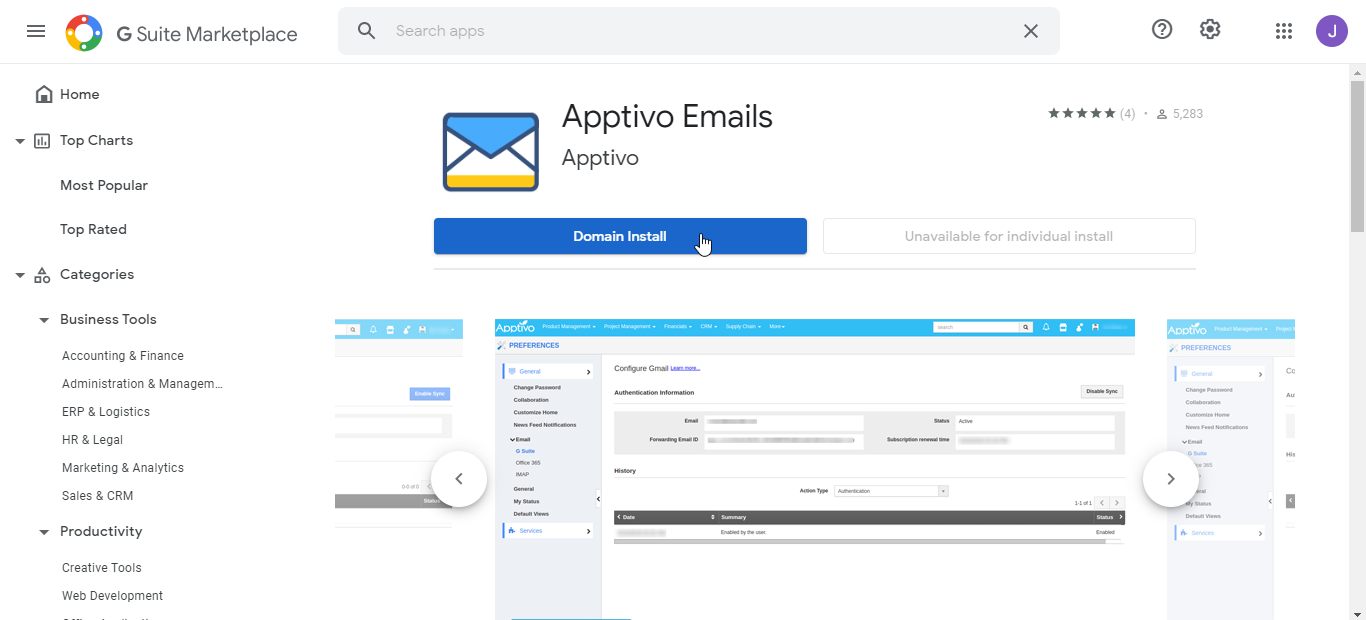
- In the Apptivo Emails App page in the Marketplace, select the Domain Install button.
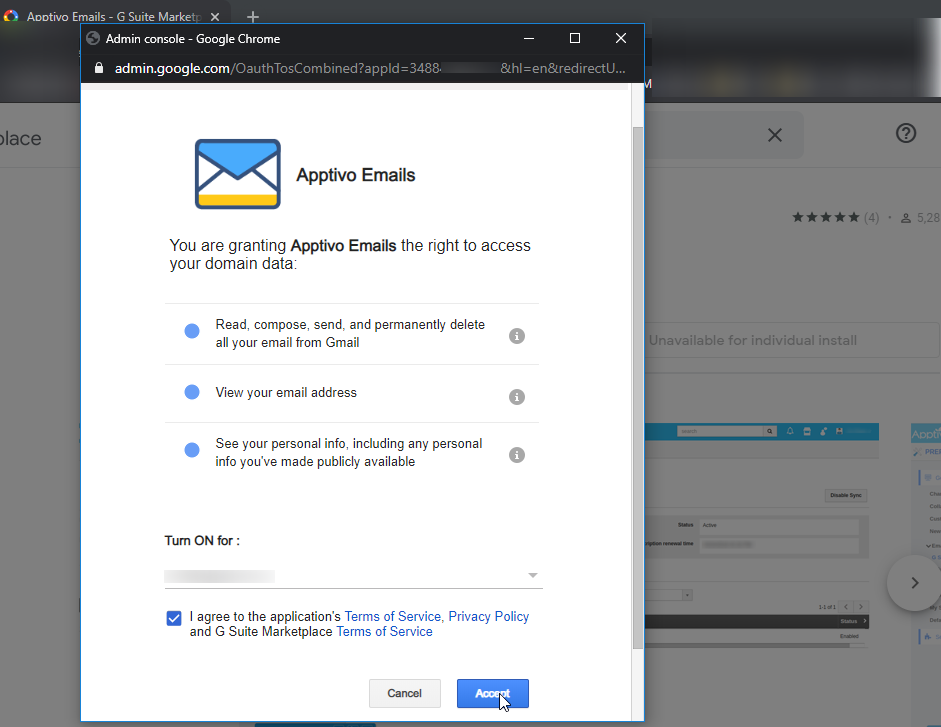
- You will be notified to give App Access permission.
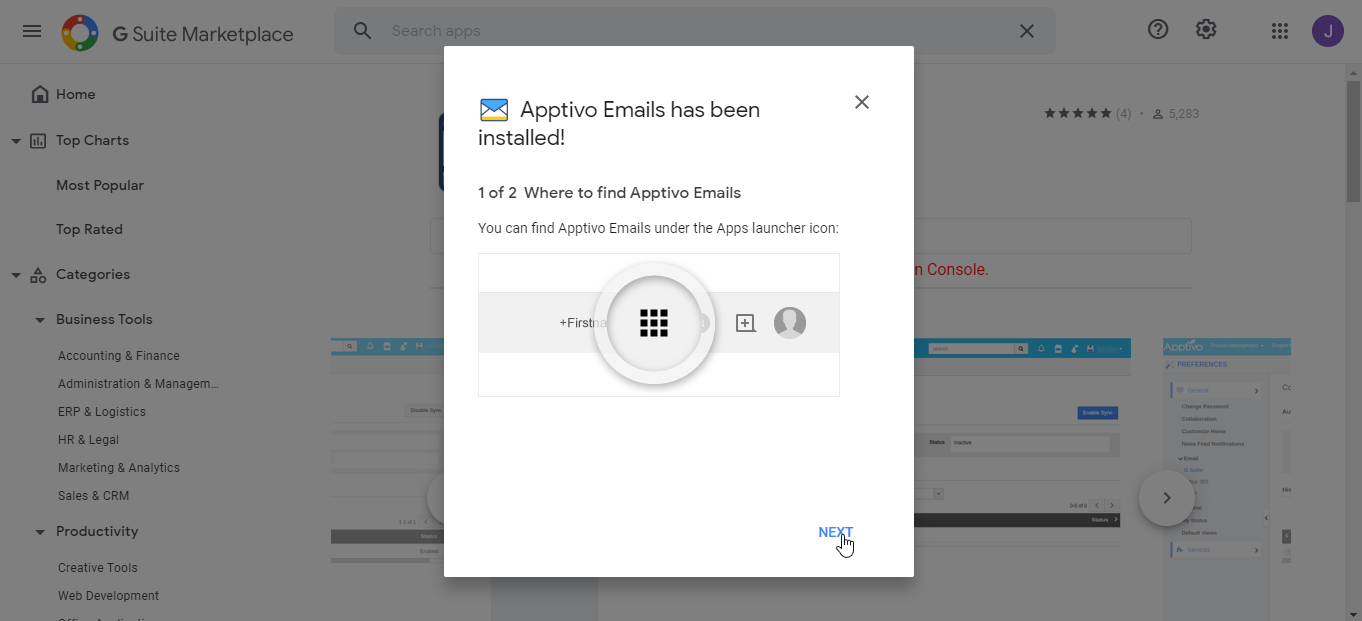
- On clicking Accept, you will be notified that the App is installed.
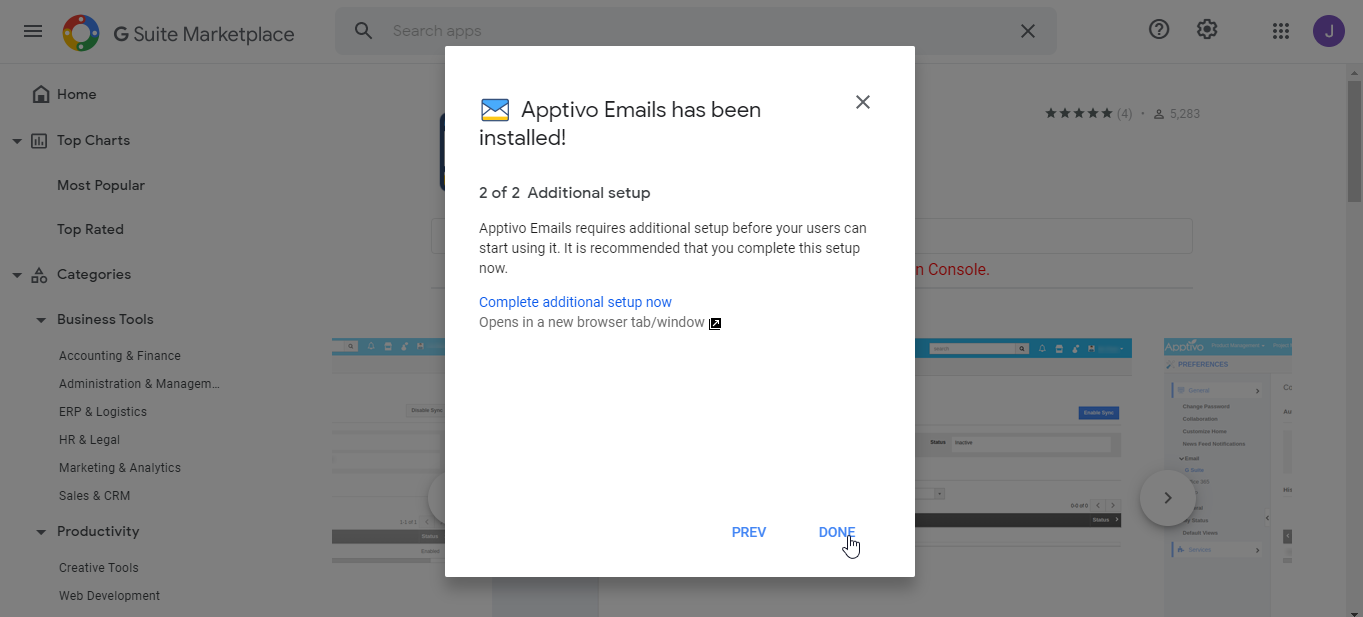
- Click Next to complete the installation.
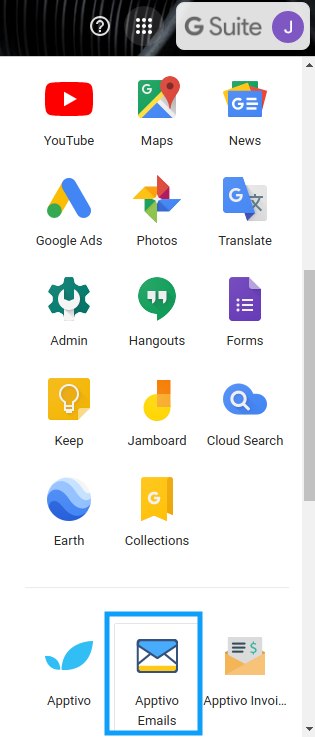
- The App is installed successfully.
Authorization
Apptivo allows G Suite Admin to install the Apptivo Emails app and configure G Suite sync. The user can use the G Suite sync. If it is the first time installing the Apptivo Email app, then the G Suite Admin has to set up the Apptivo Emails App using the “Additional Settings in G Suite Settings.”
Steps to set up Apptivo Email App
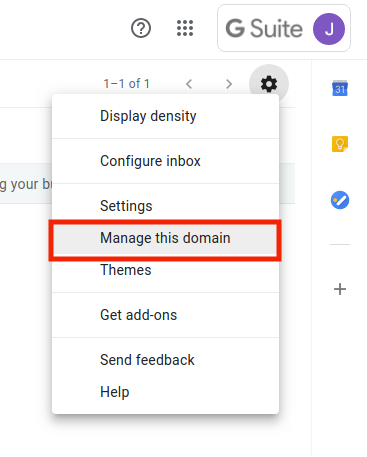
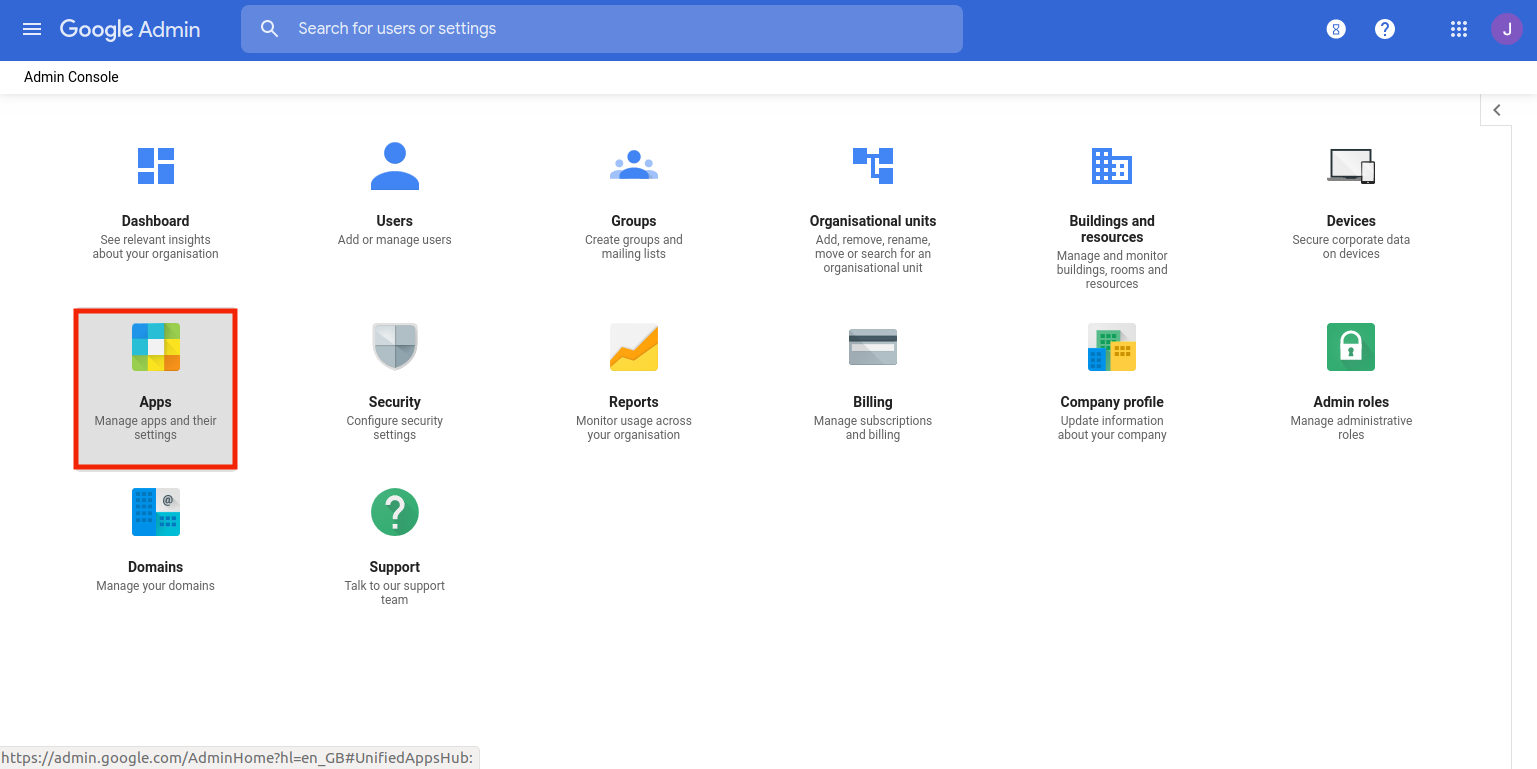
- Navigate to Settings in G Suite account and select “Manage this domain.”
- Go to Apps → Marketplace Apps → Apptivo Emails app.
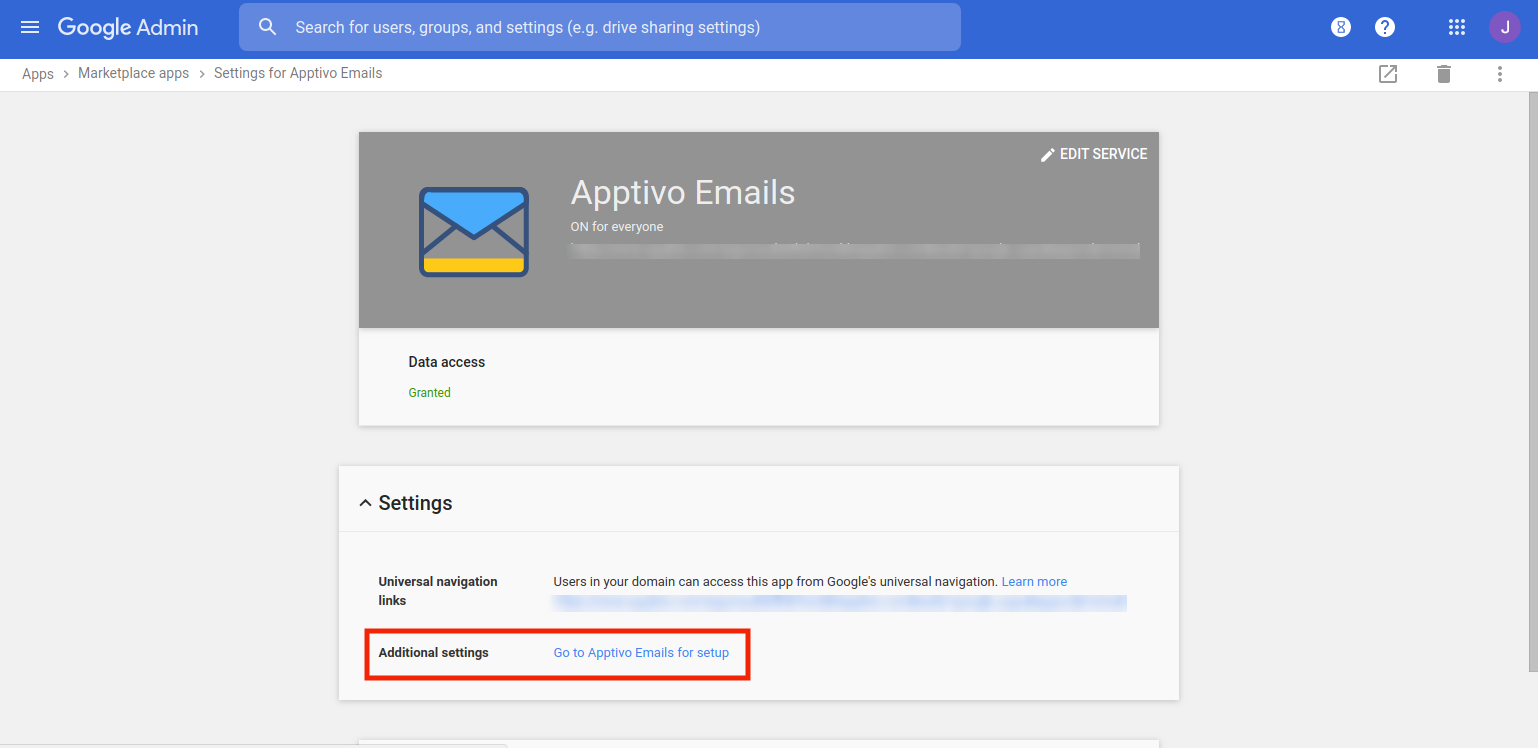
- Select Settings for the Apptivo Emails app.
- Click on the hyperlink “Go to Apptivo Emails for setup” from additional settings.
Steps to Configure G Suite Email Sync in Apptivo
This feature is available in paid versions of Premium, Ultimate, and Enterprise plans.
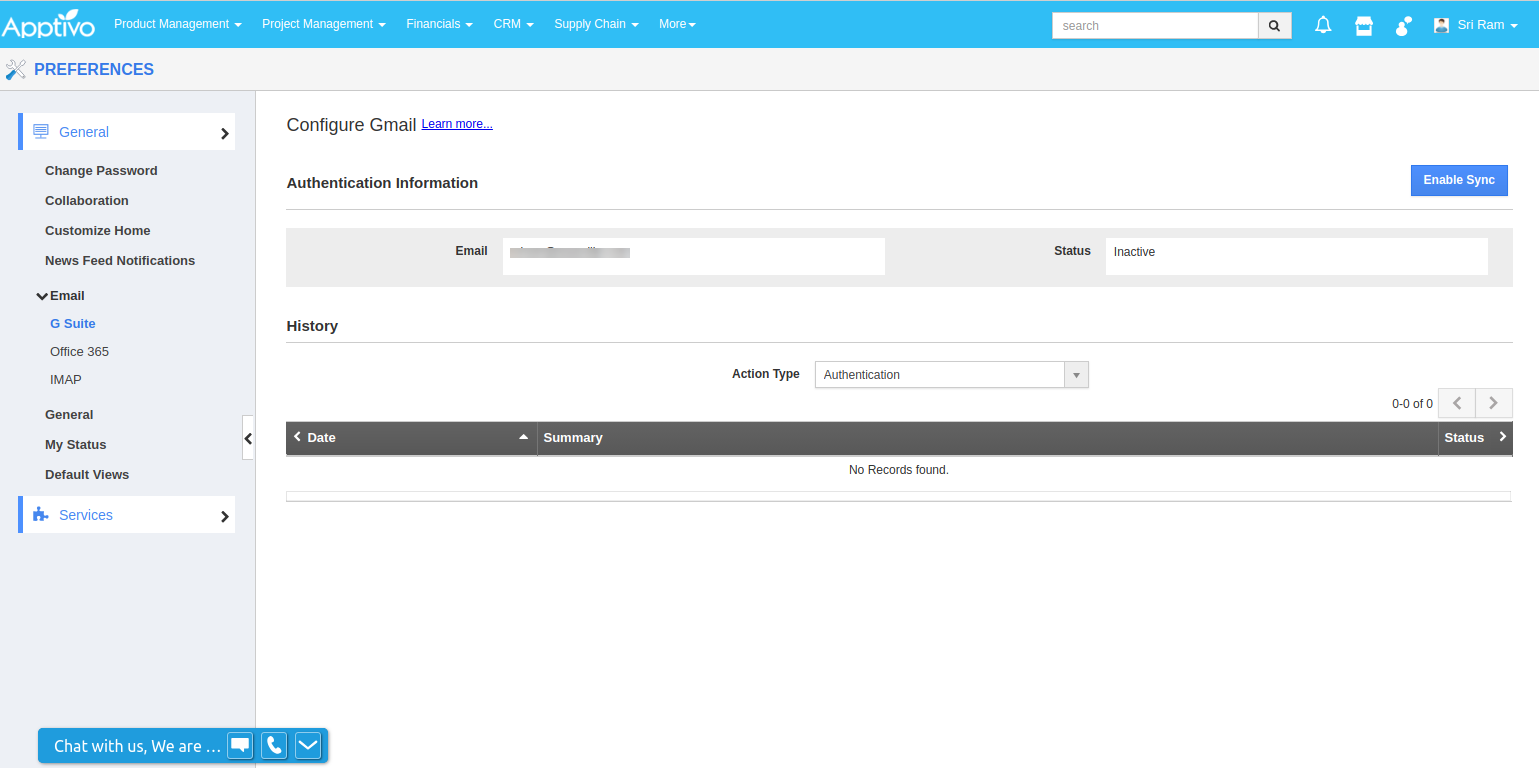
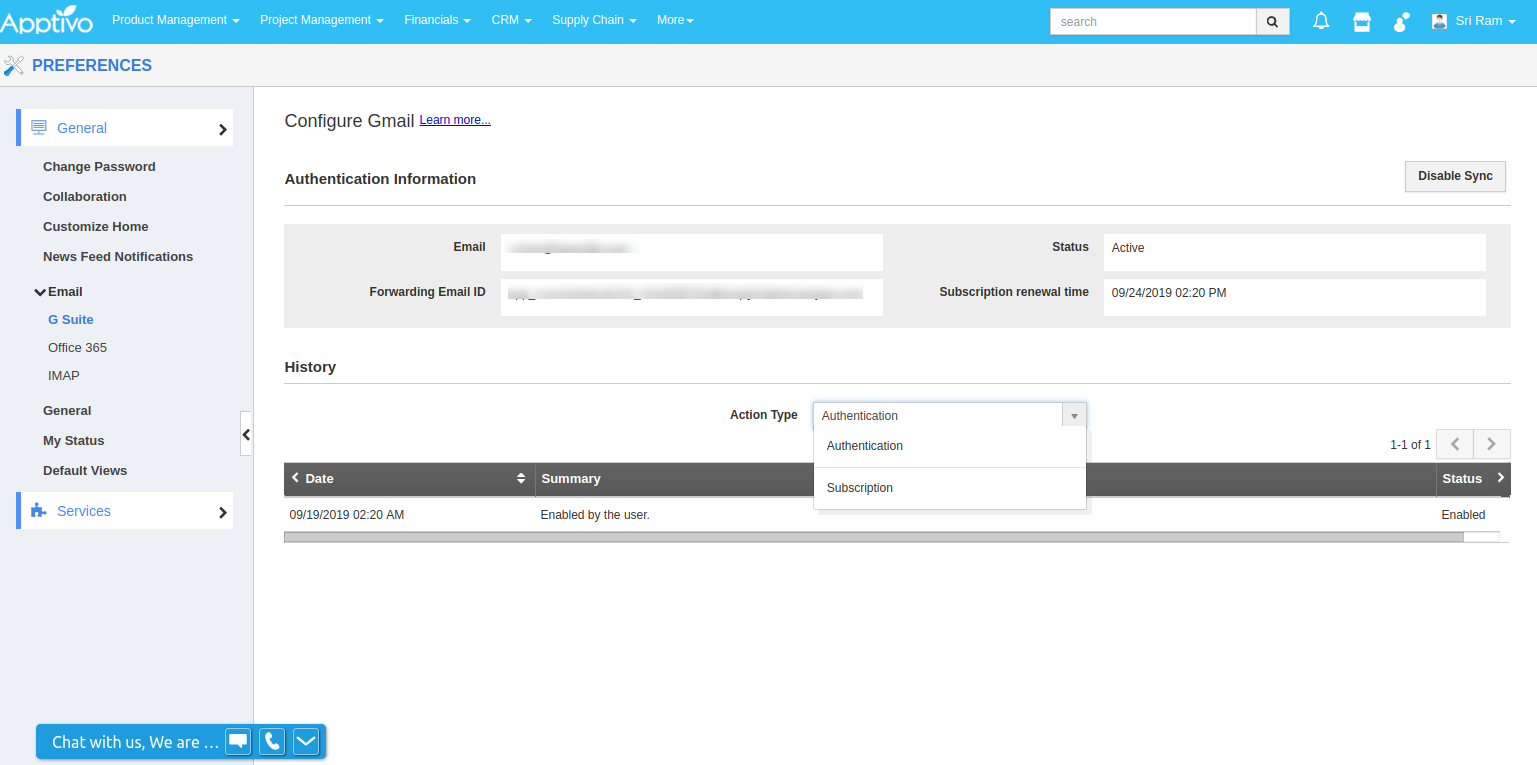
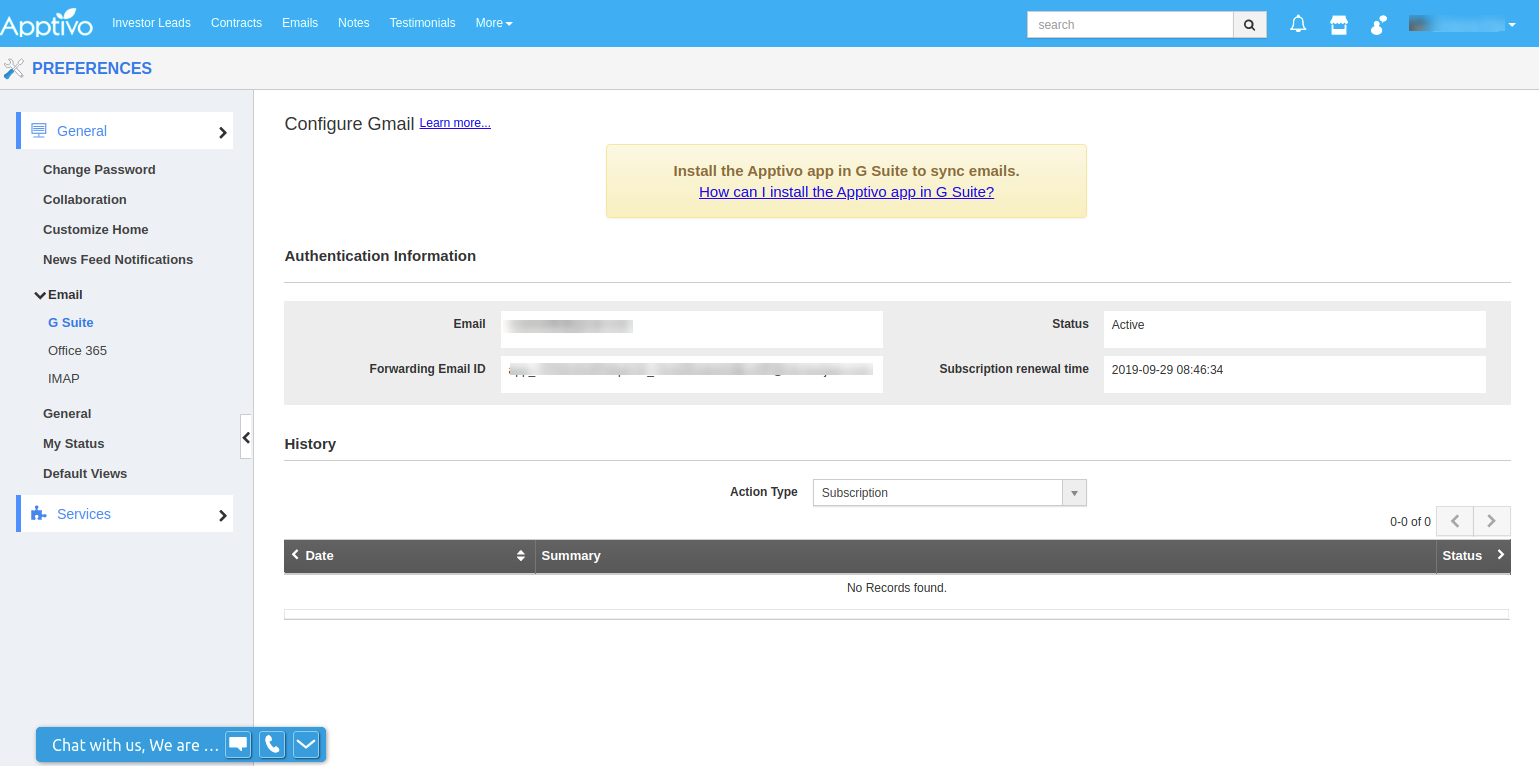
- In your Apptivo account, click on Preferences -> General -> Email -> G Suite. You will be directed to the “Configure G Suite” page. Here, the Email ID used in the G Suite account will be auto-populated.
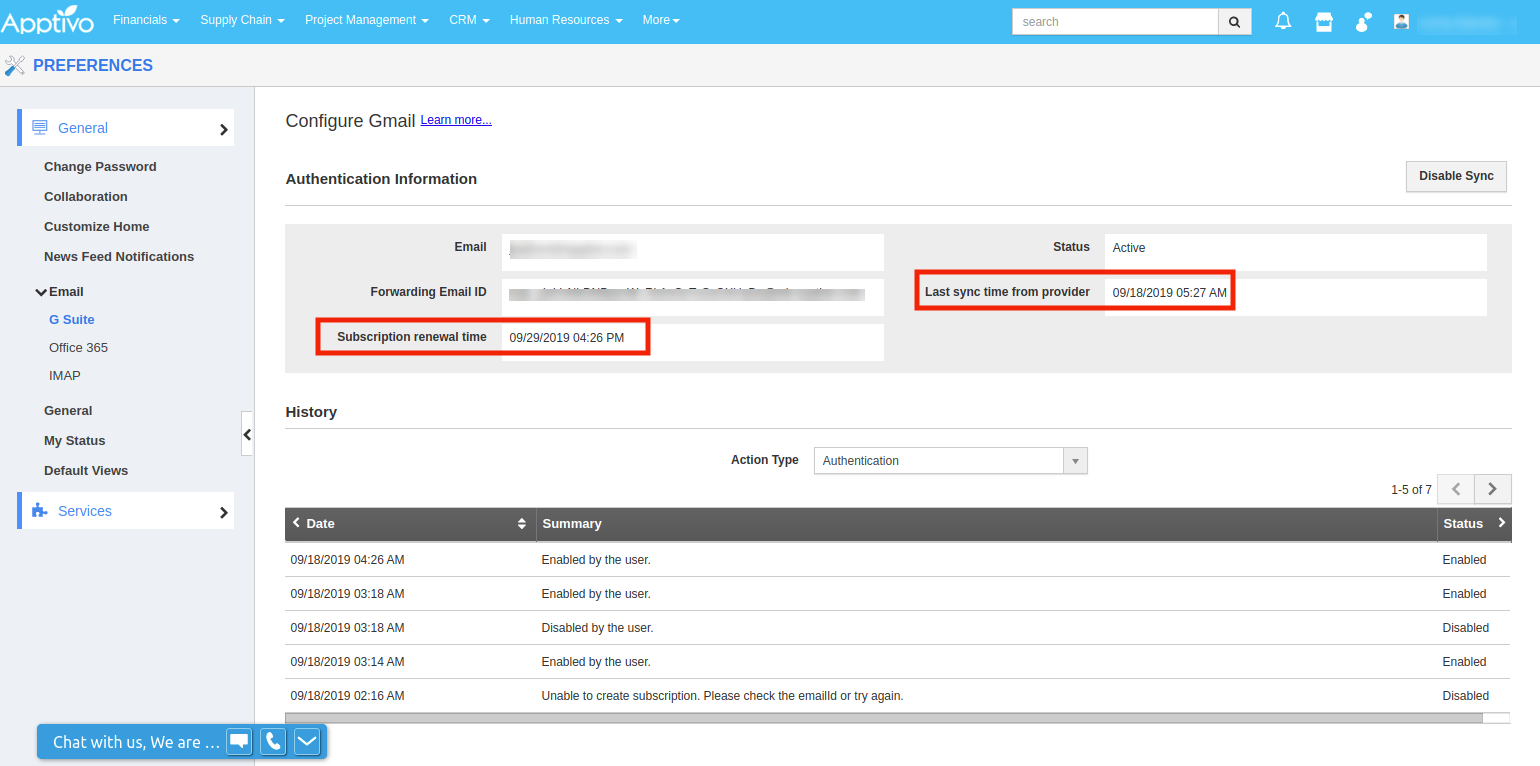
- You have the option to view the history of Authentication and Subscription. This can be viewed by selecting the preferred action from the “Action Type” dropdown.
- Now, click on “Enable Sync”.
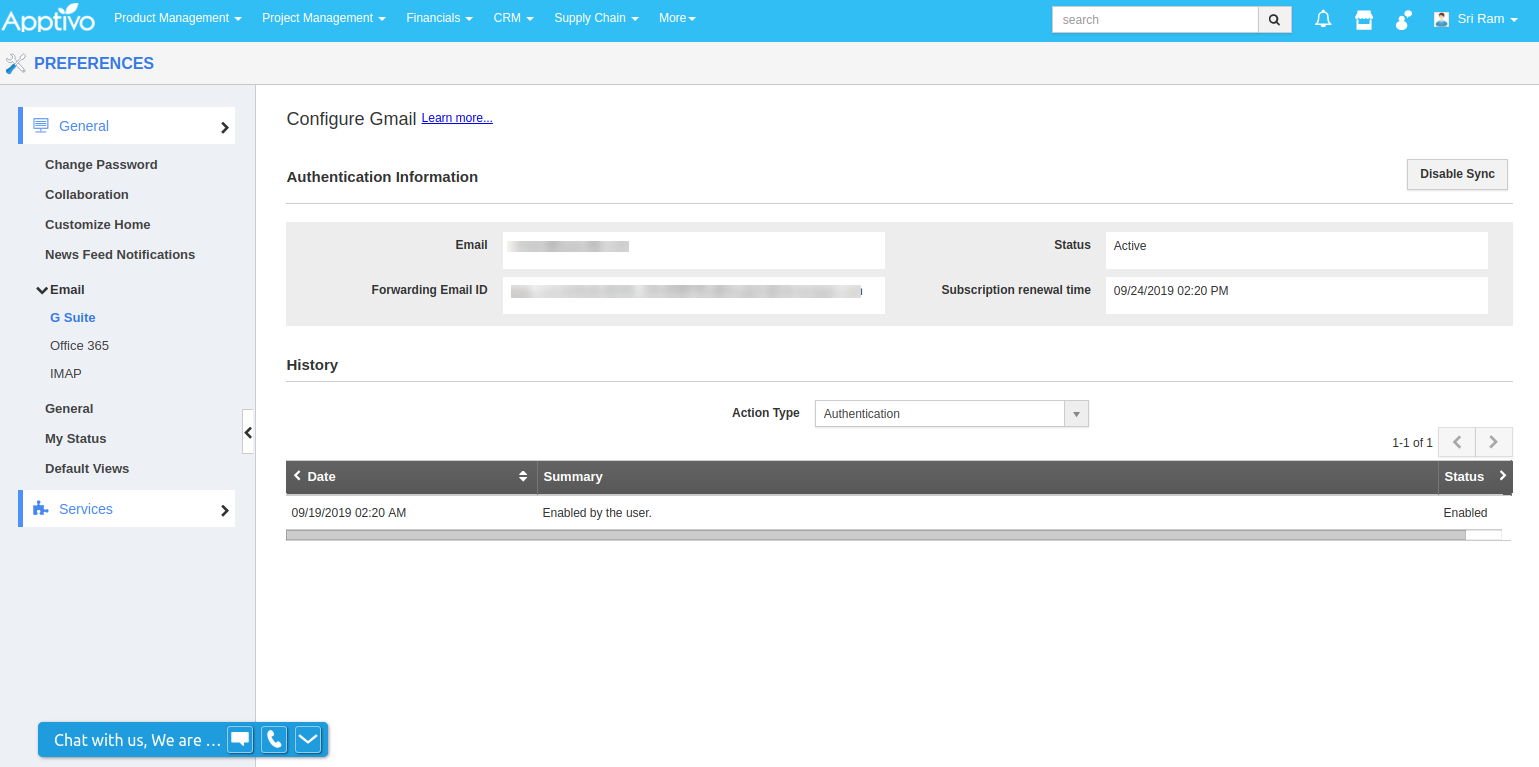
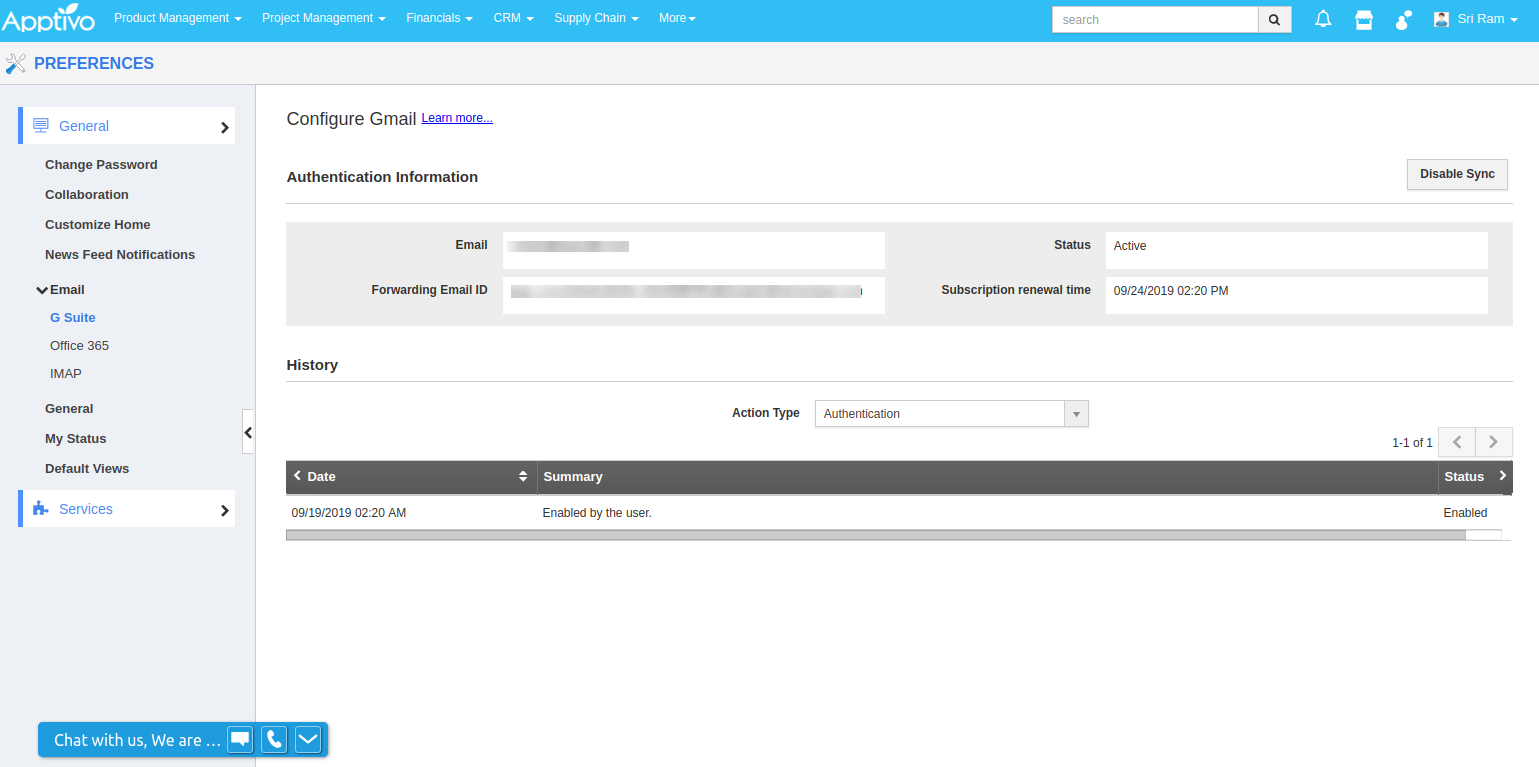
- The sync will be enabled. Forwarding the Email ID field will be visible once the sync is successfully enabled.
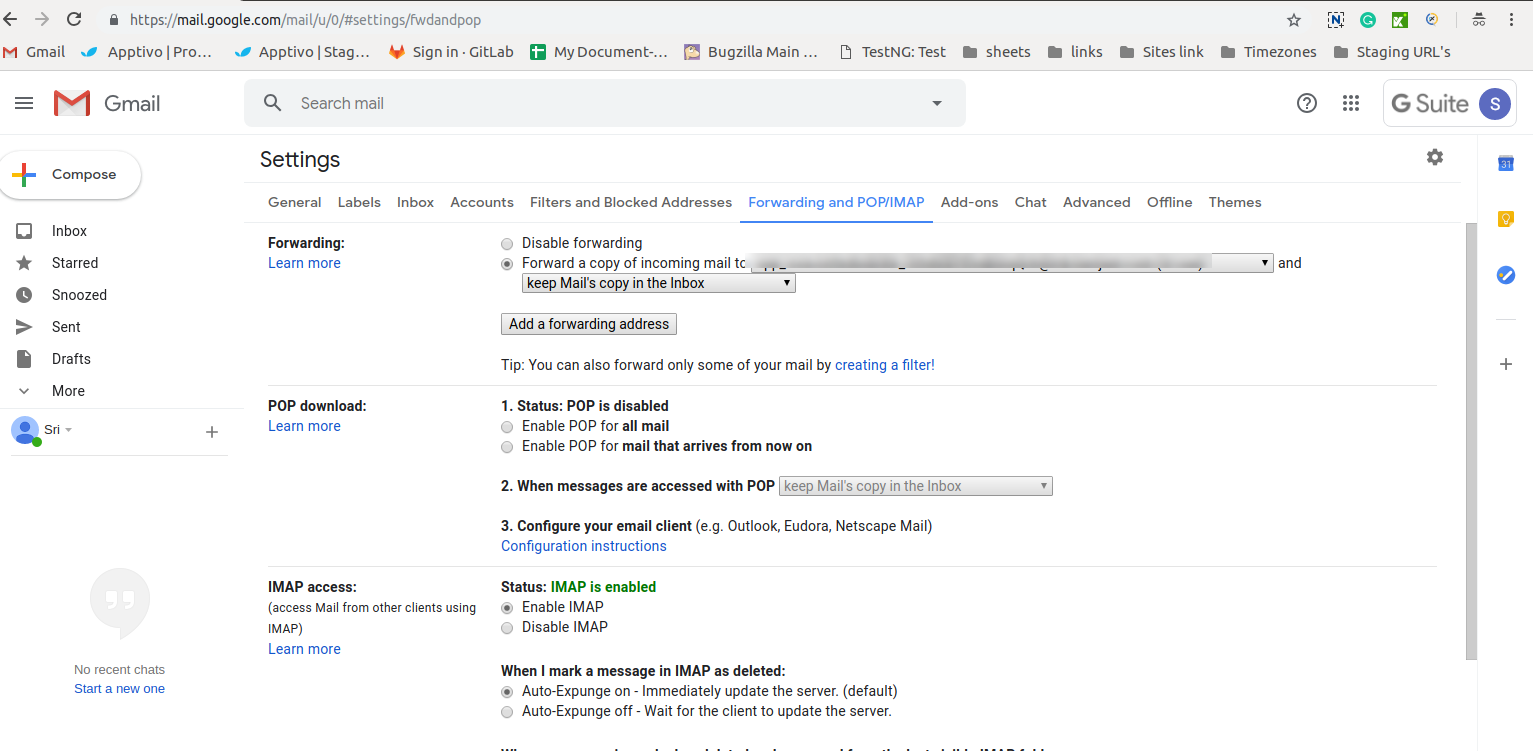
- Copy the Forwarding Email ID from your Apptivo account and paste it in the “Forwarding my Emails” to field in G Suite Forwarding settings. Now, the emails will get synced with Apptivo.
- You can view the last sync time from G Suite, Status of G Suite authentication(Active or Inactive) and history details of Authentication, and Subscription.
You could also synchronize the Emails with Apptivo. Here’s how to do it:
Email Synchronization
Apptivo supports syncing of both the inbox and sent a folder of your email. To receive the complete synchronization experience, you must enable Email Forwarding.
Let’s have a look at it.
Email Forwarding
You can automatically forward all the incoming emails, to any other email account of your choice. Here is a simple way to get automatically the copy of the emails that arrive in Apptivo mail.
Steps to Configure Email Forwarding
- Access from “Apptivo” then go to “Email” option under “Preferences”
- After selecting the “Email “ option click on the “G Suite“ button.
- Then, you must collect the "Forward ID" from Apptivo.
- Once you get the Email Forwarding id, you can configure the "G Suite Email" by using the below steps on how to integrate,
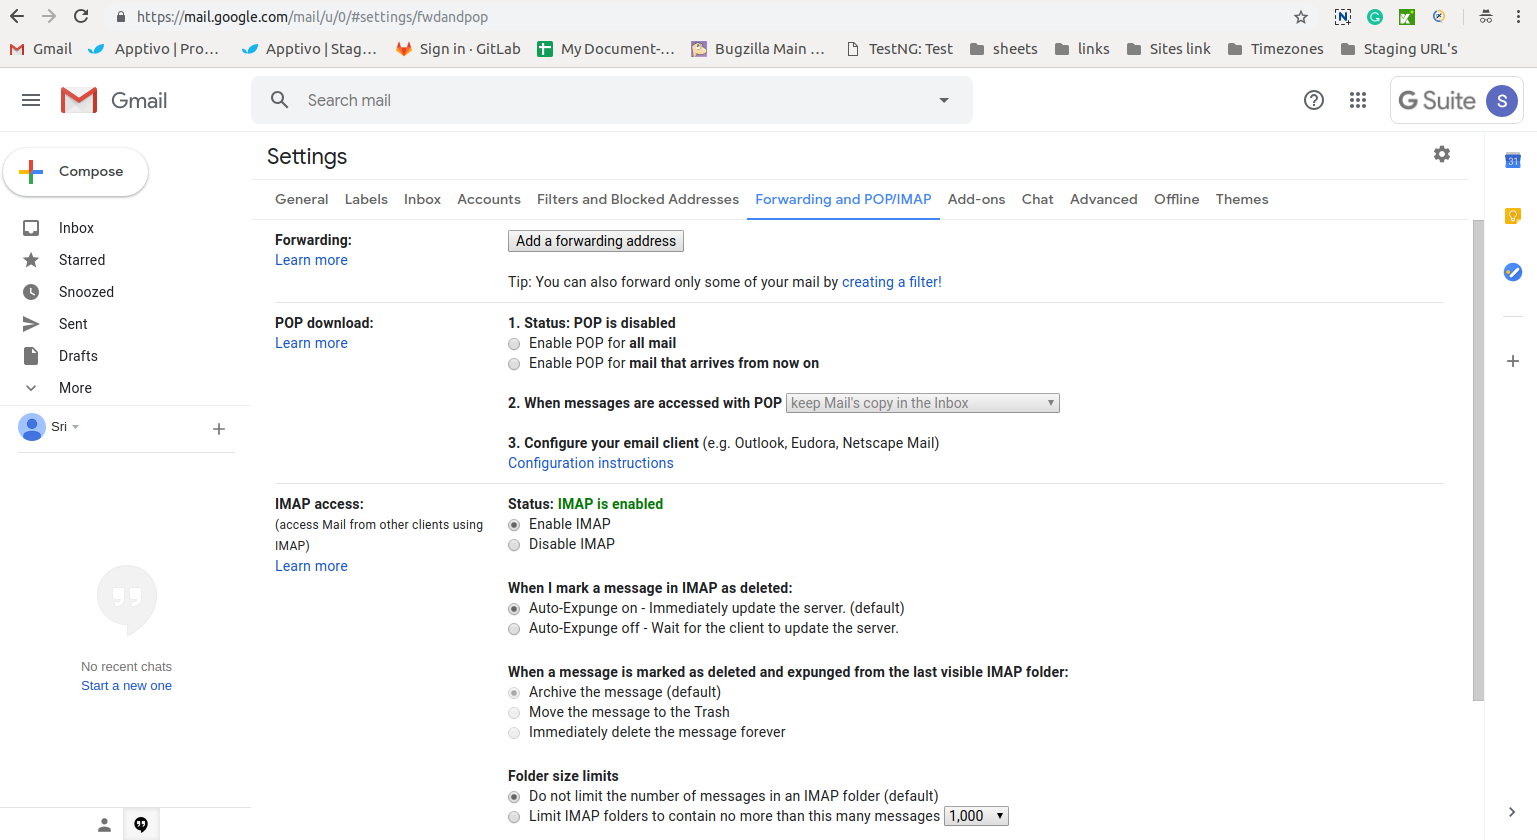
- Login to "G Suite" Web App, click "Settings" → Mail Under Your App Settings.
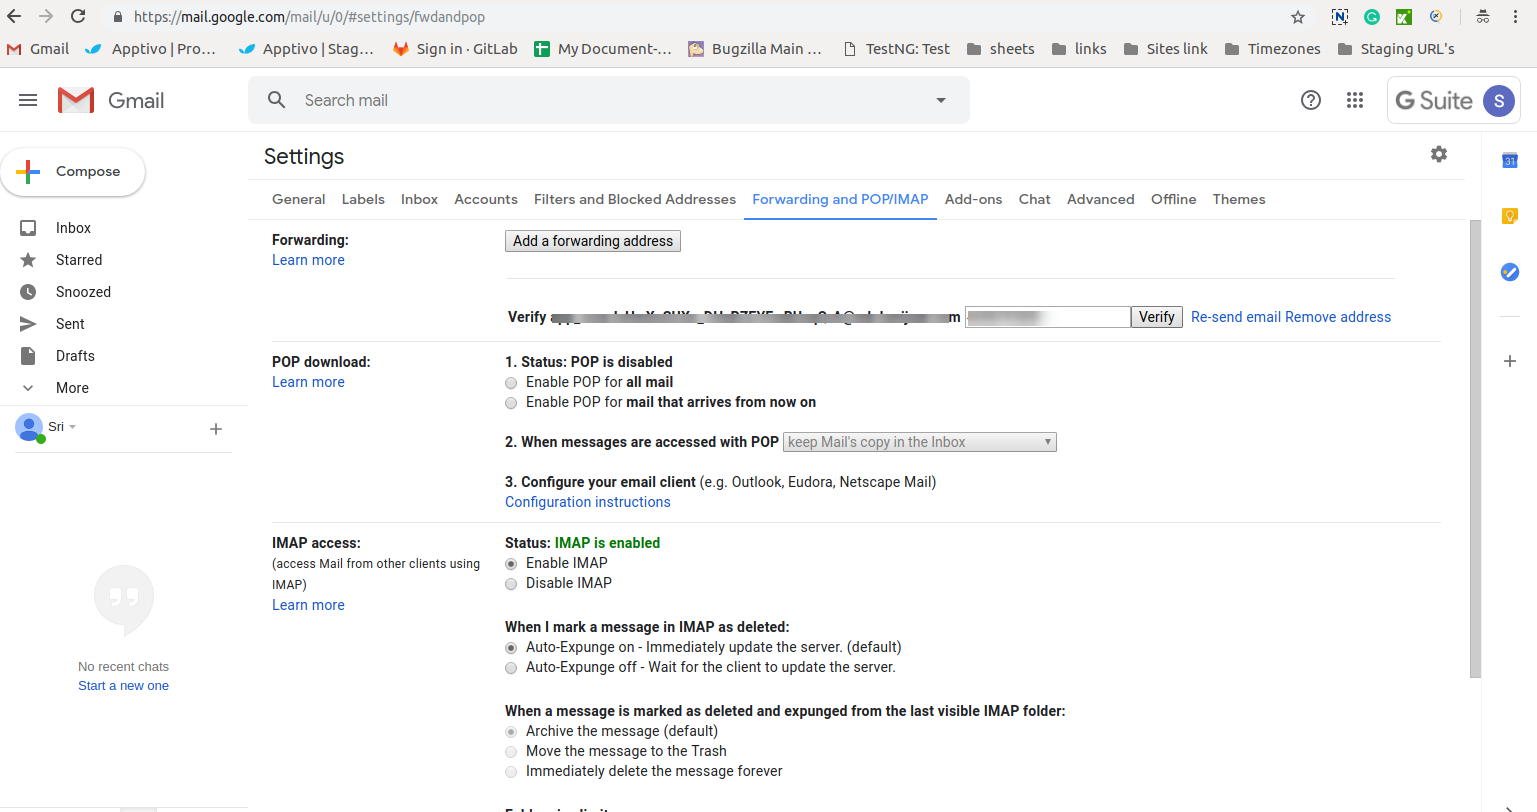
- Go to Accounts → "Forwarding and POP/IMAP"
- Click on “Add a Forwarding address”.
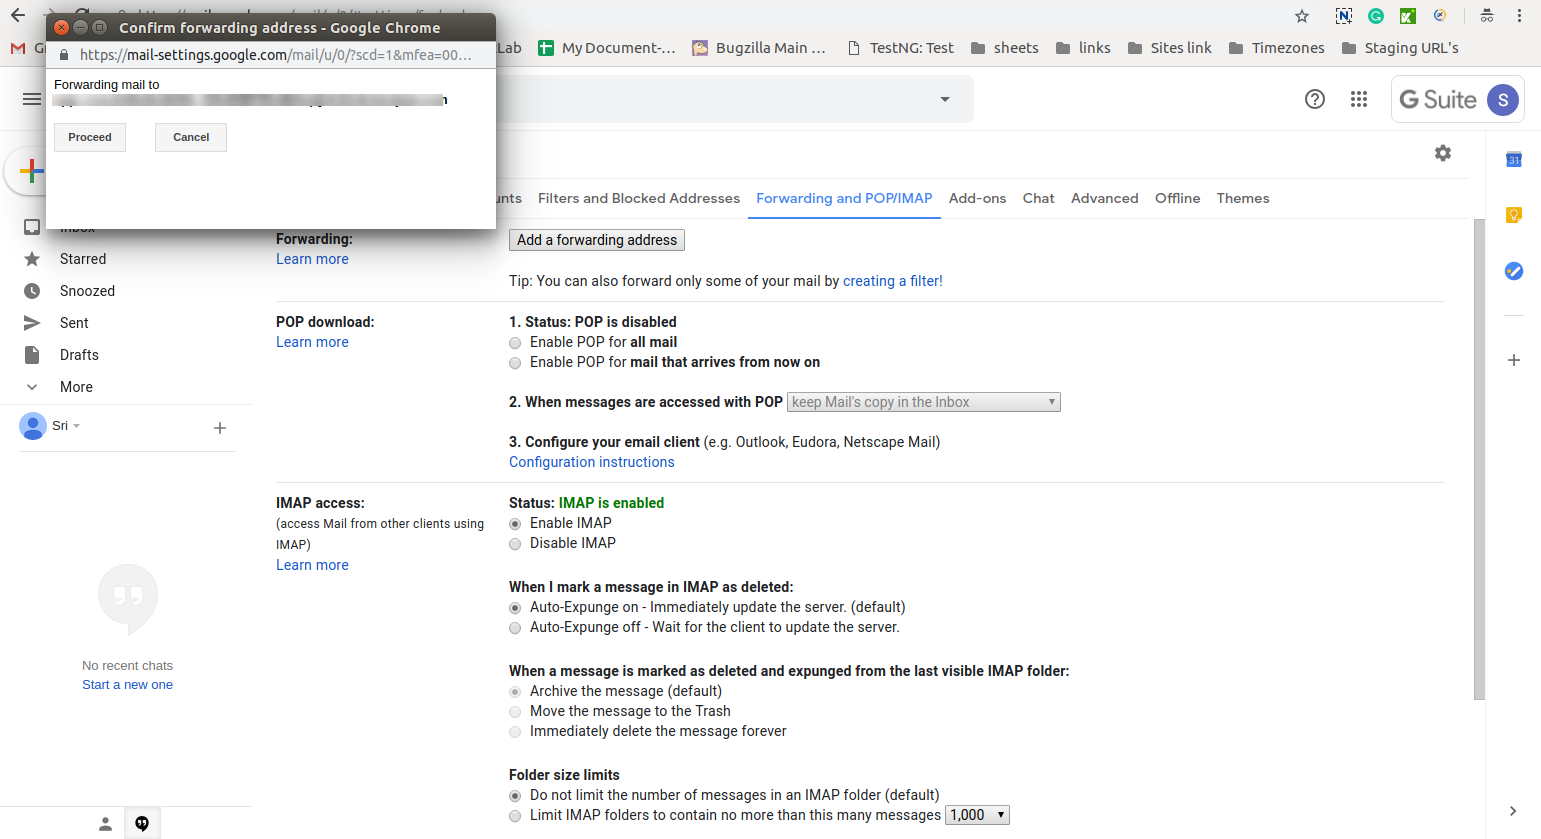
- You put the Apptivo "Forwarding Id" here.
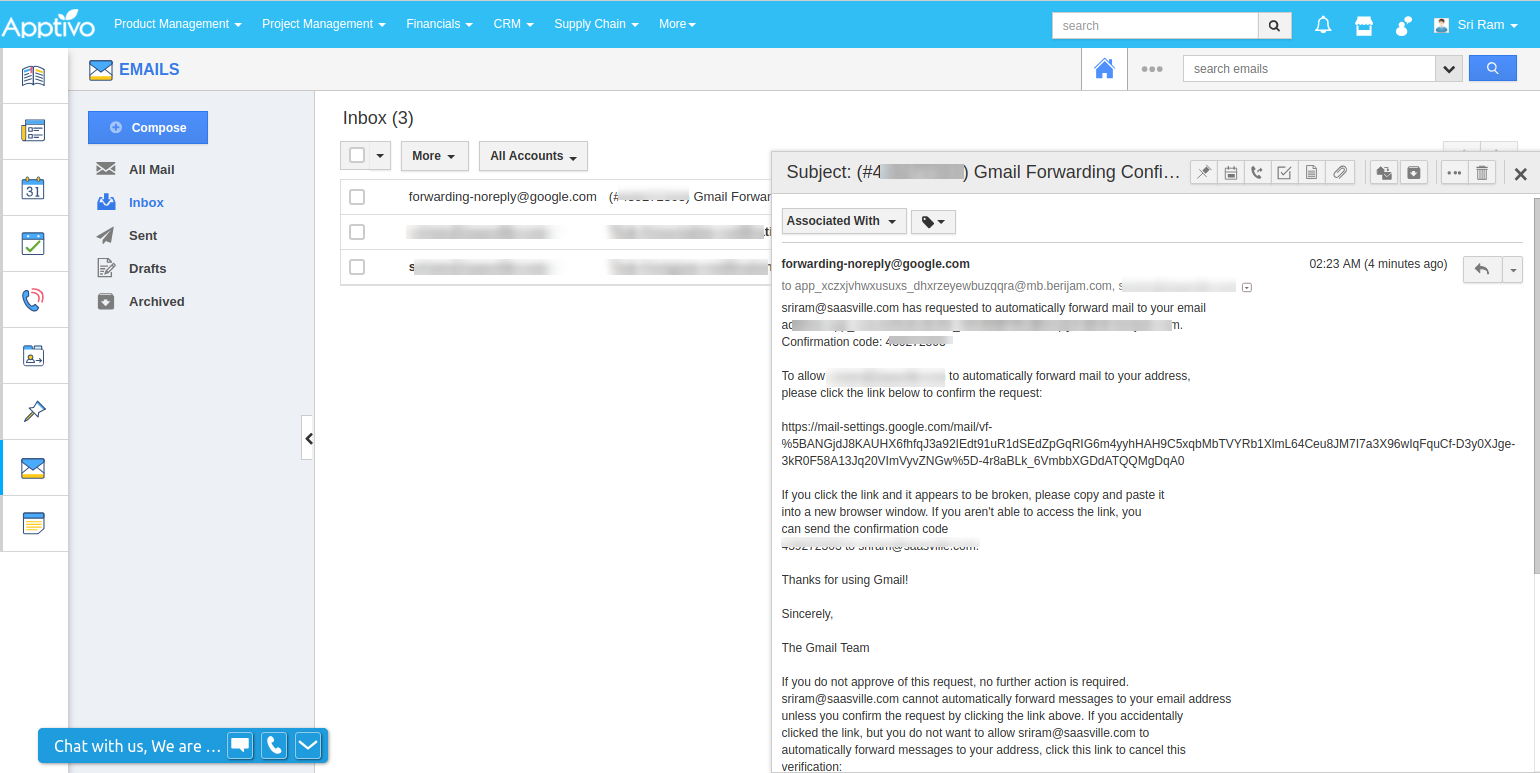
- On adding the forwarding id, proceed to get the confirmation code in your Apptivo emails.
- Copy the confirmation code and paste the same in the G Suite to verify code.
- Select the radio button to forward a copy of the incoming emails to the specified email.
- You can find the subscription renewal time with the last synced time being updated.
- Once finish the above steps, you can get all your G Suite emails into Apptivo.
Note:
- If the Admin installs the Apptivo Emails app in domain level, then all non-super users under the same domain will have the app added to their G Suite and Apptivo accounts. The other users with the same domain have to enable the Apptivo Emails app in their respective accounts.
- Once you enable the sync, emails from your G Suite mailbox will be available in Apptivo (the emails which are arriving after enabling the sync will be synced to Apptivo).
- All existing Gmail users' email sync will be moved to IMAP automatically.
For Existing Users:
Existing Users will have the below window. You need to install the Apptivo Emails app for their G Suite domain by following the steps mentioned above.
Note:
- If the existing users don’t want to proceed with the Apptivo Emails app, you can continue to sync with the prevailing OAuth till the OAuth sync is failed.
