Browse by Solutions
Browse by Solutions
How do I Create and Set Triggers in the Sales Receipt App?
Updated on September 23, 2024 07:41AM by Admin
Triggers empower you to automate actions increasing effectiveness and ensure business process does not slip through. With every trigger you set up, you can characterize a sequence of automated actions and activities to trigger once the conditions are fulfilled. Sales Receipt App allows you to set the following two types of triggers - Event Based and Time Based.
With triggers, you are able to specify exactly how an automation should be initiated. You can add multiple triggering conditions so that the same automation is initiated for multiple events.
Event Based Triggers
The Event Based Triggers in Apptivo Sales Receipt App are used, when there is a need to execute an action after the occurrence of a certain event. Here, the trigger can be set for the events like Sales Receipt Creation and Sales Receipt Updation.
Time Based Triggers
Time based triggers are created and executed when you would want to perform an action multiple times (Recurring) or only once (One-Time) after the triggering criteria is met.
Trigger Actions
Trigger actions are nothing but the automated actions that has to be performed once the triggering criteria is satisfied. Once a trigger criteria are set, there are four automatic actions that can be triggered:
- Send Email - An email can be triggered to the Referred By, Assigned To, Customer, Employee or a Team.
- Update Attribute - Updates a particular attribute value.
- Update Associated Object Attributes - Updates the attribute values of its associated objects.
- Call a Webhook URL - A Webhook URL gives you the ability to push the real time information from Apptivo to your customer database instantly. Through Webhook URL the details created/updated/deleted in Apptivo will get reflected in your Customer’s database enabling your employees/ the concerned to make hold of the data.
For instance: If you want to notify your customer on the payment done, then you can create an event based trigger which will send out an email to the customer automatically. Here,
- Event - Sales Receipt is paid.
- Action to be triggered - Send an acknowledgement email to the customer.
Steps to Create Event Based Triggers
- Go to the Sales Receipt App.
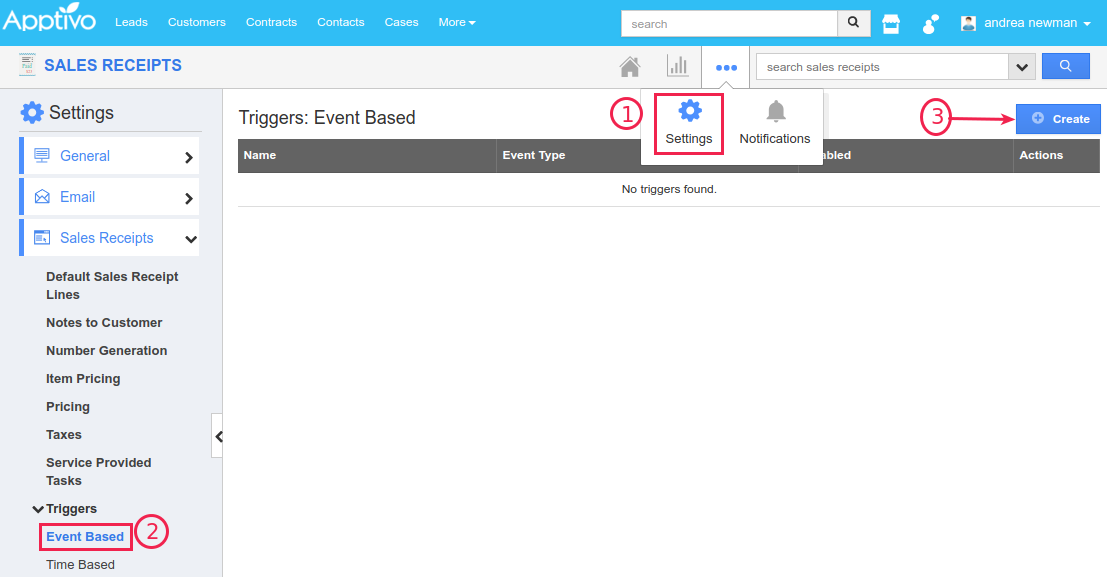
- Click on “More (...)” icon -> “Settings” -> “Sales Receipts” -> “Triggers”.
- Select “Event Based” triggers option. And click on “Create”.

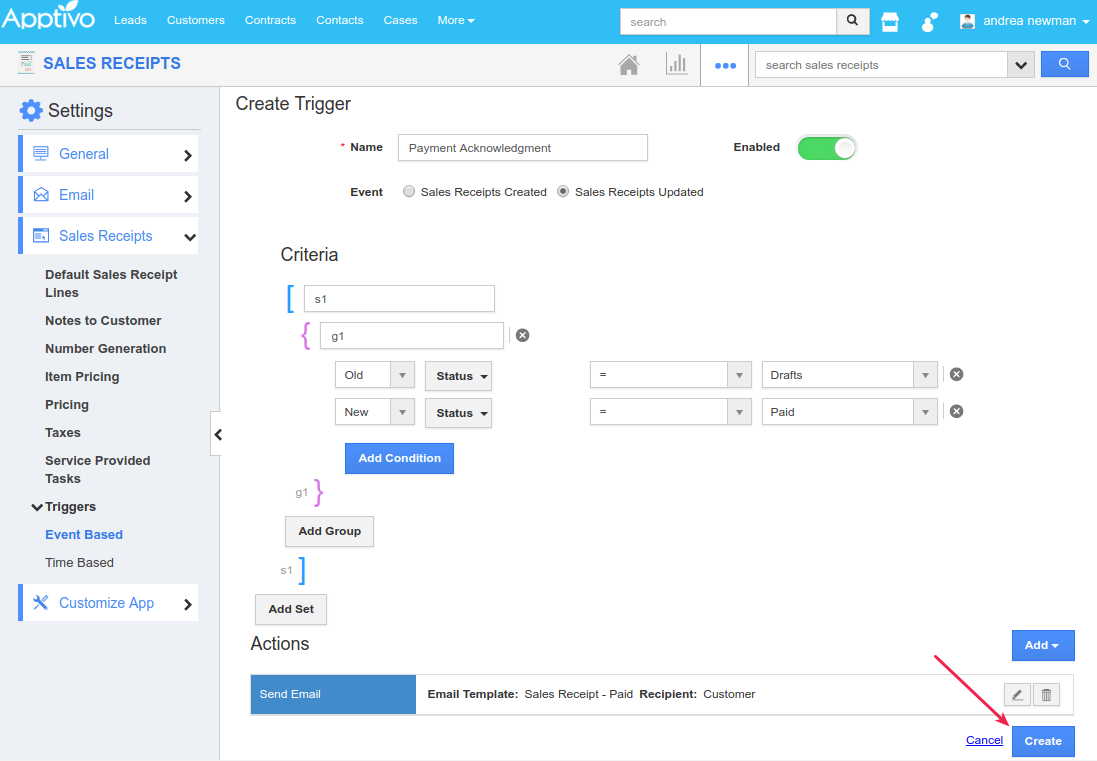
- In the creation page, define the following:
- Name - Enter the name of the event based trigger.
- Enabled - Slide the toggle ON, to keep this trigger working.
- Event - Select “Sales Receipt Updated” by checking on the respective radio button.

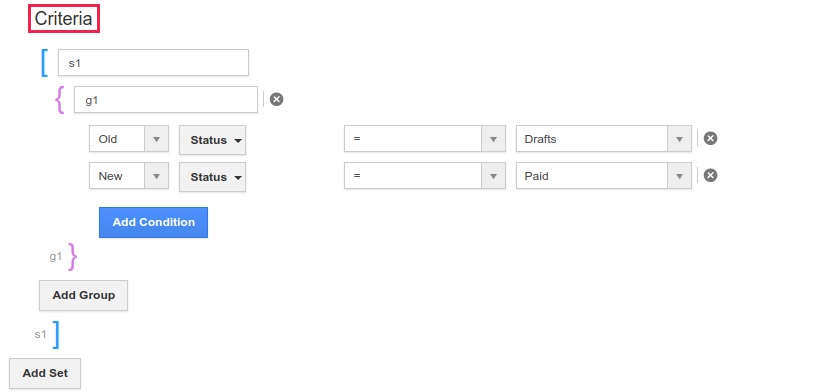
- The Criteria section is where we are going to define the trigger condition. Here, the Status field denotes the state of the sales receipt (if it is paid or not). That is, when “Status=Paid” it signifies that the sales receipt has been paid by the customer. So, we are now going to set the criteria based on the Status as - when it gets updated to Paid value.

- In the “Action” section, select “Send Email”.

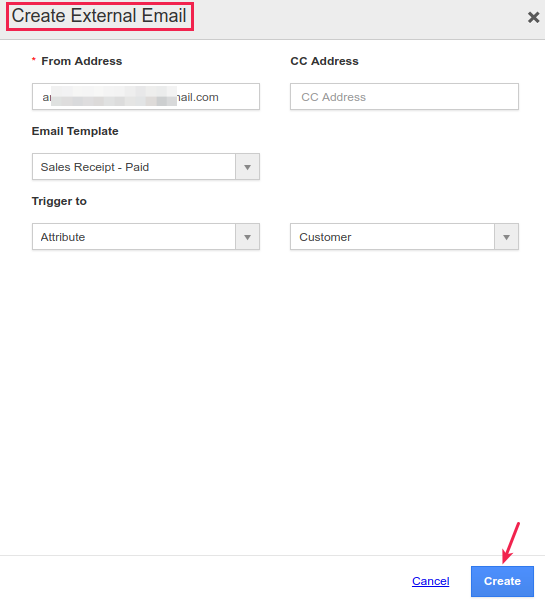
- The Create External Email popup will be displayed. In the Trigger To drop down, select “Attribute” and set it Customer.
- Click on “Create”.

- Finally, click on “Create” to complete.

- So, now whenever a sales receipt gets paid, an email will be triggered to that customer, as shown in the image below:

