Browse by Solutions
Browse by Solutions
What are Activities Floating Bar and how do I use them?
Updated on June 20, 2018 07:15AM by Admin
Activities Floating Bar in Apptivo allows you to quickly create tasks, events, follow-ups, call logs and notes from anywhere in the Overview pages across all the apps. You can enable this feature by following the steps below: See example use cases
- Log in to your account.
- Click on your name at the top-right corner and select Business Settings from the list of options.
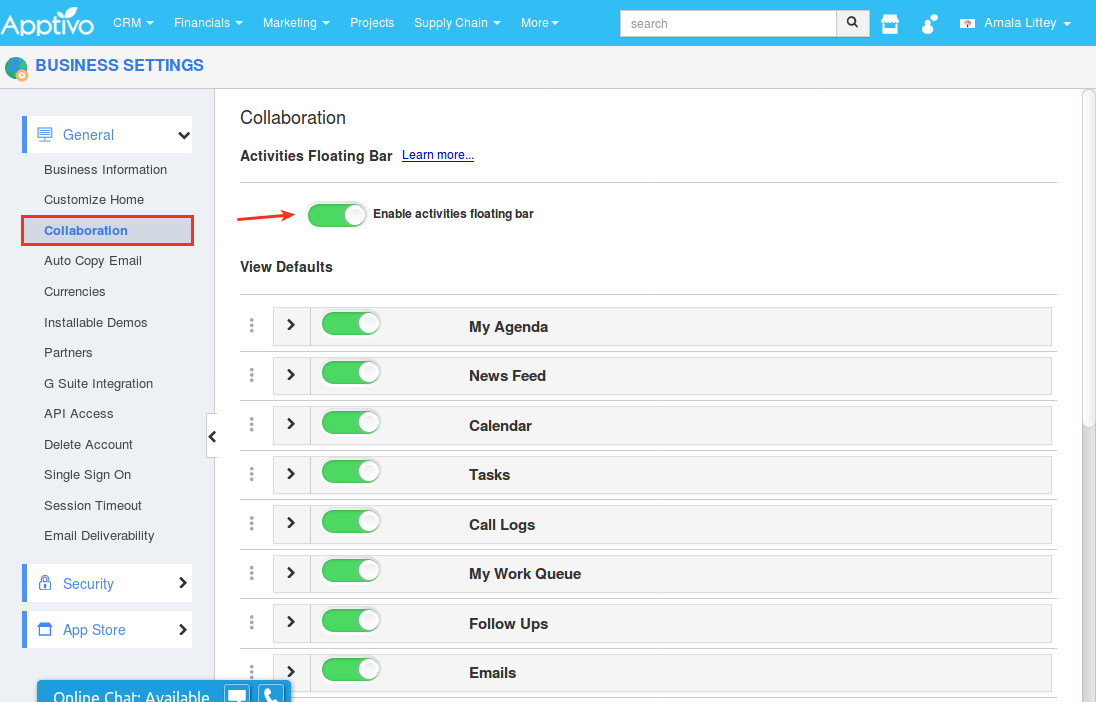
- Click Collaboration tab the left navigation panel and slide the toggle ON for Enable activities floating bar setting.

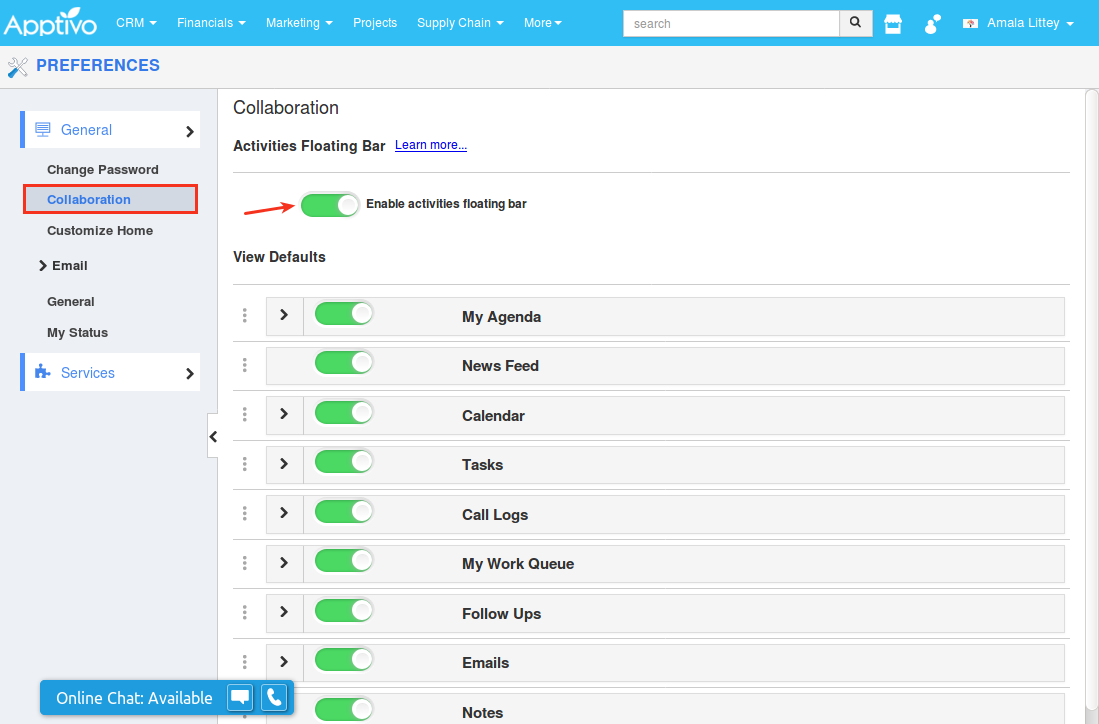
- Once that’s done, go to the Preferences section and click Collaboration tab from the left navigation panel and slide the toggle ON for Enable activities floating bar setting.

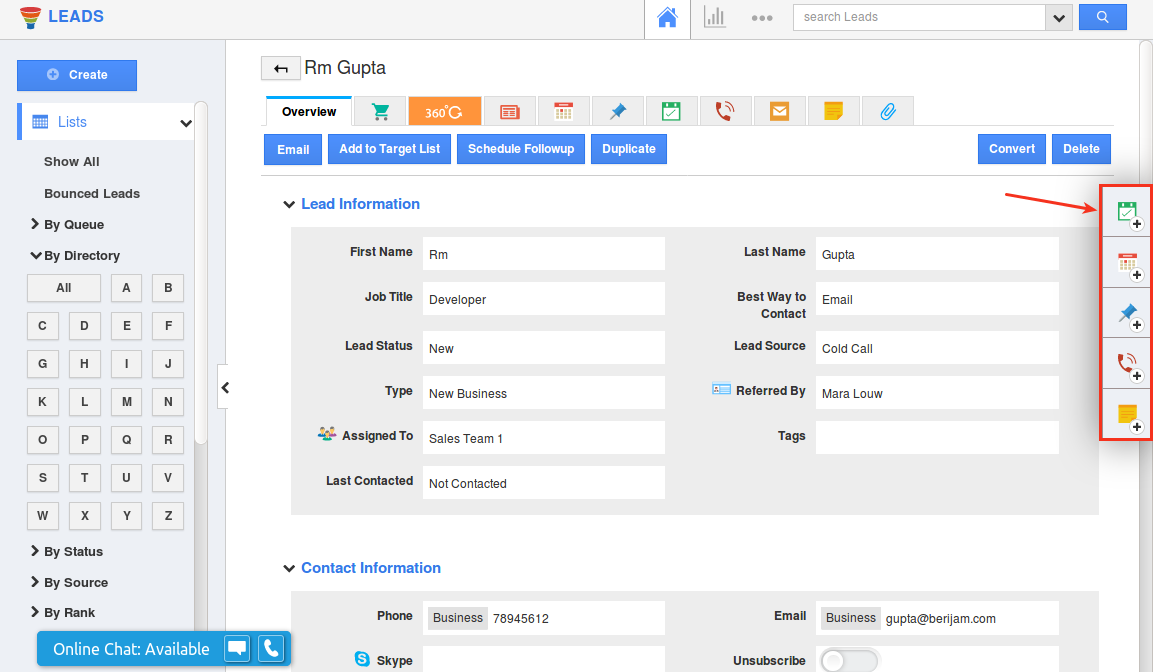
- Once enabled, activities floating bar will appear in the apps. You can use the Create Task icon (first icon from top) to create the task.

Example Use Cases
Consider the following instances, where activities floating bar could make your life easier.
Example scenario 1:
Assume you’re in a lead overview page and you remembered that you have to send him a proposal in a few days. Now you can quickly create this as a task and associate it with that lead by clicking the Create Task icon in the activities floating bar located on the right side of the screen. Create Task page will pop up allowing you to create the task with a due date and other relevant details.
Example scenario 2:
Assume you are in the Contacts Association Table in the Leads app and you remembered that you have to send him a purchase order. You can quickly create this as a task and associate it with that contact by clicking the Create Task icon in the activities floating bar located on the right side of the screen. Create Task page will pop up allowing you to create the task with other relevant details.
Example Use Cases
Consider the following instances, where activities floating bar could make your life easier.
Example scenario 1:Assume you’re in a lead overview page and you remembered that you have to send him a proposal in a few days. Now you can quickly create this as a task and associate it with that lead by clicking the Create Task icon in the activities floating bar located on the right side of the screen. Create Task page will pop up allowing you to create the task with a due date and other relevant details.
Example scenario 2:Assume you are in the Contacts Association Table in the Leads app and you remembered that you have to send him a purchase order. You can quickly create this as a task and associate it with that contact by clicking the Create Task icon in the activities floating bar located on the right side of the screen. Create Task page will pop up allowing you to create the task with other relevant details.
Test
Test update

