Browse by Solutions
Browse by Solutions
How do I Build My Own Custom View in the Invoice App?
Updated on July 24, 2023 11:30PM by Admin
Custom views enable you to create customized views by defining the criteria according to your requirement.The custom views created by the user will be listed in the left panel views of Invoice App. That is it can be saved. Customized views are usually created using the attributes(column fields) that are frequently used.
Let’s quickly go through the following steps to understand better
Steps to Build My Own Custom Views in Invoice App
- Login and access to the Invoice App from the Universal navigation menu bar.
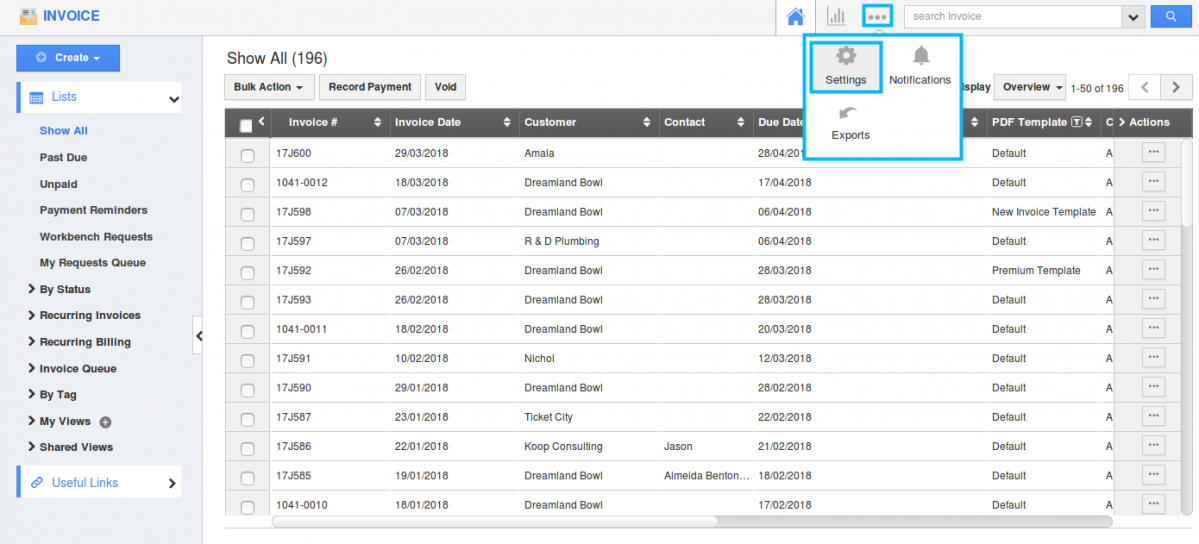
- Click on More -> Settings from the App header bar.

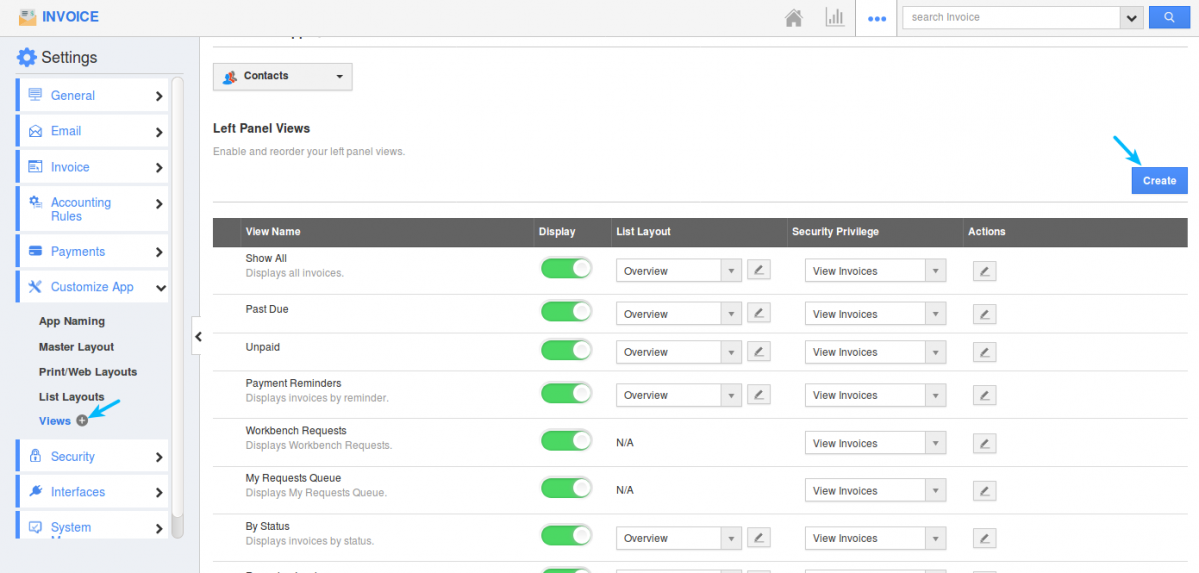
- You will be directed to the Settings page. Click on “Customize App -> Views” from the left navigation panel.
- Click on “+” icon to create a new view or Click on Views and you will be opened with View page.

- Click on “Create” button to create a new view.
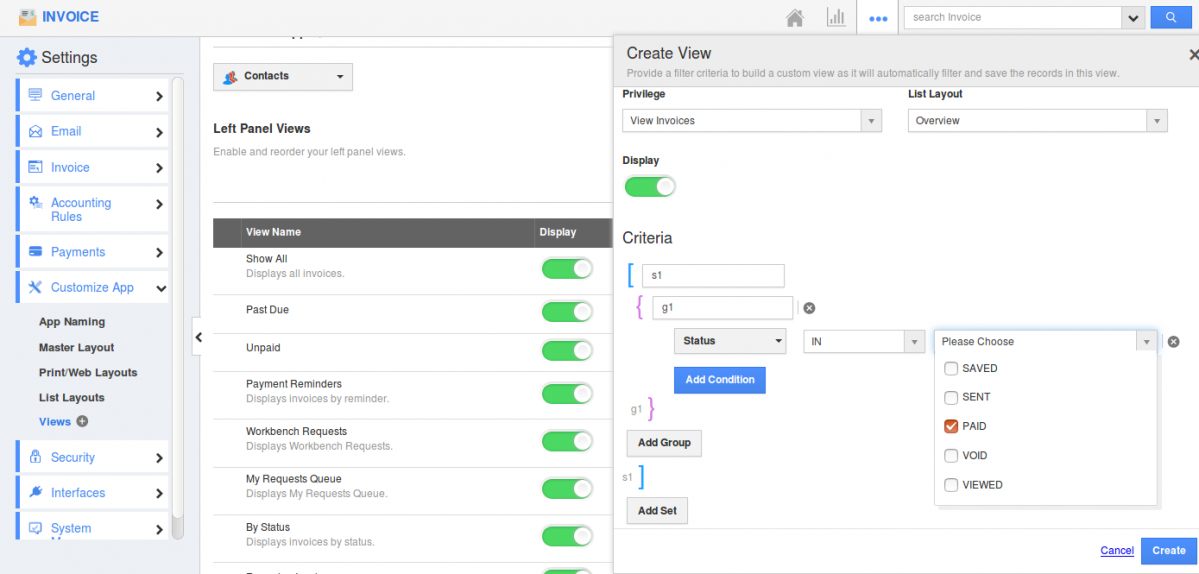
- Provide with Title, Description, privilege and give your own criteria by giving your needed conditions. Tap on Create button after providing all information.

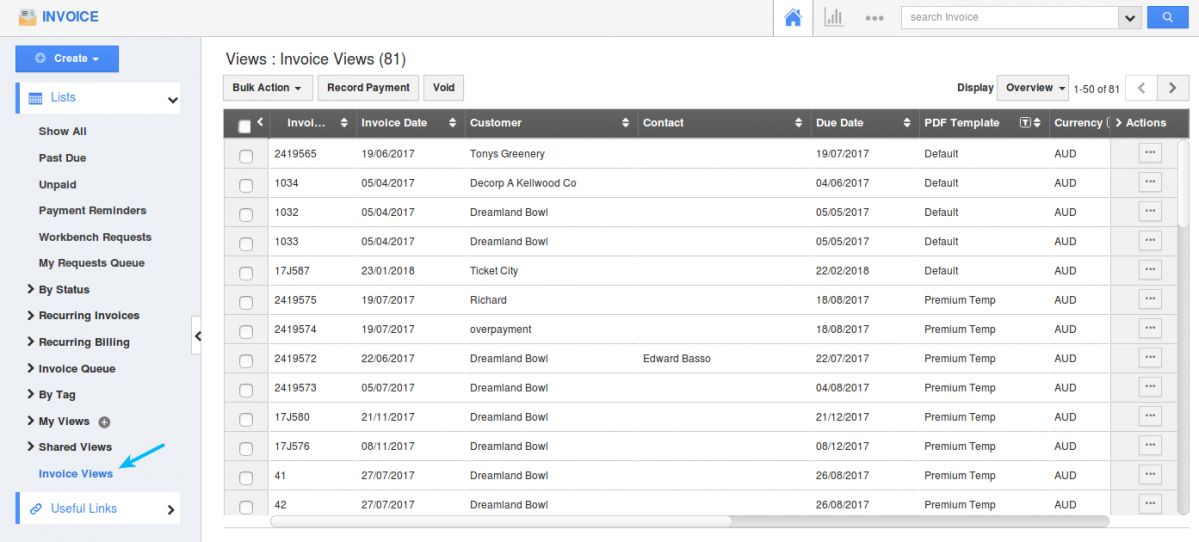
- Your view will be saved and it will be displayed in the left panel of the Invoice home page.

HOW TO DELETE CUSTOM VIEWS IN INVOICES APP?
- To delete the view, click on More→ Settings from the App Header Bar.
- The User will be directed to the Settings Page. Click on “Customize App → Views” from the Left Navigation Panel.
- One can see the list of custom views along with the delete icon on the action column.
- The user can click on the “Delete” icon to delete the custom view which is no longer needed.

- Upon successful deletion, a confirmation alert will be displayed.
Flag Question
Please explain why you are flagging this content (spam, duplicate question, inappropriate language, etc):


