Browse by Solutions
Browse by Solutions
How do I view My Custom App in 360 degree view of the Customers App?
Updated on October 11, 2018 10:19PM by Admin
Apptivo gives you the ability to create your own custom apps according to your business requirements using the App Builder App. And these custom apps created, can be viewed in the 360 degree view of the Customers App. Using the App Builder App, you can:
Now, both of these apps can be viewed from the Customers 360 degree view. Follow the steps given to view the custom app in the 360-degree view.
Steps to view Custom App in 360 degree view
- Create a Custom App.
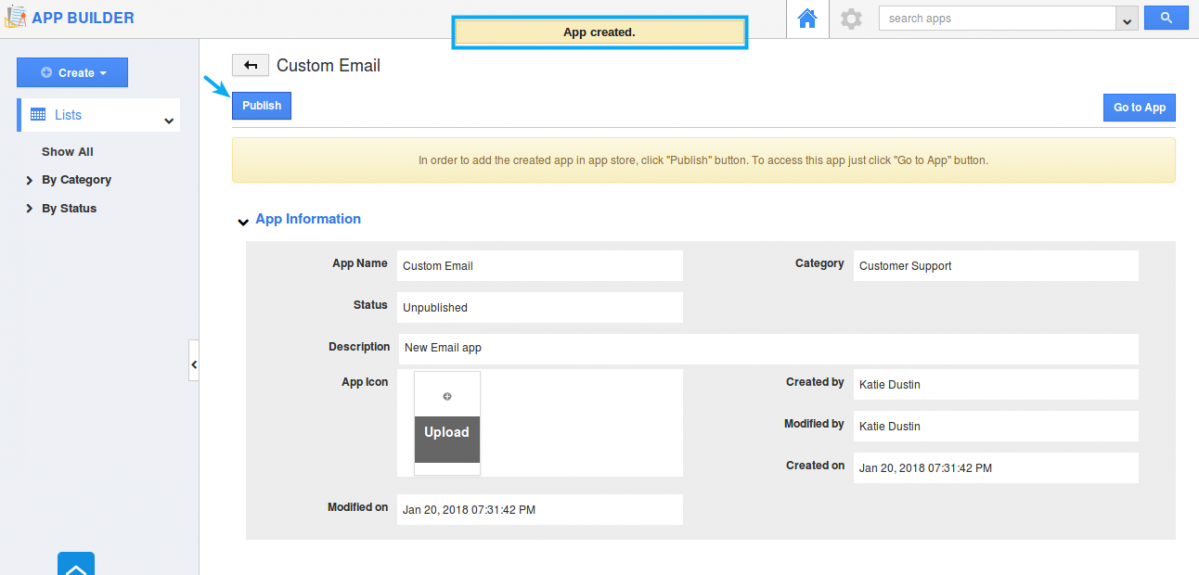
- Your custom app will be created. Click on Publish button to make the app go live.
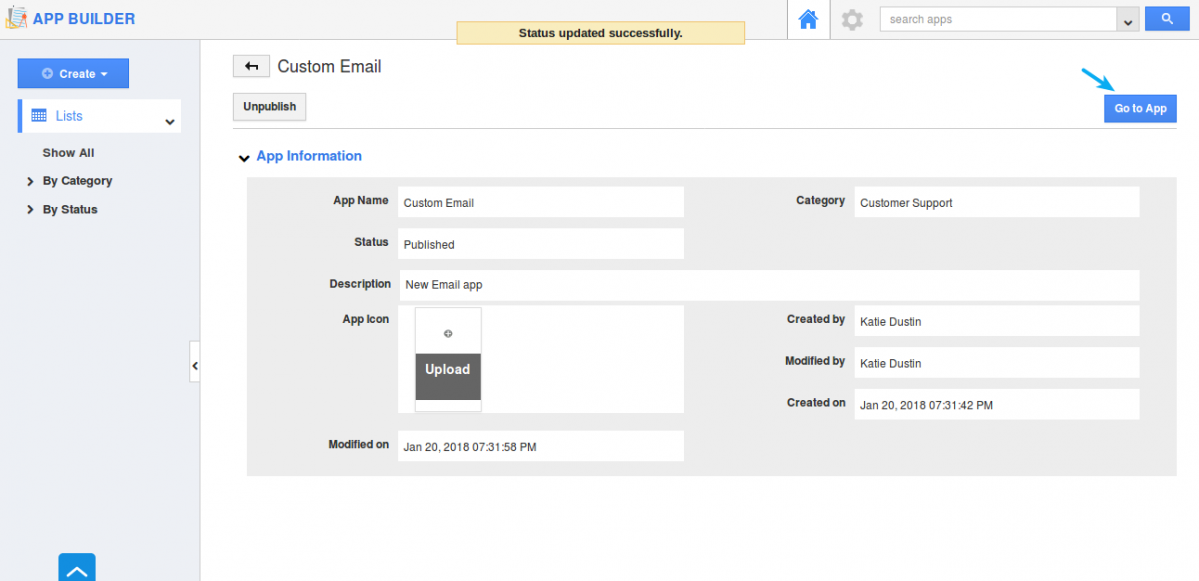
- Select “Go to App” and you will be viewing your created custom app in a new tab.
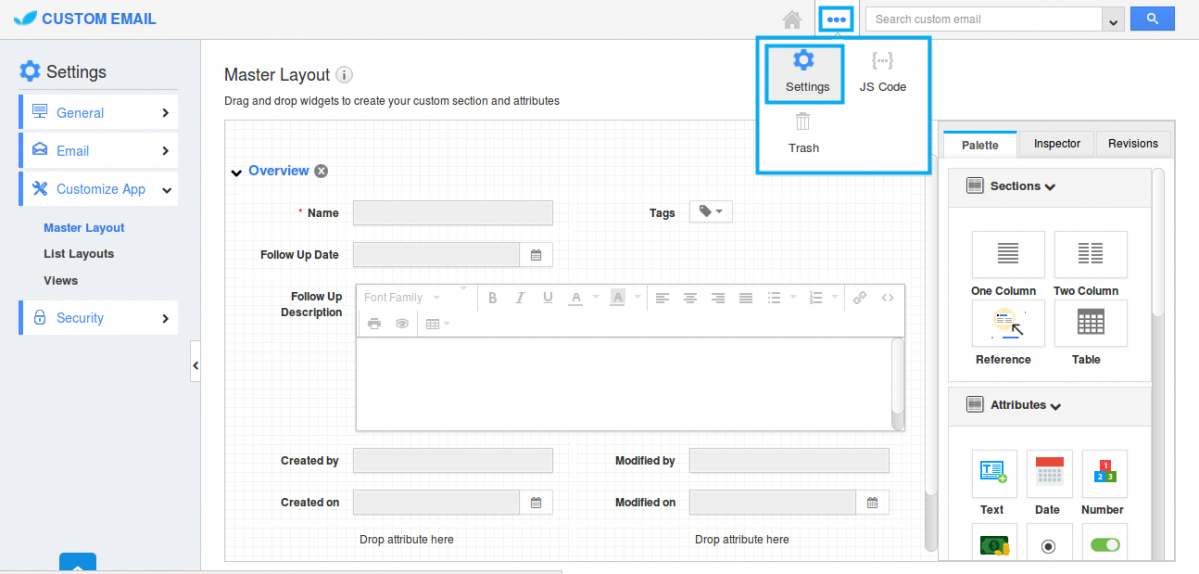
- For instance: The name of the custom app created is Custom Email App. Now move to “More -> Settings -> Customize App -> Master layout” from the left navigation panel.
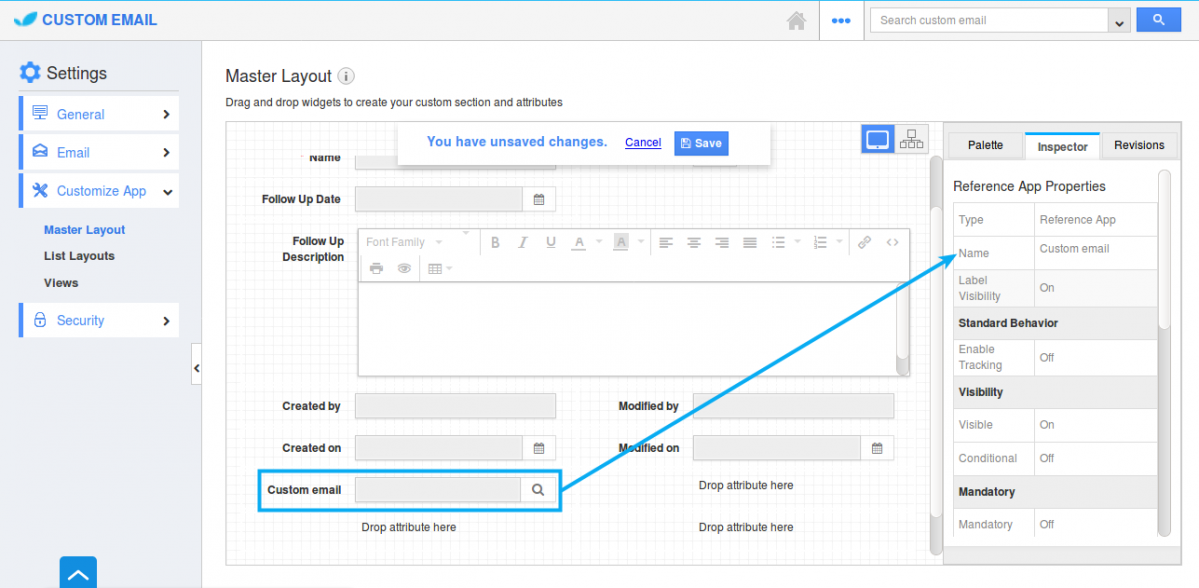
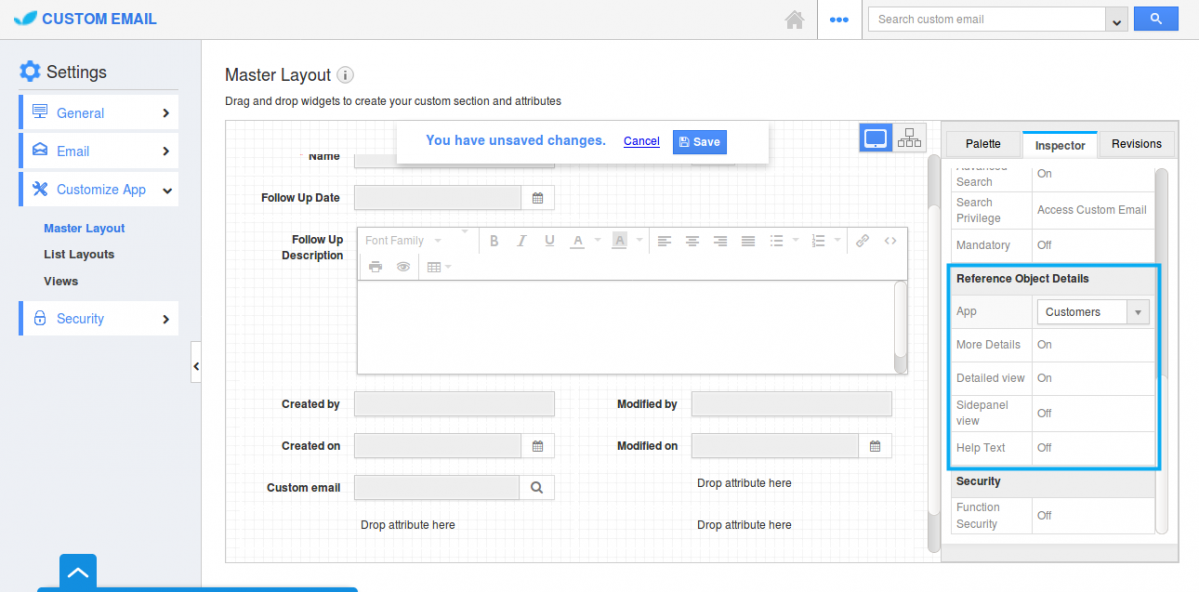
- Drag and drop the Ref App attribute in the Master layout.
- Clicking on the field name in hand opens with Inspector tab where you can change the name of the field.
- Scroll down till Reference Object details section. Select App -> Customers App and click on “Save” button.
- Now, move on to Custom Email App home page and create a new object.
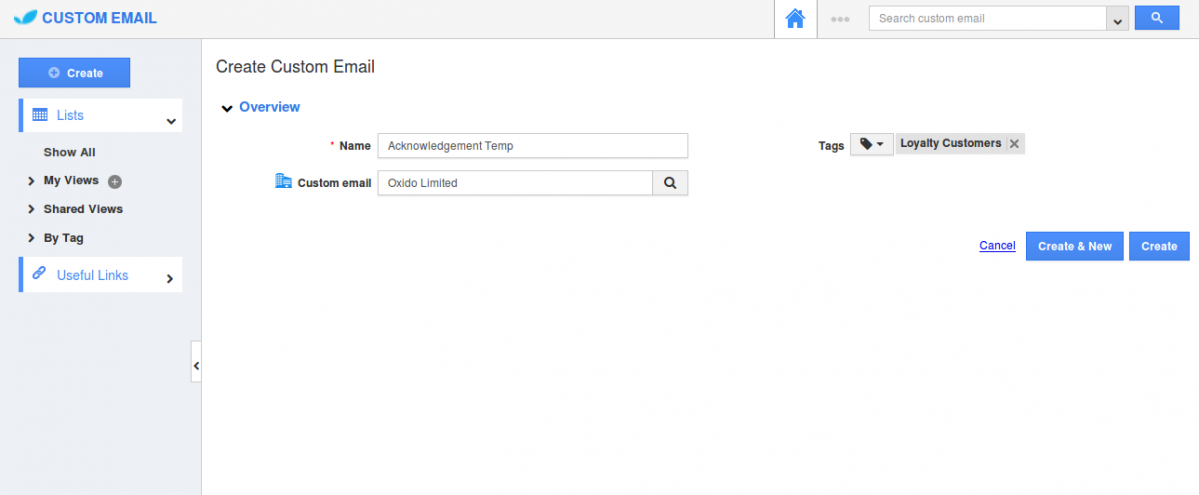
- Associate the needed customer, say Oxido Limited and click on Create button. Your custom email record will be created successfully.
- Go to Customers App. Select the customer Oxido limited and move on to its Overview page.
- You can see the custom app (Custom Email App) in the 360-degree view drop down.
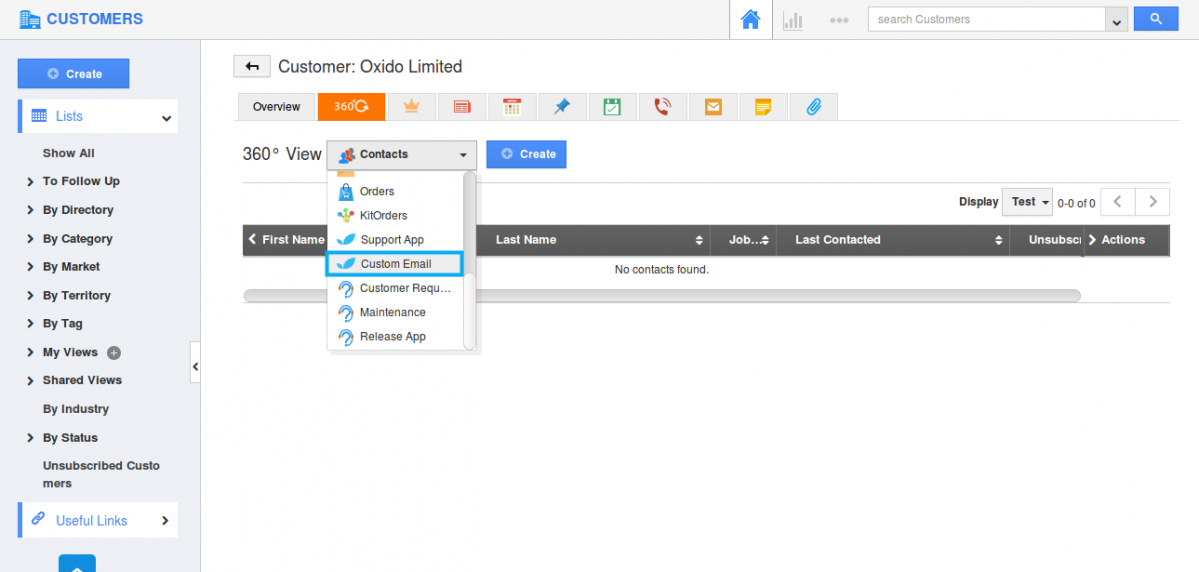
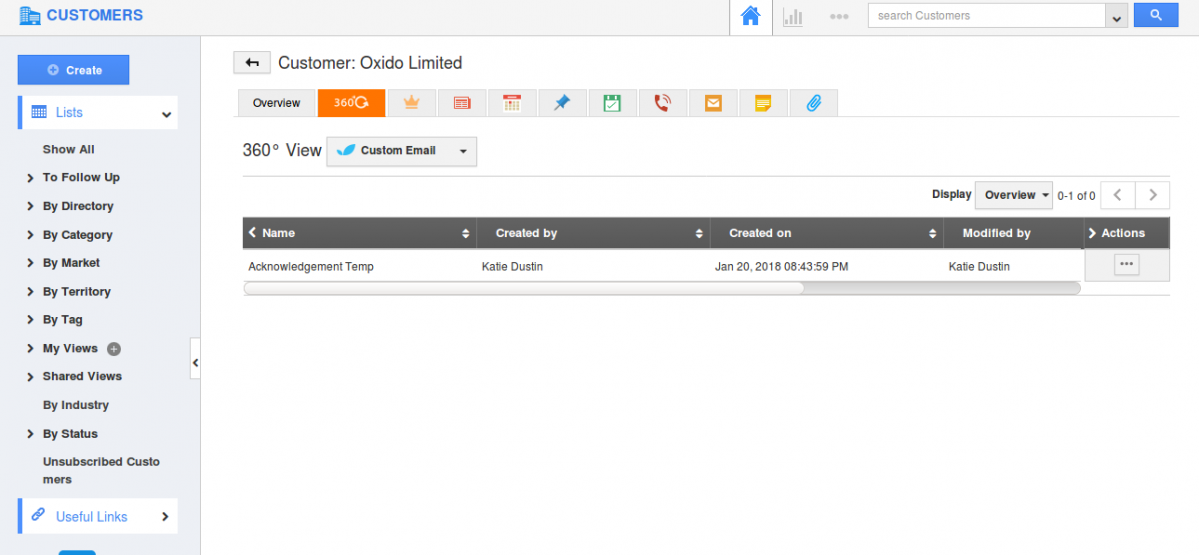
- On clicking on that, you can view the created custom email object associated with this customer.
For Cases Extended App
- Similarly, create an extended app. (here, we have created an extended app with the name “Internal Ticketing”)
- Publish the app, repeat the above steps from 5 to 7.
- Now, create a record in the extended app and associate it with the required customer.
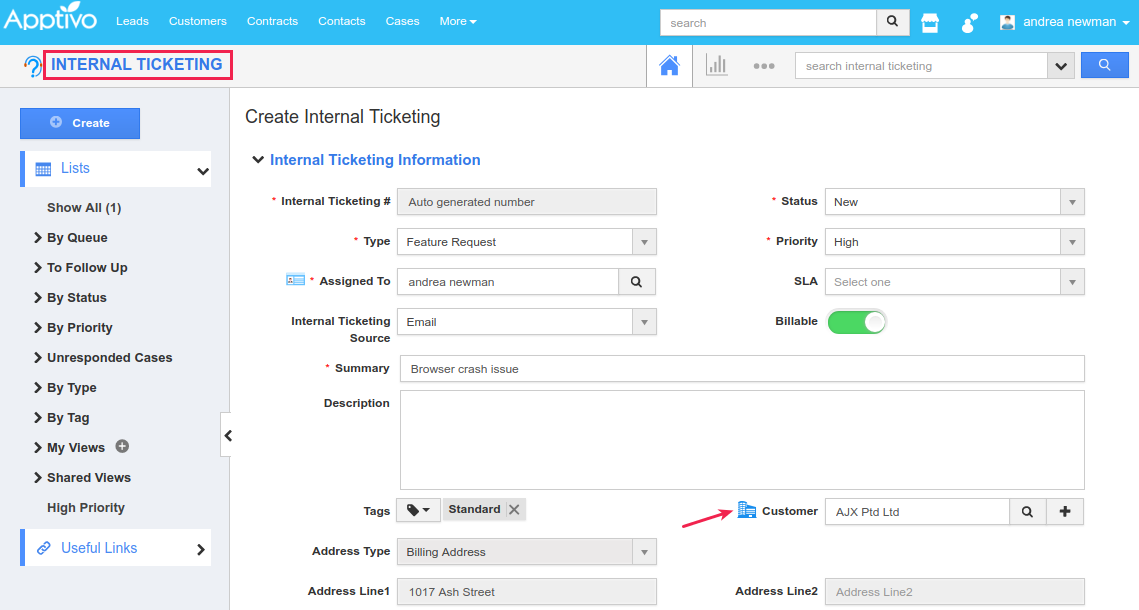
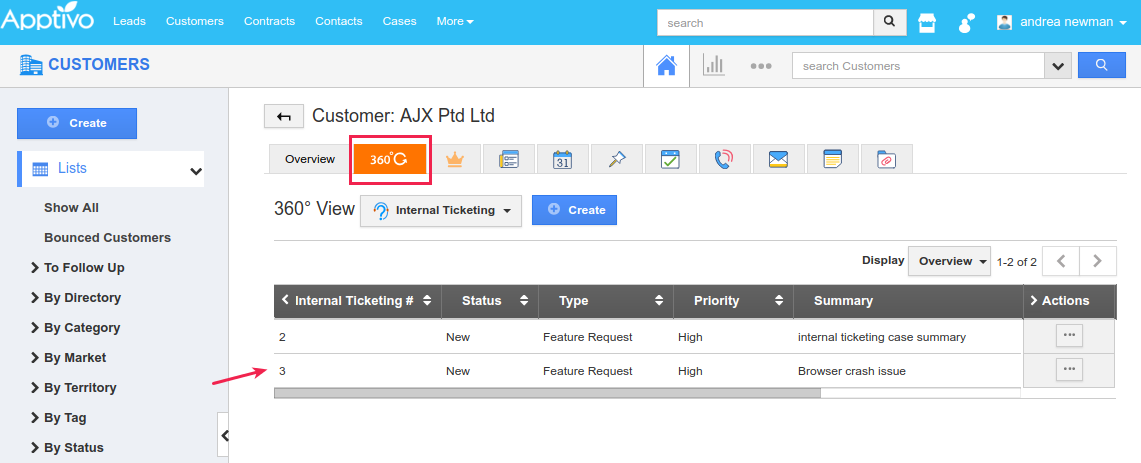
- Now, go to the Customers App > 360° View and you can view the record created.
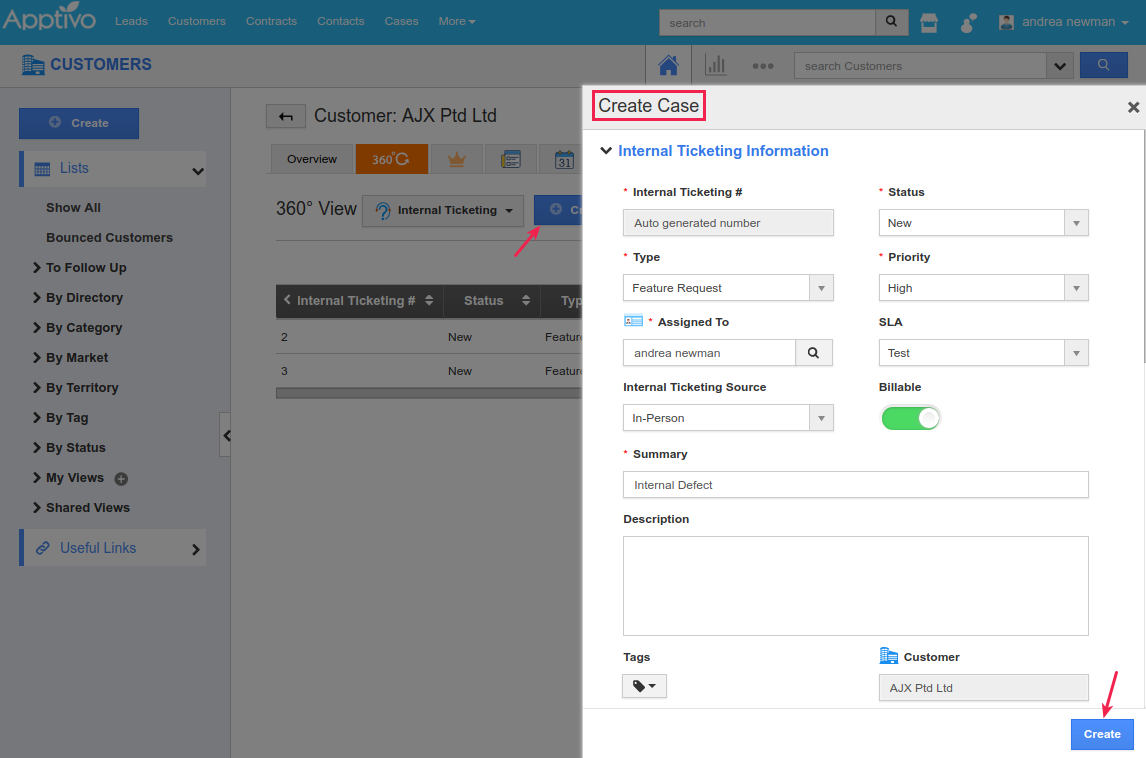
- Similarly, you can create an extended app record from the Customers App. Clicking on Create, the Create Case side-panel will be opened. Enter the details and click Create. The object record created will be associated with that customer by default. This created record will also get collected in the cases extended app you have created.
Flag Question
Please explain why you are flagging this content (spam, duplicate question, inappropriate language, etc):

