Browse by Solutions
Browse by Solutions
How to process Credit Card Payments for an Order in Apptivo?
Updated on December 10, 2018 11:10PM by Admin
Apptivo Orders App helps the E-commerce users to define their own preferred credit card charge points, for the orders placed by their customers. Charge Point of the credit card, points out to the time, when the customer’s card is to be charged. This feature lets you charge your customer’s credit card, based on the configured Charge Point.
Apptivo allows you to charge the credit card at the following four points.
- Create -> When an Order is submitted or placed, the customer will be charged.
- Pick Release -> When an Order is placed and is ready for the release, customers will be charged.
- Pick -> When an Order is picked and ready for delivery, customers will be charged with the order amount.
- Ship -> When the Order is shipped and delivered to the customer, the charge will be taken (Cash on delivery).
Note: Ensure to have setup the Authorize.Net Payment gateway to capture payments online.
Consider the scenario where you would like to charge your customers, when their ordered items are ready to be shipped and are out of inventory. For this, you can have the Charge point set to Pick Release. This denotes that, when an order is created with valid credit card details (Authorize.Net), you can view an entry of that order in your configured Authorize.Net account with the status as “Authorized/Pending Settlement”. And when the order is pick released, the order gets updated to the status of “Captured Pending Settlement”. And when the Transaction Cut-Off time is reached, the status will get changed to “Settled Successfully” in Authorize.Net. Lets now walk through a detailed step wise instructions on how to configure the credit card charge point.
Steps to Configure the Credit Card Charge Point
- Log in and access Orders App from the Universal Navigation menu bar.
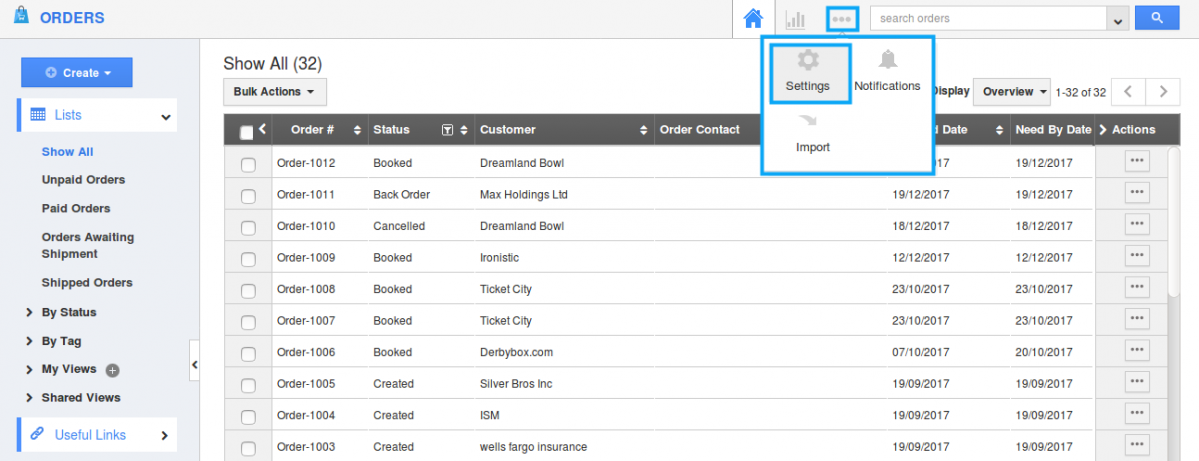
- In Orders App home page, click on “More (...) -> Settings” from the app header bar.
- You will be redirected to the Settings page. Select “Orders -> E-commerce” from the left navigation panel.
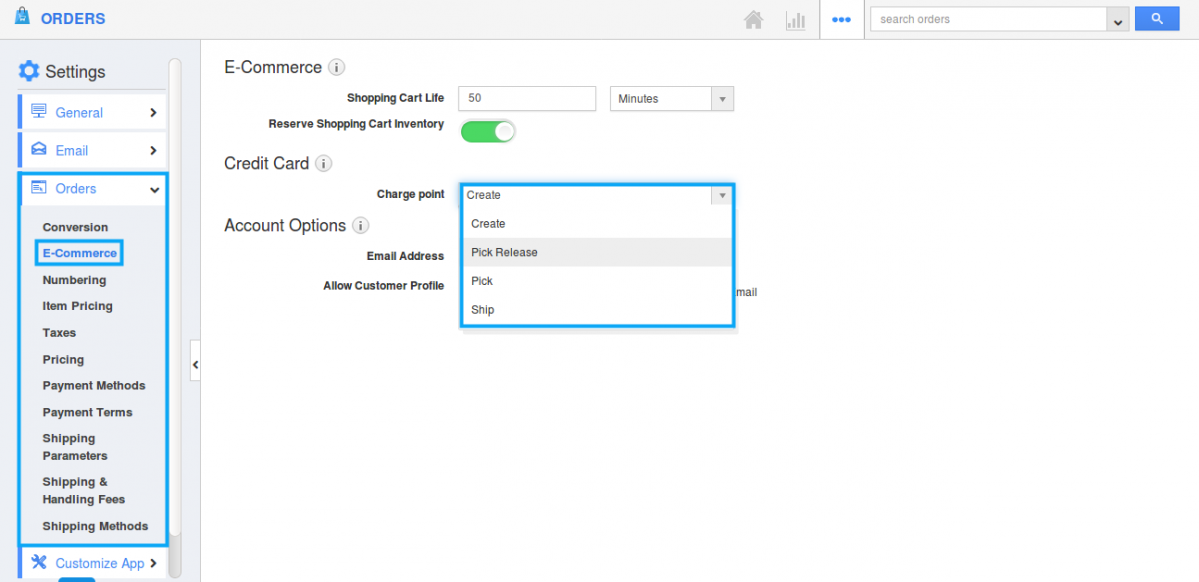
- E-commerce page will be displayed where you can set Charge point for the credit card.
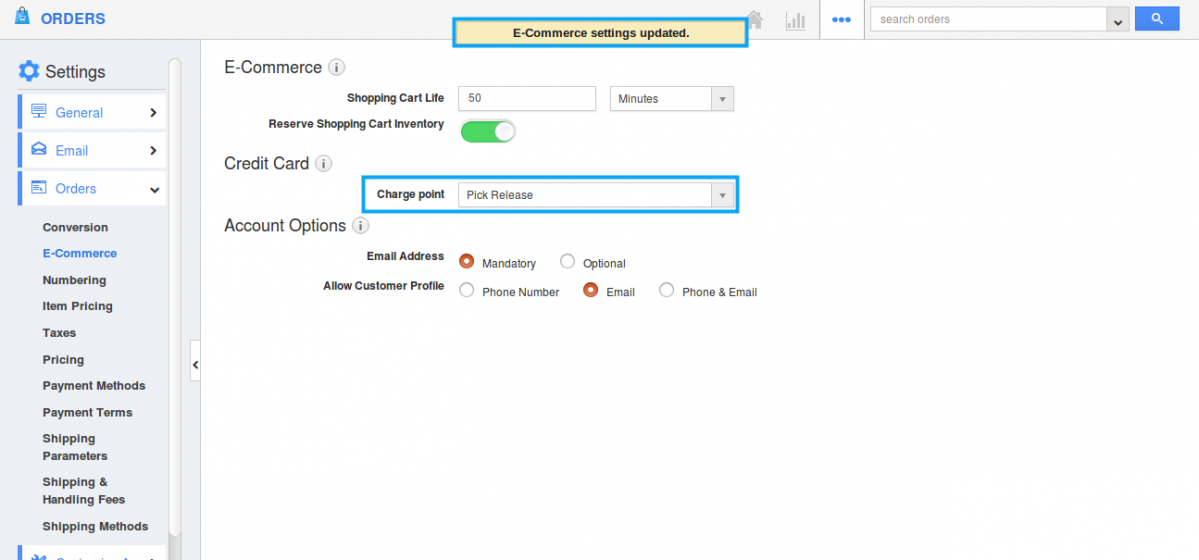
- Changes will get auto-saved. Here in this case - Charge point is set to Pick Release, and the credit card will be charged only when the order is Pick Released.
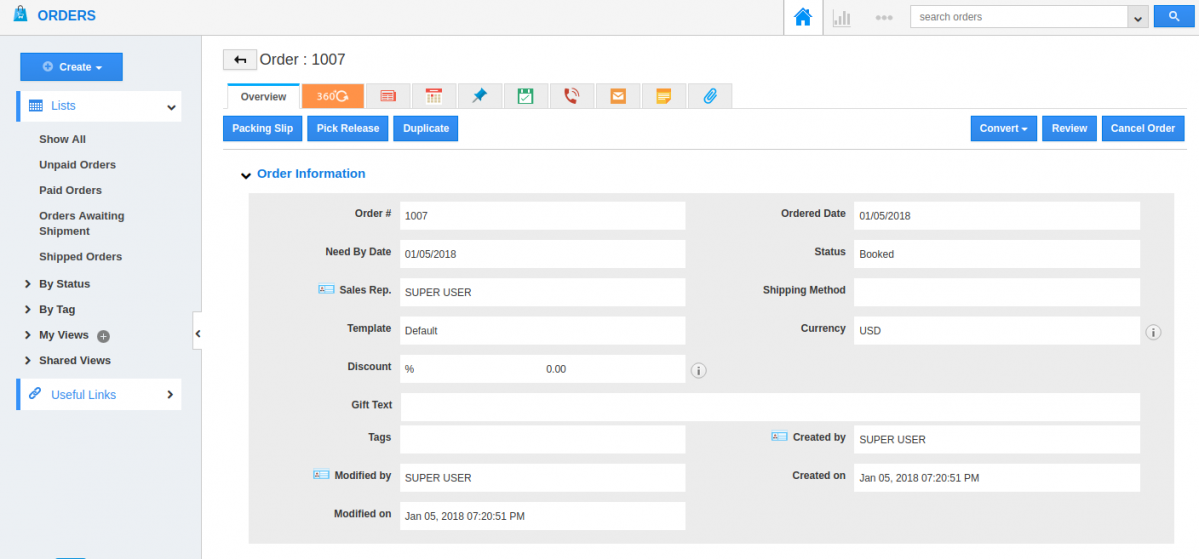
- Now, create a new order with all the required details and click “Create”.
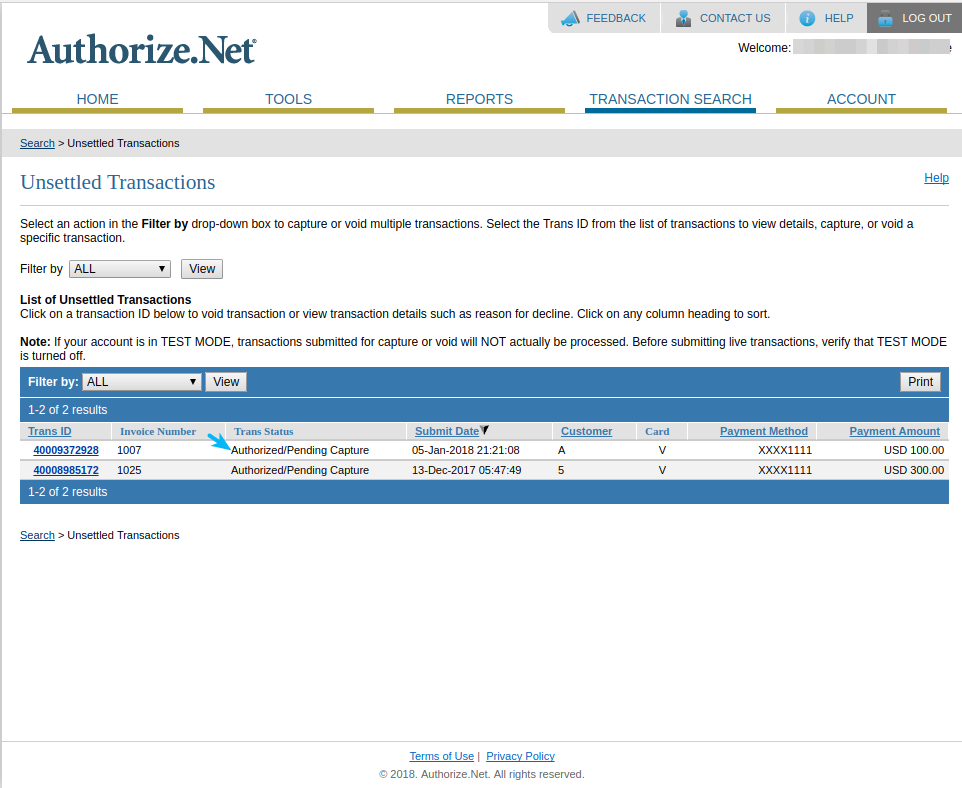
- On viewing the order in your Authorize.Net account, you can find the status set as “Authorized/Pending capture”.
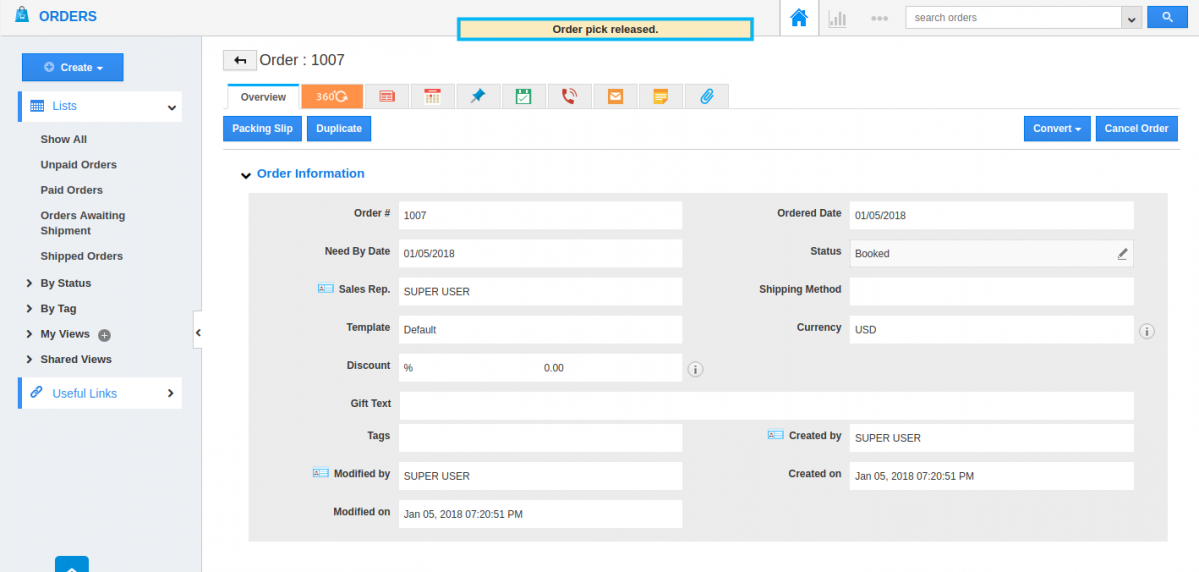
- And when the order is ready to pick release, click “Pick Release” button present in the Orders’ Overview page. The order is now pick released.
- And you will now be charged and you can view the order in Authorize.Net account with the status as “Captured/Pending Statement”. (Note: Once the Cut-Off time is reached, the status will get changed to “Settled Successfully”)

When the Charge point is set to Create
- On creating a new order, an entry will be made in your Sandbox account with the status "Captured Pending Settlement".
- And when the Transaction cut-off time is reached, the status will get changed to “Settled Successfully”.
When the Charge point is set to Pick
- On creating a new order, an entry will be made in your Sandbox account with the status "Authorized Pending Capture".
- Once the order is picked, the Status will change to "Captured pending settlement".
- And when the Transaction cut-off time is reached, the status will get changed to “Settled Successfully”.
When the Charge point is set to Ship
- On creating a new order, an entry will be made in your Sandbox account with the status "Authorized Pending Capture".
- Once the order is shipped, the Status will change to "Captured pending settlement".
- And when the Transaction cut-off time is reached, the status will get changed to “Settled Successfully”.

