Browse by Solutions
Browse by Solutions
How do I Create Sales Cycles in the Opportunities App?
Updated on November 16, 2017 12:52AM by Admin
One important aspect of a CRM is the process of identification of business opportunities and to effectively track those business opportunities. Apptivo Sales Cycle Management encompasses all your sales activities in closing a deal successfully.
A Sales Cycle (Pipeline) is a step-by-step sales process of closing a deal, defining a set of sales pipeline stages. In other words, an ordered collection of sales opportunity stages is a Sales Cycle.
The Apptivo sales pipeline management in the Opportunities App consists of a default sales cycle with a set of sales cycle steps (sales stages), which will be assigned by default, to all the opportunities that are created. Now the sales stages in crm may vary depending on your business type.
For instance: Consider you are running an IT firm with two different sales pipelines, one pipeline to track web design, and a different one to track web development. In that case, Apptivo gives you the ability to create and customize your own sales pipeline accordingly.
Before proceeding with the sales cycle creation, we need to create and identify the Sales Stages for these pipelines.
- Web Design Sales Cycle
PSD WireFrame -> HTML & CSS -> QA -> Live - Web Development Sales Cycle
HTML & CSS -> DEV -> QA -> Live
Steps to Create Sales Cycle
- Go to the Opportunities App.
- Click on “More (...)” -> “Settings” -> “Opportunities” -> “Sales Cycle”.
- Here, click on the “Create” button present.
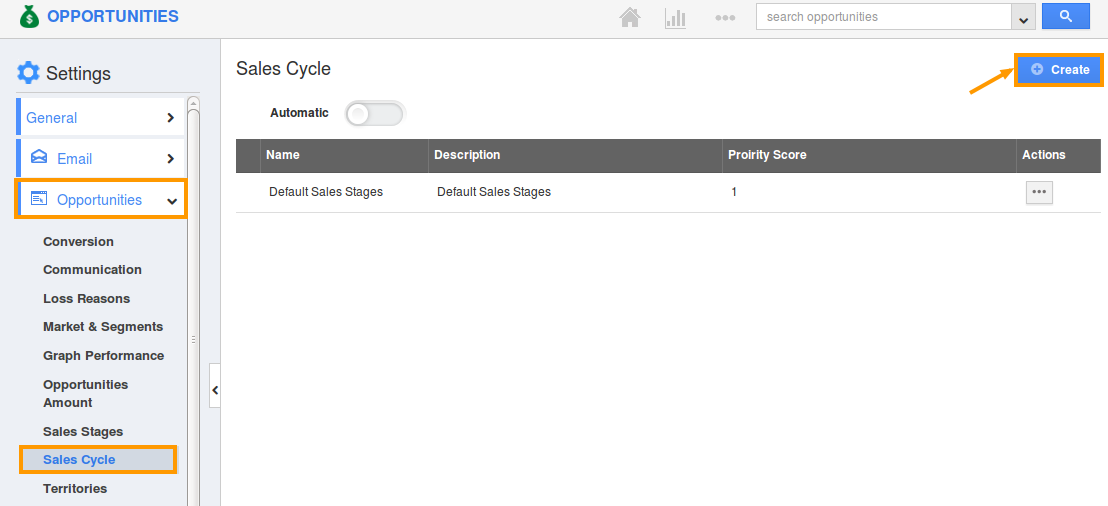
- Now create a new Sales Cycle with the name “Web Design”. Enter the description and priority score to prioritize the sales cycles when two or more conditions satisfy the criteria.

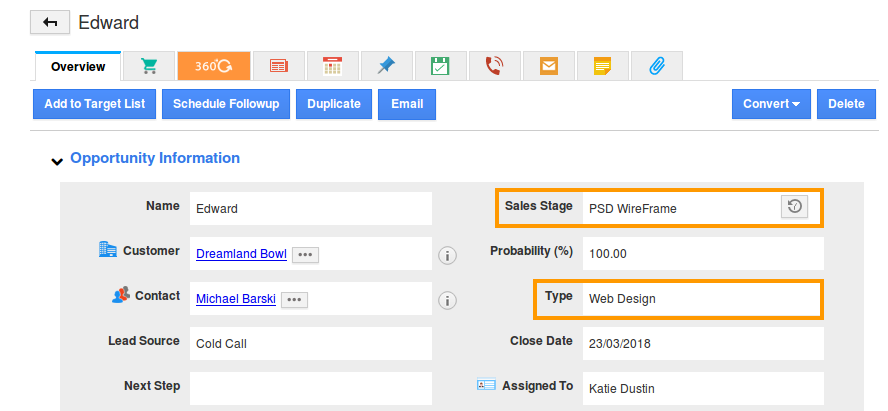
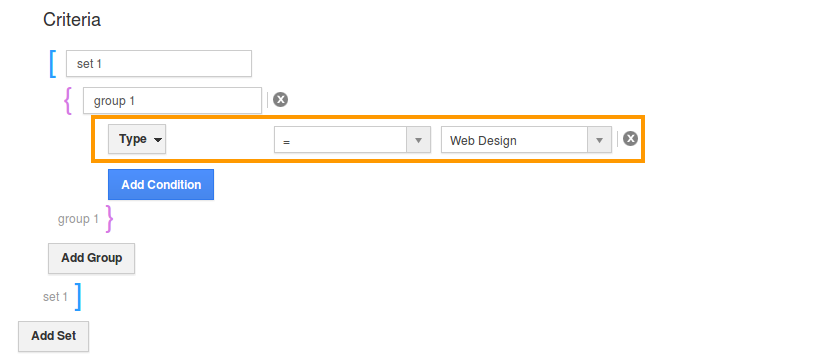
- For this example, let us consider the “Type” field. That is, when an opportunity is created with “Type = Web Design”, this sales cycle should get applied.
- So define the criteria, where the condition can be set by selecting the attributes (Type) and its equivalent values (Web Design).
- Click on the “Add” button and add the corresponding sales cycle stages.
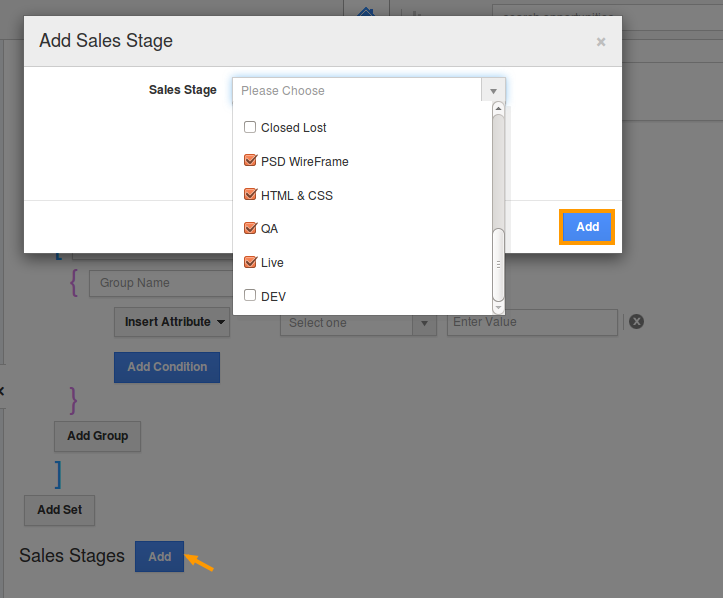
- The order of the sales stages can be re-ordered accordingly, by using the drag and drop option.
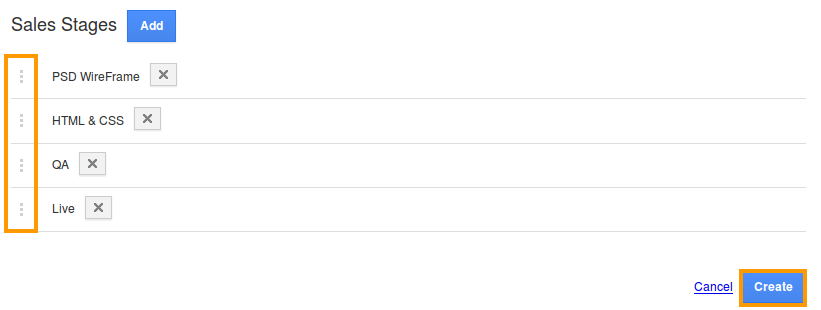
- Finally, click on “Create”.
Following the above procedure, create “Web Development” sales cycle defining it’s own sales stages (HTML & CSS, DEV, QA, Live).
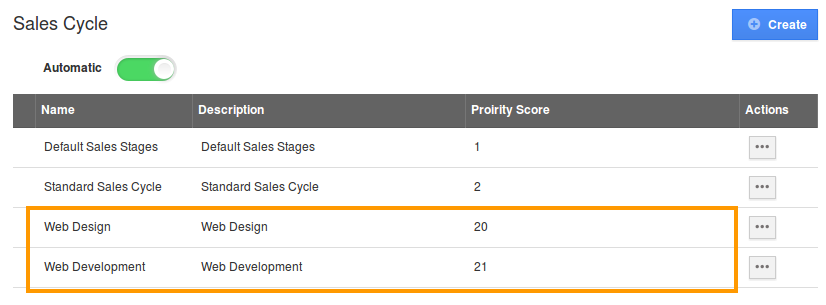
So now, if you are creating an opportunity with “Type = Web Design”, then it will be assigned to the sales stages added to the above created sales cycle (by default - PSD WireFrame).
