Browse by Solutions
Browse by Solutions
How do I Configure Taxes in Sales Receipts App?
Updated on August 31, 2017 03:38AM by Admin
Sales Receipts App helps you to create both Single and Multi rate taxes by configuring the Settings. You can create taxes using "Taxes" option.
Steps to Configure Taxes
- Log in and access Sales Receipts App from your Universal Navigation menu bar.
- Click on "More(...)icon -> Settings" from the App header bar.

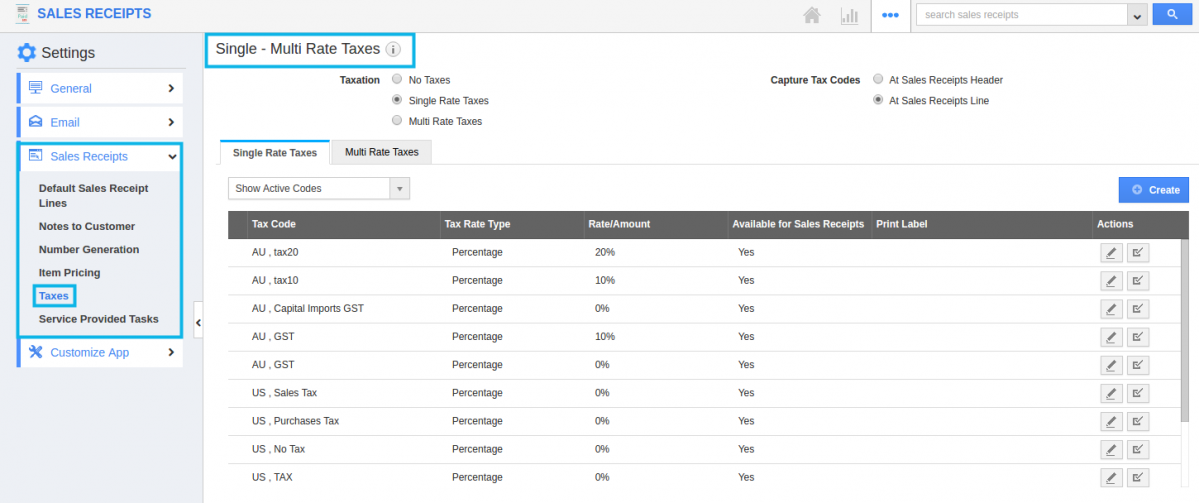
- You will be redirected to the Settings page. Click on "Sales Receipts -> Taxes" from the Left navigation panel.
- You will be viewing the tax dashboard, where you can create single rate tax and multi rate tax.
Single Rate Tax
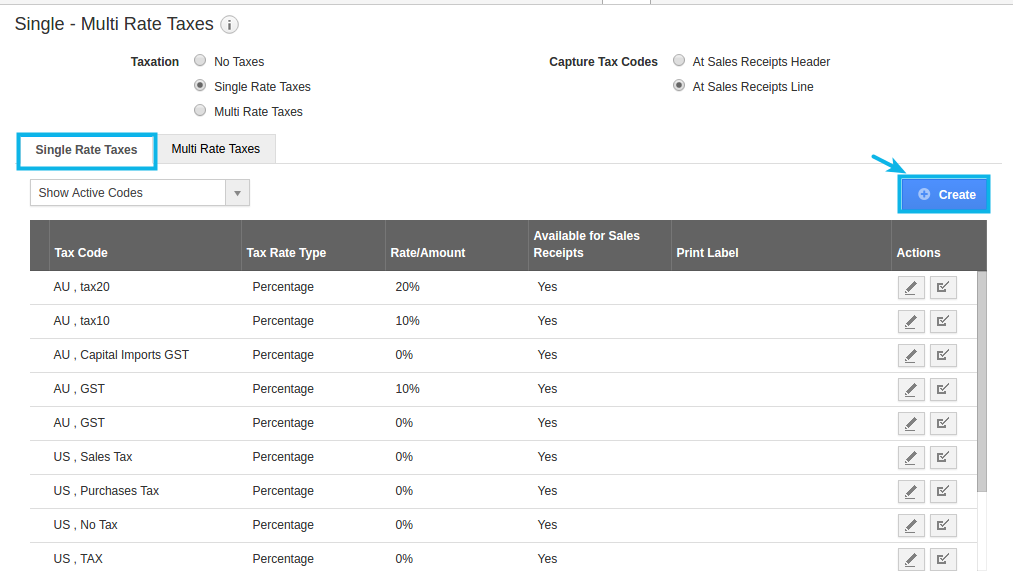
- Choose Single Rate taxes and click on "Create" button.
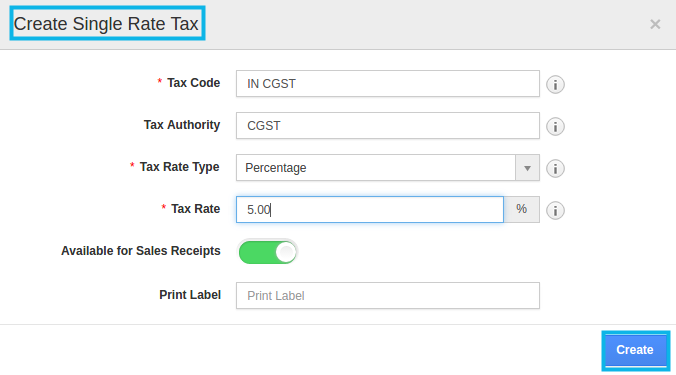
- Provide following information:
- Tax Code - Short code for the tax levied. E.g. S.Tax
- Tax Authority - The country or state which levies the tax.
- Tax Rate Type - Fixed or percentage of taxes.
- Tax Rate - It may be a fixed amount or fixed rate of tax.
- Available for Sales Receipts - Toggle it On to make this available for Sales Receipts.
- Print Label - You can create your own Label for the created tax.
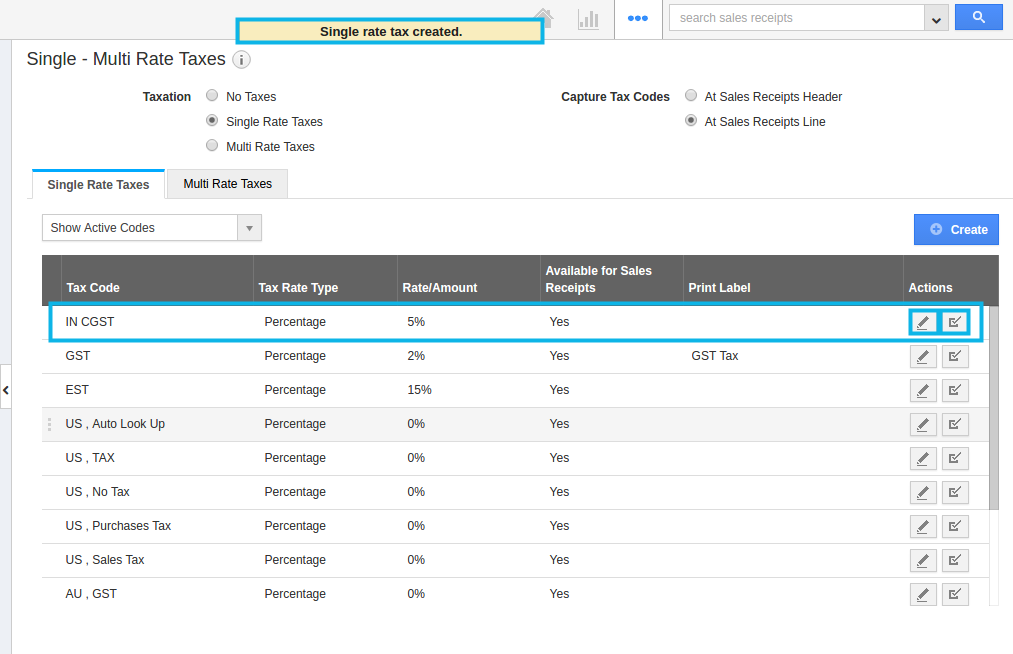
- You can update taxes by clicking on “Edit” icon, if needed.
Multi Rate Tax
- Choose "Multi Rate taxes" and click on "Create" button.
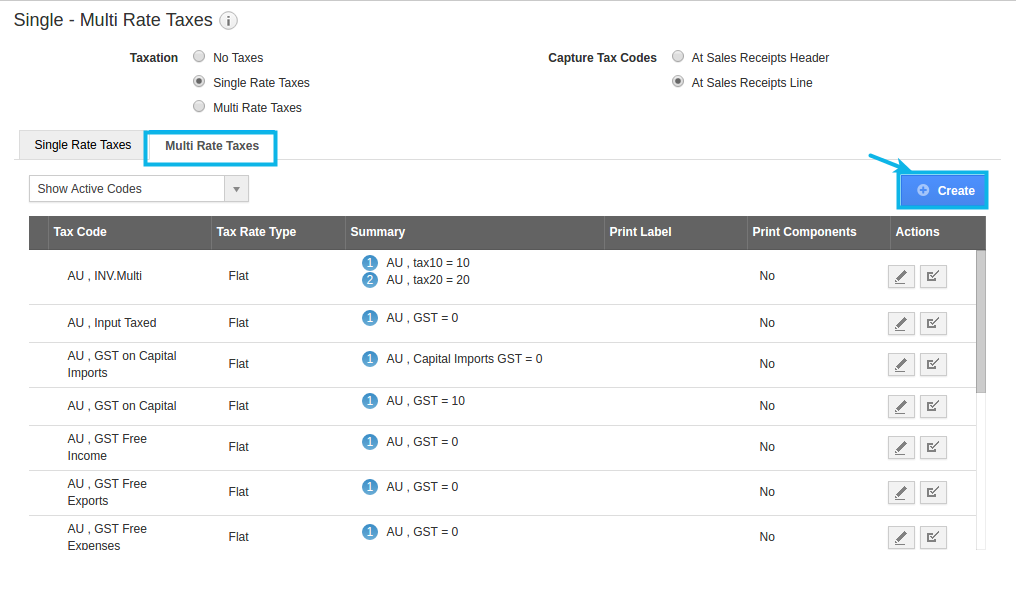
- Provide following information:
- Tax Code - Short code for the tax levied. E.g. S.Tax
- Tax Authority - The country or state which levies the tax.
- Tax Rate Type - Fixed or percentage of taxes.
- Print Label - You can create your own Label for the created tax.
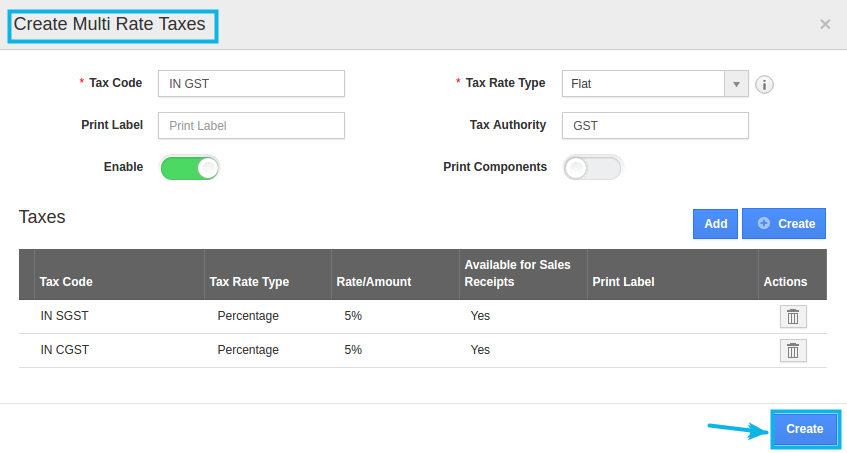
- You can add or create one or more of single rate taxes and click on "Create" button
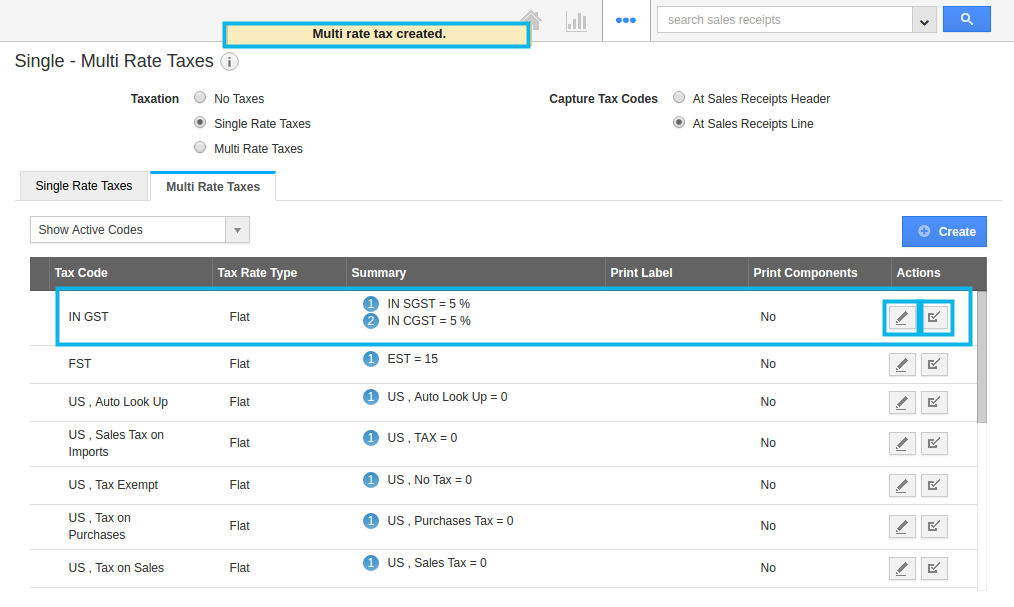
- Multi rate tax will be created successfully. You can update taxes by clicking on "Edit" icon if needed.
Flag Question
Please explain why you are flagging this content (spam, duplicate question, inappropriate language, etc):

