Browse by Solutions
Browse by Solutions
How do I Customize List Layout with my Preferred Column Sets in the Requirements App?
Updated on May 17, 2018 01:31AM by Admin
List Layouts allows you to customize your preferred columns based on your requirements. It helps to easily access your saved custom views.
For Instance: If a user wants to customize the column in the overview page with the following details, such as Requirement, Status, Business Value, Summary and Assigned To - then it can be modified by following the below steps:
Steps to Customize List Layouts
- Go to “Requirements App” from universal navigation menu bar.
- Click on “More(...)” icon and select “Settings” from the app header bar.

- Click on “Customize App” and Select “List Layout” from the left navigation panel. You can add Column by clicking the “Create” button in the top right corner as shown in the below snapshot.

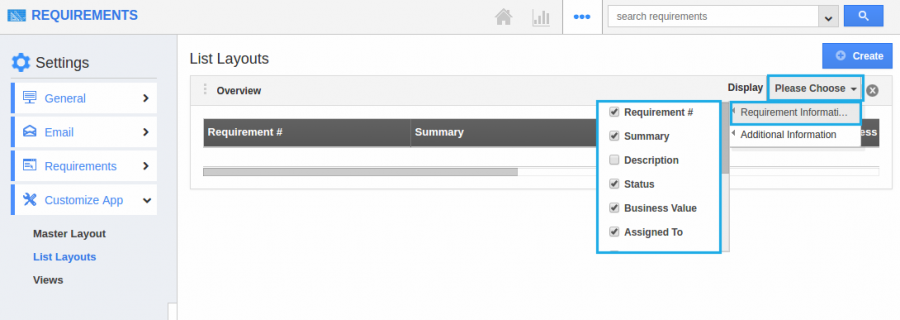
- Now you can choose your preferred columns by choosing the “Display” drop-down. choose the “Requirement Information” and add the preferred sets as Requirement, summary, Status, Business Value and Assigned To, by checking the box from the “Display” drop-down as shown in the below snapshot.

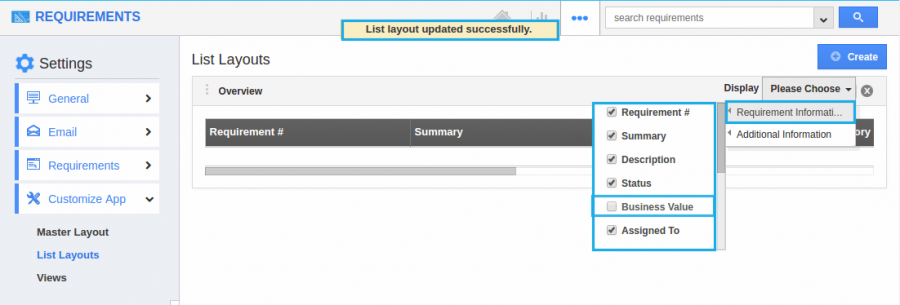
- You can also hide the options by unchecking the field if needed as shown below.

Related Links
Flag Question
Please explain why you are flagging this content (spam, duplicate question, inappropriate language, etc):

