Browse by Solutions
Browse by Solutions
How do I Set Event based Triggers in Targets App?
Updated on September 23, 2024 06:51AM by Admin
The Event Based Triggers in the Targets App are utilized, when we have to execute an action after the occurrence of a certain event. Here, the trigger can be set for the events like Target Lists Creation, Target Lists Updation and Target Lists Deletion.
Once a trigger criteria are set, there are three automatic actions that can be triggered:
- Send Email - An email can be triggered to the Referred By, Assigned To, Customer, Employee or a Team.
- Update Attribute - Updates a particular attribute value.
- Update Associated Object Attributes - Updates the attribute values of its associated objects.
Note: More than one action can be added for a trigger.
For instance: Consider a Sales Manager, who wants to trigger an email to the employee, whenever a target list is created for his business category "Consultant" (Categories = Consultant).
Steps to Create an Event Based Trigger
- Go to Targets App.
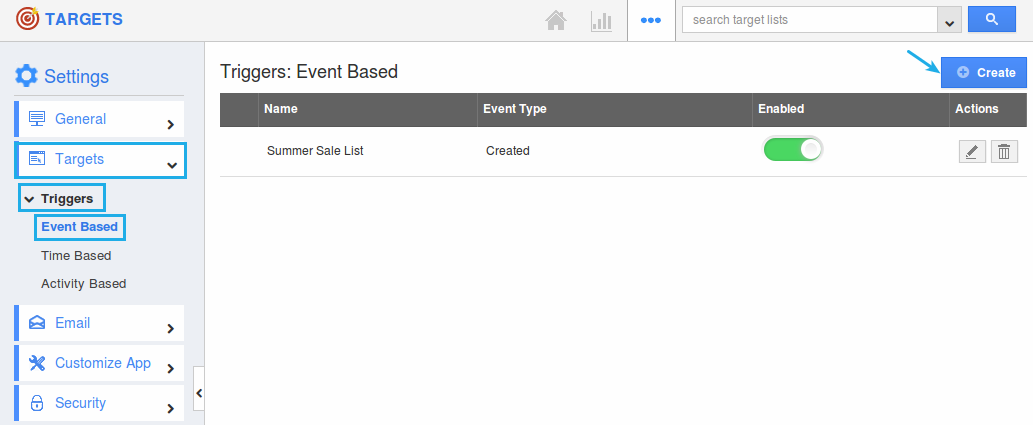
- Click on “More (...)” icon -> “Settings” -> “Targets” -> “Triggers”.
- Select “Event Based” triggers option. Click on “Create”.

- In the creation page, define the following:
- Name - Enter the name of the event based trigger.
- Enabled - Slide the toggle ON, to keep this trigger working.
- Event - Select “Target Lists Created” by checking on the respective radio button.

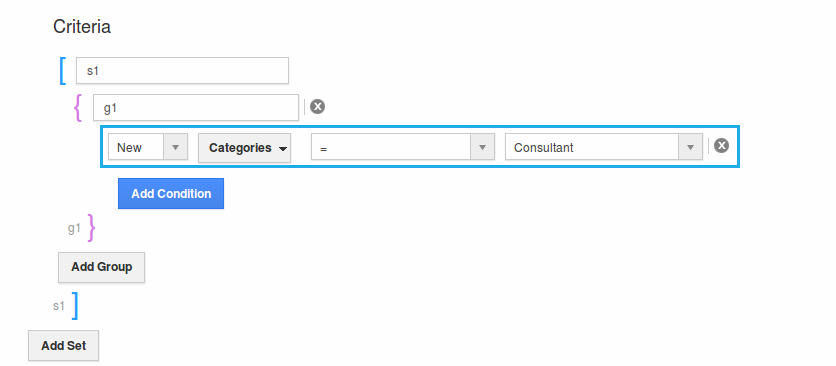
- In the “Criteria” section, define the criteria as “Categories = Consultant”, by selecting the required attributes from the drop down.

- In the “Action” section, select “Send Email”.

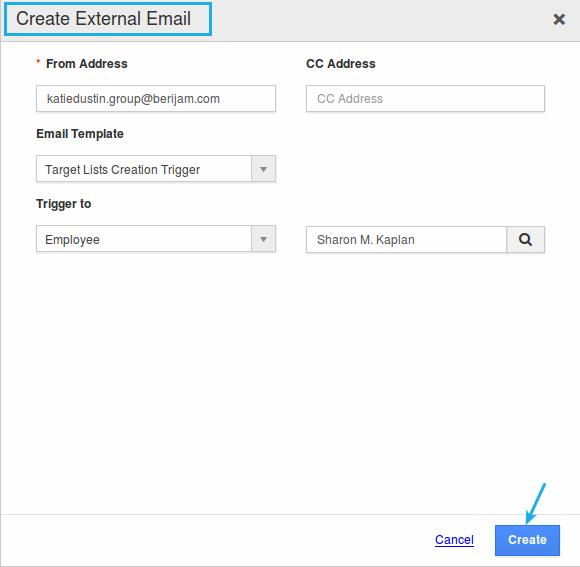
- The Create External Email popup will be displayed. Select “Trigger To” as “Employee”.
- Click on “Create”.

- Finally, click on “Create” to complete.

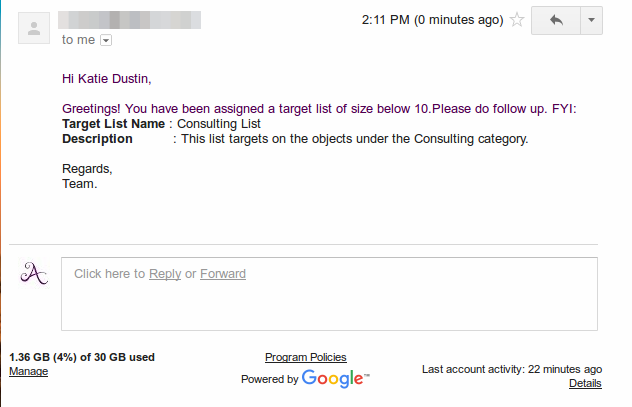
- So, now whenever a target list with less than 10 objects is created, an email will be triggered to that employee.


