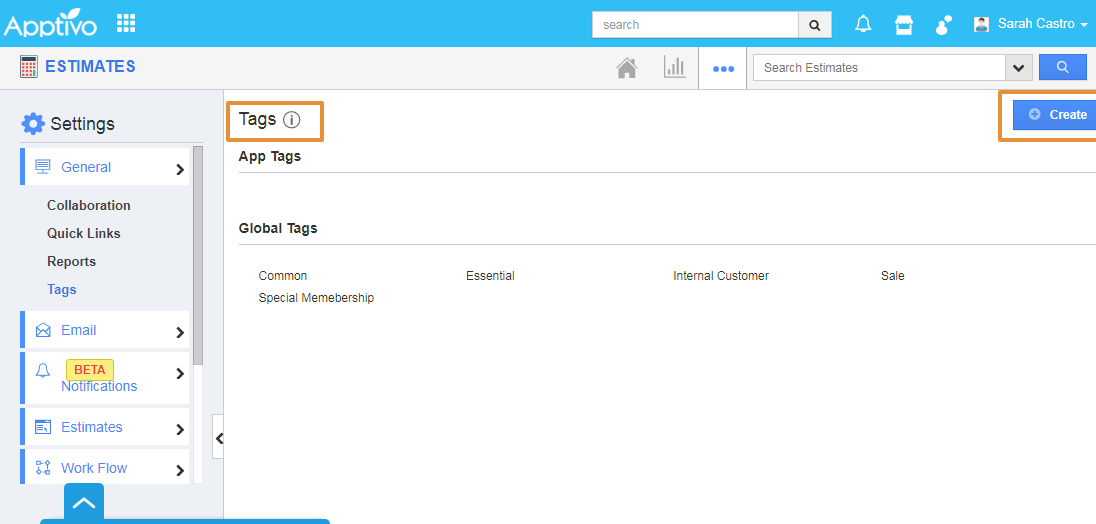
Tags are nothing but labels. Tags are associate with most of the records and it helps to organize the data in a personalized way. Also, it allows the user to group records from the various categories by common use, which facilitates finding or searching for information.
For Instance: If you want to view those estimates under ‘Premium Customers’, then that can be created as a tag. Then, add the estimates in Premium Customers under By Tag, the estimates associated with that tag will be displayed.
Steps to Create Tags in Estimates App
- Log in and access Estimates App from the universal navigation menu.
- Click on the More(...) icon and select Settings.
- In the Settings page, select Tags under General drop-down on the left navigation panel.
- In Tags dashboard, you can view:
- App Tags - These tags are app-specific. They can be accessed only within the Estimates App.
Global Tags - These tags can be accessed throughout the apps in Apptivo.
- Click on the Create button.
- Enter the Tag Name in the Create Tag Popup.
- Select the type of tag as App Tag or Global Tag.
- Then, click on the Create button to complete.
- The created tag can be edited, by clicking on the Edit icon.
Steps to apply the Tags
- Once the tag has been created, go to the Create Estimate page.
- Now, select an appropriate tag from the Tags field as shown.
- You can add multiple tags for a single estimate.
- By clicking on By tags option, you can easily view the Estimates which are grouped by the tag created.
Related Links


