Browse by Solutions
Browse by Solutions
How to set permissions to users to delete Leads?
Updated on May 7, 2017 06:50PM by Admin
Apptivo Leads App allows you to manage bad leads and contacts by deleting their records. The bad leads and contacts are those leads that have not responded to any of your marketing campaigns.
When a lead record is deleted, its removed permanently from the database. And all the associated notes, attachments and the related activities are also deleted with it.
As an entrepreneur, you should decide on the set of users who should be given the privilege or permission to delete the lead records. Its not wise to give the delete permission to everyone as it lead chaos within the team. Also, unscrupulous employees can delete the qualified leads. So you need to choose only those employees whom you trust when it comes to setting privileges to modify or delete.
Lets quickly go through the steps to set permissions to user to delete lead records.
Steps to give permission to users to delete Leads
- Log in and access Leads App from your universal navigation menu bar.
- Click on “More” icon and select “Settings” located at the app header bar.

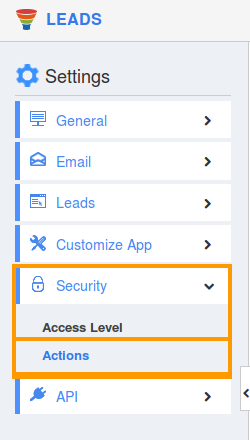
- Click on “Actions” from security drop down list from the left navigation panel.

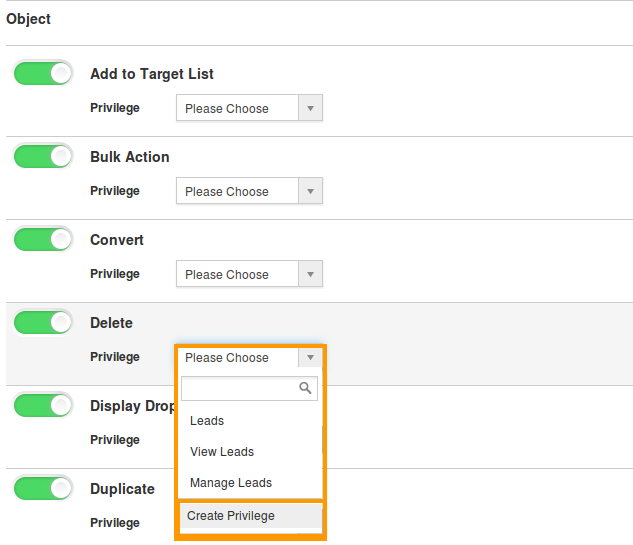
- Locate the “Delete” option from “App” section and click on the privileges drop down list.

- Click "Create privilege" option found at the bottom of the privilege drop down list.
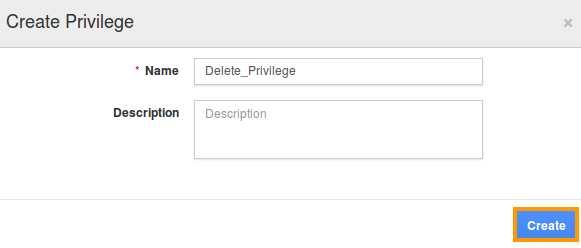
- Create privilege pop up window is displayed. Enter the name and description of the new privilege that you want to add against the "Delete" option.

- Click on "Create" button.
- After creating the privilege go to Employees App to give access to specific employees.
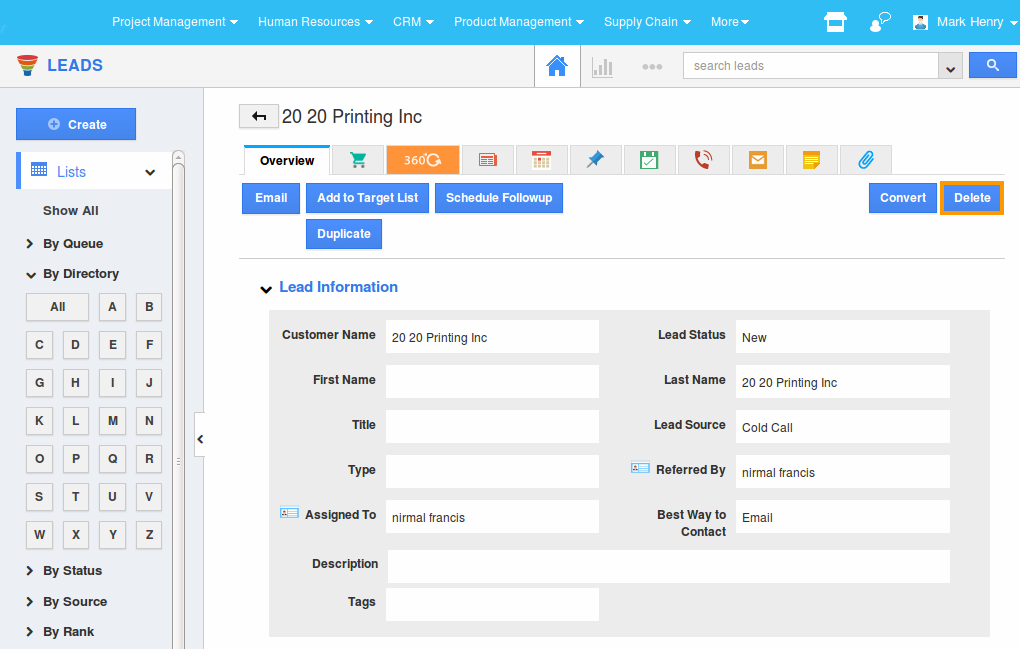
- Now, employee Mark Henry has the privilege to delete Leads from Leads app. In Mark Henry login, the “Delete” button will be visible as shown in the image below:


