Browse by Solutions
Browse by Solutions
How to give permissions to users for useful links in Leads App?
Updated on May 9, 2017 08:33PM by Admin
Giving access permission to Useful Links to a user allows him to manage a team and its members. He would also be be able to integrate applications with Lead apps, use Quick Links as well as other Related Help links with ease.
The permission to Useful Links is usually given to a senior personnel in the team. Apptivo Leads App has such a facility and allows you to set permission for users. Lets take a quick look at the steps.
Steps to give permission to users for useful links in Leads
- Log in and access Leads App from your universal navigation menu bar.
- Click on “More” icon and select “Settings” located at the app header bar.

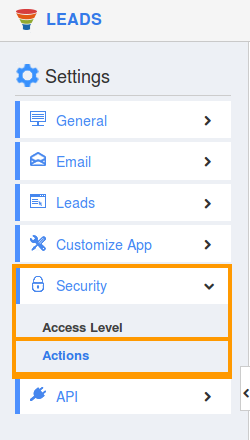
- Click on “Actions” from security drop down list from left navigation panel.

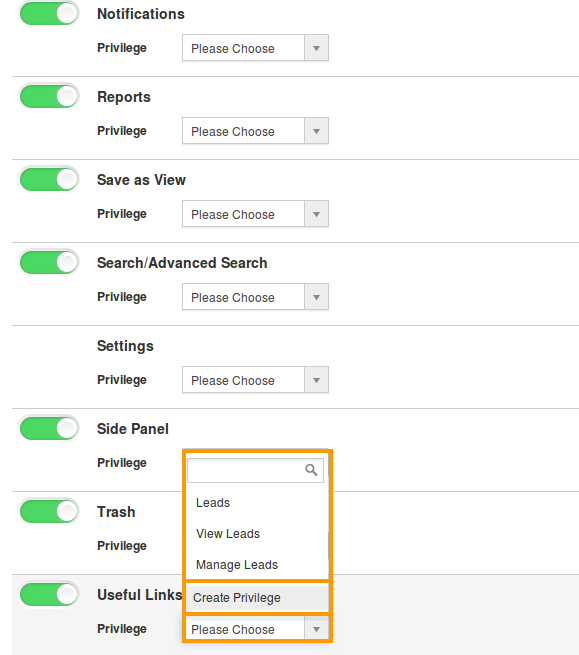
- Locate the “Useful Links” option from “App” section and click on privileges drop down list.
- Click "Create privilege" option found at the bottom of the privilege drop down list.

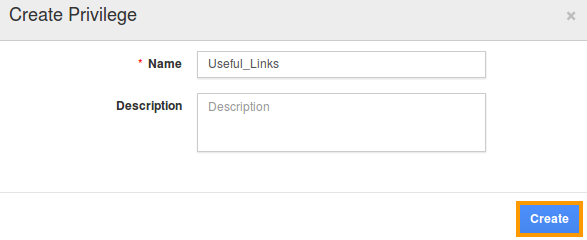
- Create privilege pop up window appears. Enter the name and description of the new privilege that you want to add against the "Useful Links" option.

- Click on "Create" button .
- After creating the privilege go to Employees App to give access to particular employees.
- Please refer this link: https://answers.apptivo.com/questions/12694/how-do-i-assign-custom-privilege-to-employee-for-managing-objects-found
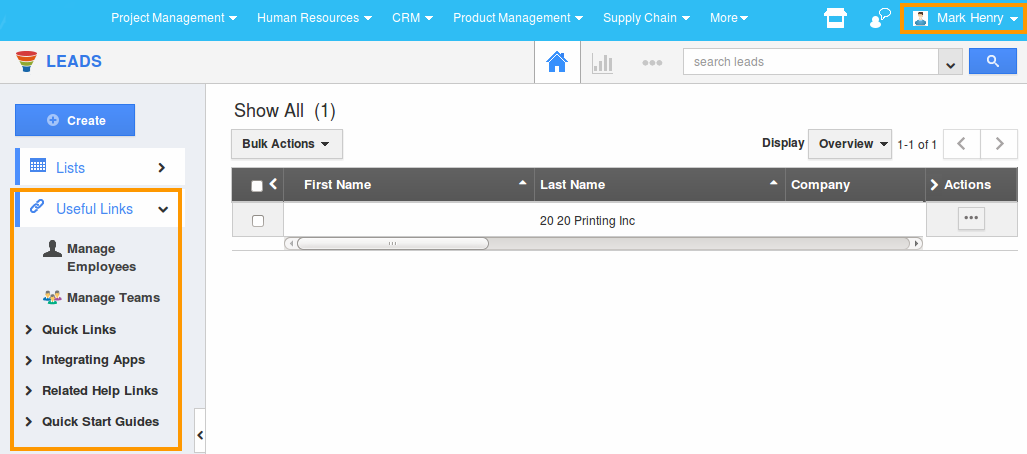
- Now, employee Mark Henry has the privilege to useful links related to Lead. In Mark Henry login, the “Useful Links” drop down list will be visible as shown in the image below:

Flag Question
Please explain why you are flagging this content (spam, duplicate question, inappropriate language, etc):

