Browse by Solutions
Browse by Solutions
How do I allow users to email a Lead?
Updated on May 10, 2017 06:41AM by Admin
To this day, email is the primary mode of communication with the customer in any business organization.
Sending an email, monitoring the email response, and sending follow-up emails is a herculean task that has to be done with dedication. Some emails are confidential as well as private and needs to be handled delicately and with utmost care.
Keeping in mind the importance of this task, you need to form a group with a few users who can take up the responsibility of sending and monitoring emails. For these users to be able to send emails, permission needs to be set.
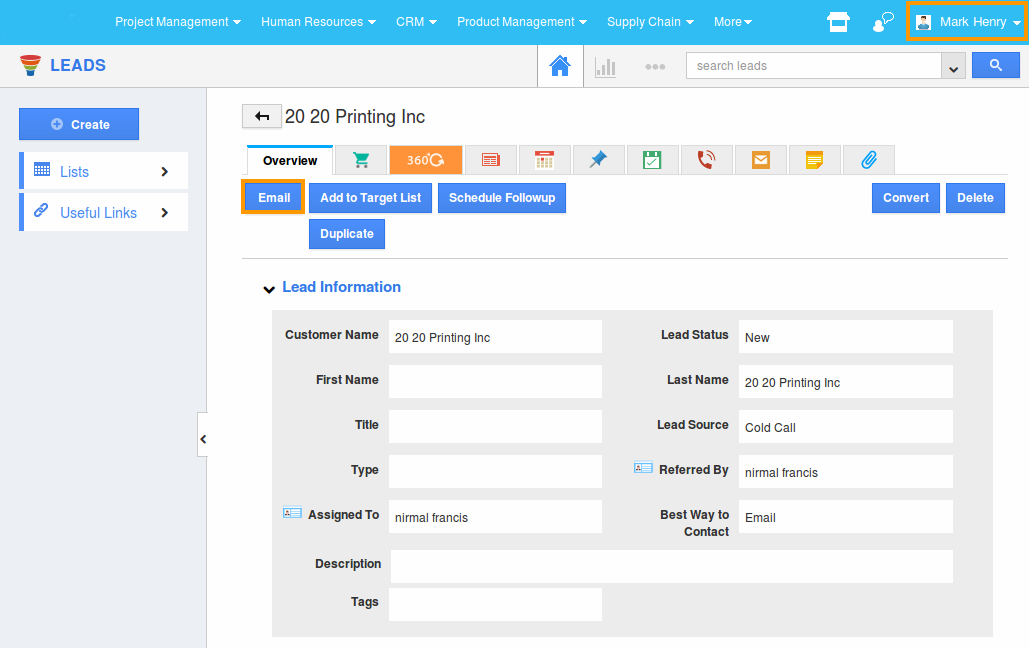
The users who have privilege for mailing the Lead, can use “Email” button and also the email icon found in overview page of an Lead.
Here we go!
Steps to give user permission to email a Lead
- Log in and access Leads App from your universal navigation menu bar.
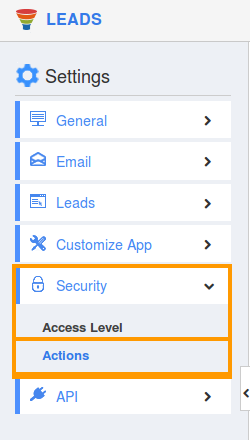
- Click on “More” icon and select “Settings” located at the app header bar.

- Click on “Actions” from security drop down list from left navigation panel.

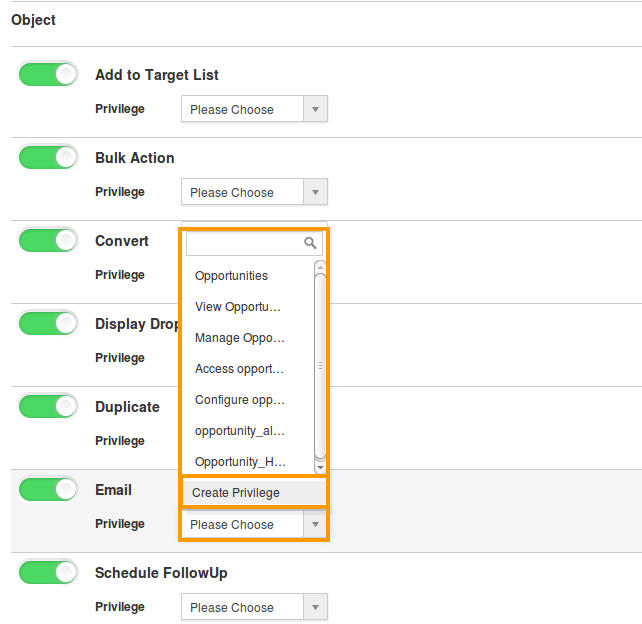
- Locate the “Email” option from “Object” section and click on privileges drop down list.

- Click "Create privilege" option found at the bottom of the privilege drop down list.
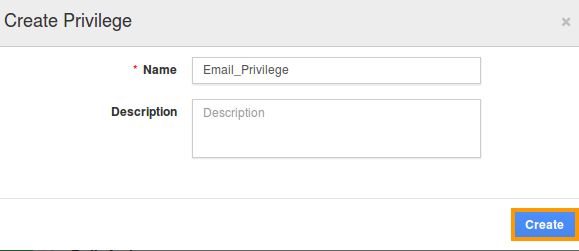
- Create privilege pop-up window appears. Enter the name and description of the new privilege that you want to add against the “Email” option.

- Click on "Create" button.
- After creating the privilege, go to Employees App to give access to particular employees.
- Please refer this link: https://answers.apptivo.com/questions/12694/how-do-i-assign-custom-privilege-to-employee-for-managing-objects-found
- Now, employee Mark Henry has the privilege to email a Lead. In Mark Henry login, the “Email” button will be visible as shown in the image below:


