Automation is what businesses look while selecting a CRM. Email to Case is one of the automation features in Apptivo that creates the received emails from customers as Cases. All you need to do is authenticate your email with Apptivo and emails received in the authenticated email account can be collected as a case in Cases App. To use this option, you must configure the email service provider's authentication to convert the emails into cases. Let's walk through the following steps to get a better understanding of this concept.
For instance, you can authenticate your company’s support email address with the Email to Case feature and have the emails created as cases automatically! Let’s see the steps to authenticate:
Steps to Configure "Email to Case":
- Log in and access Cases App from your universal navigation menu bar.
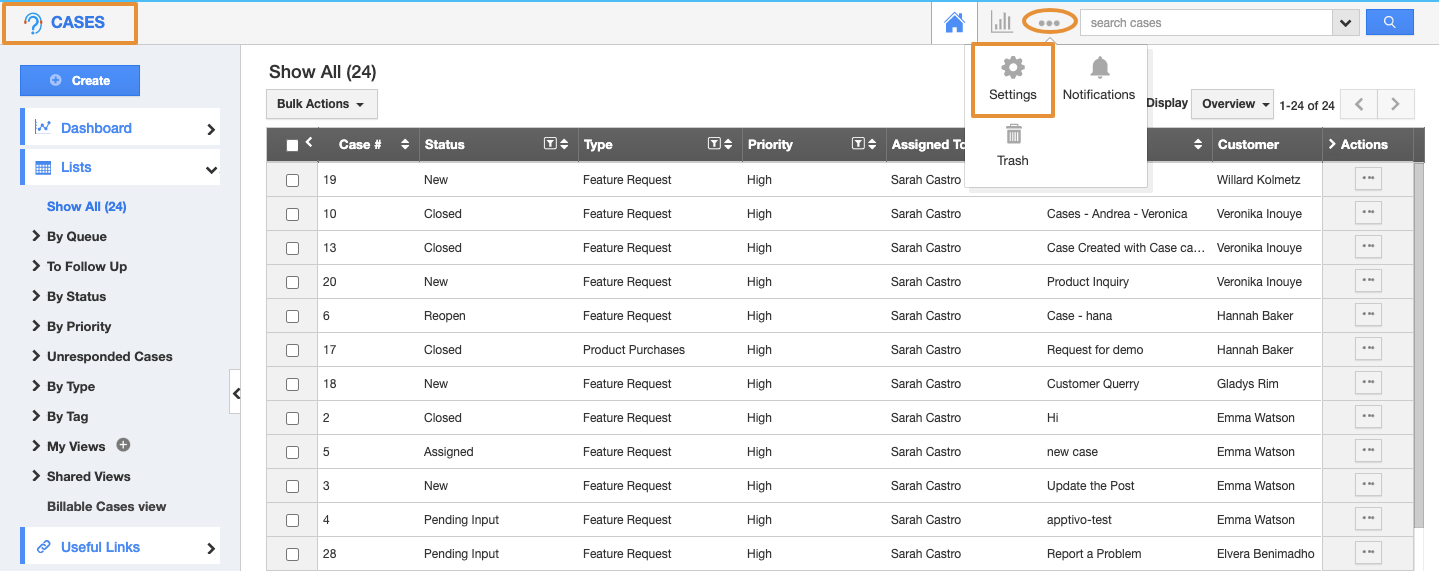
- Click on the "More" icon and select “Settings” located at the app header bar.
- On the settings page, go to Email >Email to Case” from the left navigation panel.
- Click on the “Add” button to add the email address.
- Provide the following details:
- Email Forwarding: Here, you’re going to provide all the email-related details like receiving email ID, Assigned to, and other details that you prefer.
- Addressed To Email Account: Either you can choose the same account or can redirect to the email list.
- Assigned To: Select an Employee or team to whom it should be assigned automatically.
- From Email Id: When composing a message you can set this authenticated email address. If you want to use this email id when composing click on the “Off” button and enable “On”.
- Add to CC: Enable the toggle to add the authenticated email id to the CC list automatically.
- Report Data Access: Select an employee to provide the report data access.
- Now provide the details of SLA section:
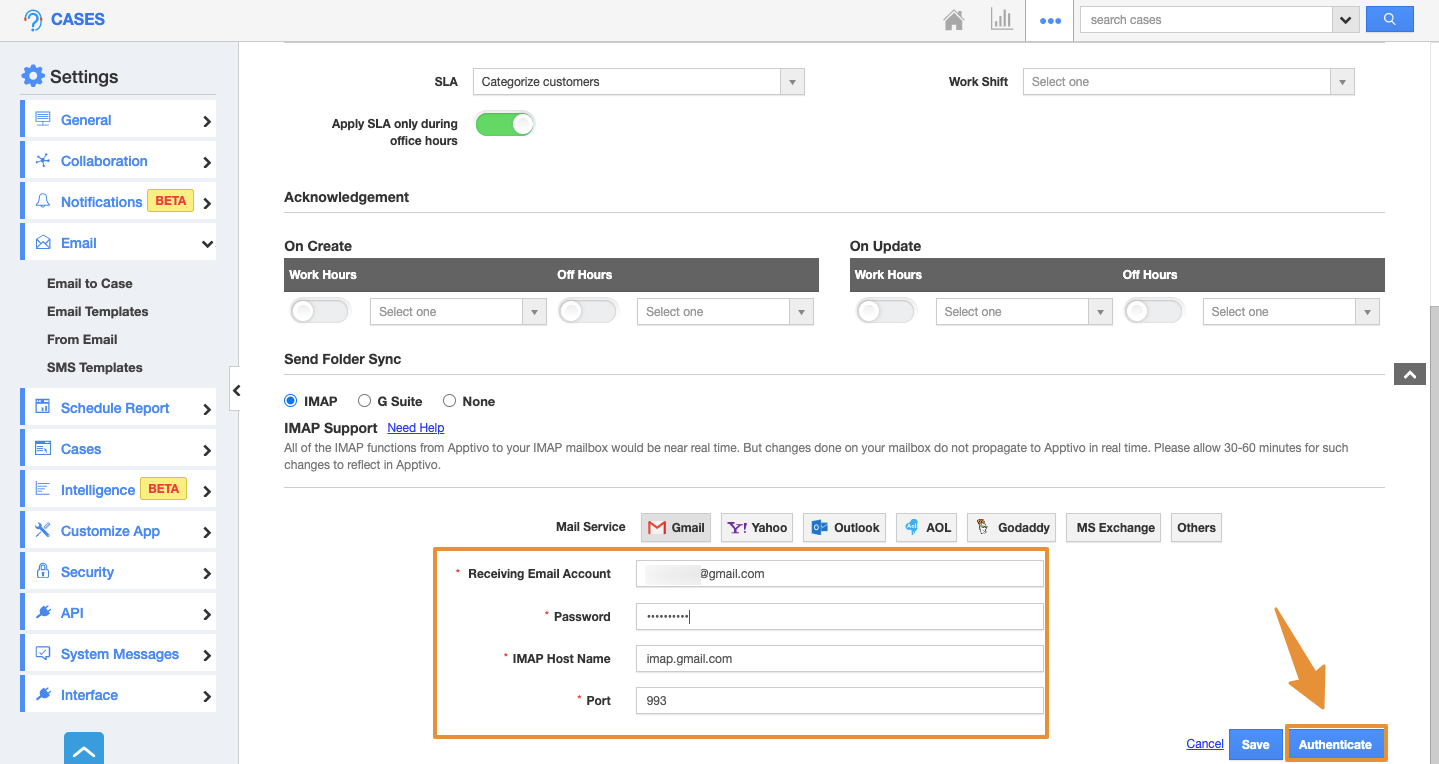
- SLA: Select the required SLA of your business using the dropdown.
- Work Shift: Select the work shift, which will be applied to the created case.
- Apply SLA only during office hours: Enable the toggle to have the SLA to be applied during only office hours.
- On Create: When cases are created the acknowledgment email will be sent automatically; If you enable this option "ON" with the message template.
- On Update - When cases are updated the acknowledgment email will be automatic; If you enable this option "ON" with the message template.
- Send Folder Sync: Now you could perform the Sync and the Addressed To Email Account should be the same as the Email ID that you’re going to authenticate.
- The Send Folder Sync allows you to sync using IMAP, Gsuite, and Office365. Here, I’ve selected IMAP to authenticate.
- Provide the Email address and then, click on the Authenticate button.
- After authenticated your email id, go back to the edit page to get an "Email forwarding code."
- You can view the "Email forwarding code" near “Apptivo Email ID to forward.”
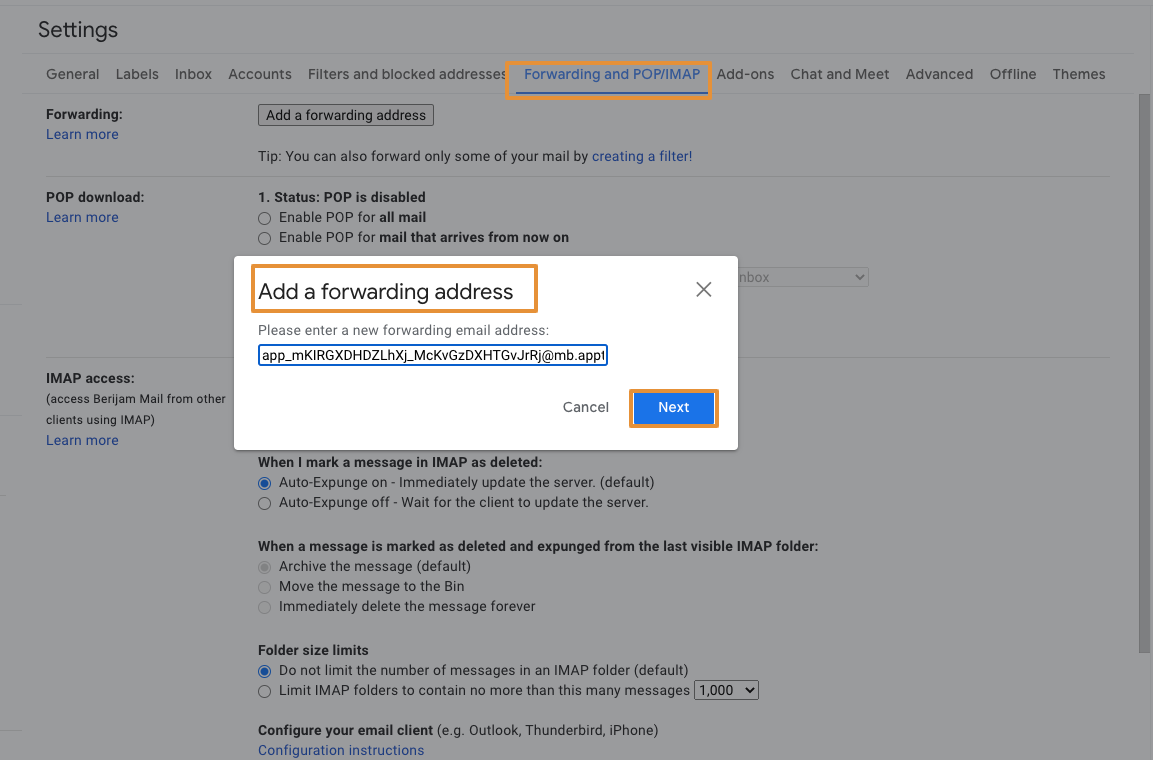
- Now, copy the generated code. Navigate to your business account (G Suite, Gmail, Yahoo, Outlook, etc.) and move on to the "Settings" page.
- Now select the “Forwarding and POP/IMAP” tab and click on “Add a Forwarding Address.”
- Paste the email forwarding address.
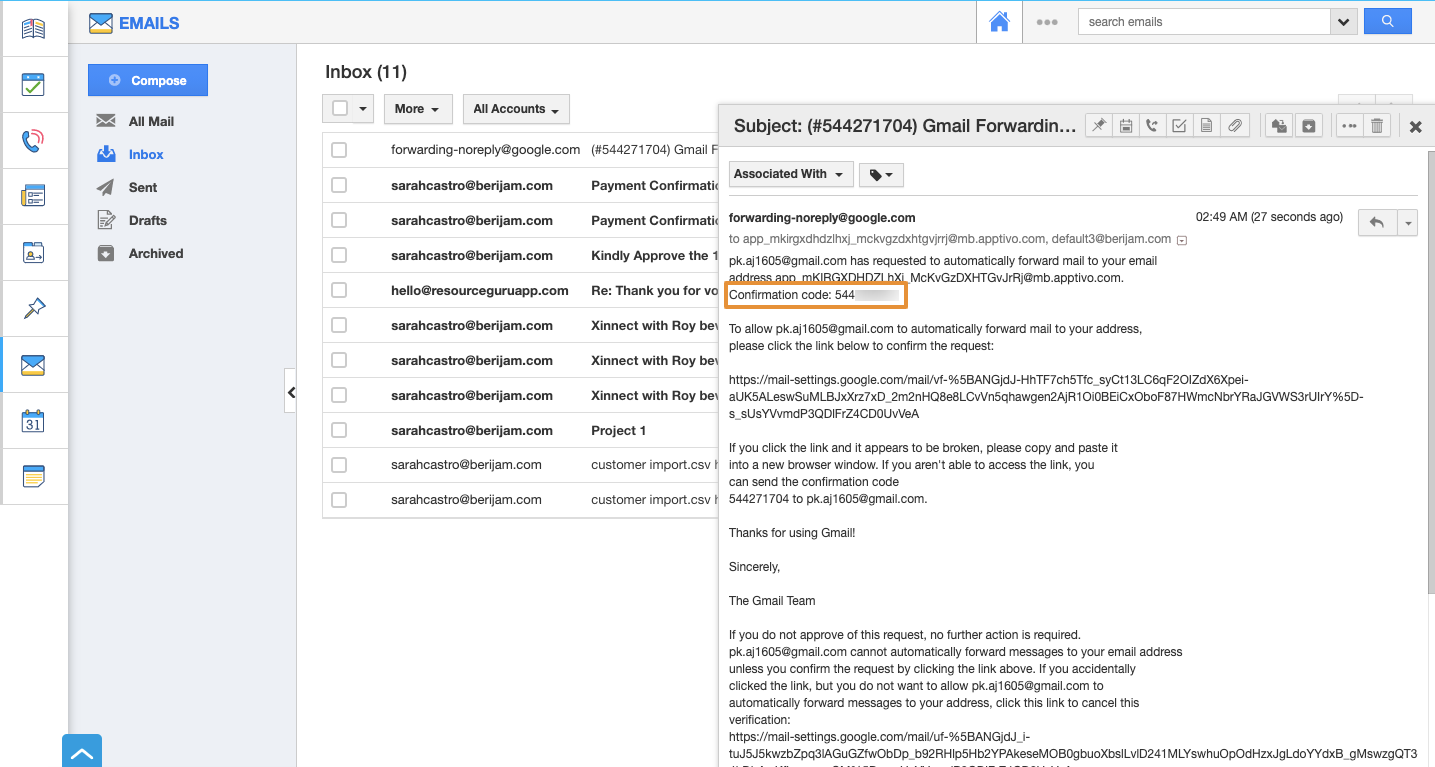
- Now a pop-up window will appear, click on the "Proceed" button to receive an acknowledgment email with a confirmation code.
- You can view the code on the homepage dashboard's "Emails" inbox.
- Copy and paste the code in the “Verify code” field of your Gmail account.
- You have to manually select the "Forward a copy of incoming mail to" option (By default "Disable forwarding" option will be enabled).
- Now all your emails received in your Email account will be immediately collected into the Apptivo account. Also, log a case automatically.


