Browse by Solutions
Browse by Solutions
How do I Capture Leads from my Website?
Updated on September 22, 2024 11:29PM by Admin
The Lead generation or creation is an initiation of a consumer interest/enquiry into your company's products/services. Once the leads are created, they can be followed up on and qualified quickly. This post completely focuses on Collecting Leads from Ecommerce Plugin.
Rather than the manual creation of leads which is time consuming, this feature lets you collect all those visitors directly to your Apptivo account as Leads. In order to collect leads from your website, your website should be built on WordPress platform. Apptivo CRM is closely integrated with the WordPress. Therefore, you can download a plugin from your CMS (Content Management System), and build your "Contact Us" form.
You can create your own attributes on the form. However, they should be matched with the attributes within the Apptivo Leads App. In order to collect leads from wordpress, follow the steps mentioned below:
Install Apptivo Plugin
- Log in to your Wordpress account.
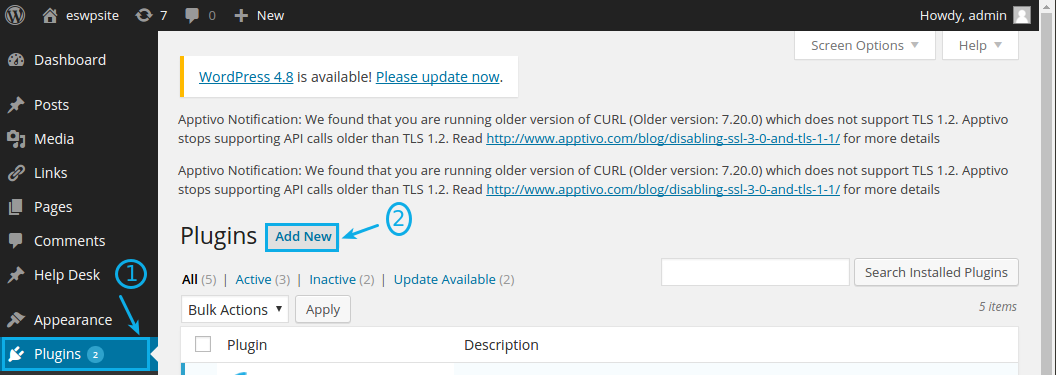
- Click on “Plugins” from the left panel.
- Now, click on the “Add New” button present.
- In the search box, type in “Apptivo Business site Plugin” and press “Enter”.
- The results will be displayed as shown:
- Click on “Install” to install the plugins.
General Settings
Once the required Apptivo plugins are installed successfully, you can view the “Apptivo” tab in the left panel.
- Now, log in to the Apptivo firm, where you need your leads to get collected.
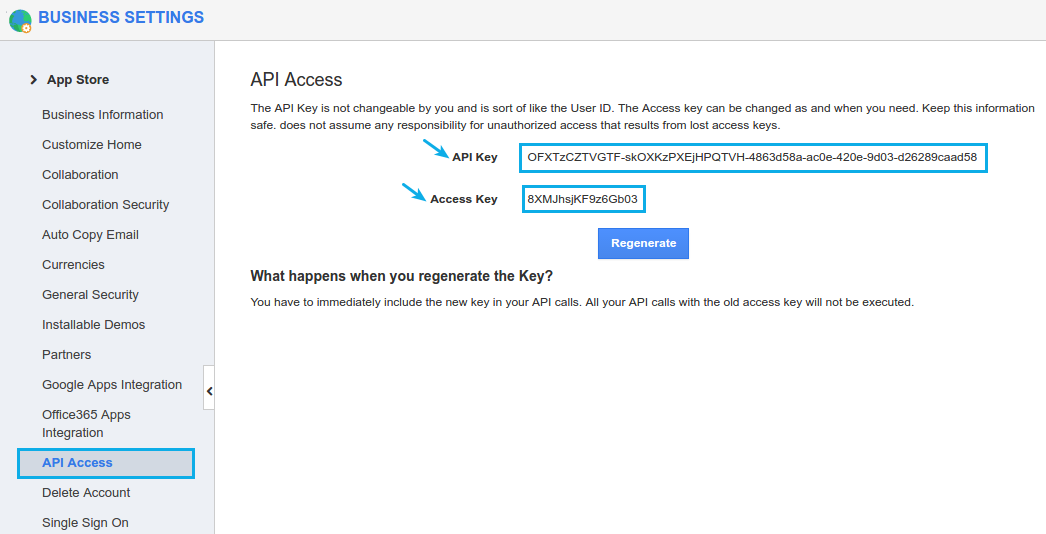
- Go to the “Business Settings”.

- Click on “API Access”. Copy your “API Key” and “Access Key” which will be present.
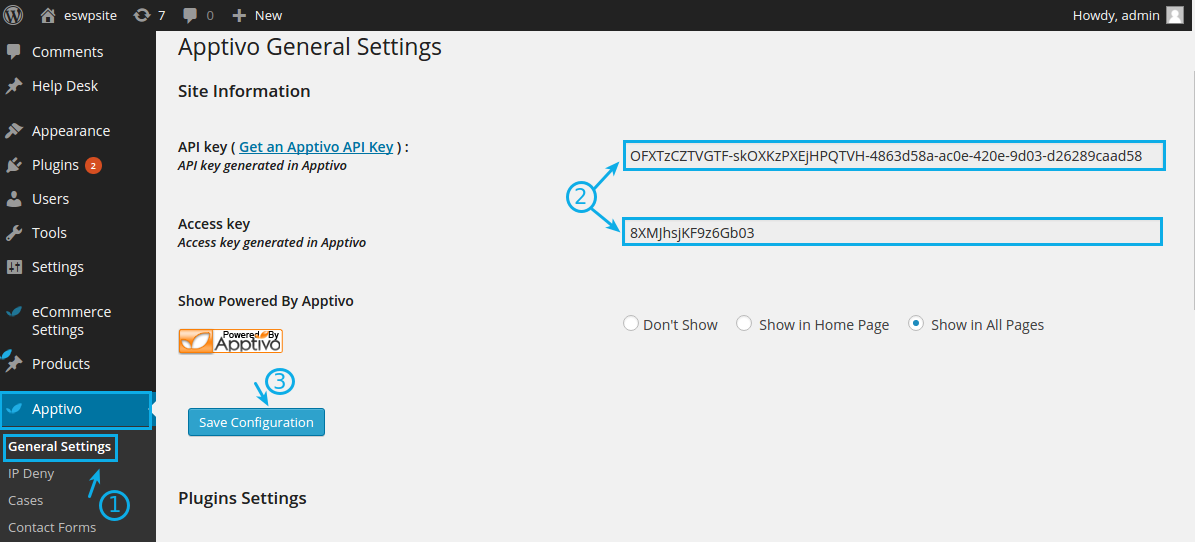
- Click on “General Settings” in your Wordpress login.
- Now, paste them in the “API Key” and “Access Key” fields respectively, in the Wordpress.
- Click on “Save Configuration”.
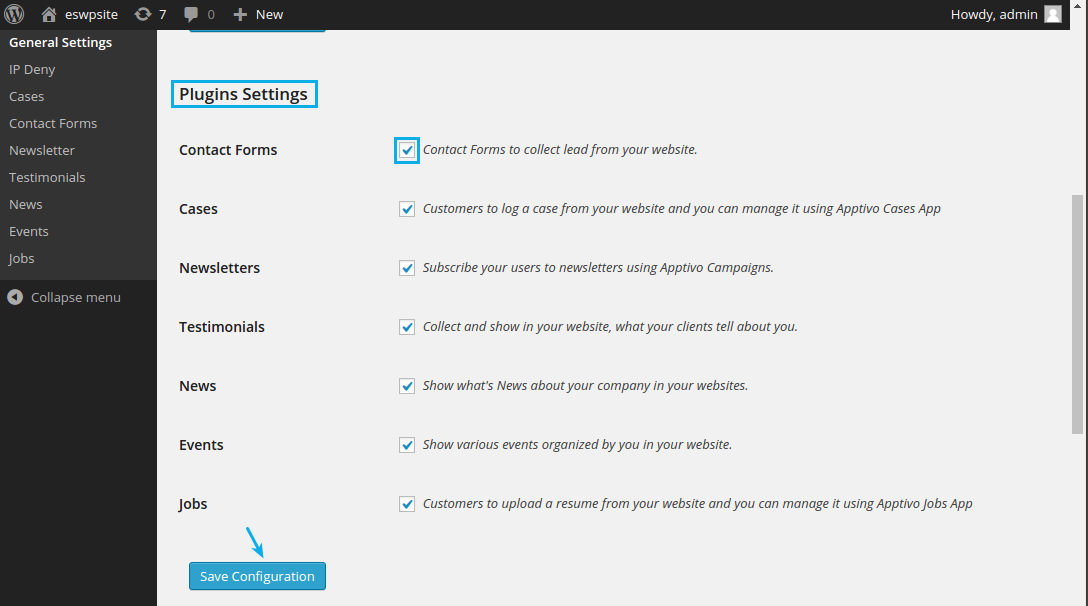
- In the “Plugins Settings” section, ensure that the “Contact Forms” checkbox is enabled.
- Click on “Save Configuration”.
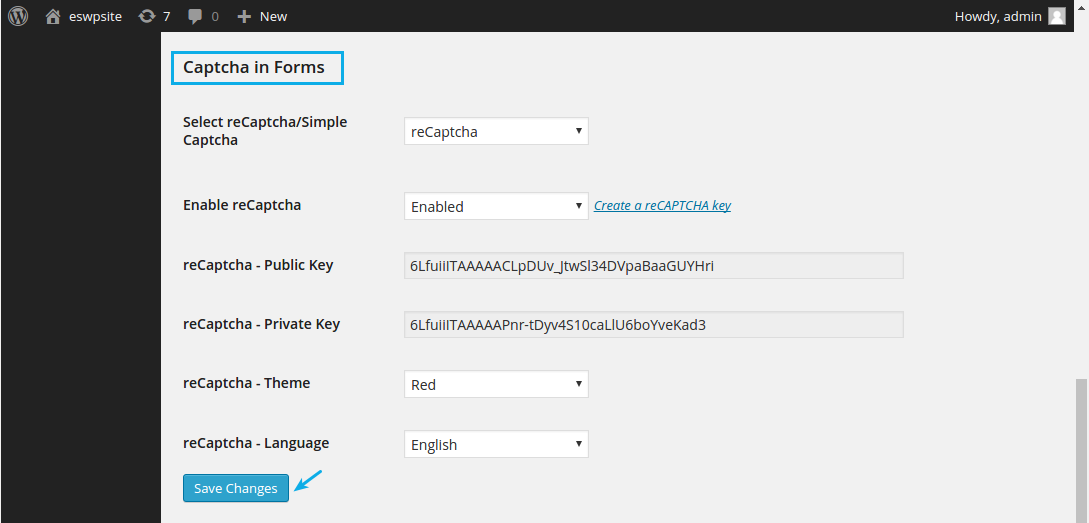
- As per your requirements, configure the “Captcha in Forms” section.
- Click on “Save Changes”.
Create Contact Form
Once the General Settings are configured, it's now time to create the Contact Form.
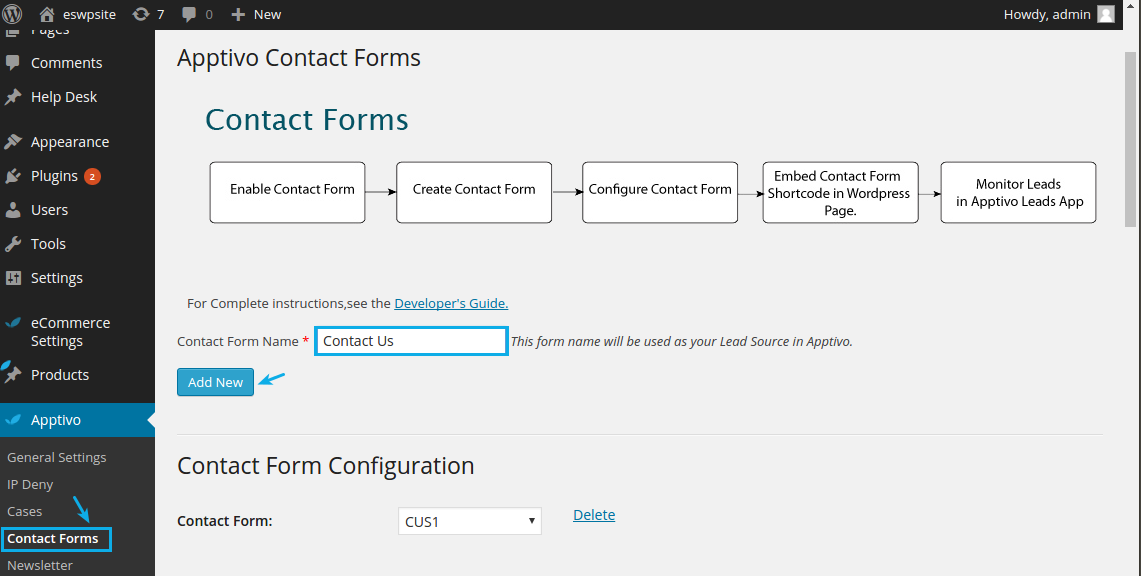
- Click to “Contact Forms” from the left panel.
- Enter the name of your contact form in the “Contact Form Name” textbox.
(Note: This form name will be used as your Lead Source in Apptivo) - Now, click on “Add New”.
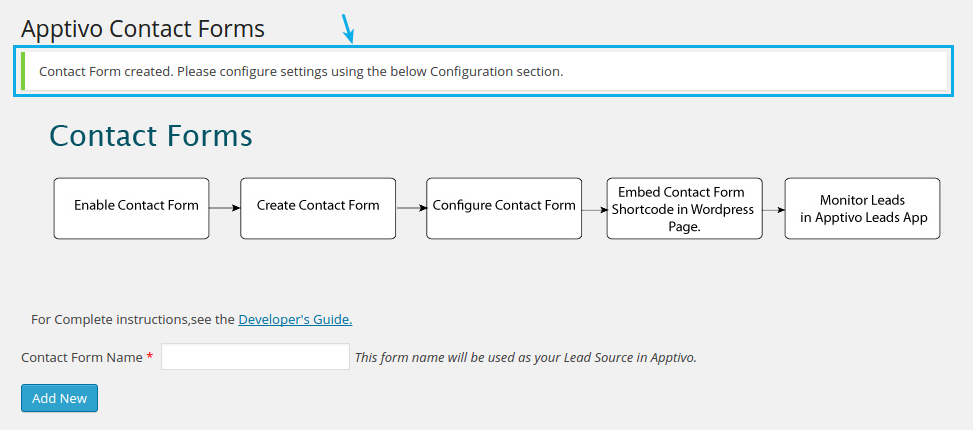
- The Contact Form will now be successfully created.
Configure Contact Form
After creating the Contact Form, there are some configuration steps to be made.
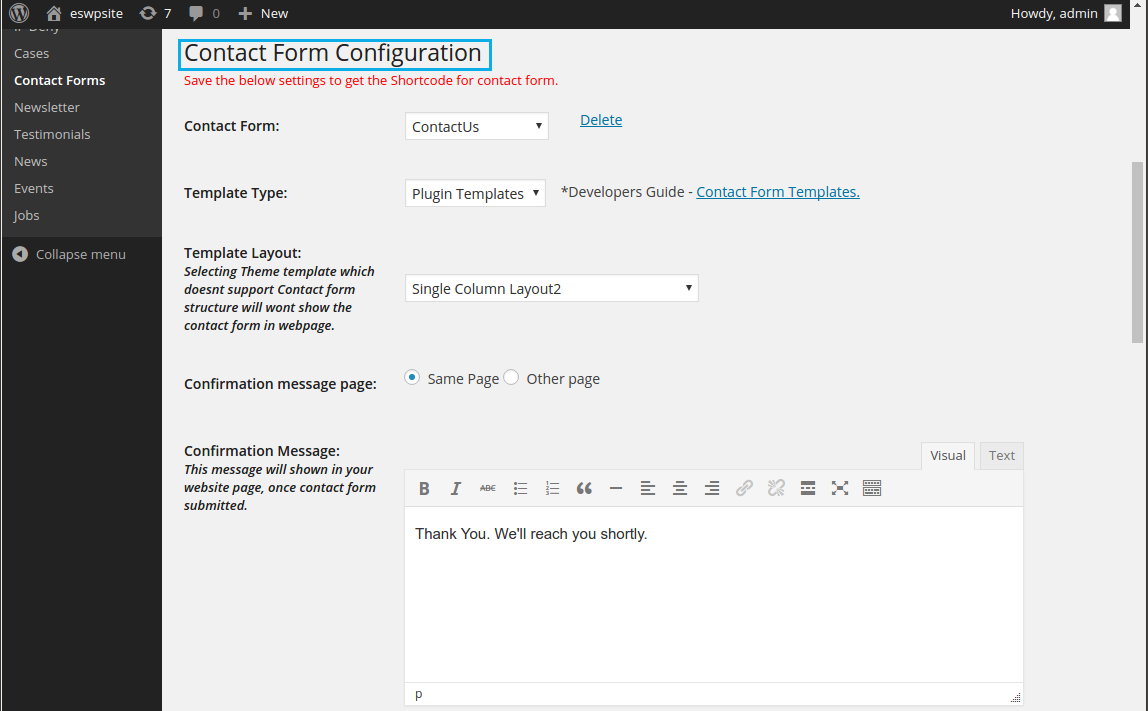
- In the “Contact Form Configuration” section,
- Contact Form - The Contact Form drop down will be automatically set to the above created form name.
- Template Type - By default, the “Template Type” will be “Plugin Templates”.
- Template Layout - Based on your requirement, select the “Template Layout” (For ex. - Single Column Layout or Double Column Layout).
- Confirmation message page - This is to decide whether the confirmation message after submission, to be displayed in the “Same Page” or “Other Page”.
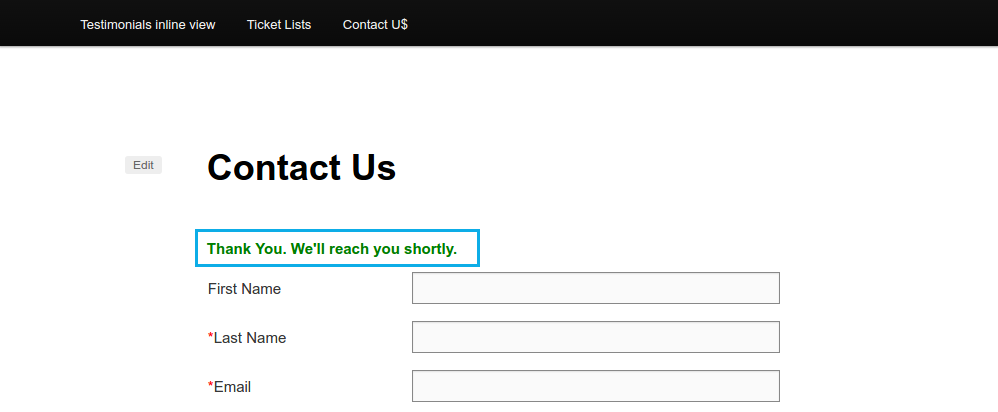
- Confirmation Message - This message will be shown in your website page, once the contact form is submitted.
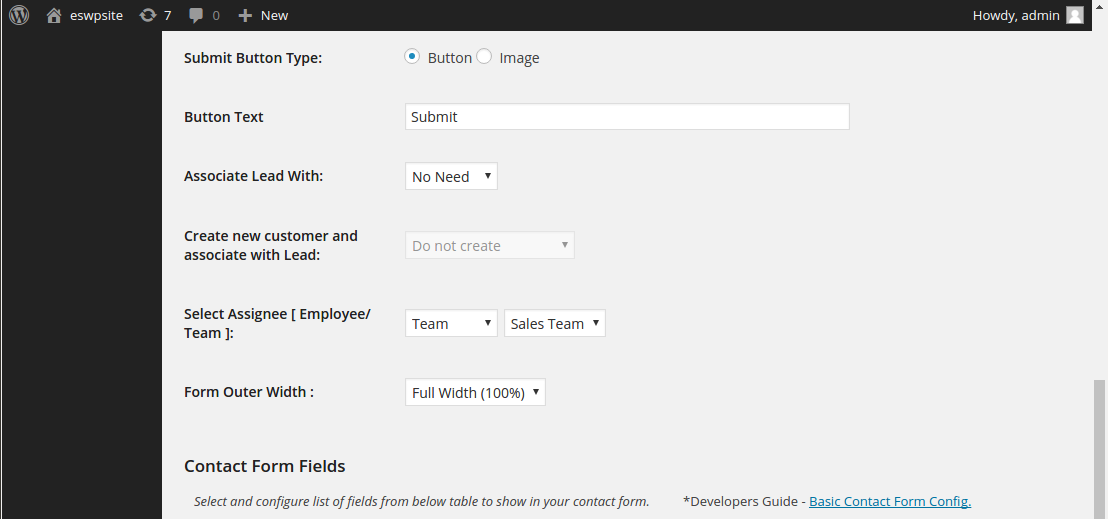
- Submit Button Type - Choose the type either as “Button” or “Image”.
- Button Text - Enter the text to be displayed on the button.
- Associate Lead With - On submission, this lets you choose if the leads created should be associated with customers or not.
- Create new customer and associate with lead - This will be enabled, based on the above selection of association.
- Select Assignee - The created lead can be assigned to an employee or a team.
- Form Outer Width - Select the width of the form.
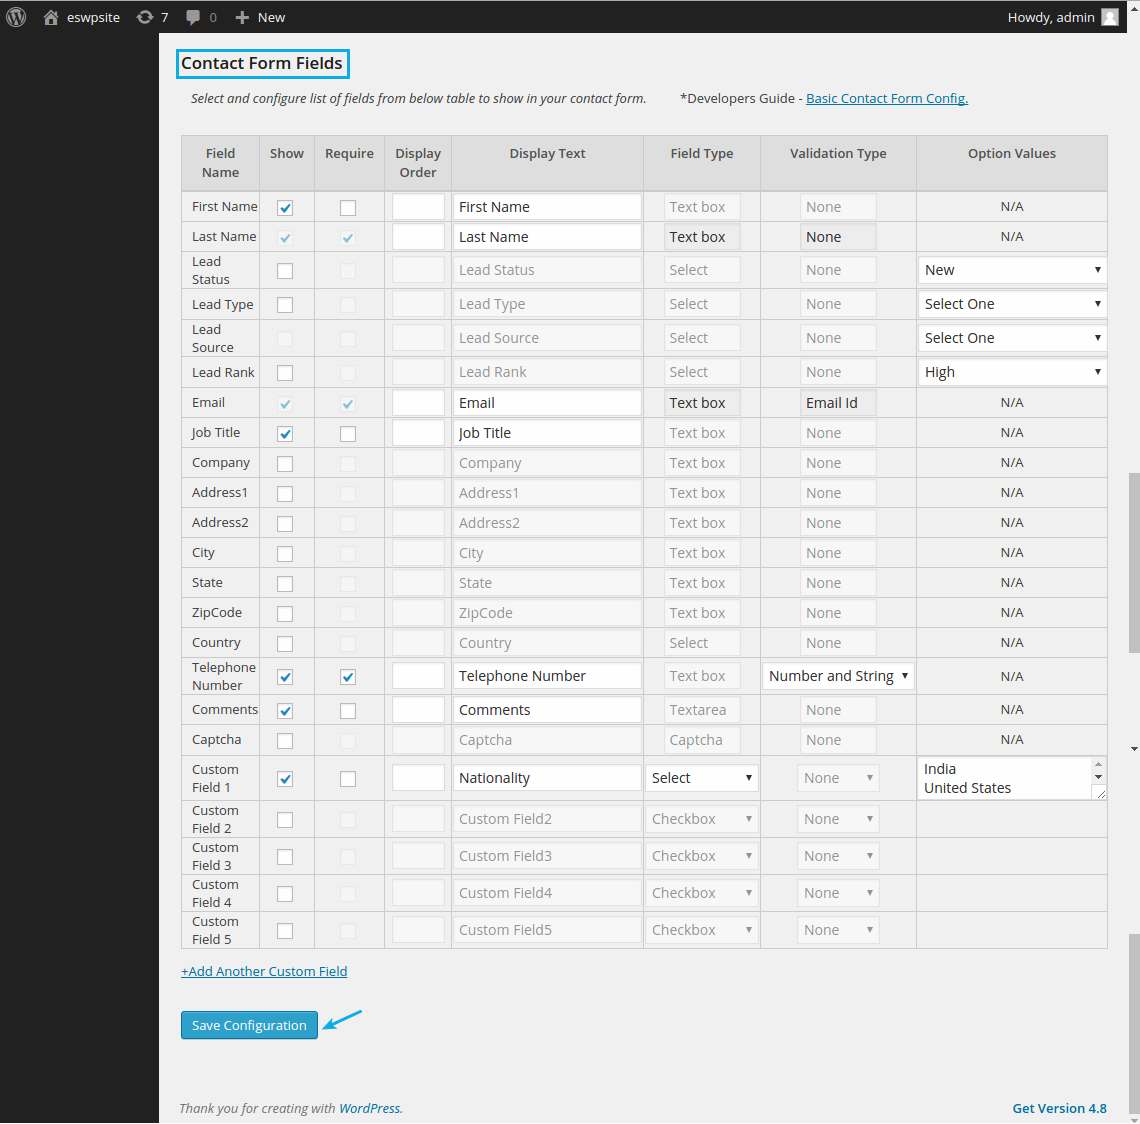
- Similarly, in the “Contact Form Fields” section, select and configure the list of fields to show in your contact form. Enable the “Require” check box to make the field mandatory.
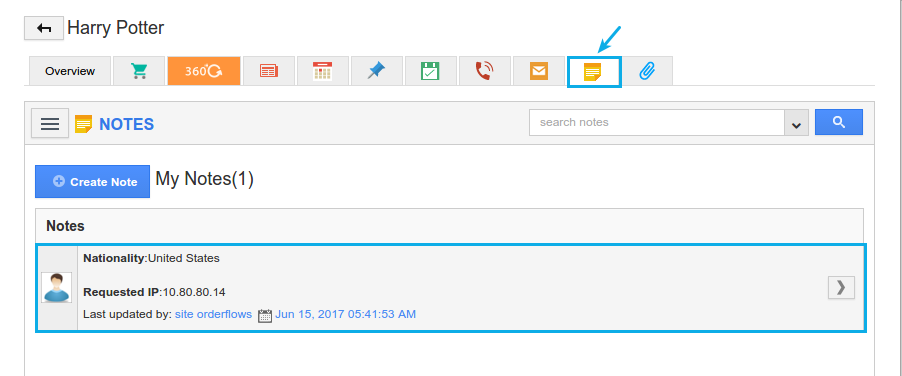
(Note: The custom fields created will be displayed in the “Notes” section of that particular lead in Apptivo Leads App) - Click on “Save Configuration”.
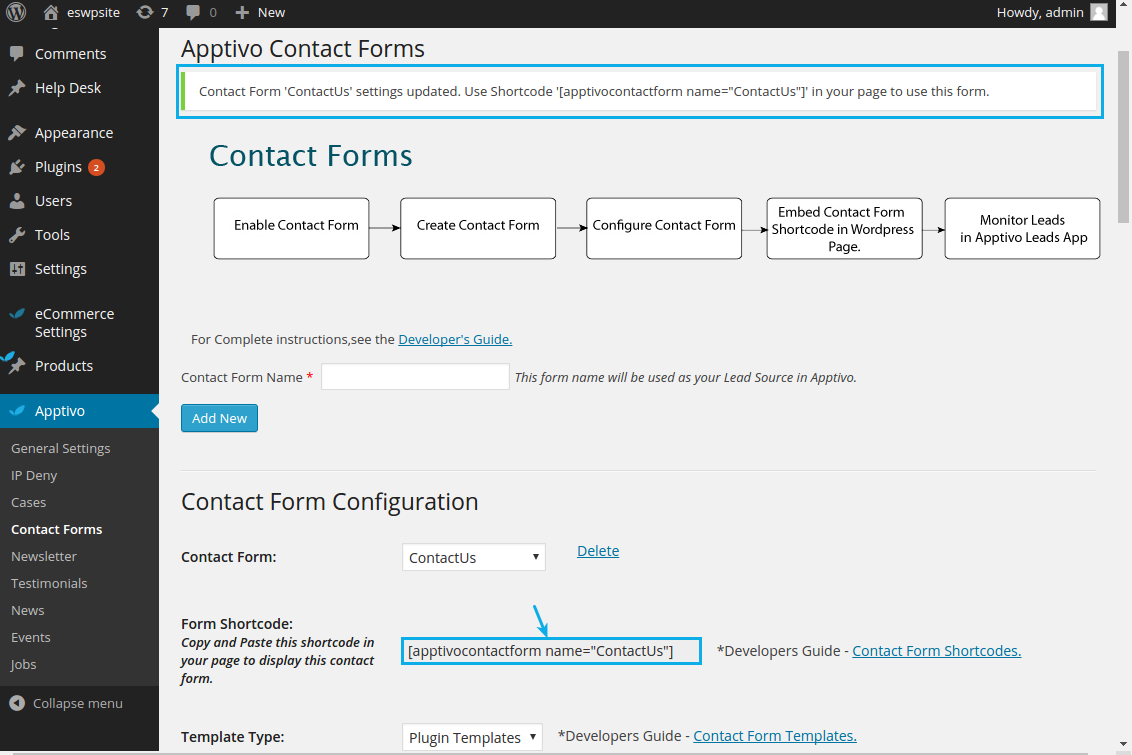
- On saving the configuration, a Form Shortcode will be auto generated as shown:
Embed Contact Form Shortcode in Wordpress Page
On successful creation of the Contact Form, the Form Shortcode which is already generated should be embedded.
- Copy the Form Shortcode.
- Go to “Pages” -> “Add New” from the left panel.

- Enter the page title and paste that Shortcode in the text area.
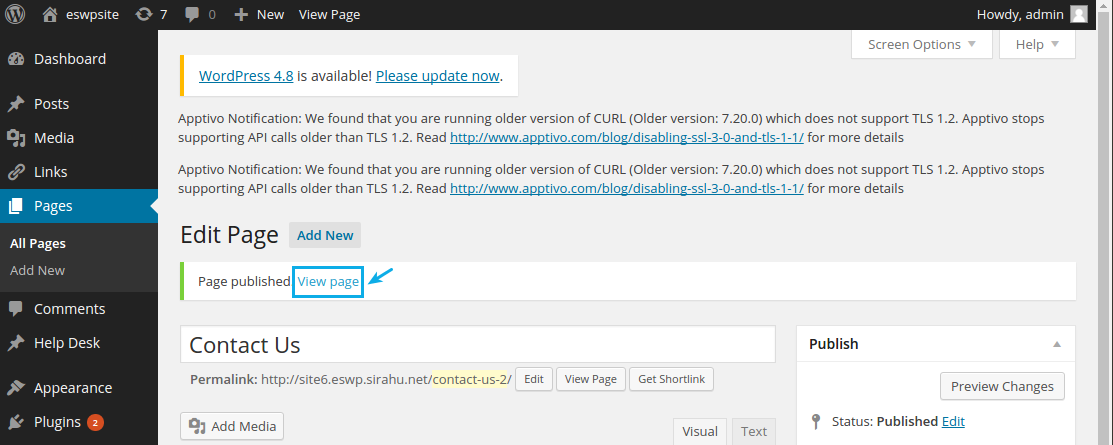
- Click on “Publish”.
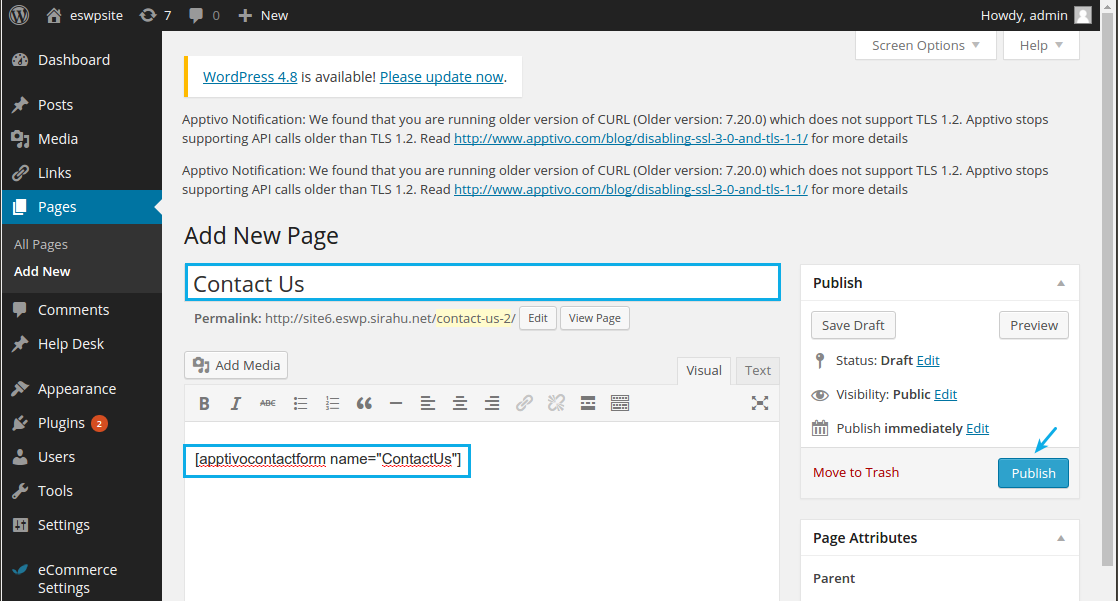
- Once done, you can view your contact form, by clicking on “View Page”.
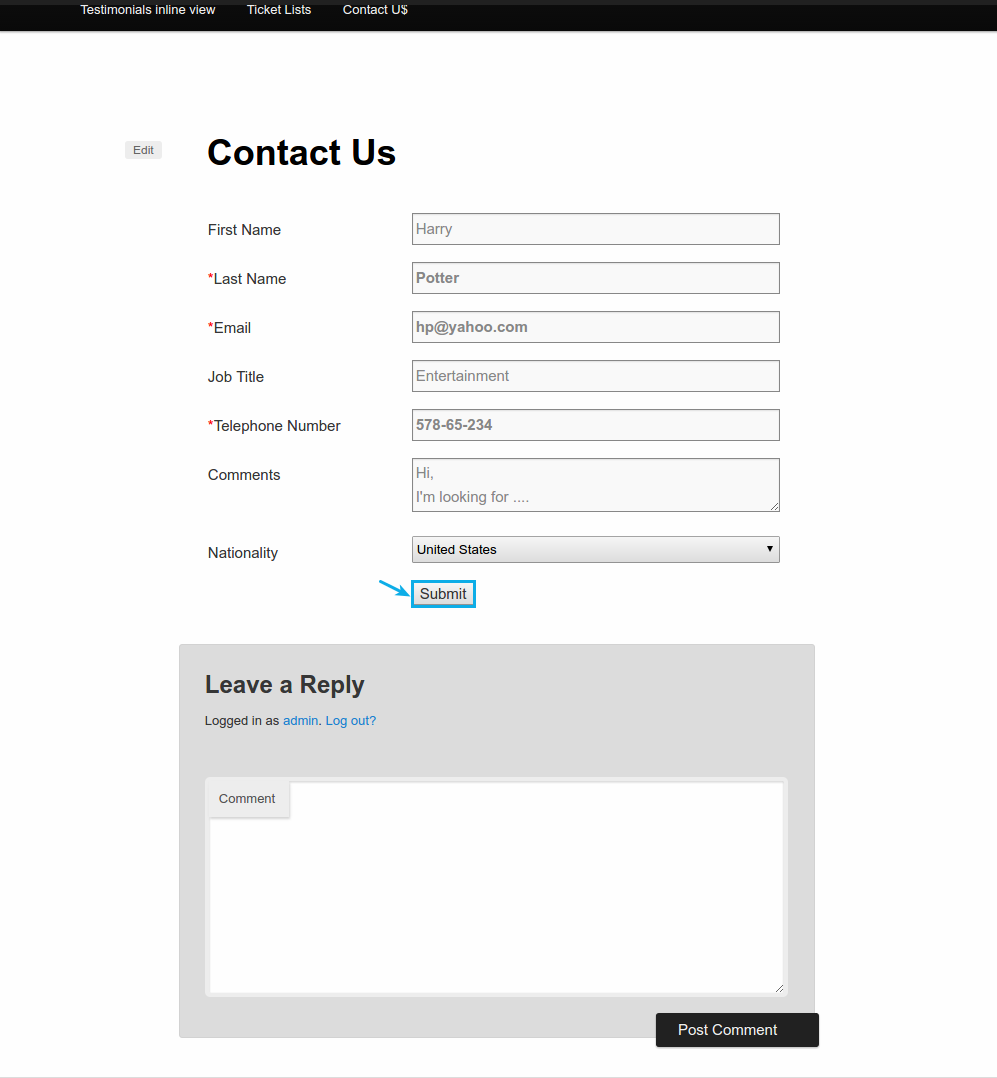
- The Contact form will be displayed as shown:
View Leads in the Apptivo Leads App
Now, if the visitor enters his details and clicks on “Submit”, he will be automatically collected as a Lead in your Apptivo Leads App.
- Go to the Leads App in your Apptivo Firm.
- You can now view the lead created from Wordpress.
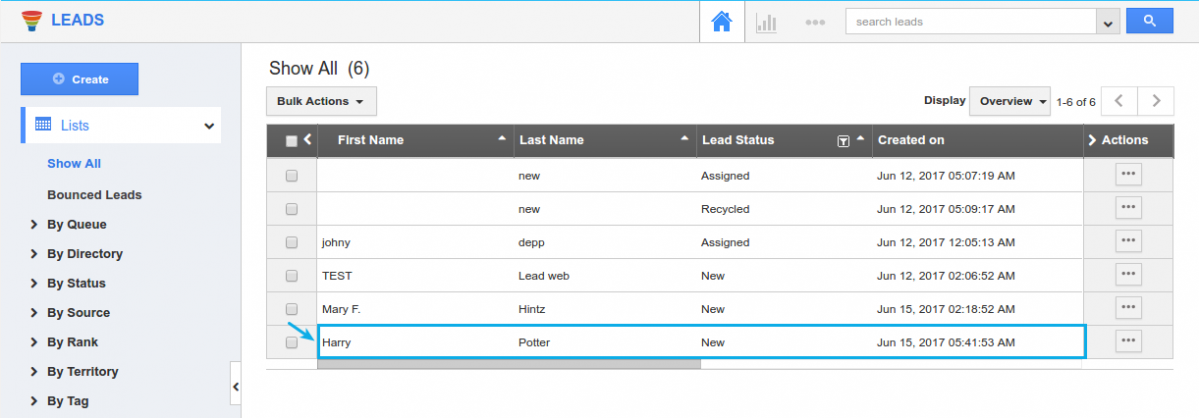
- The custom field “Nationality”, will be created as a note.
Notify Email for Lead Creation
You will receive an email notification, if the user submits the information through "Contact Us" form as shown in the image below:
For instance: Here, the lead source "WebSite" is a default lead source in word press (Note: You can also create your own custom lead source).
You need to enter your email address in the "Notify Email id" of that particular lead source "Website" in the Leads app. Go to the Leads App -> Settings -> Lead Sources.

